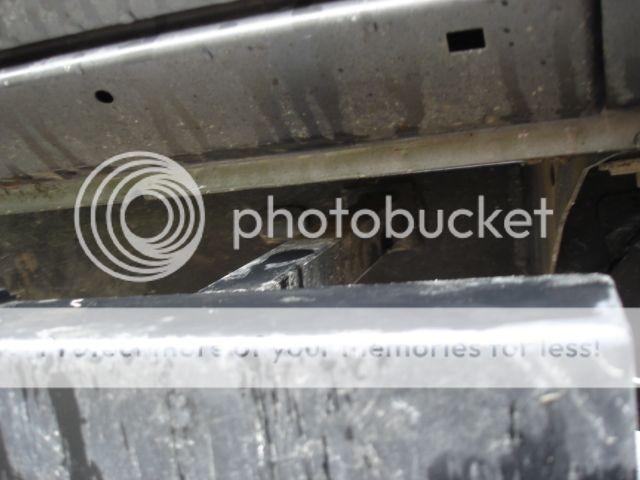
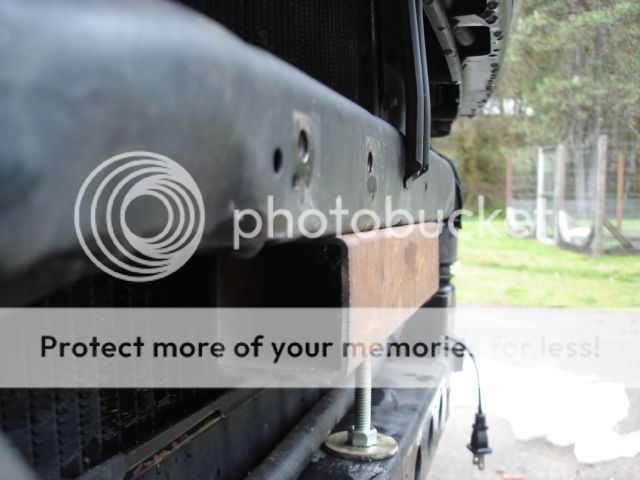
I decided to remove the b/l for my swap to see what happens. I kept trying to convince myself I had clearance as I don’t like body lifts in general and I also like a lower stance, so I grabbed my girlfriend’s son’s Play-Doh and did some hood-to-engine clearance tests. The doh squished at about 1.75” in random places so I thought I was set. As a side note really quick, this Runner has seen a 22re, 5mge, and now a 5vzfe as of about 15k ago. I’ve been in and out of the engine bay so many times it doesn’t bother me to make my own mounts anymore. This gave me a blank slate on the frame rails when mounting the engine. When I was placing the engine I was paying more attention to the bottom clearances (mount the front of the oil pan just above flush with the frame rails for hi-steer clearances). Serendipitously this leant me more clearance on the hood side of things. Getting back to the removal….one of the problems I knew I would encounter is that I routed / installed most everything with the body lift on so I’d have to possibly tweak / modify some stuff in the process, most importantly, removing my side steps and doing some gas tank clearance stuff, and also shortening the sticks the appropriate amount. Here are some before pics and pics of clearance areas…
*****PLEASE SEE MORE IN NEXT REPLY, EXCEEDED MY PICTURE LIMIT FOR THIS POSTING*****
[URL="http://i677.photobucket.com/albums/vv136/chilldyl77/009.jpg"][URL="http://i677.photobucket.com/albums/vv136/chilldyl77/009.jpg"] [/URL][/URL]
[URL="http://i677.photobucket.com/albums/vv136/chilldyl77/018.jpg"][URL="http://i677.photobucket.com/albums/vv136/chilldyl77/018.jpg"] [/URL][/URL]
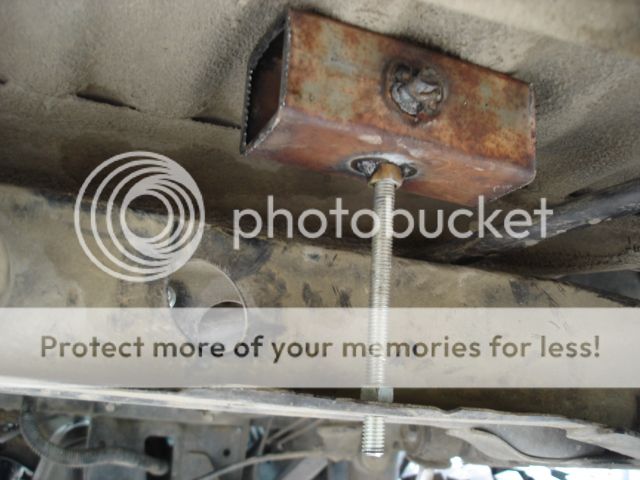
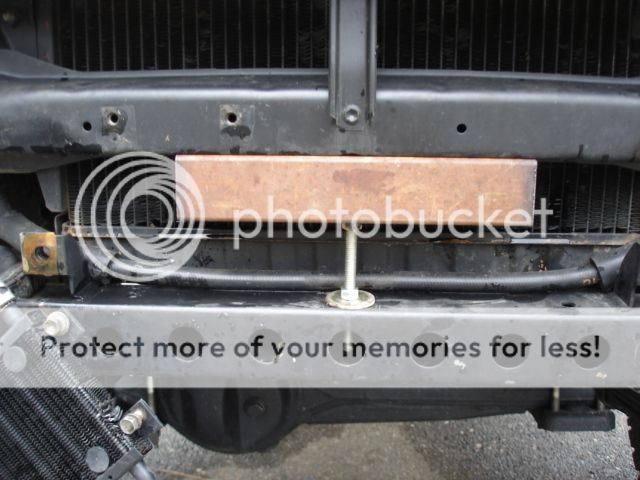
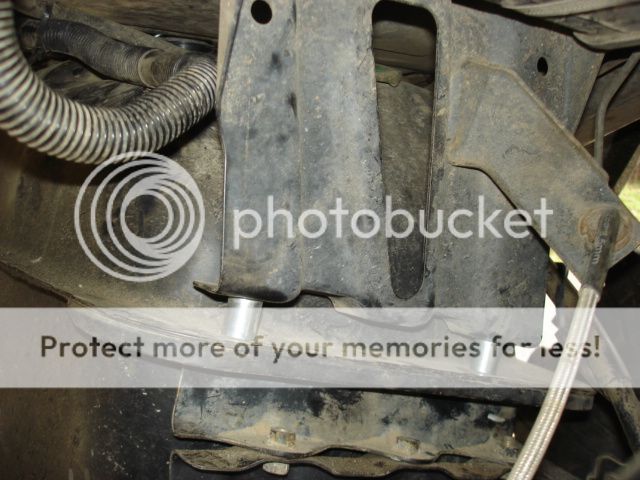
This is my solution to lift the body off the frame, and what I really want whoever reads this post to take from it because it’s more of a universal idea than taking a b/l off which probably isn’t happening that much. I took some 2x2 tube and some 3/8” all thread with some nuts and washers. I popped a hole in the tube and inserted the all thread with nut threaded on it and welded the nut in place then removed the all thread. The all thread needs to be made to be removed from the tube so you can slide it into place or you’ll get in a bind either up or down. I placed the rear jacks in the holes in which the OEM spare tire jacking mechanism was mounted, and the front one in the middle hole in the frame.
[URL="http://i677.photobucket.com/albums/vv136/chilldyl77/019.jpg"][URL="http://i677.photobucket.com/albums/vv136/chilldyl77/019.jpg"] [/URL][/URL]
[URL="http://i677.photobucket.com/albums/vv136/chilldyl77/031-2.jpg"][URL="http://i677.photobucket.com/albums/vv136/chilldyl77/031-2.jpg"] [/URL][/URL]
[URL="http://i677.photobucket.com/albums/vv136/chilldyl77/033-1.jpg"][URL="http://i677.photobucket.com/albums/vv136/chilldyl77/033-1.jpg"] [/URL][/URL]
As seen in the front pic there is a nut spun onto the all thread that rests (with a washer) on the frame, when you turn that nut the “jack” goes up and down and lifts the body off the frame….worked well. By my observation there was no deflection in the body where the jacks were engaging, it’d be even better if there was a location for a center set. The whole system cost maybe 8 bucks and time. The metal b/l was from Trask Industries in Rogue River…
[URL="http://i677.photobucket.com/albums/vv136/chilldyl77/020.jpg"][URL="http://i677.photobucket.com/albums/vv136/chilldyl77/020.jpg"] [/URL][/URL]
[URL="http://i677.photobucket.com/albums/vv136/chilldyl77/023-1.jpg"][URL="http://i677.photobucket.com/albums/vv136/chilldyl77/023-1.jpg"] [/URL][/URL]
[URL="http://i677.photobucket.com/albums/vv136/chilldyl77/034.jpg"][URL="http://i677.photobucket.com/albums/vv136/chilldyl77/034.jpg"] [/URL][/URL]
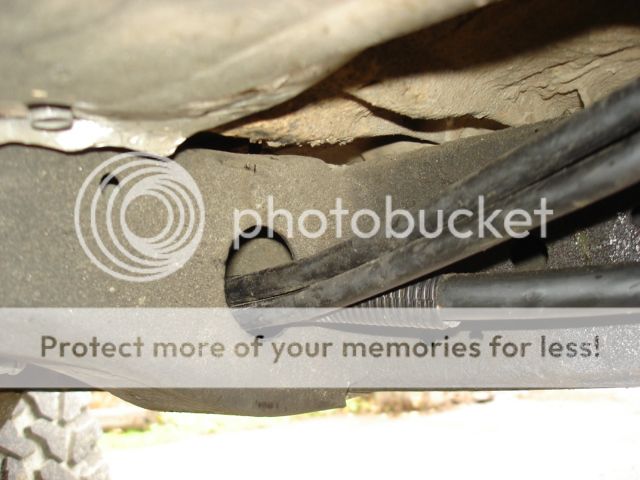
After I jacked the body and removed the b/l I began to lower the body back to the frame. My power inverter supply and EVAP lines got pinched and I had to re-route them through the frame....
[URL="http://i677.photobucket.com/albums/vv136/chilldyl77/046.jpg"][URL="http://i677.photobucket.com/albums/vv136/chilldyl77/046.jpg"] [/URL][/URL]
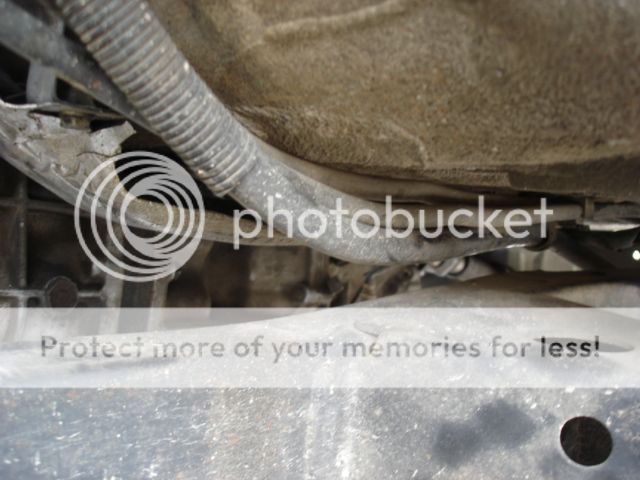
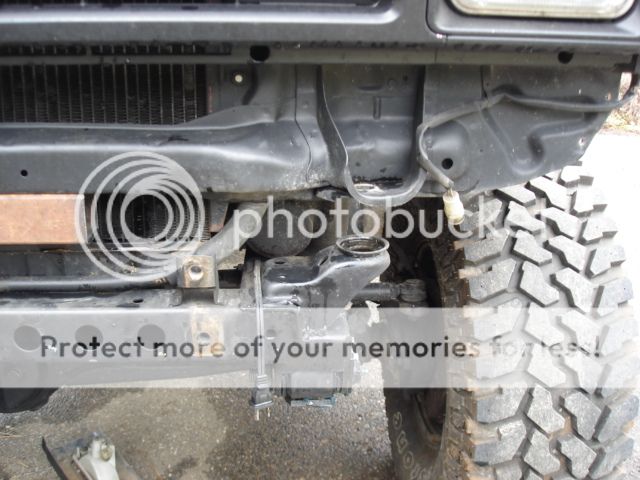
I also had to loosen my steering shaft at the body and chisel it open where the shaft splines meet the joint so there would be easy slippage inward. Upon lowering the body I realized that there wasn’t going to be enough clearance for the tank evap so I dropped the tank down ¾“ to make up the difference. Also had to pull up the sheet metal a bit for the tank stuff, ended up pressing it down a bit, the access panel fits and the seat latches properly...
[URL="http://i677.photobucket.com/albums/vv136/chilldyl77/012.jpg"][URL="http://i677.photobucket.com/albums/vv136/chilldyl77/012.jpg"] [/URL][/URL]
[URL="http://i677.photobucket.com/albums/vv136/chilldyl77/041.jpg"][URL="http://i677.photobucket.com/albums/vv136/chilldyl77/041.jpg"] [/URL][/URL]
Got the body on the frame and time for the moment of truth, slowly lowered the hood, and…it hits….crap, but wait, turns out it was hitting a portion of the center spline under the hood, part of which I had already cut out for previous 5mge clearance, so I cut some more out.
Moment of truth time again, lower the hood, it’s all good, little lower, still good, click the sucker into place and it’s just touching…not even noticeable from the outer surface....
[URL="http://i677.photobucket.com/albums/vv136/chilldyl77/033-2.jpg"][URL="http://i677.photobucket.com/albums/vv136/chilldyl77/033-2.jpg"] [/URL][/URL]
Lucky for me this is a Toyota and there are adjustments everywhere, including the hood latch and the rubber hood stopper on the corners. They were all set low so I moved them up a bit and now I had clearance, barely, maybe 1/8. I could at least dimple the hood down to the engine with my finger, but it’s clearance nonetheless. Based on how far back my body was set, in relation to the mounting holes, I think I can slide if forward more which should give me more clearance as the engine will be under a higher part of the hood. Cinched the body down, tightened up all the loose stuff and drove it down to get a 6 pack of Widmer Brothers Rotator IPA. Came back and there was some rubbage probably from the engine jostling around on my pothole and washboard laden road. The larger scuff in the middle of pic, the others are from the dremel....
[URL="http://i677.photobucket.com/albums/vv136/chilldyl77/034-1.jpg"][URL="http://i677.photobucket.com/albums/vv136/chilldyl77/034-1.jpg"] [/URL][/URL]
Shimmed up the hinge side with some 1/8 plate which seemed to do the trick until/if I shift the body, now I have more like 1/4 clearance...
[URL="http://i677.photobucket.com/albums/vv136/chilldyl77/031-3.jpg"][URL="http://i677.photobucket.com/albums/vv136/chilldyl77/031-3.jpg"] [/URL][/URL]
That 1.5” makes a big diff, feels like it handles better, could be the lower center of gravity or the “I just washed my rig and topped off my tank and all of a sudden it feels peppier” illusion. Despite having to cut my side steps off, at least now I can tip-toe and only moderately rub my arse on the edge of the seat upon entry, but I think they’re going back on, probably same relation to the body which would make them 1.5” lower than the bottom of the frame this time.
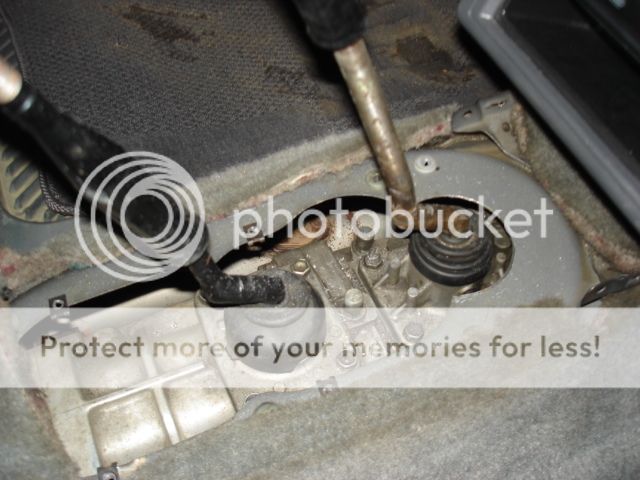
I had to mod my shifter sticks previously to stab them to work, look, and feel like OEM, but now there was going to be no lift so I had to remove part of the body for the sticks to fit. This is what happens when you use the v6 x-member in a 4cyl OE rig, you can see my new mounting holes with those screw clip things...
[URL="http://i677.photobucket.com/albums/vv136/chilldyl77/003-7.jpg"][URL="http://i677.photobucket.com/albums/vv136/chilldyl77/003-7.jpg"] [/URL][/URL]
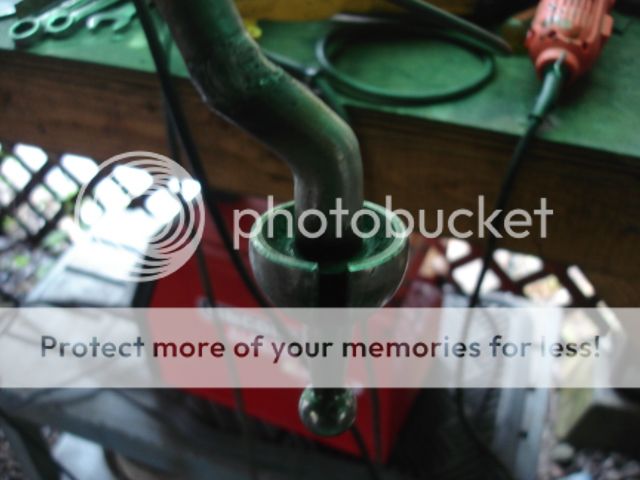
I also permanently located and mounted my boots with ring (my original ring from w56, boot from 89 r150) to work with the OEM w56 outer leatherette boot. This is a pic of the sticks before I cut them down to size...
[URL="http://i677.photobucket.com/albums/vv136/chilldyl77/002-8.jpg"][URL="http://i677.photobucket.com/albums/vv136/chilldyl77/002-8.jpg"] [/URL][/URL]
I plugged the hole behind the tranny boot with light gauge rubber bed liner material. The way the shifter was previously modded there was contact where the plastic tray is molded into the front. After lots of cutting, tacking, fitting, bending, tacking, etc. I finally got the dog legs I needed in the sticks. The whole process took about 3 hours for both. The first bend off the cup is the finished product/look.
[URL="http://i677.photobucket.com/albums/vv136/chilldyl77/020-1.jpg"][URL="http://i677.photobucket.com/albums/vv136/chilldyl77/020-1.jpg"] [/URL][/URL]
[URL="http://i677.photobucket.com/albums/vv136/chilldyl77/017-1.jpg"][URL="http://i677.photobucket.com/albums/vv136/chilldyl77/017-1.jpg"] [/URL][/URL]
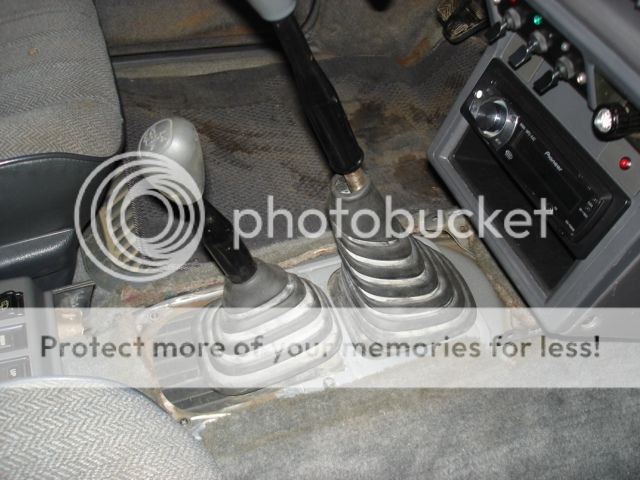
Finally got my sticks in a comfy position for the rubber boot and the outer boot with no stick interference or boot grab. What you see is Neutral / H2; I may lift my t-case shifter up a little....
[URL="http://i677.photobucket.com/albums/vv136/chilldyl77/026-1.jpg"][URL="http://i677.photobucket.com/albums/vv136/chilldyl77/026-1.jpg"] [/URL][/URL]
[URL="http://i677.photobucket.com/albums/vv136/chilldyl77/030-1.jpg"][URL="http://i677.photobucket.com/albums/vv136/chilldyl77/030-1.jpg"] [/URL][/URL]
Well finally finished after 2 days and came in here to document and share my experience, have yet to put some real miles on it but I think it’ll all be good. I see no visible clearance issues, shifters feel good, everything fit back into place like I expected, I think I might have pulled it off.... Now, onto the dents....
*****PLEASE SEE MORE IN NEXT REPLY, EXCEEDED MY PICTURE LIMIT FOR THIS POSTING*****
[URL="http://i677.photobucket.com/albums/vv136/chilldyl77/009.jpg"][URL="http://i677.photobucket.com/albums/vv136/chilldyl77/009.jpg"]
 [/URL][/URL]
[URL="http://i677.photobucket.com/albums/vv136/chilldyl77/018.jpg"][URL="http://i677.photobucket.com/albums/vv136/chilldyl77/018.jpg"]
 [/URL][/URL]
This is my solution to lift the body off the frame, and what I really want whoever reads this post to take from it because it’s more of a universal idea than taking a b/l off which probably isn’t happening that much. I took some 2x2 tube and some 3/8” all thread with some nuts and washers. I popped a hole in the tube and inserted the all thread with nut threaded on it and welded the nut in place then removed the all thread. The all thread needs to be made to be removed from the tube so you can slide it into place or you’ll get in a bind either up or down. I placed the rear jacks in the holes in which the OEM spare tire jacking mechanism was mounted, and the front one in the middle hole in the frame.
[URL="http://i677.photobucket.com/albums/vv136/chilldyl77/019.jpg"][URL="http://i677.photobucket.com/albums/vv136/chilldyl77/019.jpg"]
 [/URL][/URL]
[URL="http://i677.photobucket.com/albums/vv136/chilldyl77/031-2.jpg"][URL="http://i677.photobucket.com/albums/vv136/chilldyl77/031-2.jpg"]
 [/URL][/URL]
[URL="http://i677.photobucket.com/albums/vv136/chilldyl77/033-1.jpg"][URL="http://i677.photobucket.com/albums/vv136/chilldyl77/033-1.jpg"]
 [/URL][/URL]
As seen in the front pic there is a nut spun onto the all thread that rests (with a washer) on the frame, when you turn that nut the “jack” goes up and down and lifts the body off the frame….worked well. By my observation there was no deflection in the body where the jacks were engaging, it’d be even better if there was a location for a center set. The whole system cost maybe 8 bucks and time. The metal b/l was from Trask Industries in Rogue River…
[URL="http://i677.photobucket.com/albums/vv136/chilldyl77/020.jpg"][URL="http://i677.photobucket.com/albums/vv136/chilldyl77/020.jpg"]
 [/URL][/URL]
[URL="http://i677.photobucket.com/albums/vv136/chilldyl77/023-1.jpg"][URL="http://i677.photobucket.com/albums/vv136/chilldyl77/023-1.jpg"]
 [/URL][/URL]
[URL="http://i677.photobucket.com/albums/vv136/chilldyl77/034.jpg"][URL="http://i677.photobucket.com/albums/vv136/chilldyl77/034.jpg"]
 [/URL][/URL]
After I jacked the body and removed the b/l I began to lower the body back to the frame. My power inverter supply and EVAP lines got pinched and I had to re-route them through the frame....
[URL="http://i677.photobucket.com/albums/vv136/chilldyl77/046.jpg"][URL="http://i677.photobucket.com/albums/vv136/chilldyl77/046.jpg"]
 [/URL][/URL]
I also had to loosen my steering shaft at the body and chisel it open where the shaft splines meet the joint so there would be easy slippage inward. Upon lowering the body I realized that there wasn’t going to be enough clearance for the tank evap so I dropped the tank down ¾“ to make up the difference. Also had to pull up the sheet metal a bit for the tank stuff, ended up pressing it down a bit, the access panel fits and the seat latches properly...
[URL="http://i677.photobucket.com/albums/vv136/chilldyl77/012.jpg"][URL="http://i677.photobucket.com/albums/vv136/chilldyl77/012.jpg"]
 [/URL][/URL]
[URL="http://i677.photobucket.com/albums/vv136/chilldyl77/041.jpg"][URL="http://i677.photobucket.com/albums/vv136/chilldyl77/041.jpg"]
 [/URL][/URL]
Got the body on the frame and time for the moment of truth, slowly lowered the hood, and…it hits….crap, but wait, turns out it was hitting a portion of the center spline under the hood, part of which I had already cut out for previous 5mge clearance, so I cut some more out.
Moment of truth time again, lower the hood, it’s all good, little lower, still good, click the sucker into place and it’s just touching…not even noticeable from the outer surface....
[URL="http://i677.photobucket.com/albums/vv136/chilldyl77/033-2.jpg"][URL="http://i677.photobucket.com/albums/vv136/chilldyl77/033-2.jpg"]
 [/URL][/URL]
Lucky for me this is a Toyota and there are adjustments everywhere, including the hood latch and the rubber hood stopper on the corners. They were all set low so I moved them up a bit and now I had clearance, barely, maybe 1/8. I could at least dimple the hood down to the engine with my finger, but it’s clearance nonetheless. Based on how far back my body was set, in relation to the mounting holes, I think I can slide if forward more which should give me more clearance as the engine will be under a higher part of the hood. Cinched the body down, tightened up all the loose stuff and drove it down to get a 6 pack of Widmer Brothers Rotator IPA. Came back and there was some rubbage probably from the engine jostling around on my pothole and washboard laden road. The larger scuff in the middle of pic, the others are from the dremel....
[URL="http://i677.photobucket.com/albums/vv136/chilldyl77/034-1.jpg"][URL="http://i677.photobucket.com/albums/vv136/chilldyl77/034-1.jpg"]
 [/URL][/URL]
Shimmed up the hinge side with some 1/8 plate which seemed to do the trick until/if I shift the body, now I have more like 1/4 clearance...
[URL="http://i677.photobucket.com/albums/vv136/chilldyl77/031-3.jpg"][URL="http://i677.photobucket.com/albums/vv136/chilldyl77/031-3.jpg"]
 [/URL][/URL]
That 1.5” makes a big diff, feels like it handles better, could be the lower center of gravity or the “I just washed my rig and topped off my tank and all of a sudden it feels peppier” illusion. Despite having to cut my side steps off, at least now I can tip-toe and only moderately rub my arse on the edge of the seat upon entry, but I think they’re going back on, probably same relation to the body which would make them 1.5” lower than the bottom of the frame this time.
I had to mod my shifter sticks previously to stab them to work, look, and feel like OEM, but now there was going to be no lift so I had to remove part of the body for the sticks to fit. This is what happens when you use the v6 x-member in a 4cyl OE rig, you can see my new mounting holes with those screw clip things...
[URL="http://i677.photobucket.com/albums/vv136/chilldyl77/003-7.jpg"][URL="http://i677.photobucket.com/albums/vv136/chilldyl77/003-7.jpg"]
 [/URL][/URL]
I also permanently located and mounted my boots with ring (my original ring from w56, boot from 89 r150) to work with the OEM w56 outer leatherette boot. This is a pic of the sticks before I cut them down to size...
[URL="http://i677.photobucket.com/albums/vv136/chilldyl77/002-8.jpg"][URL="http://i677.photobucket.com/albums/vv136/chilldyl77/002-8.jpg"]
 [/URL][/URL]
I plugged the hole behind the tranny boot with light gauge rubber bed liner material. The way the shifter was previously modded there was contact where the plastic tray is molded into the front. After lots of cutting, tacking, fitting, bending, tacking, etc. I finally got the dog legs I needed in the sticks. The whole process took about 3 hours for both. The first bend off the cup is the finished product/look.
[URL="http://i677.photobucket.com/albums/vv136/chilldyl77/020-1.jpg"][URL="http://i677.photobucket.com/albums/vv136/chilldyl77/020-1.jpg"]
 [/URL][/URL]
 [URL="http://i677.photobucket.com/albums/vv136/chilldyl77/017-1.jpg"][URL="http://i677.photobucket.com/albums/vv136/chilldyl77/017-1.jpg"]
 [/URL][/URL]
Finally got my sticks in a comfy position for the rubber boot and the outer boot with no stick interference or boot grab. What you see is Neutral / H2; I may lift my t-case shifter up a little....
[URL="http://i677.photobucket.com/albums/vv136/chilldyl77/026-1.jpg"][URL="http://i677.photobucket.com/albums/vv136/chilldyl77/026-1.jpg"]
 [/URL][/URL]
[URL="http://i677.photobucket.com/albums/vv136/chilldyl77/030-1.jpg"][URL="http://i677.photobucket.com/albums/vv136/chilldyl77/030-1.jpg"]
 [/URL][/URL]
Well finally finished after 2 days and came in here to document and share my experience, have yet to put some real miles on it but I think it’ll all be good. I see no visible clearance issues, shifters feel good, everything fit back into place like I expected, I think I might have pulled it off.... Now, onto the dents....
Last edited:


") I don't got those skills.
I don't got those skills. 