Hi all,
They say when you have a hammer, everything looks like a nail. Well, I bought a bunch of camel leather to recover some dining room chairs and then I got started on a 1993 model 80 and a 1998 model 100 (called 'Dhanno' after the equine start of a well-known Bollywood movie).
I plan to change the leather trim on Dhanno's steering wheel (I posted in the 80 forum about redoing the steering wheel for that truck already), but I decided I did not want to pull that myself, given the air bag in the model 100, but I also wanted to do the shift knob which looks a little sad. I finally got started last weekend.
I started by going to the local wrecker and buying a shifter assembly complete with the plastic panel with the PDNR, etc. which I also wanted to change. The old one with 500K km on the clock was pretty scratched. I paid maybe 40 bucks for the assembly.
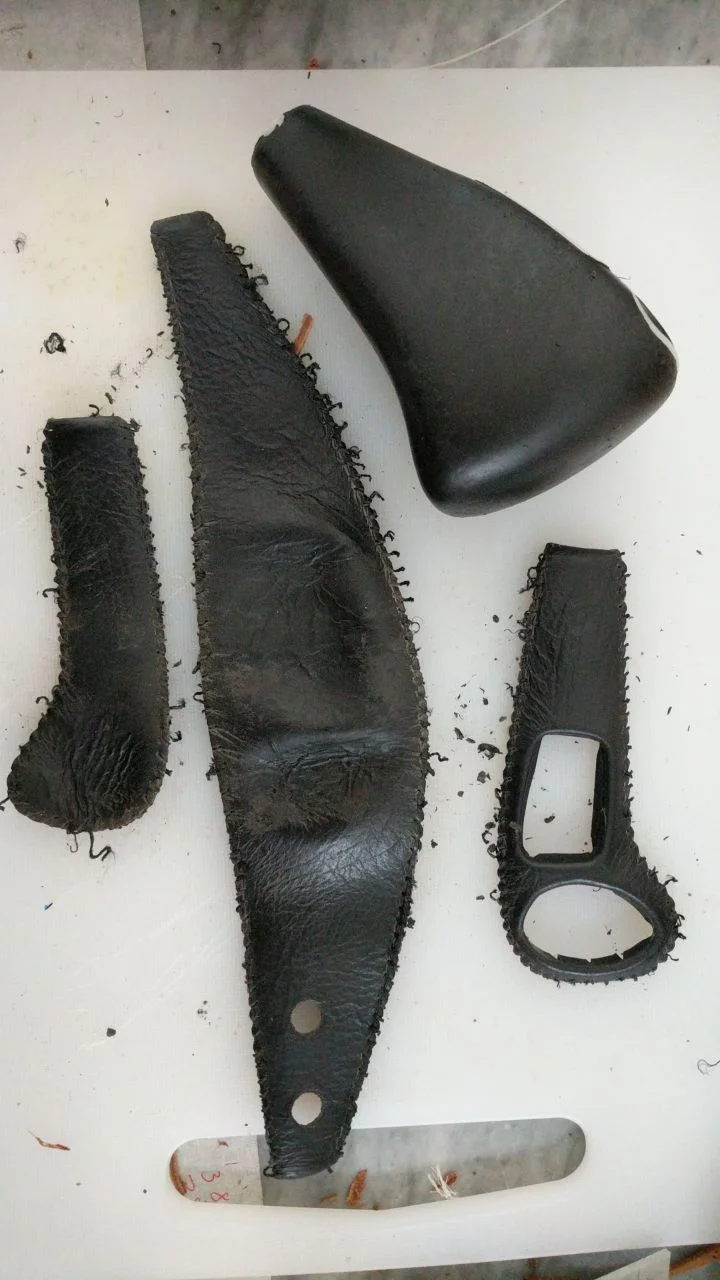
I started by removing the leather from the new shift knob:

Kinda nasty. I just used a sharp craft knife to slice through the threads. The leather on the knob is pretty thin. Underneath is a rubber material with some plastic inserts.
I then ironed the old pieces to flatten them out more completely:

I used steam and put the pieces in between a layer of old cut-up t-shirt. As I said it was not too clean and I only have the one iron.
Then I proceeded to trace the old leather onto the new and cut it out:


Couple of hints: make the replacement pieces a bit longer than the originals. The old leather was folded up and you need some length to go past the end of the rubber knob. I had to re-make two of the pieces before I got it right. Also, get an assortment of leather punches and cheap cutting boards from Ikea or equivalent to cut into.
Here is a photo showing the completed piece of leather that goes up and over the top of the knob:

Only punch the holes on this piece because you have to mark where the holes go on the other two pieces. I used this kind of hole punch:
https://www.amazon.com/gp/product/B073VGYMKP/ref=oh_aui_search_detailpage?ie=UTF8&psc=1
Some might think that the hole spacing is a bit wide, but I'm using pretty thick leather and it is a lot less work than if the holes are closer together. I'm sure my neighbors in the apartment building were wondering what I was doing--it makes some noise when you do it on a table.
Then it is time to glue the larger piece that goes over the top of the knob on. I recommend PVA glue commonly used for bookbinding: https://www.amazon.com/gp/product/B00NZGD6OS/ref=ox_sc_mini_detail?ie=UTF8&psc=1&smid=AWMCFB3232K8Z
It dries clear and flexible and really grabs onto leather and vinyl and rubber and such.


Then place one of the other pieces in position and mark where the holes need to go in that piece:


Note that the holes are closer together where the curve is greatest. I had to use the 2-hole punch and have one of the punches go over the edge of the piece to be able to make the more closely-spaced holes this piece required.
Then glue that on:


And start sewing:


I used a 'baseball' stitch that I learned how to do on youtube. Just search that and you will find a bunch of videos. You will want to watch several. In short, you come up under the leather with each stitch, but it takes a while, for me at least, to get into a rhythm and occasionally I had to back out and re-do.
Do the other side:

The glue holds things in place. PVA glue has a decent working time, which helps a lot. I also found that masking tape could help hold things down when marking and also when stretching the leather over the form.
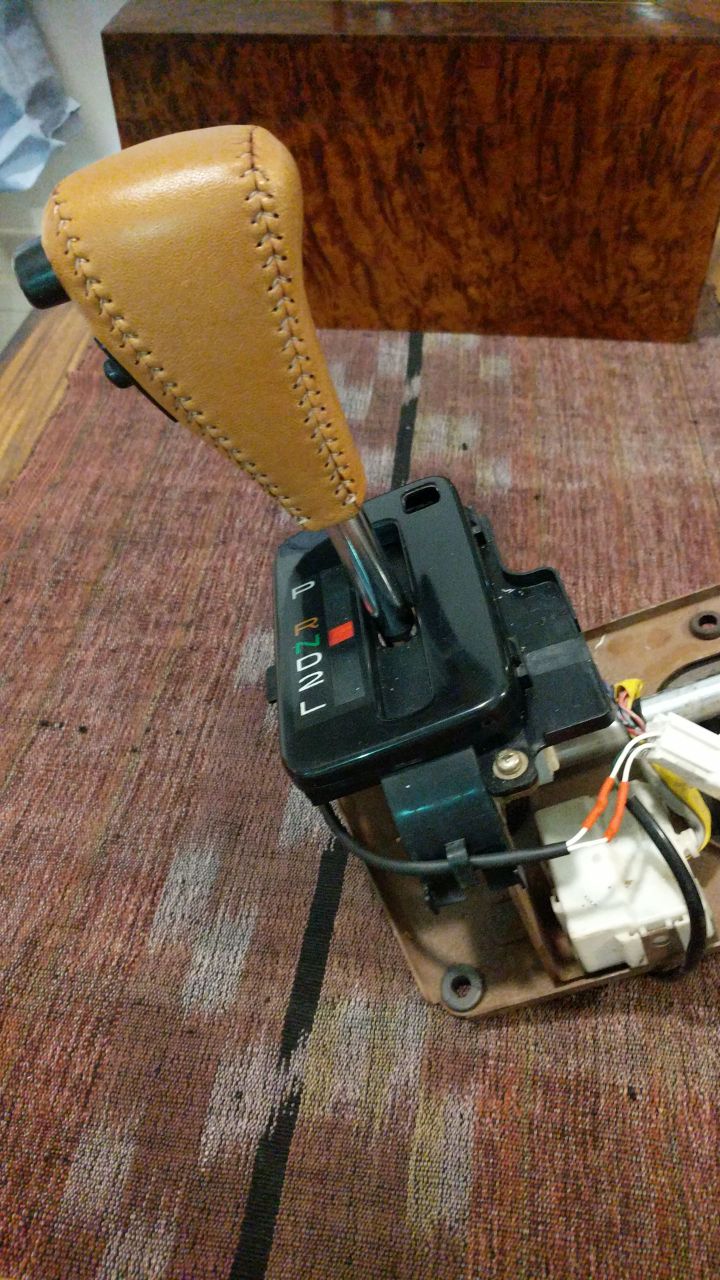
Here's the end result, pretty much finished:


When I get home I will post a few more pictures. The holes for the overdrive and shift lock button presented a challenge or two. I'm sure I could do it better but I think it turned out fine.
I have a bunch more photos here for those who might be interested.
They say when you have a hammer, everything looks like a nail. Well, I bought a bunch of camel leather to recover some dining room chairs and then I got started on a 1993 model 80 and a 1998 model 100 (called 'Dhanno' after the equine start of a well-known Bollywood movie).
I plan to change the leather trim on Dhanno's steering wheel (I posted in the 80 forum about redoing the steering wheel for that truck already), but I decided I did not want to pull that myself, given the air bag in the model 100, but I also wanted to do the shift knob which looks a little sad. I finally got started last weekend.
I started by going to the local wrecker and buying a shifter assembly complete with the plastic panel with the PDNR, etc. which I also wanted to change. The old one with 500K km on the clock was pretty scratched. I paid maybe 40 bucks for the assembly.
I started by removing the leather from the new shift knob:

Kinda nasty. I just used a sharp craft knife to slice through the threads. The leather on the knob is pretty thin. Underneath is a rubber material with some plastic inserts.
I then ironed the old pieces to flatten them out more completely:

I used steam and put the pieces in between a layer of old cut-up t-shirt. As I said it was not too clean and I only have the one iron.
Then I proceeded to trace the old leather onto the new and cut it out:


Couple of hints: make the replacement pieces a bit longer than the originals. The old leather was folded up and you need some length to go past the end of the rubber knob. I had to re-make two of the pieces before I got it right. Also, get an assortment of leather punches and cheap cutting boards from Ikea or equivalent to cut into.
Here is a photo showing the completed piece of leather that goes up and over the top of the knob:

Only punch the holes on this piece because you have to mark where the holes go on the other two pieces. I used this kind of hole punch:
https://www.amazon.com/gp/product/B073VGYMKP/ref=oh_aui_search_detailpage?ie=UTF8&psc=1
Some might think that the hole spacing is a bit wide, but I'm using pretty thick leather and it is a lot less work than if the holes are closer together. I'm sure my neighbors in the apartment building were wondering what I was doing--it makes some noise when you do it on a table.
Then it is time to glue the larger piece that goes over the top of the knob on. I recommend PVA glue commonly used for bookbinding: https://www.amazon.com/gp/product/B00NZGD6OS/ref=ox_sc_mini_detail?ie=UTF8&psc=1&smid=AWMCFB3232K8Z
It dries clear and flexible and really grabs onto leather and vinyl and rubber and such.


Then place one of the other pieces in position and mark where the holes need to go in that piece:


Note that the holes are closer together where the curve is greatest. I had to use the 2-hole punch and have one of the punches go over the edge of the piece to be able to make the more closely-spaced holes this piece required.
Then glue that on:


And start sewing:


I used a 'baseball' stitch that I learned how to do on youtube. Just search that and you will find a bunch of videos. You will want to watch several. In short, you come up under the leather with each stitch, but it takes a while, for me at least, to get into a rhythm and occasionally I had to back out and re-do.
Do the other side:

The glue holds things in place. PVA glue has a decent working time, which helps a lot. I also found that masking tape could help hold things down when marking and also when stretching the leather over the form.
Here's the end result, pretty much finished:


When I get home I will post a few more pictures. The holes for the overdrive and shift lock button presented a challenge or two. I'm sure I could do it better but I think it turned out fine.
I have a bunch more photos here for those who might be interested.


