Builds Project Resurrection v1.1

This site may earn a commission from merchant affiliate
links, including eBay, Amazon, Skimlinks, and others.

Joined
Jun 22, 2009
Threads
69
Messages
673
Location
High Point, NC
My first attempt at documenting this mess was pretty lame, so I’m starting over. The thread is still somewhere in the 40 section, but with any luck it will be forgotten.

I picked up my ’78 in January of 2011. For the most part it looked like it was ridden hard and put away wet, but really it was what the northeast does naturally to any vehicle. The body is/was shot, the motor was nearly dead and there were no brakes to speak of. The motor was rebuilt over the course of the spring of 2011, and random parts were amassed.

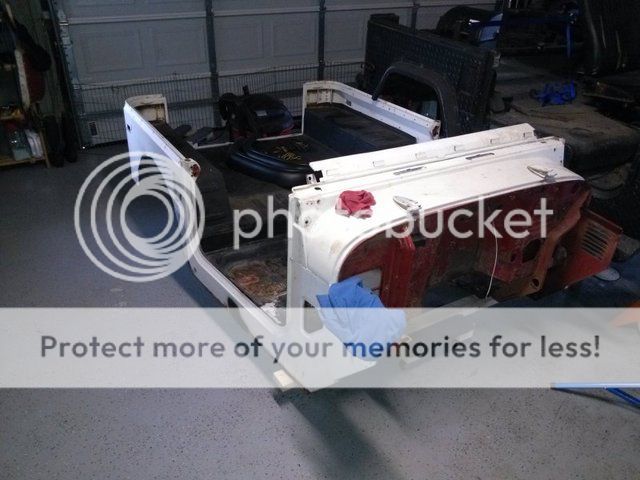
A few months back I picked up a ’77 tub from Virginia that will easily save me several months and lots of money versus trying to rebuild the original body. The floor pans for the driver’s and passenger’s feet need to be replaced, rear sill repaired and some random holes to be filled... but it’s white :grinpimp:

http://i343.photobucket.com/albums/o462/hman913/FJ40/0612120706.jpg


The plan…
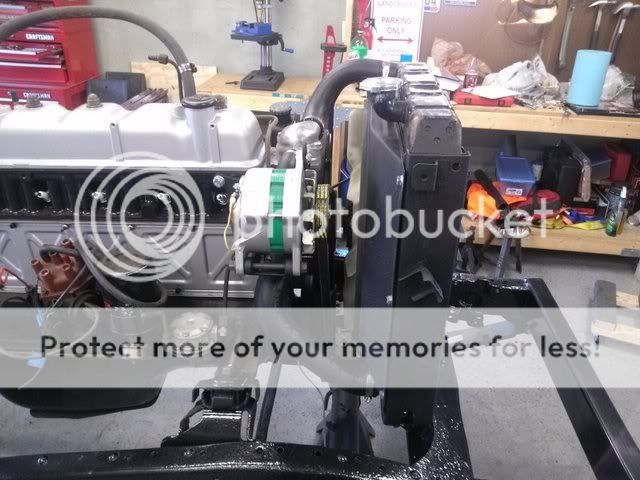
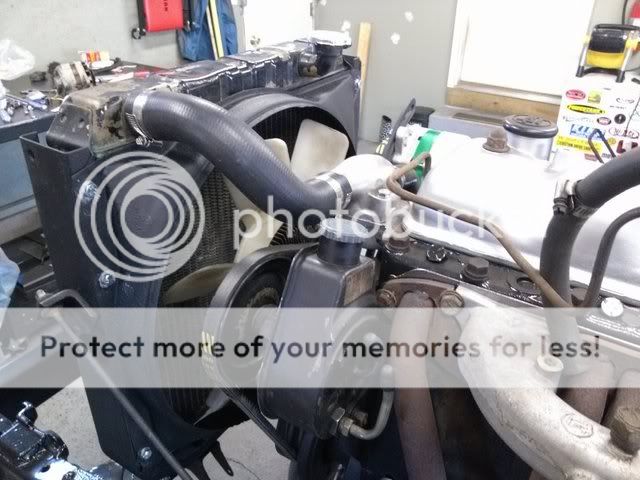
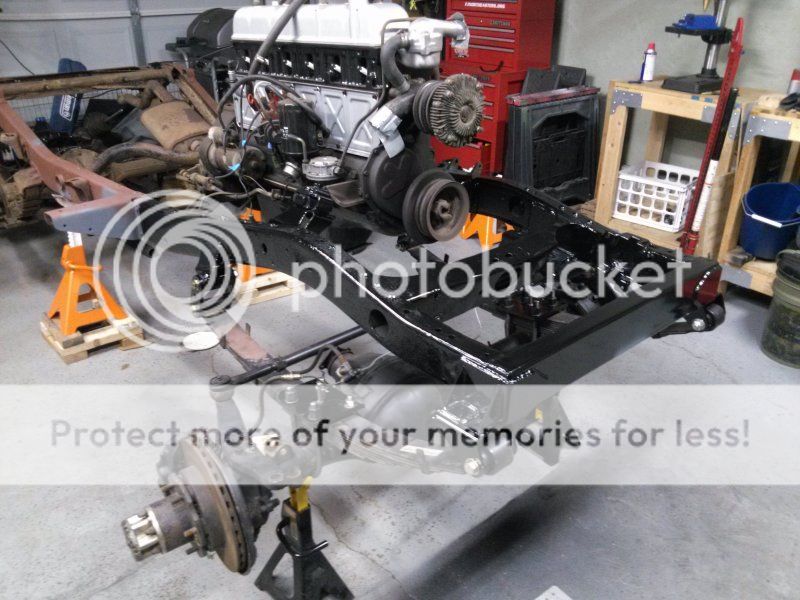
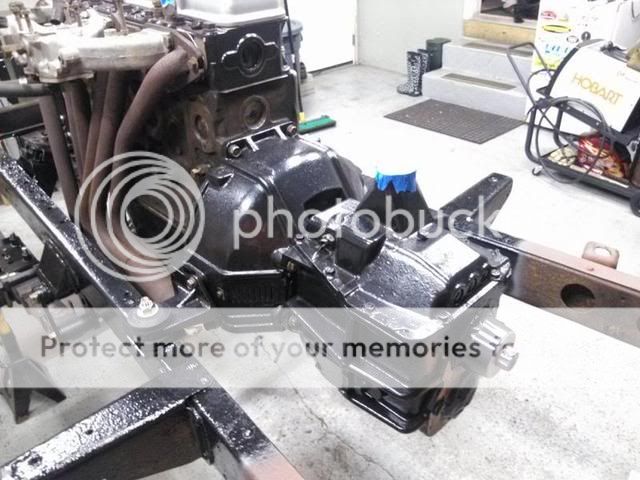
2F (because I had it and was relatively inexpensive to rebuild)
SM465 trans
Dana 300 t-case (4:1 gears, twin stick, 32sp outputs, output flanges to keep Toy driveshafts)
Undecided on fuel
Saginaw
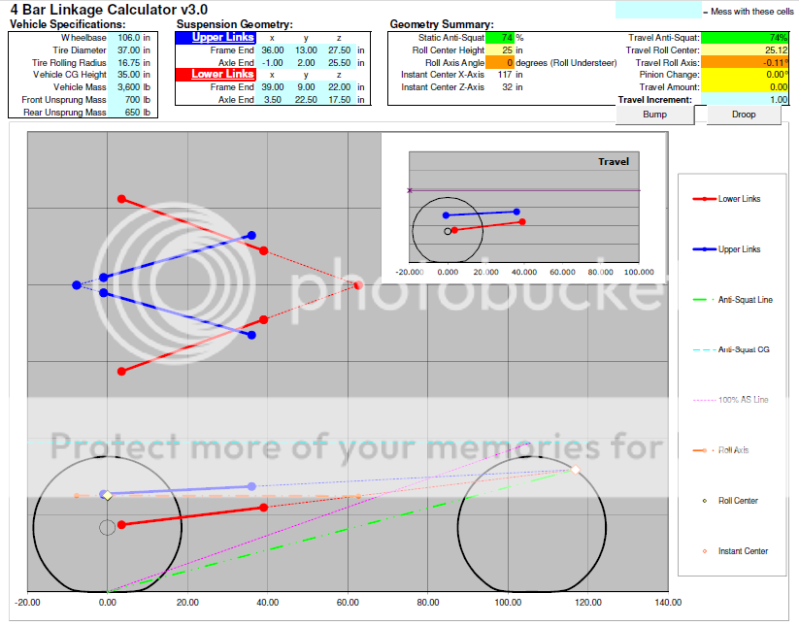
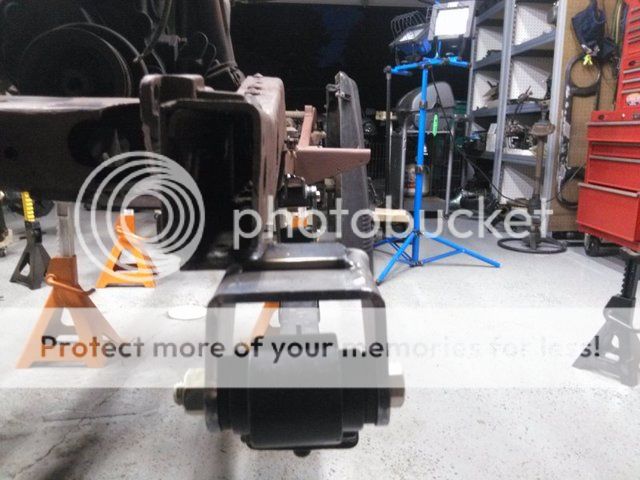
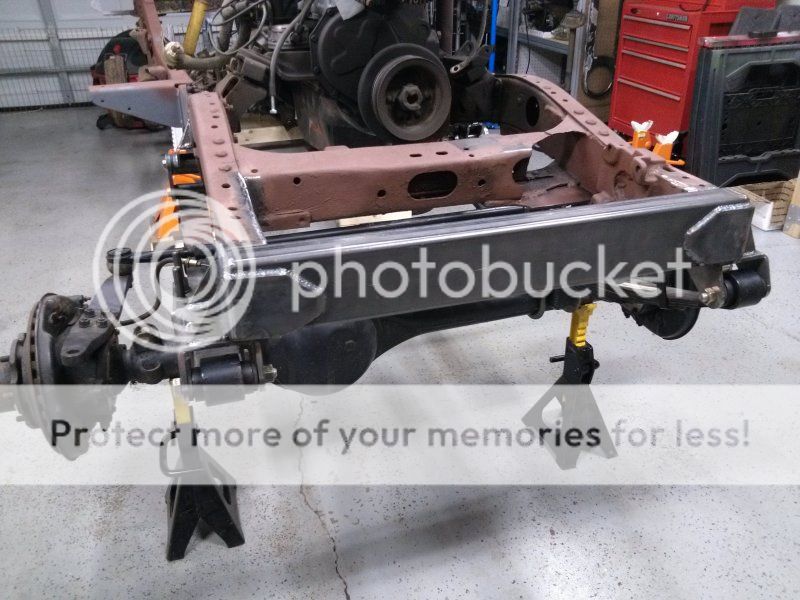
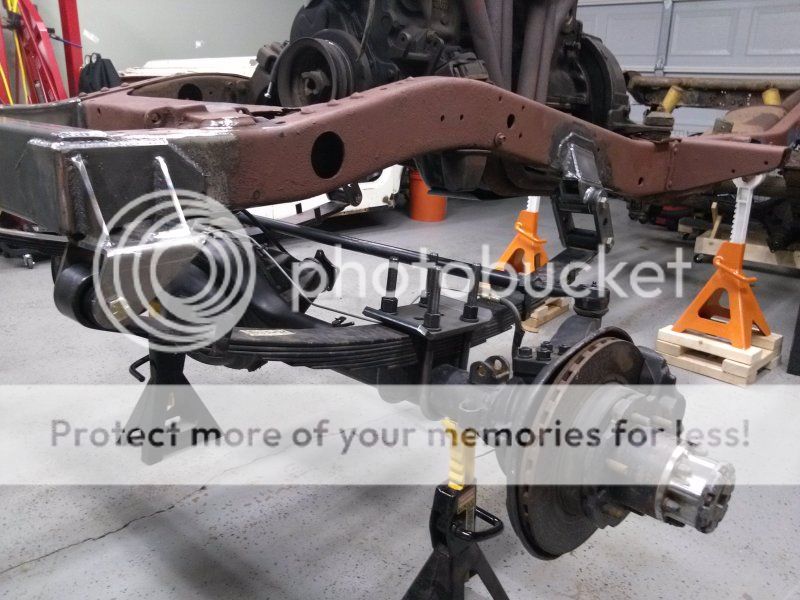
SOA front with 60 series axle/4 linked rear with hybrid LC housing
Longfields
Locked front and rear
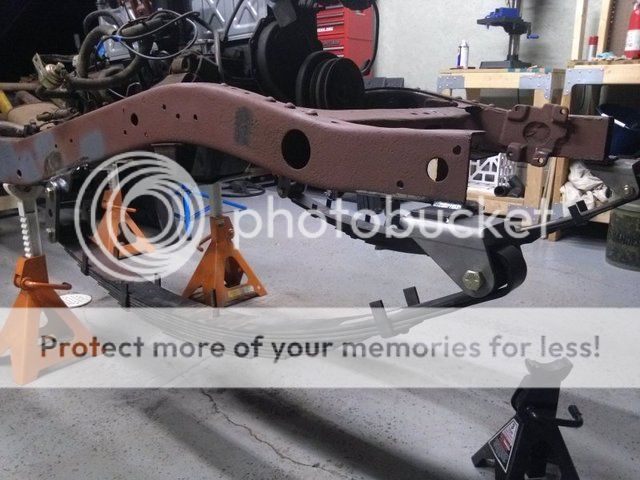
Extending wheelbase to ~106”
37’s on some sort of beadlocks
Full cage
Seats w/ 4 points
Semi-comp cut rear fenders (easier than patching some missing sheet metal)
Budbuilt rear fender skins
Complete rewire of the truck

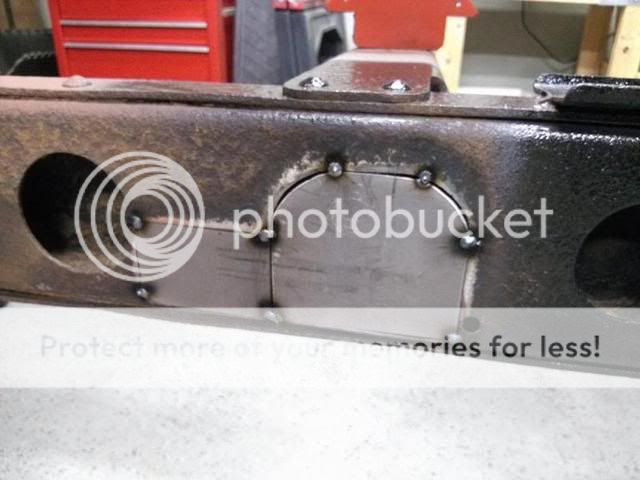
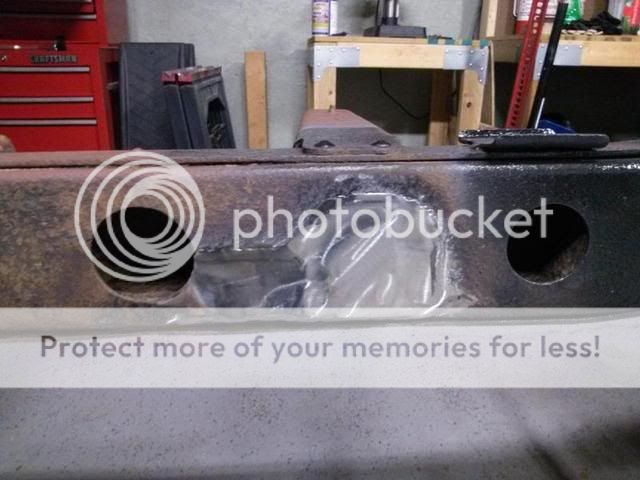
I have very little of the original truck left... only the frame, axles, engine and a few interior mechanical bits.

I’ve only been given 2 “musts” by the wife, it must keep the soft-top and be able to make it onto the trailer at the end of the day. Pretty reasonable I think.
 
Last edited:
About a month ago now I called up Ruff Stuff and made my first of many more purchases. Love that place. Ordered up everything to hang the front axle… spring plates, shackles, hangers and u-bolts.

If my twisted sense of math and physics pans out, I’m hoping to end up with about 5-6* of caster and a 12* pinion angle when the weight of the truck is sitting on the springs. Assuming the centerline of the stock axle location was/is at the middle of the bump stops, the axle is pushed forward roughly 4.5”.

Outboarded just a little
http://i343.photobucket.com/albums/o462/hman913/FJ40/0910122012.jpg
And yes the hangers have a bit of an angle to them…oops.

http://i343.photobucket.com/albums/o462/hman913/FJ40/0910122013a.jpg

With the distance of the outboard, I didn’t have much faith in the tack welds surviving if I hung the axle. In my completely inexperienced opinion, the shackle angle looked pretty decent at a droop so I finished welded everything last night.

I made scab plates for the shackle hangers last night, and hopefully I can knock out the fronts tonight. Once I gusset the hangers, I'll bolt up the axle and hope for the best with the pinion and caster angles.


The front hangers are 2” forward of the frame, which will eventually be getting some 2”x4”x.188” rectangular tube for the bumper.
 
Project looks good, but you should have set the shackle angle with weight on the springs.

Did you fully weld the front hangers yet?

I would brace them for the time being but not fully box them until you see how the shackles look under some weight.
 
I mocked up the hanger locations over the weekend before anything was welded. I'm fairly confident that I have a 50:50 shot of having done it right :lol:
 
I've done the suspension redesign thing a few times. The best way to know you got it right is to have the ride weight on it.

If your shackles are too vertical your ride will be a lot harsher.
What springs are those btw?
 
As they are now, the shackles are about 15 degrees from vertical with no weight. I'm hoping for about 4" of up travel in the fronts when done. The springs are 55 fronts.
 
A big weekend so far, relatively speaking of course. I built the front bumper last weekend using 2”x4”x.188” tubing, at the width of the frame, which would essentially became my new front crossmember. Fabbed up some 90* fish plates to tie everything together. A few tacks and some finish welding later, the front end was starting to come together nicely.


Then on to gusseting the front hangers and the long awaited hanging of the front axle.


I set everything at approximate ride height with a 37” tire. Granted there’s still a fair amount of weight to add, I ended up with a 6.5* caster angle and 10* pinion angle, and 30” to the bottom of the front bumper and 26.75” to the bottom of the mid-section of frame rail. I had thought about using 1 or 2 degree axle shims to help with the caster, but I don’t want to go any lower on the pinion. I’m also liking the shackle angle at this point.

I know a lot of this is mere child’s play to some of you guys, but I sat and stared at the chassis for about 20 minutes after I was done last night. I’ve never done anything like this before and it’s exciting to start seeing your vision come to light.
 
Good work man, I like the front crossmember.

The front clip doesn't weigh that much, and since the motor is in there, I think your shackle angle will be about perfect when its all said and done.
 
Paint!


The gloss might be a little overkill, but it helps me feel like maybe the frame was from the south and not a rusted POS.

Ordered a new drop pitman arm and motor mounts today from Cruiser Outfitters, and may be picking a new steering box this week or next.
 
Not too much going on lately as the temperatures are dropping and it’s nearing time for hibernation. I pulled the motor over the weekend to paint the inner frame rails and replace the front motor mounts. Oddly enough with the motor out, there’s a lot more maneuvering room for some inner frame repair under the driver’s seat. Tonight I will start cutting out the swiss cheese and hopefully have everything readied for reinstalling the engine this coming weekend.

My new/reman’d 4-turn steering box showed up yesterday, and by the miracle of modern hackery I can easily fit it up to the mount with roughly ½” to spare between the bumper.

More later…
 
Small update.

I had torn down the clutch and flywheel about a week ago. Ordered a GM clutch and tried a redneck resurfacing of the flywheel with 80 grit on the orbital sander. It's a good idea in theory, but I ended up taking it to the machine shop this past Monday while the hurricane was rolling through town.

In preparation for installing the transmission this weekend, I knocked in the new pilot bushing and bolted up the bellhousing and flywheel last night. Ran out of time for the clutch, so that's on tap for tonight. Was feeling pretty good about this weekend until I realized I lost one of the throwout bearing clips when I pulled the stock transmission. Naturally no one locally carries anything that might work, so OEM replacements should be showing up on Monday.
 
Frame patches.


Having never (big surprise there) dealt with a clutch before, other than using one to shift with, I had the new disc and pressure plate installed in about 20 minutes on Saturday. The new TO bearing clips came in today, and I got a buddy to stop by this evening to help install the transmission.

One more piece of the puzzle in.


...just waiting to get the adapter for the D300 so I can get rid of the duct tape/sour cream container rear output cover.
 
:bounce: I love it!!

What plans do you have for the D300? What shifters are you going to use?
 
:bounce: I love it!!

What plans do you have for the D300? What shifters are you going to use?

Thanks dude!

The D300 will be torn down over the winter, cleaned and rebuilt with 4:1 gears, 32 spline outputs front and rear and a rear disc e-brake setup. The twin sticks will most likely be coming from JB Fab.

Before I install the case though I will need to fab up a crossmember to mount to the transfer case adapter. I will probably do that during the winter while I’m waiting for my slush fund to replenish itself.
 
Another small update. Front end of the engine is done.


In hind sight I probably should have used a little longer belt for PS pump, but either way it would still be too close to the headers for my liking. Solution... fluid cooler.

I'm still undecided on fuel. Propane is out because I don't want to lose that much rear cargo area, FI is $$$ and I'm paranoid about a carb choking out on me when in Moab and subsequently rolling off a cliff.

I was bored the other day at work and drafted up the 40's frame, and overlaid the 4-link design onto the frame. The axle is moved back 12" (wheelbase ~106-107"), but the actual location will be figured out later. Looked pretty good as far as fitment is concerned.

Any thoughts on the numbers?


I borrowed some of the numbers from another design, and changed some that I think would work better for me. The link lengths are each ~38.5".
 

Users who are viewing this thread

Back
Top Bottom