Pic Request: Trimmed Rocker Panels

This site may earn a commission from merchant affiliate
links, including eBay, Amazon, Skimlinks, and others.

Finally trimming rockers and adding sliders

Thanks to everyone who posted a reply, I dare say I was inspired to imitate. Sure...it took me a year to get to it, but I got married in the meantime and had to be sure my bride didn't have any reason to hate the cruiser. She's loving it now, though with all the heavy metal I'm adding I dare say it'll be a liability to have her driving it. At least she'll be safe, I s'pose...

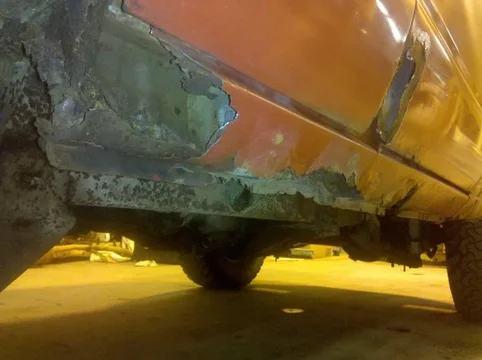
Here is what I started with...
Cruiser
Rocker panel start.webp

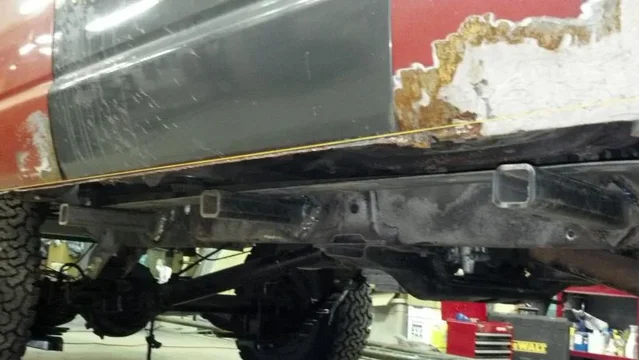
I used a string to find line up my cut and future weld line. I took the advice to weld the slider supports onto the frame in a "diamond" orientation...which is ingenious, and makes it much easier to get a complete weld.
B9kE1DBG_B8-lZLj5qxvuU4_SS99caoFvdFPYsVj6wg
2011-10-06_21-20-35_346.webp

Welded the new metal in...somewhat sloppily. If I did it again, I would go with thinner new metal as it was hard to find a happy medium between not penetrating the new and burning off the old.
ZzaA4GCLsmWDUD7kM39WO04_SS99caoFvdFPYsVj6wg
2011-10-15_01-55-07_23.webp


cPrz1V1zmLSIQzMbbDOhjU4_SS99caoFvdFPYsVj6wg

cPrz1V1zmLSIQzMbbDOhjU4_SS99caoFvdFPYsVj6wg

Rocker panel start.webp
2011-10-06_21-20-35_346.webp
2011-10-15_01-55-07_23.webp
 
Cont'd from previous post because I'm too slow to figure out how to link from Picasa...

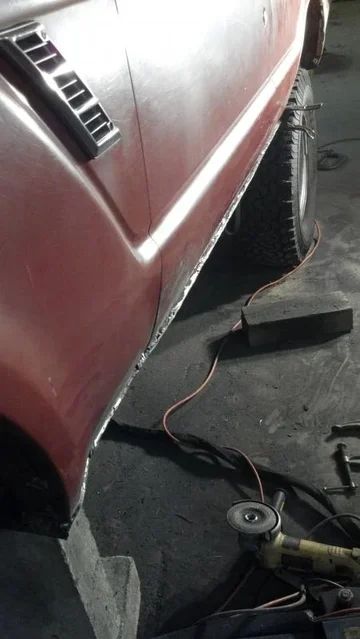
I cut off the extra metal (needed 3.5", only had 4") and ground down to shape.
JSyScSuTwU9q8q0RCCpcMk4_SS99caoFvdFPYsVj6wg
2011-10-16_20-02-00_388.webp

A buddy of mine offered to help with the structural welding (notice the skill level difference between the rocker panels and the slider mounts...) and offered to to the sliders while he was there. Here he's putting the finishing touches on the tube before attaching it to the sliders.
gJQ8AkfuCmZU2qsJ5Yhf0U4_SS99caoFvdFPYsVj6wg
2011-10-06_21-19-53_320.webp

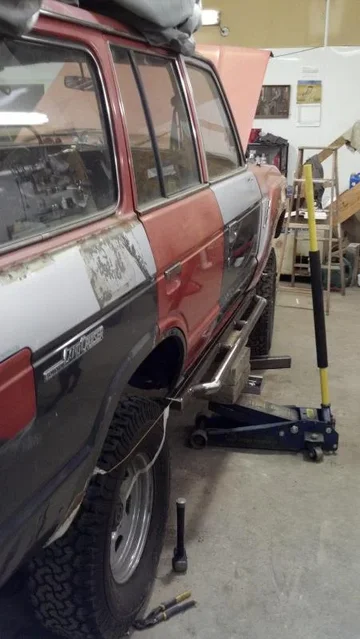
And here is a look at the slider in position. I need to finish closing up the trimmed rocker panels and I'll be ready to weld these on.
2011-10-06_22-43-58_67.webp
2011-10-16_20-02-00_388.webp
2011-10-06_21-19-53_320.webp
2011-10-06_22-43-58_67.webp
 
I like this post because its answering lots of questions for me. But im still wondering what to do with my rust over the rear wheel wells. from the passenger door back. any susgestions?

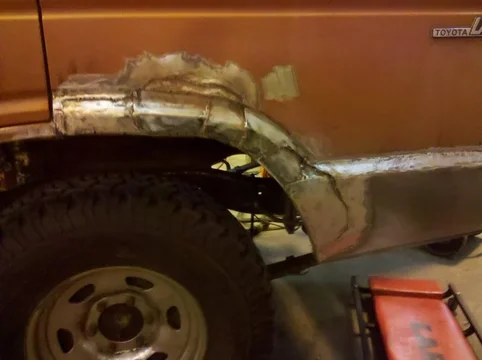
Just noticed this question 444kyle. In my the previous post you can see what I did about the passenger side rear wheel well, here are a couple pics of the driver side rear wheel well

I wasn't very good at taking "before" pics, but here is a decent one
616.webp

Here it is with the welding/grinding about 90% complete
IMG_20100908_201528.webp

I can't find a picture of the inner wheel well, but here is one from the passenger side, which is about the same
IMG_20100908_223330.webp

Hope this helps.
616.webp
IMG_20100908_201528.webp
IMG_20100908_223330.webp
 
Tubing

Hi,
Did you cut and weld the tube for the bent parts or is that done with a bender?

I need those tubes bad, I killed my door and qtrs from a side rock sneaking up on me.

Thanks
Dave
 
Hi,
Did you cut and weld the tube for the bent parts or is that done with a bender?

I need those tubes bad, I killed my door and qtrs from a side rock sneaking up on me.

Thanks
Dave

I cut and welded the tube for the bent look. I decided to go overkill and got 1/4" x 2" tube, so bending was going to be difficult and I didn't want to end up with "flat" bends or wrinkled radii.

There's a bit more grinding involved, but I figure it was easier overall.
 
Sorry, I've posted these picts before but they give you an idea of how the sliders were cut to match the lines of the wheel wells. Cutting disks and a straight line to cut by. I had a little bubbling going on but we decided to go ahead and cut the rockers.
How did you attached the front fenders. I'm in the middle of replacing rockers with square tubes. But havent yet got any good idea how to attach the fenders to them. Welding isnt an option for me because maybe I want to replace them some day.
 
Last edited:
I just used a self tapping screw and went in from underneath. make sure its galvanized.
 
Here is a bit more extreme case of cutting..
DSC_0162.webp
DSC_0163.webp
DSC_0164.webp
 
Bumping.... I am looking at a rusty 60 right now and would love some inspiration on rocker panel chops!!
 
mine's carved from front tire to rear bumper
My body has a decent amount of lower rust (more in the rear wheel wells and quarters than rockers), but since my truck will be used as a fun truck/wheeling truck I'm seriously considering cutting rockers before I install the TG sliders I have in the garage...
 
My body has a decent amount of lower rust (more in the rear wheel wells and quarters than rockers), but since my truck will be used as a fun truck/wheeling truck I'm seriously considering cutting rockers before I install the TG sliders I have in the garage...
Do it..
 
My body has a decent amount of lower rust (more in the rear wheel wells and quarters than rockers), but since my truck will be used as a fun truck/wheeling truck I'm seriously considering cutting rockers before I install the TG sliders I have in the garage...
get intimate with your favorite metal cutting tool n start carvin', the rust worm has already done some for ya :grinpimp:
 
get intimate with your favorite metal cutting tool n start carvin', the rust worm has already done some for ya :grinpimp:
I agree with that, but once I cut under there, I don't have the fab skills to weld the patch to "close it" under there... (I can't weld at ALL)

Hmmm...
 
Easiest thing i have found to cut a straight line, and fast!
Masking tape as a straight line, fool proof, and i should know.
The one thing i do that may garner some comments is i remove the guard from the grinder.
I find the guard and all the sparks it traps makes it hard to follow your cut lines.
Having said that i do use heavy leather gloves and try to keep the body parts i am partial to out of the potential trajectory of an exploding disk.
However great the temptation don't use zip disks to grind!
I have a friend who had a disc explode on him without the guard. He was lucky to be wearing safety glasses rated for OSHA work. The shrapnel was imbedded in the lens and stopped millimeters from his eyeball.

You can modify the guard on the grinder by cutting the corners off a little bit to allow you some more nimble control. After seeing those safety glasses I’ll never use a grinder without the guard. Ever. Just not worth that risk to yourself or anyone/anything else in the area. Stop and think for a moment before you remove safety equipment from your tools and ask if there’s a better way to do the work. You wanna drive the darn thing again, right?
 

Users who are viewing this thread

Back
Top Bottom