Builds Patches - My '76 40. B3.3 Swap and some general fixin' up (1 Viewer)

This site may earn a commission from merchant affiliate
links, including eBay, Amazon, Skimlinks, and others.

Slowly...

Hampered by travels and holiday activities, progress has slowed. But I got a little done lately. Got some shoes for her! The long haired guy previously pictured put some 35's on his Duramax, so the 235/85/16's were collecting dust... but I needed rims. Found some 16x6's with 3.5" BS, 61$ a peice. Wish I could have got some plain steelies, but wagon wheels will have to do. May clean up the original 15" rims later and put some 31" LTB's on them for off road tires.

20121215_161516.jpg


20121215_161459.jpg


Found some fenders a couple weeks ago on CL, the same rust hole in each one, but for half the price of new I couldn't resist.

Got one of the original motor mounts out today, will attack the other one tomorrow. Need to just make myself do something every day and I'll get there... Need to get the driveline assembled so I can burn in motor mounts before sandblasting chassis. I think a couple peices of 4x4x.25" square tube cut on an angle will be the frame side of the mounts, and I think I can modify whatever OEM mounts are on the Cummins to match up. I have a couple of Anchor 2859 motor mounts on order as well.

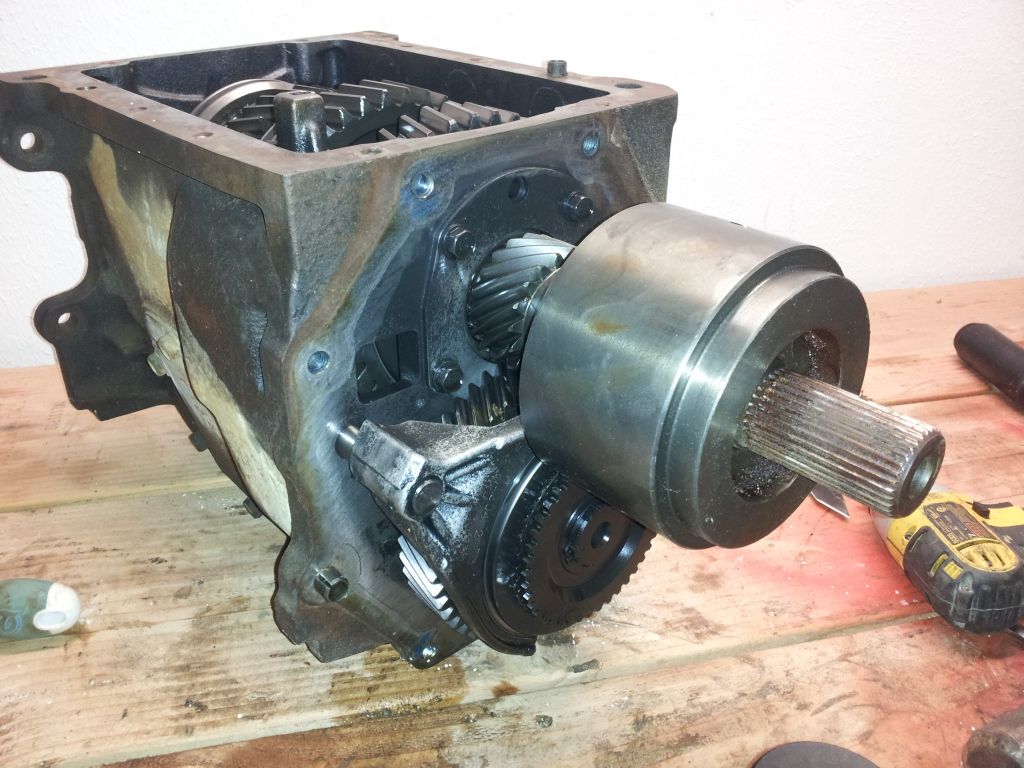
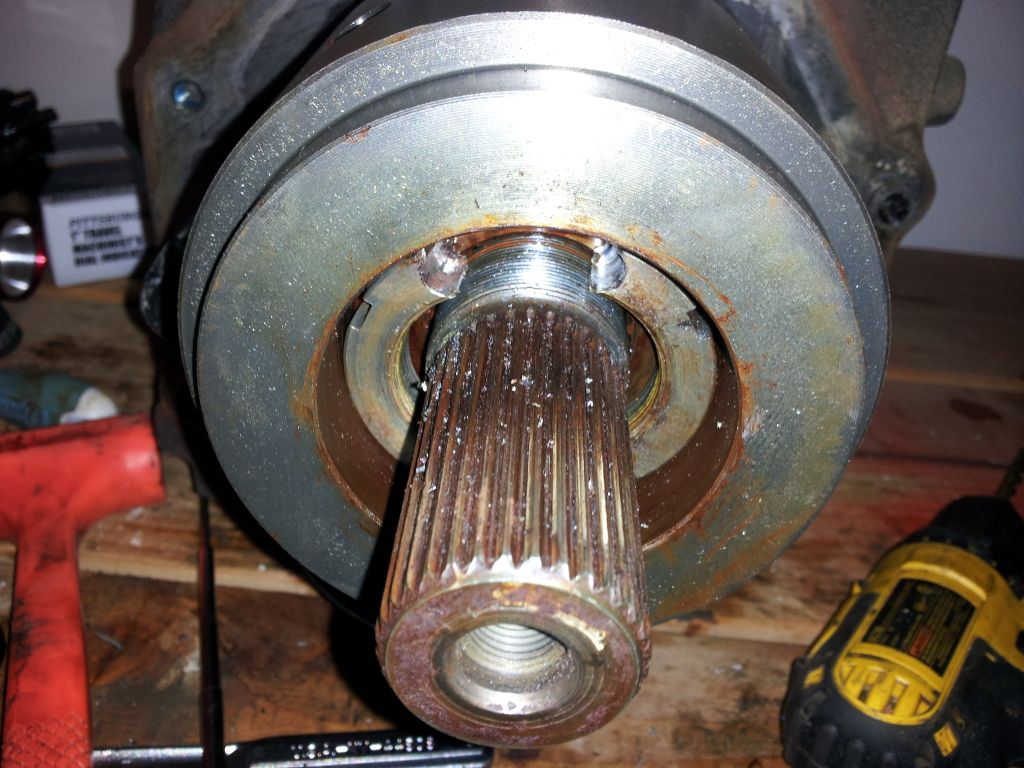
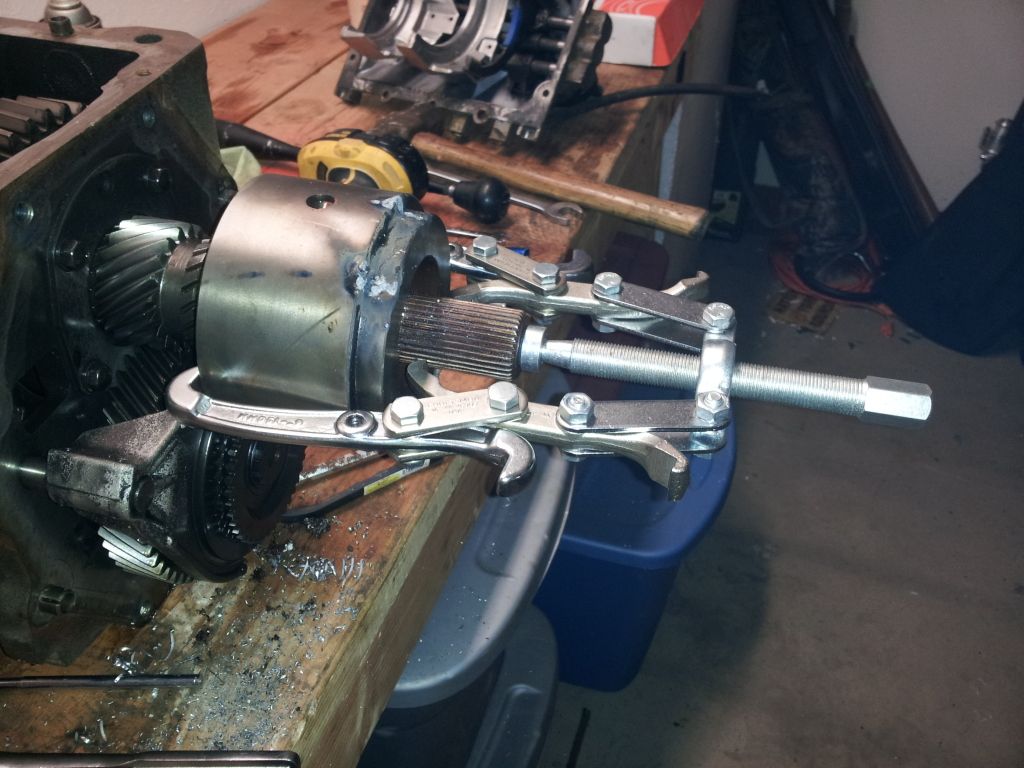
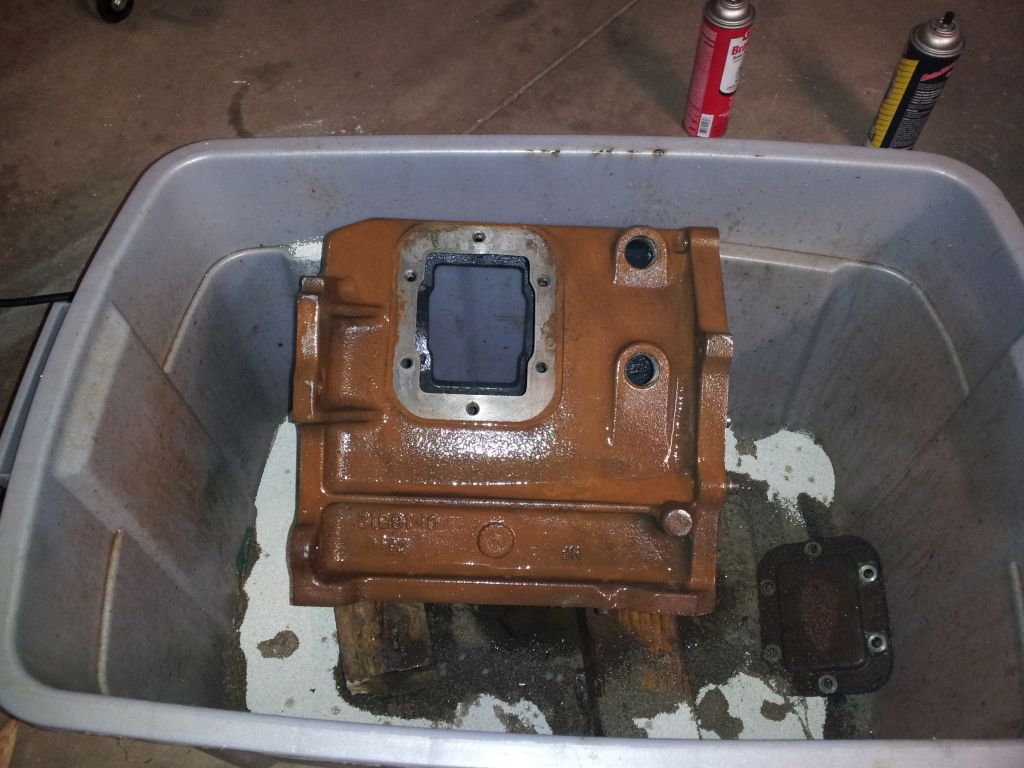
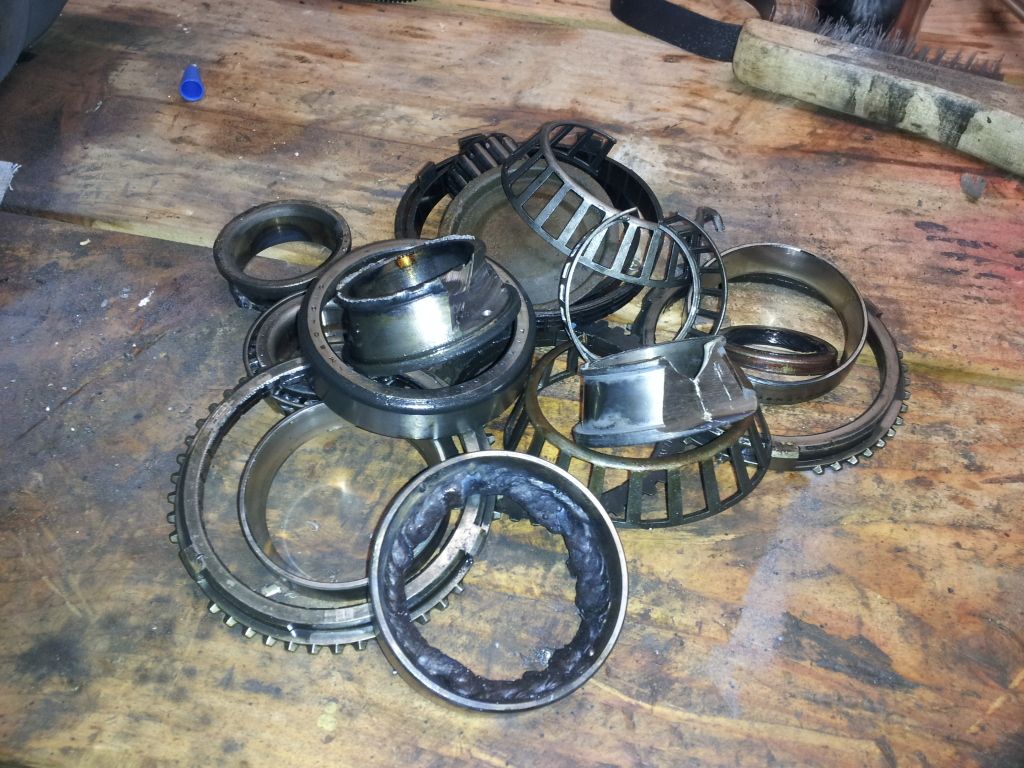
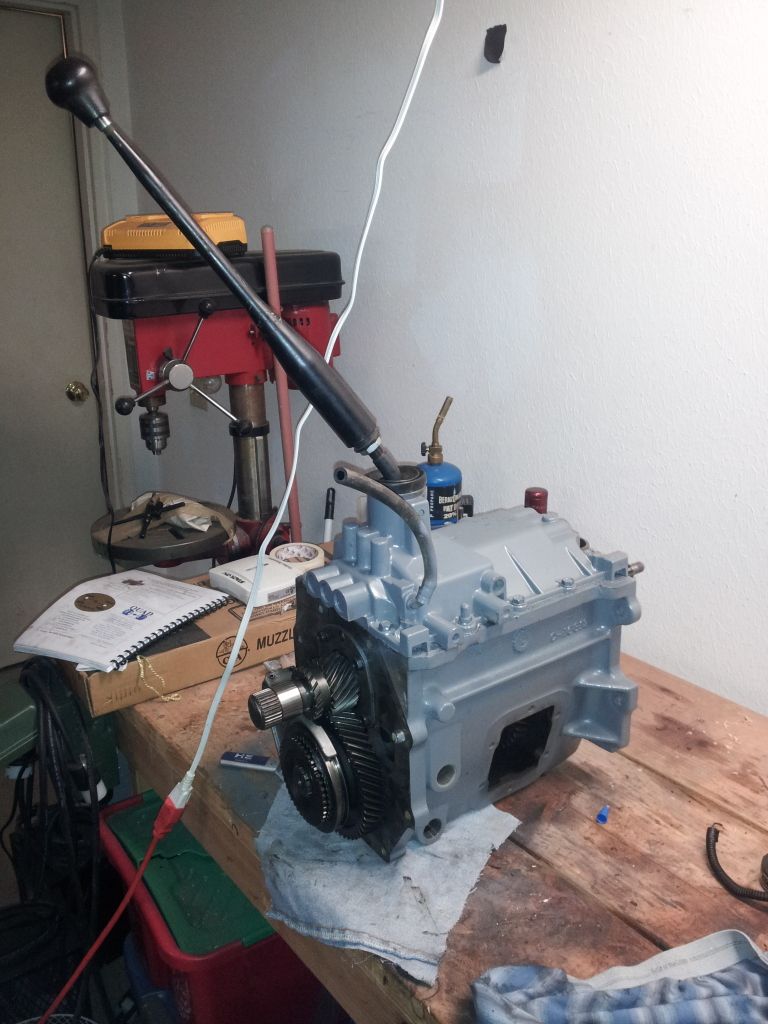
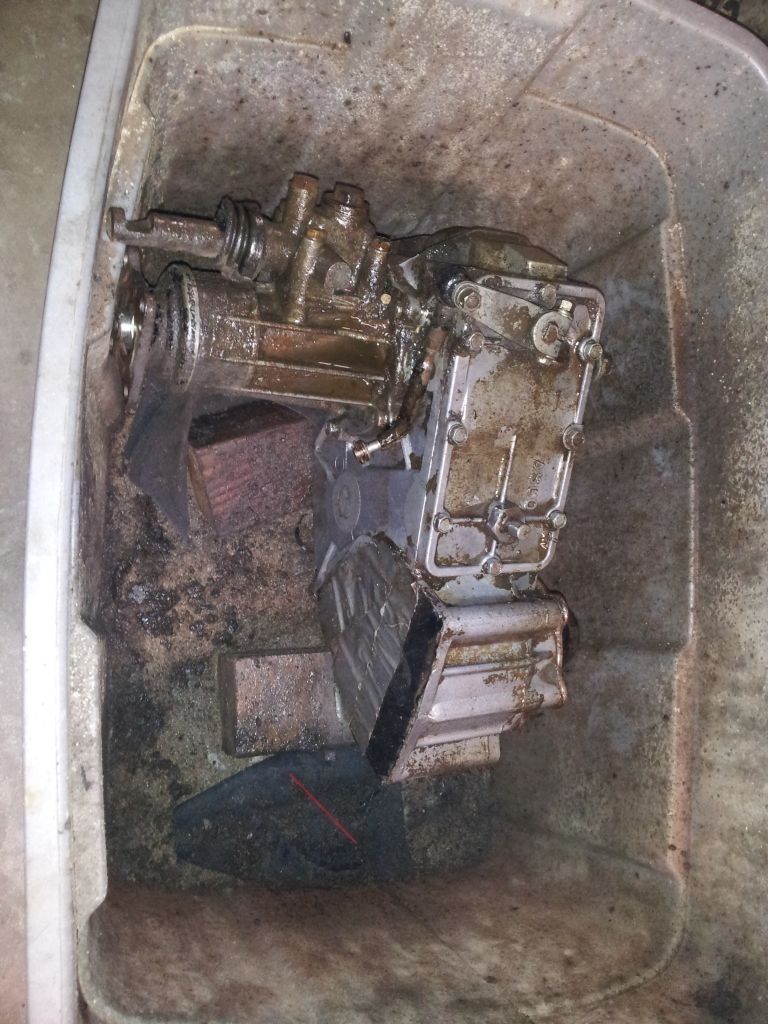
This week I will order AA bellhousing & T-case adapter, and rebuild parts for the NV4500.
 
NV4500

After heaving the pig onto the workbench, and removing the tailhousing and shift cover, we have this. (Tip - Break the tailhousing bolts loose while it's on the ground..would have been much easier.)


If you've worked on or read up on these transmissions, you may know what that coffee can size cylinder on the main shaft is - it's a harmonic damper used on some GM models (mainly diesel applications according to my research.)

For my application (AA adapter tailhousing) it needs to go away, along with a portion of the mainshaft.

Drill the retaining nut, split it, and off it comes right?


Not so fast, it's on there. And good.
When you try and put a Craftsman and HF puller together, guess which one breaks? (An old Carhartt as a scatter shield makes it a less nerve racking operation.) About the weld remnants; I thought some peices of scrap would be good "ears" for the puller to get a bite. Turns out it's cast.


NV4500 5th Gear

With the hillbillied together puller ending in (you guessed it) failure, I needed a more appropriate puller. Sears had a larger one for a reasonable price, and it was US made. The transmission was moved to a more suitable location, a 3' breaker bar was brought out, and the damper finally surrendered.

20130110_200244.jpg


With that out of the way, the mainshaft 5th gear slides off the mainshaft. It was pretty nasty looking - red sludge inside and all over the splines.

MKJVPicsDownload11713122_zps0e36b6c8.jpg


MKJVPicsDownload11713124_zps40d63320.jpg


MKJVPicsDownload11713121_zps5f4fe94a.jpg


If you've read about 5th gear weaknesses in this transmission, the pictures above put them into better perspective. The gear itself is splines the whole length, but the mainshaft is not splined the length of the gear. You can see the wear on the splines of the gear and shaft, and also marks left on the smooth section of the shaft where the gear rocking has worn grooves into the shaft.

With roughly half the engine and half the truck (as opposed to a full size 5.9 CTD), I think the transmission probably has a lot of life left in it as is. But it will continue to wear, and create more brown sludge as wear particles oxidize. I am considering using Loctite 660 during reassembly. While I don't have any experience with it, it seems to be billed as the solution to a problem such as this. (Page 12)
http://www.henkelna.com/us/content_data/192137_LT5338_Shaft_Repair_final.pdf

Anyone done anything similar with their 5th gear?

I am not going to detail the remainder of my transmission rebuild here (maybe I will put something together for another thread later). I will show things pertinent to using the AA package, and installation in the 40.

AA told me they would be shipping towards the end of this month, so more to come...
 
Transmission done, waiting on AA now...

Tore down for scrubbing in the "parts washer."
http://i291.photobucket.com/albums/ll294/khnb7f/20130128_191924_zps3b4b18ab.jpg

As evidence by the pile of used innards; you really don't need to buy any of the fancy tools that are out there for the bearings. I had to grind a few of the races flat till they split, and I ran a bead of weld around race in the front bearing retainer to shrink it for removal.


To press the bearings on I used a spindle nut socket and the old bearings on a couple, and on the rear mainshaft bearing I used one in conjuction with the 5th gear itself to press the bearing on. Set the endplays at .002" and buttoned it up.

http://i291.photobucket.com/albums/ll294/khnb7f/20130202_200255_zps41b9be61.jpg

I got an E-mail from Advance Adapters saying that their production has been delayed yet again and the new ETA is Feb 8th.

The transfer case is now in the parts washer (maybe tomorrow I'll get motivated to take it in to work and use a real one..) scrubbing with engine degreaser in a 20 degree garage is getting old..

http://i291.photobucket.com/albums/ll294/khnb7f/20130202_200839_zpsb49119ca.jpg

Went to the local Toyota dealer to try and order some seals for the t-case, the guy at the counter was very confused and couldn't understand the VIN number and said his computer only went back to '83. He has to call California. Maybe I'll find some OEM ones online..

I'm thinking things will progress a bit faster once I get the rest of my driveline parts.. I can get some motor and tranny mounts fabbed up and get to cleaning up the frame and painting it. I think I'm going to call around and see what the prices are for galvanizing. If someone locally can accept the frame as is without me having to blast it first I may go that route.. Seems to me complete immersion would be the best way to ensure all the nooks and crannies are covered, as opposed to blasting and painting or powdercoating.
 
Cool write up.

I am in the progress of doing a B3.3 swap myself. I am using the same phx flywheel adapter. Make sure you are using a neutral balanced (post 1986 bolt pattern) Chevy flywheel with your B3.3. I talked to Bill from phoenix adapters for quite awhile (nice guy), as I needed to clarify the bolt pattern on his adapter.

I am having advanced adapters make me a custom neutral flywheel, as all small blocks after '86 came with balanced flywheels.

Of course you can use an off the shelf flywheel and just have a machine shop balance the engine/flywheel together (knocking the weights off, etc.), but I am willing to pay to eliminate that hassle (~$300 for the custom flywheel).

I am mating my engine to a brand new H55F (Toyota 5-speed) and split t-case from Man-A-Fre, so I am using the advanced adapters kit to mate the bell housing.

I just have a bunch of parts right now, but I'll start a thread after I get started (frame, body, getting shipped from Aqualu this week).
 
Thanks FJ.

I'll be looking for your build thread! The H55's ratios seem much more favorable than what I'll be running, but at 3x the cost... I was thinking a T56 with 0.62 overdrive would be awesome with 31's, stock gears and a diesel, but it would be a chore to adapt one to the transfer case without having your own machine shop, but for a 2wd.... I'll keep that idea in the back of my head for my other B3.3 when I come across a nice little 2wd extra cab needing a motor..My '95 is so rusty it wouldn't be worth it.

Flywheels...Yes...Back on track... I don't recall Bill and I's exact conversation but I think I left that conversation with the impression I would just use a stock neutral balance Chevy flywheel. I do recall asking him what pilot bearing I would need, as the hole was larger than the ~1" Chevy pilot bearings I'm used to. I measured it up and did some digging and found the hole PC has in the adapter uses the same pilot bearing as a newer 6.0 truck; metric. Advance Adapters is sending me one with the rest of my order.

I hadn't given the whole setup too much thought past that. Tonight I went and measured the bolt pattern, and sure enough.. it's the newer (1 peice rear main) 3" bolt pattern :bang:.

20130208_181940_zpsd9847b99.jpg


I suppose it wouldn't be too much work to have someone turn the weights off the inside of this guy.. 70$ on Rockauto, for an 88 Camaro with a 305.

getimage.php


Advance Adapters bill just hit the CC this week when they shipped my bellhousing and t-case adapter. :crybaby:..I'm doing the flywheel the cheap way ;).

Last I checked the tracking number, my 55lb box had made it to Ohio and should be delivered Monday! Then I will start bolting things together and work on fixing my heavily adapterated drivetrain into its final resting place between the framerails of Patches..

Didn't get much done today other than finish welding up the oil pan for the engine. It had been handled roughly prior to my ownership and the oil pan was wrinkled up pretty badly. There was a Fumoto valve on it, and the threads were boogered up and I couldn't get the thing to quit leaking 100% after pounding it out flat. I took a peice of 1/4" plate and made a new bottom for the oil pan. I used a 1/2" weldolet and an NPT pipe plug as the drain plug. I will just put a wrap of teflon tape on it when I change the oil, and I'll never have to worry about cross threading a plug into a paper thin pan or finding a metric replacement plug.
 
Advanced called me back, the flywheel is only $190 so dollars. Want one?
 
Cool thread. Where did you source your engine?

Guy I know who knows I'm a diesel fan knew where there some engines that could be had for a good price, don't think they knew what they had.. New but looked like it was handled with forks, pan was dented, alternator bracket bent, etc. This discovery coincided nicely with my acquisition of the '40 - meant to be.

Seattle - I talked to a hot rodder at work who knows a few local shops that he says can do what I need to do machining a flywheel to neutral balance for cheap; I think I'll go that route. What are you doing for your clutch? I see what AA sells the Centerforce and also a LUK that are described as having low profile diaphragm pressure plates.

If you look at this, you can see how much longer the AA throwout bearing that they send with the bellhousing is (that's the factory unit from the '93 Chevy for comparison). It is explained in the AA literature that when using the LC slave, there isn't sufficient throw to operate the stock Chevy setup. I suppose since I need a new master and slave anyway I should have thought about this sooner, and just used Chevy stuff all around; replacements would be cheaper and easier to come across. I have some more research and thinking to do before I plop down $200 for a pressure plate..
20130211_180257_zps51fc5ba6.jpg


Oh yeah, my AA stuff came in finally! :clap:

20130211_180431_zps85fd18f4.jpg


It was packed pretty well and all looks to be in good order, save for one small nick on the engine side of the bellhousing that one stroke of a file will take care of.

With my new parts here, I got to work putting something together tonight..
Glued my 5th gear up with the Loctite 660.. Put a ring of 243 around the flange where it meets the bearing as well.

20130211_183451_zps256410b5.jpg


Installed the AA retainer collar.

20130211_184236_zpsb8d94c22.jpg


And the spud shaft.

20130211_192655_zpsbf089dfc.jpg


I was thinking here that the spud shaft has the same length of spline engagement that the 5th gear did, which is (hopefully was) a little sloppy for my liking. Since we are dealing with new splines here (this section of the mainshaft previously coupled to the balancer which was press fit) I suppose it's not such a big deal, the transmission could have had 200k miles on it before 5th gear got like it was (and it wasn't THAT bad.) I thought about the spline shafts on the driveshafts of the BMW motorbikes that you have to grease with some special stuff every so often and wondered if something like that wouldn't be appropriate here. Eventually, with nothing to hold it in and gear oil splashing back there it probably wouldn't last too long. I put some of that nasty black moly grease on the splines and right-stuffed the flange and put the adapter on.

20130211_203318_zpsfc5d1585.jpg


And then the transfer case.

20130211_205236_zps5f84d01f.jpg


I started putting the shifter brackets on to see how that all worked out, but realized the actual shifter was buried in the back of my K5 with a bunch of other parts from when I tore everything down and had both trucks in the garage.

That T-case seems like a toy after manhandling that 4500 around. I think the engine hoist will have to be deployed to get this combo off the workbench..
 
Last edited:
Starting to look like something..

Together at last!:clap:

20130213_184256_zpsaa5537a2.jpg


This is with the transfer case in the approximate original location...Obviously not enough room for a fan.

20130213_192720_zpsf3ee3148.jpg


These are the motor mounts I plan on using. Anchor PN 2859. In this picture the engine is sitting about where it looks like it will end up. A few inches further back than the first shot.. Clearance looks pretty good everywhere. (Don't mind the trucker ratchet strap.. I don't trust a HF engine hoist overnight..)

20130213_194258_zpsb0fc0dbf.jpg


Should be able to make up some motor mounts and hopefully transmission mount by the end of the week...
 
Looking good! Are those the fenders I gave you? If you need Toyota parts, go to Motorcars Toyota in Cleveland Heights, ask for Dan, he'll hook you up.
 
:popcorn:

Inspired use of pullers. :hillbilly:

I had some similar problem solving when pulling apart my SM465

Press on:beer:
 
Looking good! Are those the fenders I gave you? If you need Toyota parts, go to Motorcars Toyota in Cleveland Heights, ask for Dan, he'll hook you up.

No, I picked these up on craigslist down around Youngstown from a guy who was doing a very nice rebuild and using new metal. The more I looked at and scraped at the ones I got from you, combined with the cutout for fender well headers the more I thought i needed something a little more substantial (no offense!) The ones I picked up are even the right color, so the body will match better till I can get around to paint...
Thanks for the heads up on parts!
i like the beer on the gearbox, nice job!
Gotta support your unoffocial sponsors!

I got the motor mounts tacked in last night, pics when i have them presentable :). I have been busy lastely (although I can't always seem to figure out what with..) So I haven't gotten a while lot done, but the engine is sitting in the frame on its own now! Its quite a motivating change to be able to work in the garage without being in carhartts freezing ones fingers off.. Hope to get a lot done soon! Not this weekend though, driving a new (to me) '98 TRD Tacoma back from Rapid City via Denver. Saw three cell phone pictures of it, should be good :). Last one I got through this guy I drove from Cleveland to Portland no issues sight unseen (but you'd say I was nuts if you saw it...what possess a guy to put the claw of a hammer through the hood anyway??) Plan is to replace my 95 with the 98. After going from Cincinnati to Cleveland 307 miles on 9.6 gallons last weekend I'm going to miss it.. Plus a 4wd auto is going to feel like a dog compared to that thing..but 4wd pickups are infinitely more useful..

I asked for a quote to galvanize my frame, add that will be the next step after my mirror/trsns mounts are in. I am almost set on galvanizing vs. paint... I'll see how much its going to cost and if it requires sandblasting prior to dipping.
 
Last edited:
No, not a dead thread. Just been a bit busy lately..I have the engine sitting on the mounts in the frame and hope to get those finalized and burned in this week. The upgrade of my rusty '95 2wd to a non-rusty '98 TRD 4x4 with 120k less miles was a partial success; it made it back from Rapid City but I think the flexplate is cracked. Automatic....what was I thinking :bang:.

I'll get pics up when I have the mounts where I like them and the hood fits on!
 
Hiatus

I'll get a pic or two up soon once I have my technology situation rectified, but progress has halted for the time being. I got shipped to Germany for a while so the FJ had to get thrown back together and taken back to MO. Motor mounts are in, drivetrain is in, and body back on/together.) Should have plenty of time to research and order parts though!
 
Any progress on patches?

I am starting to mock up the exhaust routing for my 3BT.
 
Not lately.. I'm in Omaha now for the time being and have no space to have her up here. Maybe when it warms up I can talk the wife into parking her 4Runner outside..

Any progress on patches?

I am starting to mock up the exhaust routing for my 3BT.
 

Users who are viewing this thread

Back
Top Bottom