Kons 45 SOA Upgrade (1 Viewer)

This site may earn a commission from merchant affiliate
links, including eBay, Amazon, Skimlinks, and others.

Kon

Joined
Sep 21, 2005
Threads
30
Messages
134
Location
Perth, Western Australia
Well I thought I would start a build thread about my ute.
It’s an ‘83 FJ45, 4spd. I got it for free, a friend of a friend
needed to get rid of it. No rego, 3 wheels, missing a few panels,
starter motor and a few other bits and pieces. Looked like this…


FJ45frontcorner.jpg


A bit of time and effort on a student budget got it over the pits,
here it’s sitting on 33’s. It stayed like this for a while, taking it
out every now and then, lent it to mates who were wheel-less...
It looked more or less like this…


FJ45_07.jpg


Eventually I cut the farm-gate off the tray


Finally got some funds together and a little bit of time so the main
plan went like this:

- SOA on cable locking 60series axles, they’ve got an extra 4” width
on 40 axles so should help with stability.
- Fibreglass roof and any other parts I can get my hands on. (anyone got any for sale?)
- 37” tyres
- 5spd
- Cut down tray, customise etc.


So here's the strip down


45strippedrear.jpg


front axle is out


P6280347.jpg


slightly painful


cleaned up the spring packs, the front had the load leaves taken out and then took 4 leaves out of the rear.
diffs got 4.88s installed..


got the diff perches stripped ready for the new ones..


IMAGE_012.jpg


IMAGE_011.jpg


well these are the rear springs.. thick pack is the original pack, thin pack is the new and improved hopefully flexy

version. i took out 3 leaves down to 6..
IMAGE_019.jpg


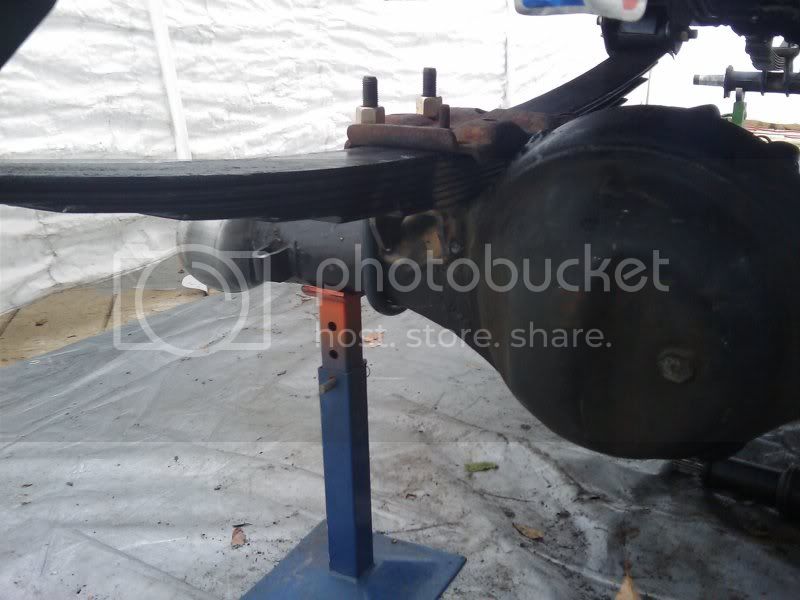
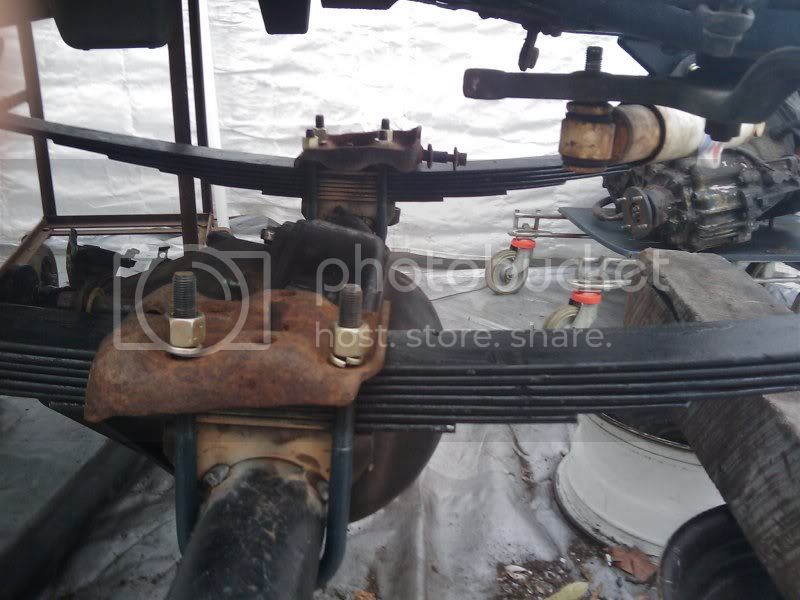
after a few variations and figuring out i had to flip the bolt so the locating pin is down..
i re-installed the rears with new pins, shackles and bushes.


IMAGE_022.jpg


IMAGE_023.jpg


front springs are painted and back together..


IMAGE_024.jpg
 
i did a spring flip, which involves turning the 2nd leaf and drilling a new hole in it..
effectively moving the diff forward roughly 100mm or 4".


IMAGE_026.jpg


IMAGE_027.jpg


next up i mocked up the diffs with the new perches..
this is how the rear diff turned out.


IMAGE_032.jpg


here is the high-tech sophisticated centering/aligning technology we used.


IMAGE_036.jpg


because the spings are closer together on a 45 than they are on a 60, the perches have to come in,
which pushes the drivers side perch right up against the pumpkin..


IMAGE_040.jpg


first major problem was the steering..

problem is with stock power steering on a 45 and the diff moved forward the idler arm sits pretty close to the diff
(see below). as the front flexes the diff will move forward as well, compounding the problem.

the plan was to install 60series ps but i ran out of time for that so we threw something togther last minute.


IMAGE_041.jpg


IMAGE_042.jpg


i got the rear hubs rebuilt and reinstalled.. rebuilt the rear end with new bearings then new rear drums, wheel cylinders and brake shoes.
front end is half done with knuckles rebuilt with new bearings. got the kit from Locktup so it included Marlin heavy

duty seals and a few shiny bits and pieces...


new rear brakes

IMAGE_047.jpg


drivers side knuckle

IMAGE_053.jpg


passenger side knuckle

IMAGE_055.jpg
 
Last edited:
got offset? this is without wheel spacers too!!

IMAGE_049.jpg


not bad eh?


i've got stuff all pictures, was kinda too busy getting it ready for a shakedown run. to name a few things:
new brakes and extended brake lines,
custom steering linkages,
changed flange on rear driveshaft to suit new diff,
got custom front driveshaft built to suit lengthened wheel base & new diff

there's more but i cant remember. sorry to skip a few steps in the build up but didnt get any photos cause I was rushed for the trip..


IMAGE_012-1.jpg


and then a few of the trip.. nothing serious, just a wedge trip


1stwedge45soa.jpg


1stwedge45soascenic.jpg


well, after this extremely mild trip i found out 3 things; cooling system was completely corroded, extending the
wheelbase makes for a stupid amount of guard rubbing up front and stock powersteering can't handle 37s.. at all.

solved the second problem..


2ndwedgeuteKJ.jpg


IMAGE_010.jpg


that was a great trip but yet again, stock powersteering was still awful.. spewed litres of ps fluid. time to step up.


i got my hands on a TrailGear Hi-Flow ps pump from Chris at Locktup4x4. fabbed up a bracket to mount it, had to keep
it low so the resevoir can be mounted above it.

heres a pic of the bracket installed with the pump. also installed a new water pump, thermostat and thermostat
housings, i got a new radiator and all new hoses to install aswell.


IMAGE_016-1.jpg


now im basically tearing it down and rebuilding it again. i was running standard length shackles which gave very little flex..
so i got a set of extended shackles and once they were installed my shackle angle was pretty much vertical,
so needed to move the shackle mounts. at the same time i cut down the frame.. this is the new rear end


IMAGE_014.jpg


chopped off over 500mm.. the new rear bar is 100mm shs, corner gussets are the same.. fish plates down the side are 10mm plate.
should be nice and strong, just gotta add recovery points.


IMAGE_015-2.jpg


IMAGE_026-1.jpg
 
Last edited:
while the rear diff was out, i braced it with some 75mm shs. pretty sure i wont be bending this anytime soon
here's some pics. still need to add a wrap bar and finish up the shock mounts..


IMAGE_018.jpg


IMAGE_020.jpg


IMAGE_021-1.jpg


IMAGE_022-1.jpg


so here is how it stands now under its own weight again.


IMAGE_026-1.jpg


IMAGE_025-1.jpg


my front springs were beyond flat and sagged.. so i sprung for a new set, modded them the same as the old ones then took out 2 leaves.. only lifted it a bit,
got about 300mm clearance to the bumpstop now. again, the extended shackles completely screwed the shackle angle so i have to move the hanger..
so because Im already cutting up hangers im going to do a shackle reversal at the same time.

back to the rear, made some new u-bolt plates and tacked in the new shock mounts..

IMAGE_031.jpg


also got the trac bar mount done. the trac bar itself will use 80series trailing arm bushes at the diff end..

IMAGE_035-1.jpg


IMAGE_034-1.jpg
 
Last edited:
started the teardown of the front end.. got the spring hangers and the shackle mounts cut off. sorry bout the photos, best i could do at midnight..

IMAGE_038-1.jpg


IMAGE_036-1.jpg


finally as it became too late to be angle grinding, mocked up the new front bar..

IMAGE_037.jpg


back under its own weight!!

only temporary to get my shackle angle set.. still have A LOT to do to the front; steering mounts, diff bracing, knuckle bracing, shock mounts, brakelines etc..


pretty happy with how the shackle angle turned out..

IMAGE_048-1.jpg


as you can see my new pinion angle leaves a lot to be desired.. it is actually less than horizontal. new diff perches are next on the list


with the shackle reversal and a bit of customization I got kinda lucky..

IMAGE_047-1.jpg


0deg approach angle!! stoked!
 
Last edited:
and then about 3 months later....


we did a strip down on the front end to do a shackle reversal and upgrade the power steering to 60series box with the TrailGear pump..
we then discovered the front diff housing was bent, due to some over zealous sand dune jumping.

in the down time between then and now, the truck has literally not changed.. I spent a while chasing down a new housing, got some new
bits and pieces and even bought a parts truck which has all come together in the last couple of weeks.


Some work has resumed; stripped the new housing, and started mocking up the new mod..

IMAGE_085.jpg


at this point in any cut'n'turn you wouldn't have pulled the knuckle out of the diff housing (you can, but it's unnecessary,
the knuckle can be spun whilst still in the housing) but I had to so I could install my new little mod.

IMAGE_092.jpg


that is machined piece of DOM tube, slips perfectly inside the diff housing as seen above, then the knuckle slips inside the sleeve like so

IMAGE_091.jpg


gentle encouragement with a hammer to give this

IMAGE_096.jpg


sorry bout the below average photos only had my phone on me, and it was late.


couple of days later, we started welding it all up:

IMAG0101.jpg


IMAG0099.jpg


unfortunately didnt get anymore pics during the rest, although most of you should have seen a cut'n'turn (if not scroll up a bit and you'll see my previous effort..
only difference is now there is a shackle reversal. here is the finished extension on the drivers side including the diff perch

IMAG0109.jpg


here is the passenger side

IMAG0108.jpg


i have now started mocking up some bracing and shock mounts.. but i havent got the right steel so thats on hold.
while the welder was out we finished up the front bar, the spring hangers and the shackle hangers.

IMAG0110.jpg
 
Last edited:
and so here's a few full shots of how it sits at the moment..


IMAG0107.jpg


IMAG0104.jpg


IMAG0105.jpg


so once i get rid of those sh*t little OEM side steps, plus adding the 3" wheel spacers, means the inside of the rim will now sit outside the widest part of the cab!!

outer rim to outer rim comes in just under 2.1m.. apparently a bit under a GU diff with same spacers? anyone enlighten me to what their diff is and what is its width?

keen eyes will also notice rims are now welded up with beadlocks.. they're all getting some paint this week, simple gloss black, cept for the outers.
the first bit of colour will be added!! they've already been painted but i'll wait till the rims are painted and i'v mounted the tyres till I share some pics.

cheers for reading guys..
any and all comments, ideas, recommendations are welcome


Cheers
 
Last edited:
wow thats a cool truck.... looks sweet..
one question was that a 60 series housing you added too or a 40 series housing..
 
it was a 60 series housing.. because I didn't outboard the springs the drivers side perch would normally sit quite high in the pumpkin, the spacer means the perch can be shifted over 1 1/4" which will bring it down the pumpkin which means lower perches and more room for steering arms.
 
well finally finished the front diff, and I reckon it is fairly insane.. but I'll let you guys be the judge!!

i didn't get many photos of the mock up for 2 reasons, firstly because we were a bit busy and secondly it looked ****ing awful for a while there!!
if you want a full step by step of the build check out my build thread on Outlaws 4x4.

front diff was pulled out from under the truck, the leaf springs are still attached to make sure the clearances were sufficient with u-bolts etc.
I got my hands on some tube, has an inner diameter that is roughly the same as the outer diameter of the diff housing.
cut a few lengths to laminate the now much longer spring perch-to-knuckle and then Zoltan burnt them in.

IMAGE_10081.jpg


IMAGE_10084.jpg


now unfortunately here is where I skipped photos for a few steps.. sorry.

I suppose now I can reveal I am doing a full hydro steering setup... *gasp*
Shocking!! It can't be done!! blah, blah, blah... let's watch!

So, had a nice length of 10mm plate with the double-ended ram mounted. the ram comes with clevis joints on each end, happily
accepting a 3/4" heim with mis-alignment spacers. Between the ram and the high-steer arms are custom made links. I found some drill rod,
basically it's high strength steel hollow bar, about 44mm OD and 16mm ID, had to get the ends machined to accept the weld-in bungs.
BIG thanks to Stu at Hydraulic Hoses for the lathe work! (Quite sure I've got the name wrong, PM me and I'll edit)

The problem was trying to get it as low as possible to allow for maximum up-travel without interfering with the radiator cross-member
but also high enough too allow for the ram/clevis joints/heims to all clear the leaf springs.

With the plate temporarily mounted we started the more permanent mount. Using some nice heavy walled tube which we'd bent a
while ago we built the front mount. I can only describe it as a rhino bar and this is how it turned out.

IMAGE_10085.jpg


Sorry about the quality of some of the pics, phone camera late at night and all...

Bit of undercoat

IMAGE_10097.jpg


and finally completely under it's own weight on all 4 wheels!!!

IMAGE_10109.jpg


Looking across to show clearances

IMAGE_10105.jpg


IMAGE_10114.jpg


IMAGE_10115.jpg


and now I have a list of 1,000,001 things to do..

all comments, thoughts, criticisms, witticisms even ideas are welcome!
 
I did some more work on the ute..

got the power steering cooler and overflow tank mounted. got a few low pressure lines done.

IMAG0128.jpg


I had planned on getting the orbital valve mounted so I could get my high pressure lines made. unfortunately I need a steering
column out of GM (commodore) because of the orbital valve spline count.. any one know were I can get one? 30spline.

so after that snag, I moved onto suspension.
wanted to figure out travel for shocks and bump stops..
thats right! wanky static flex pic times!!

IMAG0117.jpg


figure out, it doesn't quite fit under the car port! so we skull dragged it out to the top of the driveway.

IMAG0122.jpg


IMAG0124.jpg


from that, figured out travel for bump stops and shocks..
mounted the bump stops 50mm down from the chassis rail. I used some 80series bump stops. I was told they can crush down to 40mm.. I think that's probably under extreme conditions, but I used that number and ran with it.

IMAG0126.jpg


this gave us a height to work with for shock mounts. i'd had these hoops made ages ago and I made the tabs..
i've still got some bracing to add to the hoops.

IMAG0139.jpg


I incorporated top knuckle bracing and shock mounts in one.. 12mm is probably overkill, but it's all I had lying around.
it's just mocked up and not burned in yet. it will all be welded together, there is 2 strips of 12mm to connect the knuckle
bracing and the shock mounts.

IMAG0145.jpg


IMAG0144.jpg


For the 1st time in over a year, I put the fenders back on. little bit of trimming to fit over the new shock hoops and voila!


IMAG0136.jpg


thoughts, ideas and criticisms welcome!
 
mate,

That is looking awesome, great fabrication skills.

Any plans for it to be engineered and registered?

Keep the updates coming.

Dan
 
mate,

That is looking awesome, great fabrication skills.

Any plans for it to be engineered and registered?

Keep the updates coming.

Dan

hey man, cheers!

nah, it will probably never be engineered or registered..
road rules in WA mean this is a trailer queen without some BIG changes in the law..
 
alrighty.. done a bit lately. since last time I've made brake lines and diff breathers, got the hydraulic lines made and rebuilt front knuckles and bearings, installed ARP studs on the knuckles and now i'll let the pics tell the rest of the story!

first up; finished the lower shock mounts & knuckle bracing on the front diff.
IMAG0176.jpg


then got the orbital valve mounted; got a steering column from a VL commodore. they match the 30spline on the "column" from PSC that matches their orbital valve.
you can see the all new high pressure lines made and spiral wrapped.. Big thanks to Couplers in Malaga! Great hook up for a lot of parts!!
IMAG0169.jpg


IMAG0173.jpg


you can also see the shock hoops are now cross braced to each other over the top of the engine.
IMAG0170.jpg


to complete the front diff we made some ring & pinion protection! I am freaking stoked about how it turned out!!
cut the steel to fit the diff then drilled a hole to accept a threaded bung
IMAG0174.jpg


IMAG0175.jpg


then welded the bung over the original fill hole (with the plug removed!) with just enough sticking out to weld to the outer..
IMAG0178.jpg


all welded up and primered.
IMAG0180.jpg


next up did a whole lot of rewiring.. god I hate petrols sometimes!! too much electrical noise.. was able to fix a fair few wiring issues I had been ignoring.
even setup a temporary rear mount for the battery, ran some heavy cable to a new terminal in the engine bay, mounted both fenders after some heavy trimming.

and then... for the first time since April 2010.. I DROVE THE UTE!!! It was amazing.. Absolutely stoked!
there is A LOT of tweaking to get everything moving right.
next up is rear shocks mounts, wrap bar and then onto what I'm sure will be my favourite and easiest task so far.. bending tube for roll cage!
here is how it sits at the moment..
IMAG0182.jpg


IMAG0183.jpg


thoughts and comments welcome!
 
WOW that's sick I love it
 
I would describe this build as is ..

from mild to wild .. :D

Note: PS oil cooler with both inled and outlet pointing up can make a bit more difficult the bleeding part.
 

Users who are viewing this thread

Back
Top Bottom