Gaberelli's M101 CDN Build Thread (1 Viewer)

This site may earn a commission from merchant affiliate
links, including eBay, Amazon, Skimlinks, and others.

Joined
Aug 27, 2009
Threads
20
Messages
134
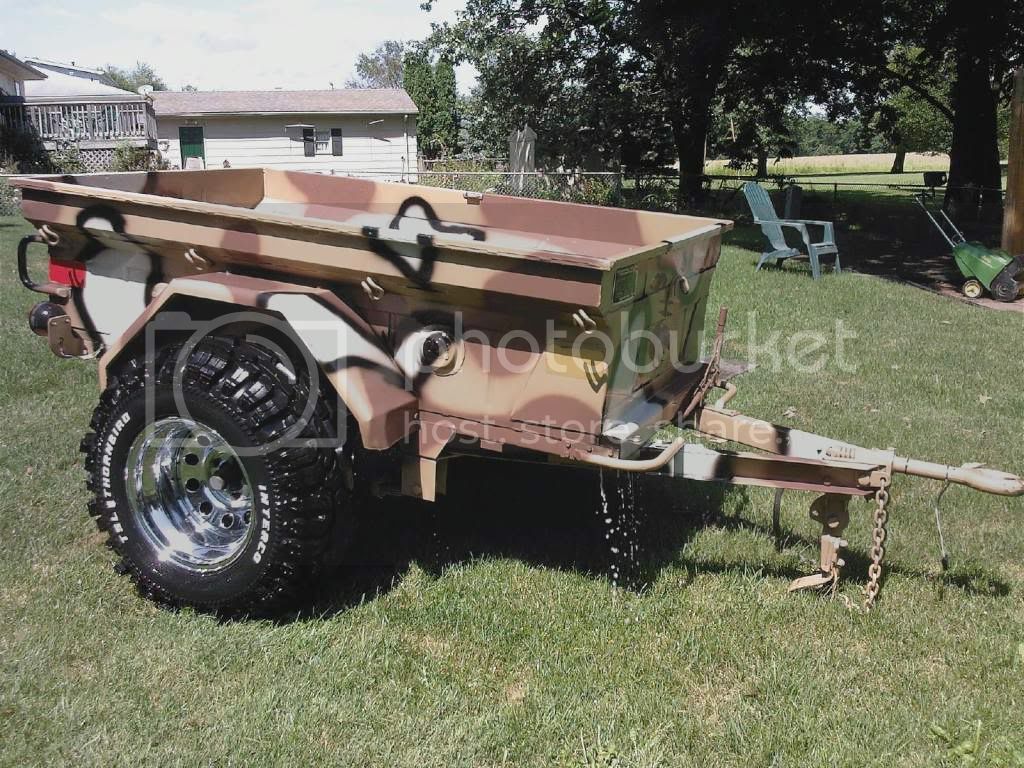
Just thought I would quickly put together a thread with the history of my trailer and detail the things I have done. I now have a clean slate to start with and plan to make some simple mods in the coming months/years.

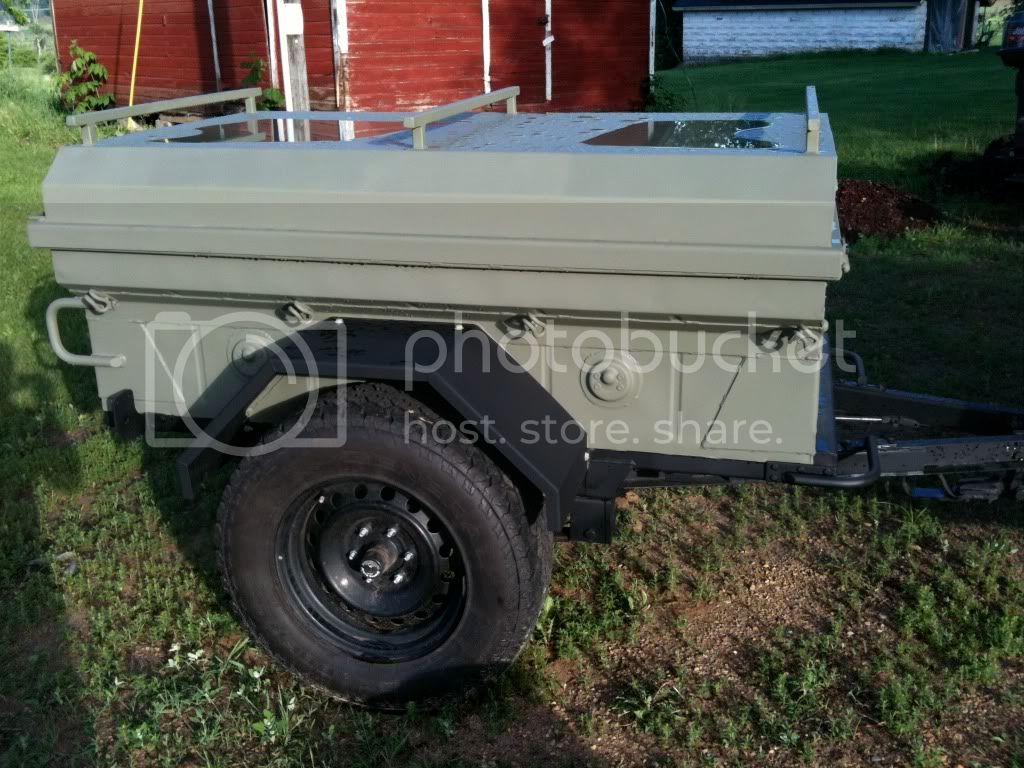
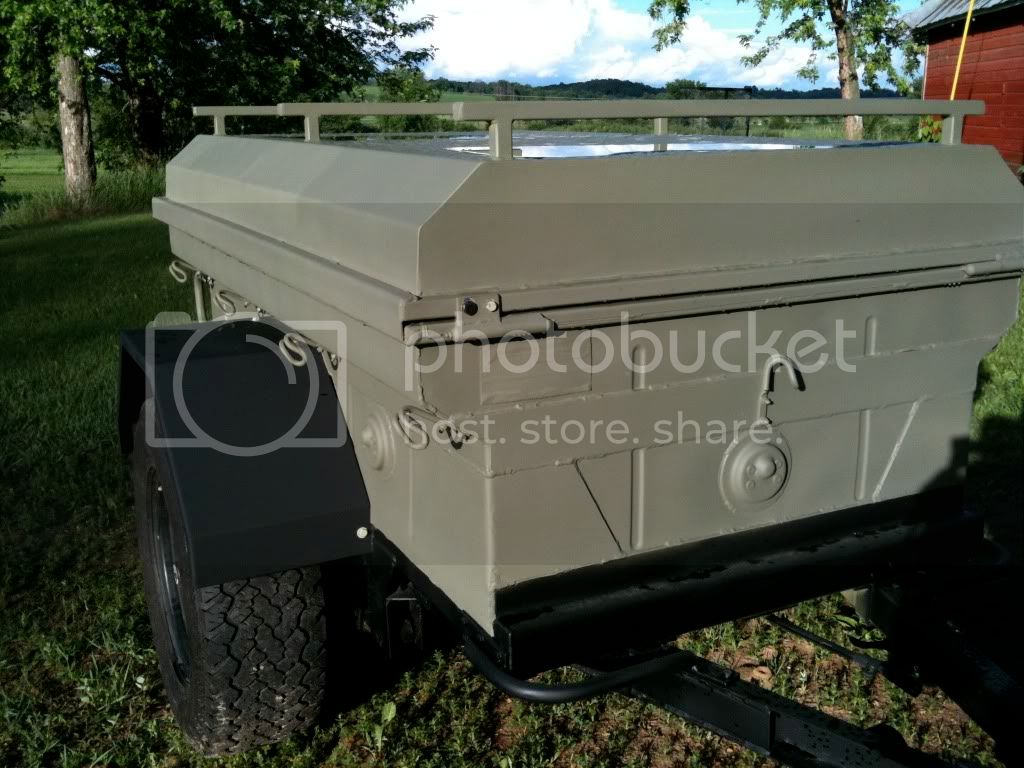
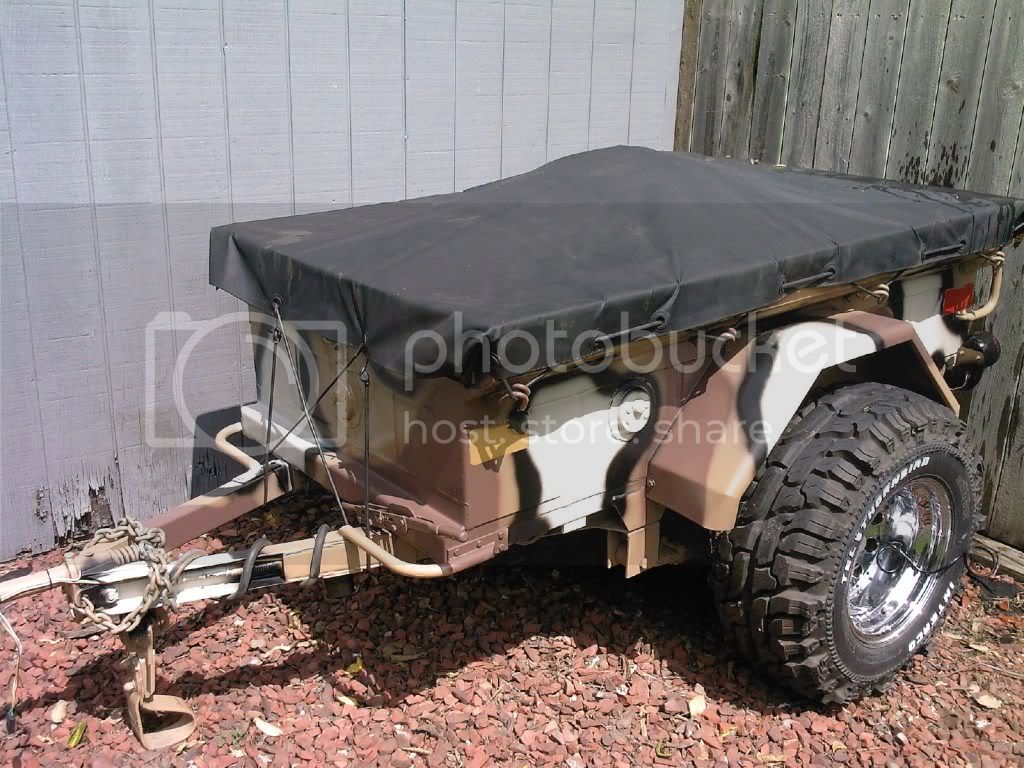
My trailer came over in a shipment of unused trailers from Canada purchased by a Jeep off-road group. The guy in Iowa that bought mine added a rad paint job and some rims/tires to match his Heep...hmmhmmm...I mean Jeep.

0828091341.jpg


0816091433_01.jpg


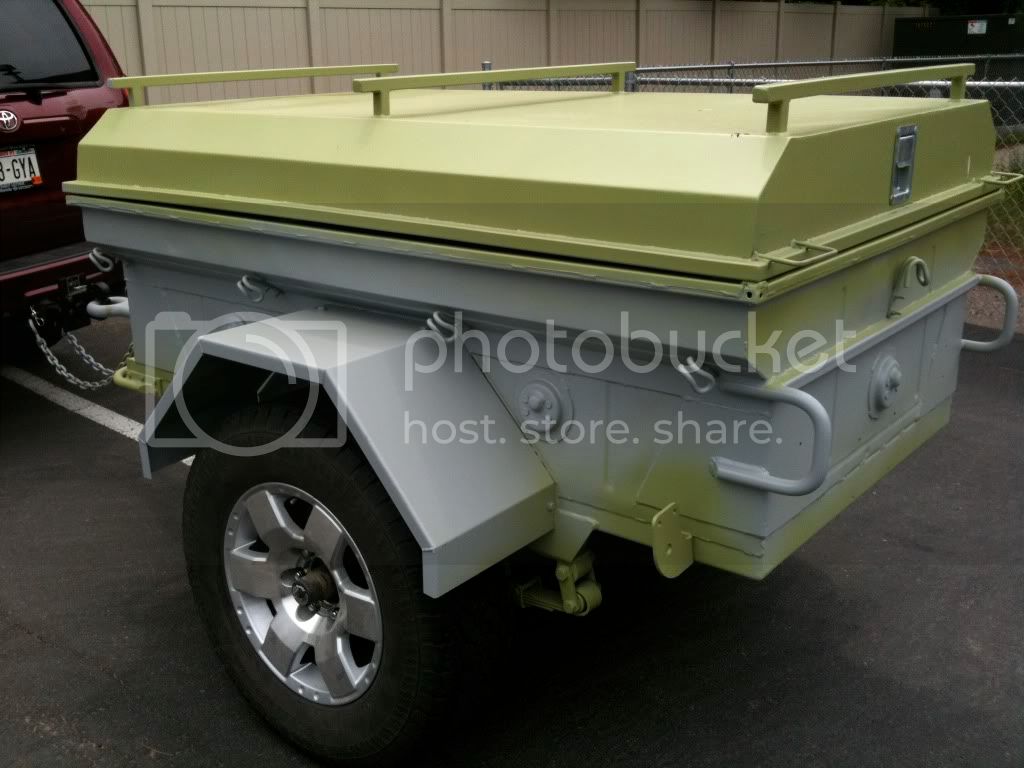
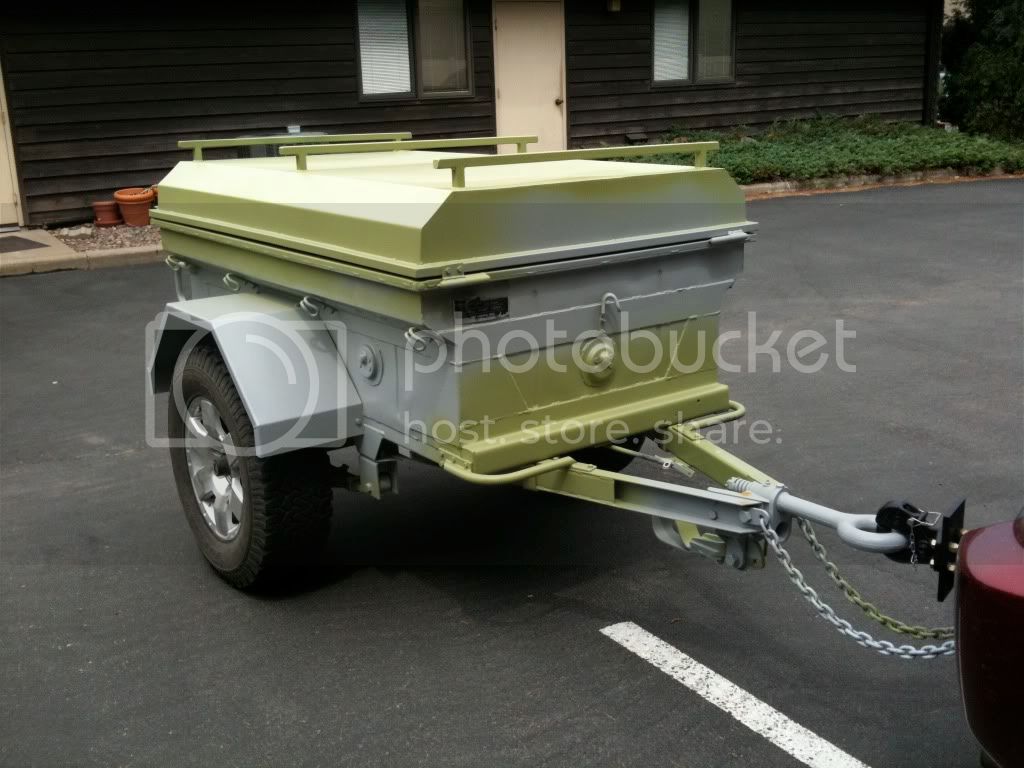
I started by ripping off the tires/wheels and putting on some Toyota bolt pattern (6x5.5) hubs from here:

http://www.southwestwheel.com/store/p-247-l0655lb3e.aspx

I soon realized that these hubs come with SAE threads (1/2"x20) and I planned on putting some FJ Cruiser aluminum wheels on to match my towing vehicle with the plan of carrying one spare. Well....the factory aluminum wheels can't use the acorn style nuts that came with the hubs. Like this:

acorn_onepc_draw.jpg


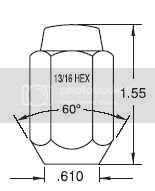
because they use a "shank" style nut like this:

5077.gif


So, I changed out the lug studs from SAE to metric (M12x1.5) from here:

List: '610-376' | O'Reilly Auto Parts

I thought I was all good until I mounted them and realized that there is no hub ring on the trailer hub for mounting hub centric wheels like factory Toyota wheels. Isn't learning a bitch sometimes? Since there was zero hub ring, I couldn't use cheap hub ring adapters to increase the hub ring to 106mm (Toyota). Instead, I bought some Spidertrax wheel spacers. From here:

Toyota Hub Centric Wheel Spacer Kit

These would be lug centric to the hub and hub centric to the wheel. Perfect! But, I still wasn't happy. Now the wheel stick out another 1.5" and I had to buy a $100 part just to make the $250 wheels (price for 4) work on the trailer. This is when plan B kicked in. I decided to return the Spidertrax spacers and sell the aluminum FJ wheels and buy a set of 4 steel FJ Cruiser wheels I found for $100. These would be lug centric and use standard metric acorn lug nuts. In a pinch, I could use the vehicle spare with some "shank" lug nuts I kept and mount that spare on the trailer. I would just risk breaking a stud or damaging the wheel. I may try and find a place to mount a full steel spare since I have 2 extra.
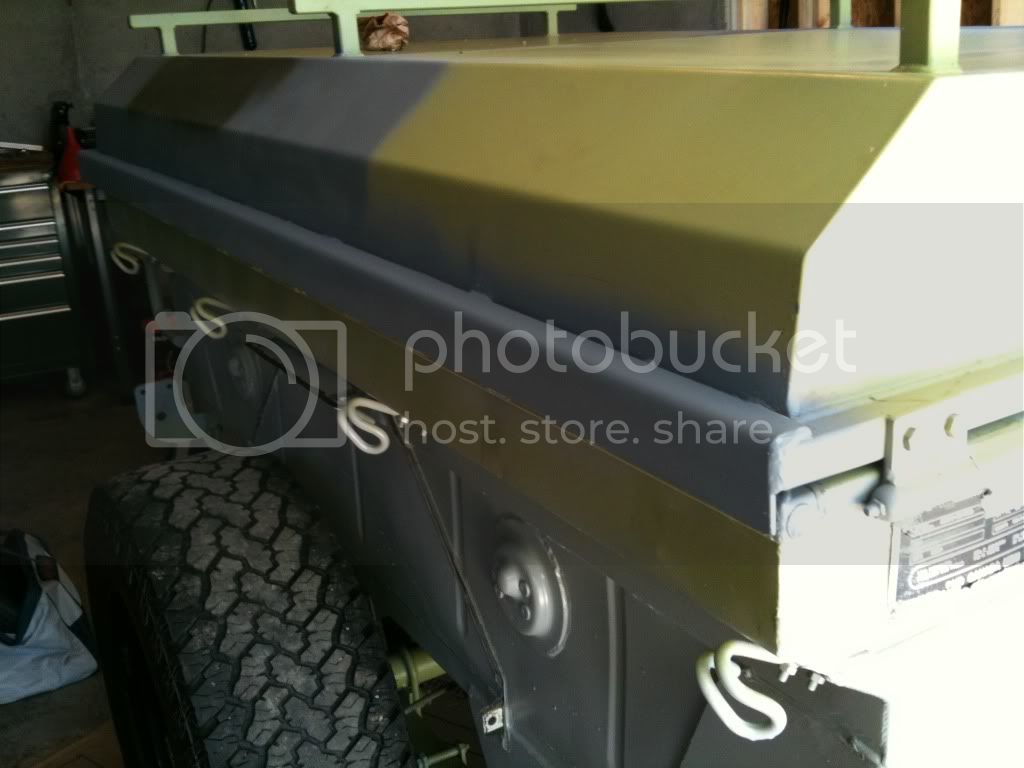
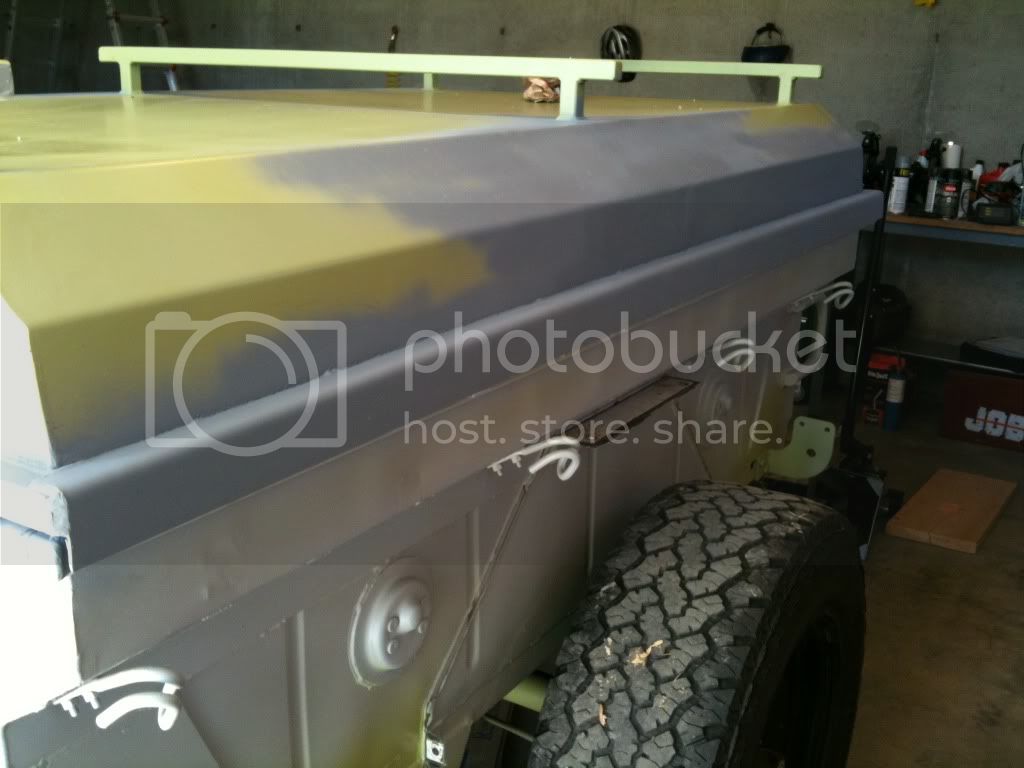
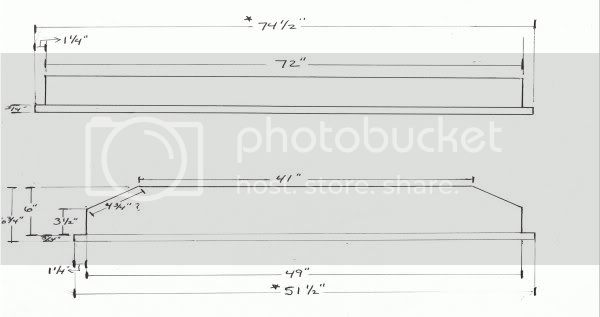
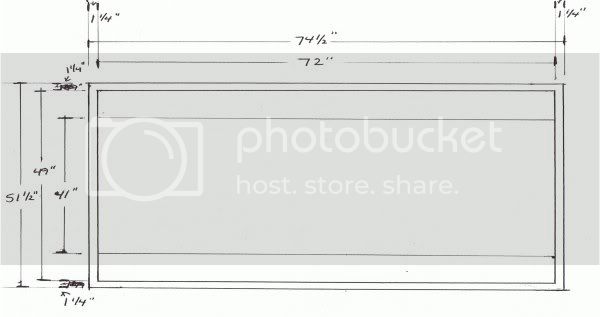
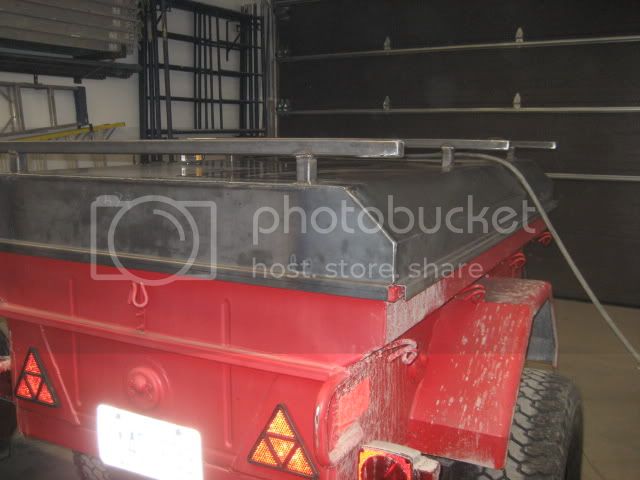
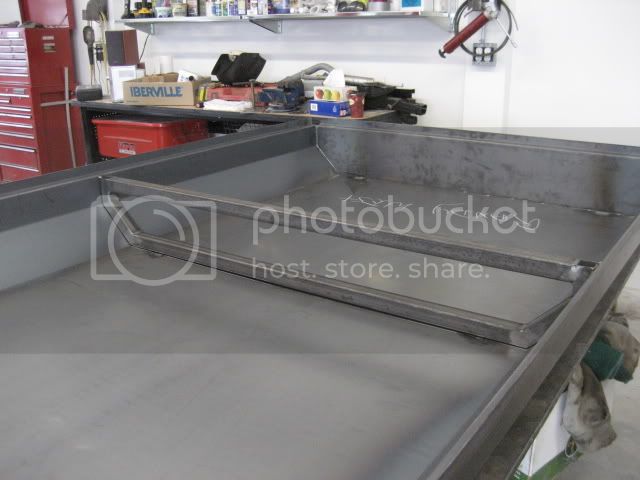
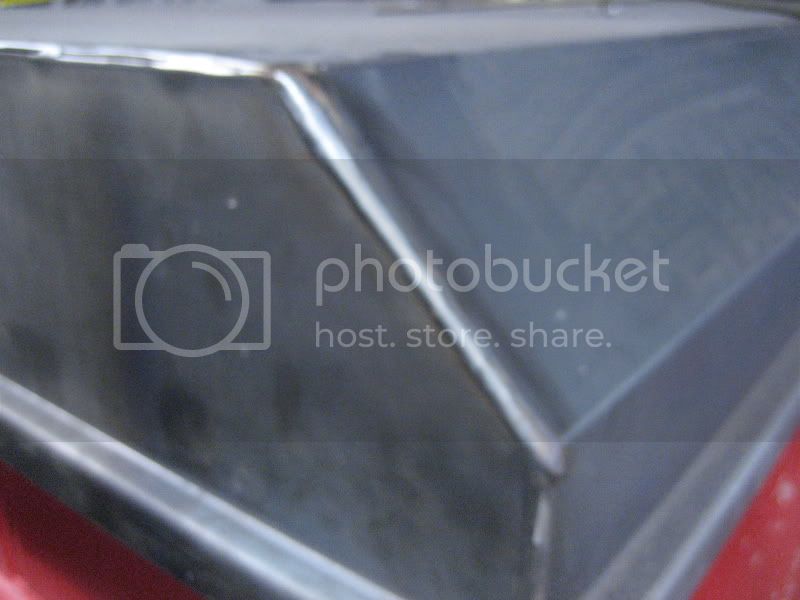
Now comes the lid.
 
The lid

This was quite a process. My fabricator took the trailer in the winter thinking that they would get to it at some point. I gave him some detailed drawings from other helpful users here and on the other forum. After reviewing them, the fabber said they could not bend the drip edge from one piece into the lid like others I had seen. Their equipment couldn't do it. So, we decided to go with 12ga for each end, 14 guage for the top and square 1" tube for the perimeter of the base of the lid and for a truss in the center.

I also dropped off two 200# struts and mounting hardware, greaseable weld-on barrel hinges and a paddle latch from here:

Allegis Corporation

Allegis Corporation

Allegis Corporation

And then the waiting began.....

The shop got busy and my project got back burnered. Eventually I had to give them the cattle prod because I needed to get started on my own work on the trailer. It didn't help that I also asked them to put together some wider fenders, which they did from scratch. They finally finished the trailer and it looked like this:

IMG_0221.jpg


IMG_0222.jpg


It looked great in its cool primer colors except the rushed welding process led to a warped lid. On the sides, the lid rose to almost 1/2" and would not be able to be sealed by weatherstripping. The fabber took the lid back and added to angle iron to the sides and back and I got this:

IMG_0223.jpg


IMG_0225.jpg


Much better! Now its time for paint. I went to wally world and bought a ton of flat olive drab and black paint. My wife and I put it in the drive and and started to paint. Less than 15 minutes later, we decided this thing was going to a pro. I called a guy that had done some work for my business in the past. He gave me a quote that I thought was steep so I called two other painters. They both quoted me DOUBLE what he had. Needless to say, he got the job and may I say he did an excellent job:

IMG_0229.jpg


IMG_0232.jpg
 
Last edited:
Once all the paint and new angle iron was added, the 200# struts that the fab shop said would be way too heavy could now barely lift the lid. My wife could hardly get the thing up. So, I ordered and installed some 250# struts from the same manufacturer, Allegis. They work great now.

Next was wiring. I ordered some LED tail light and 7-way wiring from etrailer.com. I also ordered this tongue box from Harbor Freight. I saw it in the store and it was actually pretty nice:

Steel Trailer Tongue Box

I plan on putting the wiring box for the trailer wiring as well as an auxiliary battery in the box. I may go with a battery isolator like this:

Hellroaring Battery Isolator Combiner, BIC-75150A
 
Got any drawings for the lid that you could share? I basically like the design....(although the warp is not so cool...)

Cheers!
 
Got any drawings for the lid that you could share? I basically like the design....(although the warp is not so cool...)

Cheers!

Sure,

These came from another member that can chime in if he wants:

picture.jpg

picture-1.jpg

IMG_1876.jpg

IMG_1874.jpg

IMG_1870.jpg
 
My tongue has been modified (lengthened) slightly by the PO so I'll have to measure, but that tongue box looks good for the price. Got it on yet for pics, or at least sitting on the tongue for a poser shot?

Does it have any weather stripping for the lid? I was just considering getting a propane tank strap holder and having a base for the tank fab'ed up for the tongue, but hmmm...you've got me rethinking.

The box should be here by the end of the week. Tonight I put the weatherstripping on the front side where there is no drip edge. Is fits nice and snug. I put a strip along the back side, but it kept the latch mechanism from working correctly. I may try the thing without any on the sides and back. If it leaks, I will have to space the latch down so that it can close with the weatherstripping in there.

I want a propane tank somewhere, but haven't decided where or how...any thoughts?
 
Sure,

These came from another member that can chime in if he wants:

Gracias!! Looks like it would fit an M416 too...just a little different dims....

Cheers!
 
The box should be here by the end of the week. Tonight I put the weatherstripping on the front side where there is no drip edge. Is fits nice and snug. I put a strip along the back side, but it kept the latch mechanism from working correctly. I may try the thing without any on the sides and back. If it leaks, I will have to space the latch down so that it can close with the weatherstripping in there.

I want a propane tank somewhere, but haven't decided where or how...any thoughts?

Did a quick measurement on the trailer using the specs of the box - too big for my taste. Think I'll stick to putting the propane tank right there in the middle of the tongue.

Post pics when your's is on. You removing the two grab handles up front to mount the box?
 
Did a quick measurement on the trailer using the specs of the box - too big for my taste. Think I'll stick to putting the propane tank right there in the middle of the tongue.

Post pics when your's is on. You removing the two grab handles up front to mount the box?

It looks the the grab handles may have to go. I am not planning on putting propane in that location because I want to have a T-post on the tank when parked with a lantern and stove hookup. The way my lid opens won't allow for this. I haven't decided where its going yet.
 
There he is!! Thanks for the inspiration, Swampman. Just don't sue me for copyright infringement :D

my people will be calling you... just kidding .. i am glad to help.. all of my ideas came from this site and expo.. i just took what i saw and tweaked em to suit my build.. if i can help somebuddy, that is a good thing.. . im thinkin bout building another one, just for fun, i got so many ideas i would like to try out.
 
my people will be calling you... just kidding .. i am glad to help.. all of my ideas came from this site and expo.. i just took what i saw and tweaked em to suit my build.. if i can help somebuddy, that is a good thing.. . im thinkin bout building another one, just for fun, i got so many ideas i would like to try out.

You're so modest...and so talented..:clap:

Whats going in the nose box?

Is there a water tank in the future?

Spare?

Stabilizers?

Rear bumper?

RTT?

Just sayin...:cheers:
 
my people will be calling you... just kidding .. i am glad to help.. all of my ideas came from this site and expo.. i just took what i saw and tweaked em to suit my build.. if i can help somebuddy, that is a good thing.. . im thinkin bout building another one, just for fun, i got so many ideas i would like to try out.

Yup...projectitis is an affliction some of us can't get away from. I have a lot of little things I would like to do, but for our trip next week it will just be a basic trailer. No propane, no battery, no fun stuff yet. Soon though!
 
You're so modest...and so talented..:clap:

Whats going in the nose box? nose box is for battery and misc electrical needs. I would like to have an inverter and some outlets for 120 and 12v. I need to buy the isolator and a few other things before I am ready to do this. The trailer budget is currently blown, so this may wait.

Is there a water tank in the future? I want to find on that fits either under the axle area or span the inside of the tub. For now, it will be big water jugs.

Spare? Spare got mounted today on one of the extra wheels. When I had aluminum on it the plan was one spare. Then I thought I would keep the spidertrax spacers and use it if the trailer blew a tire and I needed to use the vehicle spare. But now, I am going to strap the spare to the rack. I'll post some pics this weekend as i finish up.

Stabilizers? Bought some Atwood telescoping stabilizers to use. No hurry to mount them as we aren't tenting on top of the thing and it is and will always be tongue heavy. I may still mount them anyways.

Rear bumper? This is part of stage II. I will mount the stabilizers to this when it is made. I may just weld a receiver into the rear crossmember as the only thing going on it is a bikerack.

RTT? Do you have one you want to give me???? Someday there will be one.


WOW!! that was some interrogation!!!

Just sayin...:cheers:
 
Sorry pal...had to put it out there...lol:grinpimp:

It's just looking so damn sweet I felt the need to turn up a burner...
 
Sorry pal...had to put it out there...lol:grinpimp:

It's just looking so damn sweet I felt the need to turn up a burner...

Thanks. I guess :rolleyes:

I did have my first broken part today. I used the trailer to bring the aluminum wheels I sold to the buyer. When I opened the lid, the left latch cable broke :bang:

Not too bad though. I was lucky it broke while opening the lid. I was able to bungee the two latch pins together and then bungee the lid shut for the drive home. If the cable would have broke while it was closed or if I had closed it after it broke, the only way in would be to take the hinges off! Needless to say, first point of action will be to put in beefier cables from the latch pins to the latch.
 
I bought a few of these:

Cargo Control Cargo Bar with Ratchet Erickson Truck Bed Accessories,Trailer Cargo Control 08908

I found them at the local Farm & Fleet for about $20 each. The ones I bought twist to tighten rather than ratchet. Which is ok because this way I won't ratchet the trailer out of square.

They will help to keep thing like water jugs from moving around or tipping over. I just had to modify them a bit to fit in the lower portion of the tub. I few inches off both pieces of the telescoping rod did the trick.
 
And we are off. We leave tomorrow morning for the trailer's inaugural voyage from Mondovi, WI to Chamberlain, SD to Sundance, WY to Jackson Hole, WY to Wilsall, MT to Great Falls, MT to Libby, MT to Bozeman, MT to Belfield, ND to St. Cloud, MN and back home. It will be quite a trip with a six year old lab and a six month old Newfoundland mix!!

Without the trailer it wouldn't be possible. I didn't get everything I wanted finished, but the trailer is in good condition. I still don't have a spare mounted, so I am bringing the spidertrax spacers to use if I need to use the vehicle's spare on the trailer. Nothing fancy, but it will do the trick.

I will be sure to post some pics of the journey.
 

Users who are viewing this thread

Back
Top Bottom