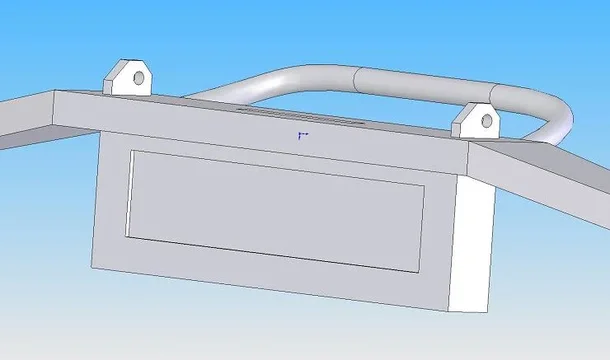
Front Bumper Project

This site may earn a commission from merchant affiliate
links, including eBay, Amazon, Skimlinks, and others.

And another thing

Sorry for such long post, but you take it for granted people know things and they learn them the hard way. Remember that if your pieces fit up nicely, you're gonna be welding kinda on top of the joint. That might hold fine, but if you get to grinding and you want all those joints to look good and you grind off 80% of the weld, then a crack is gonna develop there. Might look good for a while, but there's not a lot of metal there. On the thin stuff that can be a challenge.

And on those bolts on the frame--do I need to say--make sure they are Grade 8 or something similar.

Nice looking truck too.
 
Thanks for the advice. I have been using the 90A setting and it seems to get pretty hot, maybe I could bump it up on the joint to the 3/4 plate. I did tack weld first to reduce the amount of warpage, but it still warped a little.

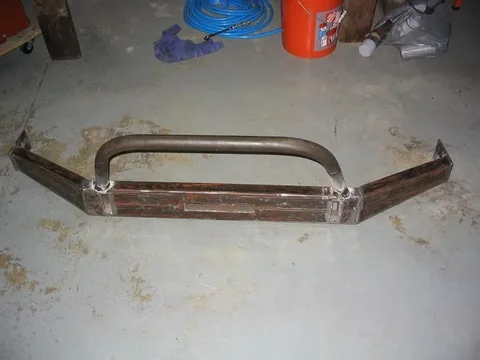
For the base plate, I welded the angle iron frame together only on the back side. I tried to get the welds to penetrate as much as possible because I had to grind some of it off to get it to fit into the rails.

Once that was together I put the 1/4 plate into the frame, then tacked in the corners on the top and bottom before making a complete pass around the top and around the bottom.

bumper6.webp

After that I welded the entire base plate assembly to the 3/4 D-ring plates that fit into the frame.

Well, time for another day of fun. I think my camera is toast (someone dropped it or something happend), sorry for that.
bumper6.webp
 
what size and what electrode are you using? i can give you a ballpark heat as to what I would run it at if that might help, usually what i do is get into the right ballpark heat, theres about 20 or 30 amps that you can kinda play around in easily, get it to where i like it and then ajust my welding speed to the material thickness from there....nice looking bumper design
 
Hey Yota,

I'm using 3/32(2.4mm) electrode, Fleetweld from Lowes.

Well, today was not as productive...I made a mock-up for the wings with cardboard and I did a bunch of running around getting things. I got some 1/2" Grade 8 hardware from Ace and had to get some drill bits as my old ones suck. I got the top bolts in, but I have to notch some of the base plate out to get the lower bolt heads to fit in there.
 
Before You get too far you really should cut a rectangular hole direstly under the cable spool . This allows the cable to bunch up during winching without binding between the spool and mounting plate and also drainage. Otherwise the courteous thing to do would be to add a shompoo and soap rack for those rainy days that your winch will be taking it's bath

http://www.man-a-fre.com/pa/pictures/2655cwinchmnt.jpg
 
wow, those are some small electrodes....usually you would use those on sheet metal, buddy of mine welded 22 gauge with that size...i would seriously think about bumping your electrode up to a 1/8 inch 6010 or 6011 (only one difference in the flux)...this will give you good penitration and you can run them anywhere from about 80-110 amps... something like this Lincoln Electric - Fleetweld® 180 (E6011) 1/8 In. Stick Electrode (5 lbs.) - ED030563 - Home Depot Canada these things spark and spatter alot but when you need penitration and strength this is your best bet for a single pass weld. hope this helps and best of luck with the bumper!
 
Thanks Yota,

I'll check it out. I made a second pass yesterday along the bottom of the winch plate and you are correct, this electrode results in a bunch of spattering, although the front of my welder has a little guide and it says that this is an OK size to work with the 90A setting.

I'll go get some stuff today and play around, thanks.
 
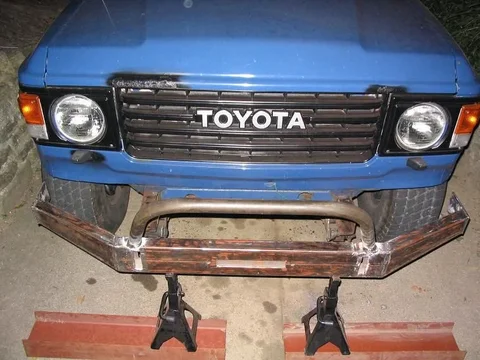
My camera has been acting crazy, but I got it to work tonight. Here are some pics with the progress of the bumper. The base plate is currently at the machine shop a few blocks away getting the chamfers and d-ring holes cut out.

Yota, I got the 1/8" sticks and I felt a little uncomfortable as they would blow right through the material so I went back to the smaller ones. If you take a look at the driver side weld on the tube you see that I accidentally made a hole in it and had weld it a few times to close it...that was with the smaller element.

Front_Bumper_7.webp

Front_Bumper_8.webp

Front_Bumper_9.webp
Front_Bumper_7.webp
Front_Bumper_8.webp
Front_Bumper_9.webp
 
hhhmmm thats a bit weird...what was the machine set at? in any case i apolagize for leading you astray from what you were doing....thats what had seemed to work for me, everybody welds different. welds look good though. im just going to sit back, shut up and let you do your thing....
 
It's all good man, I'm going to try it out again with some thicker stuff and I'll crank down the current on the box. I don't think you are leading me astray...just broadening my horizon.:beer:
 
Looks like you're making progress, keep it up and keep the pictures coming.
 
Ok,

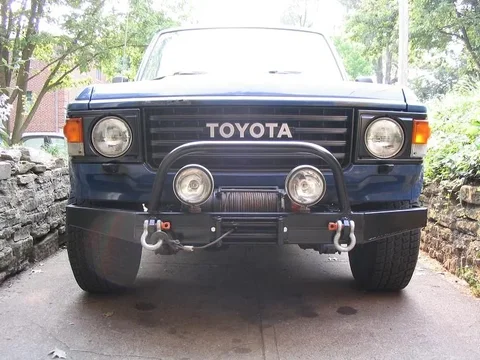
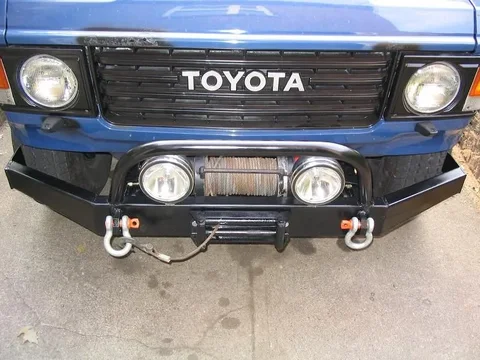
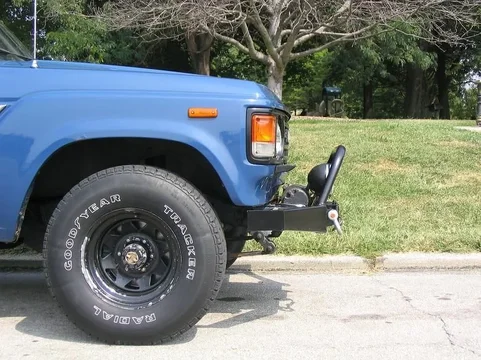
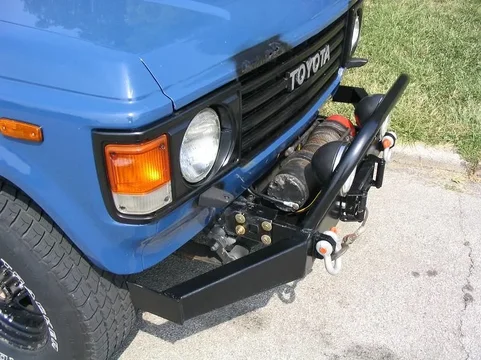
Here it is. Finished product. The machine shop was nice enough to bend the pipe for me and also cut the d-ring holes and chamfers. I just need to figure out where to put the winch control box and the license plate. She still fits in the garage!


Front_Bumper_10.webp


Front_Bumper_11.webp


Front_Bumper_12.webp
Front_Bumper_10.webp
Front_Bumper_11.webp
Front_Bumper_12.webp
 
I took the dogs out this morning to the park and got a few more pics of the bumper. I ended up mounting the winch control box under the hood and brought the remote connector into the cab.


Front_Bumper_17.webp


Front_Bumper_14.webp

Front_Bumper_15.webp
Front_Bumper_17.webp
Front_Bumper_14.webp
Front_Bumper_15.webp
 
Front_Bumper_16.webp

with the extra weight upfront it makes the rear suspension look a little less saggy!

Front_Bumper_18.webp
Front_Bumper_16.webp
Front_Bumper_18.webp
 
Looks good! Just a thought though: will the ends be stiff enough? maybe you could use some plate to make a platform on the ends.. some diamond tread-plate would be cool..

Looks like you will be doing some welding further back on the body too :doh:;)
 
I was actually thinking about doing that. I could make a gusset that would tie the wings to the base plate which would certainly strengthen the bumper...and at the same time, would give me a good place to put my tools when I'm wrenching!
 
So what do you guys think?

I was comparing my result with 2mbb's results and I think mine is probably like an inch lower than his and I ended up with a gap below the valence. I used 2x5 tube and he used a 2x6 and also offset the tube so that it sits higher. If I had to do it over again I would move the bumper up on the D-ring plates.

All in all I'm pretty happy with the outcome for such a low cost...now I just need to fix some body stuff.
 
Thanks, I ended up using 3 half-inch grade 8 bolts and one 7/16 fine thread on each side. I didn't have enough space in the back corner of the base plate to fit the larger bolt head. Hopefully that will be enough to hold the bumper on the truck if I have to pull out with it someday.
 

Users who are viewing this thread

Back
Top Bottom