Fj80 Visor repair (disection pics)

This site may earn a commission from merchant affiliate
links, including eBay, Amazon, Skimlinks, and others.

Joined
Feb 23, 2015
Threads
34
Messages
265
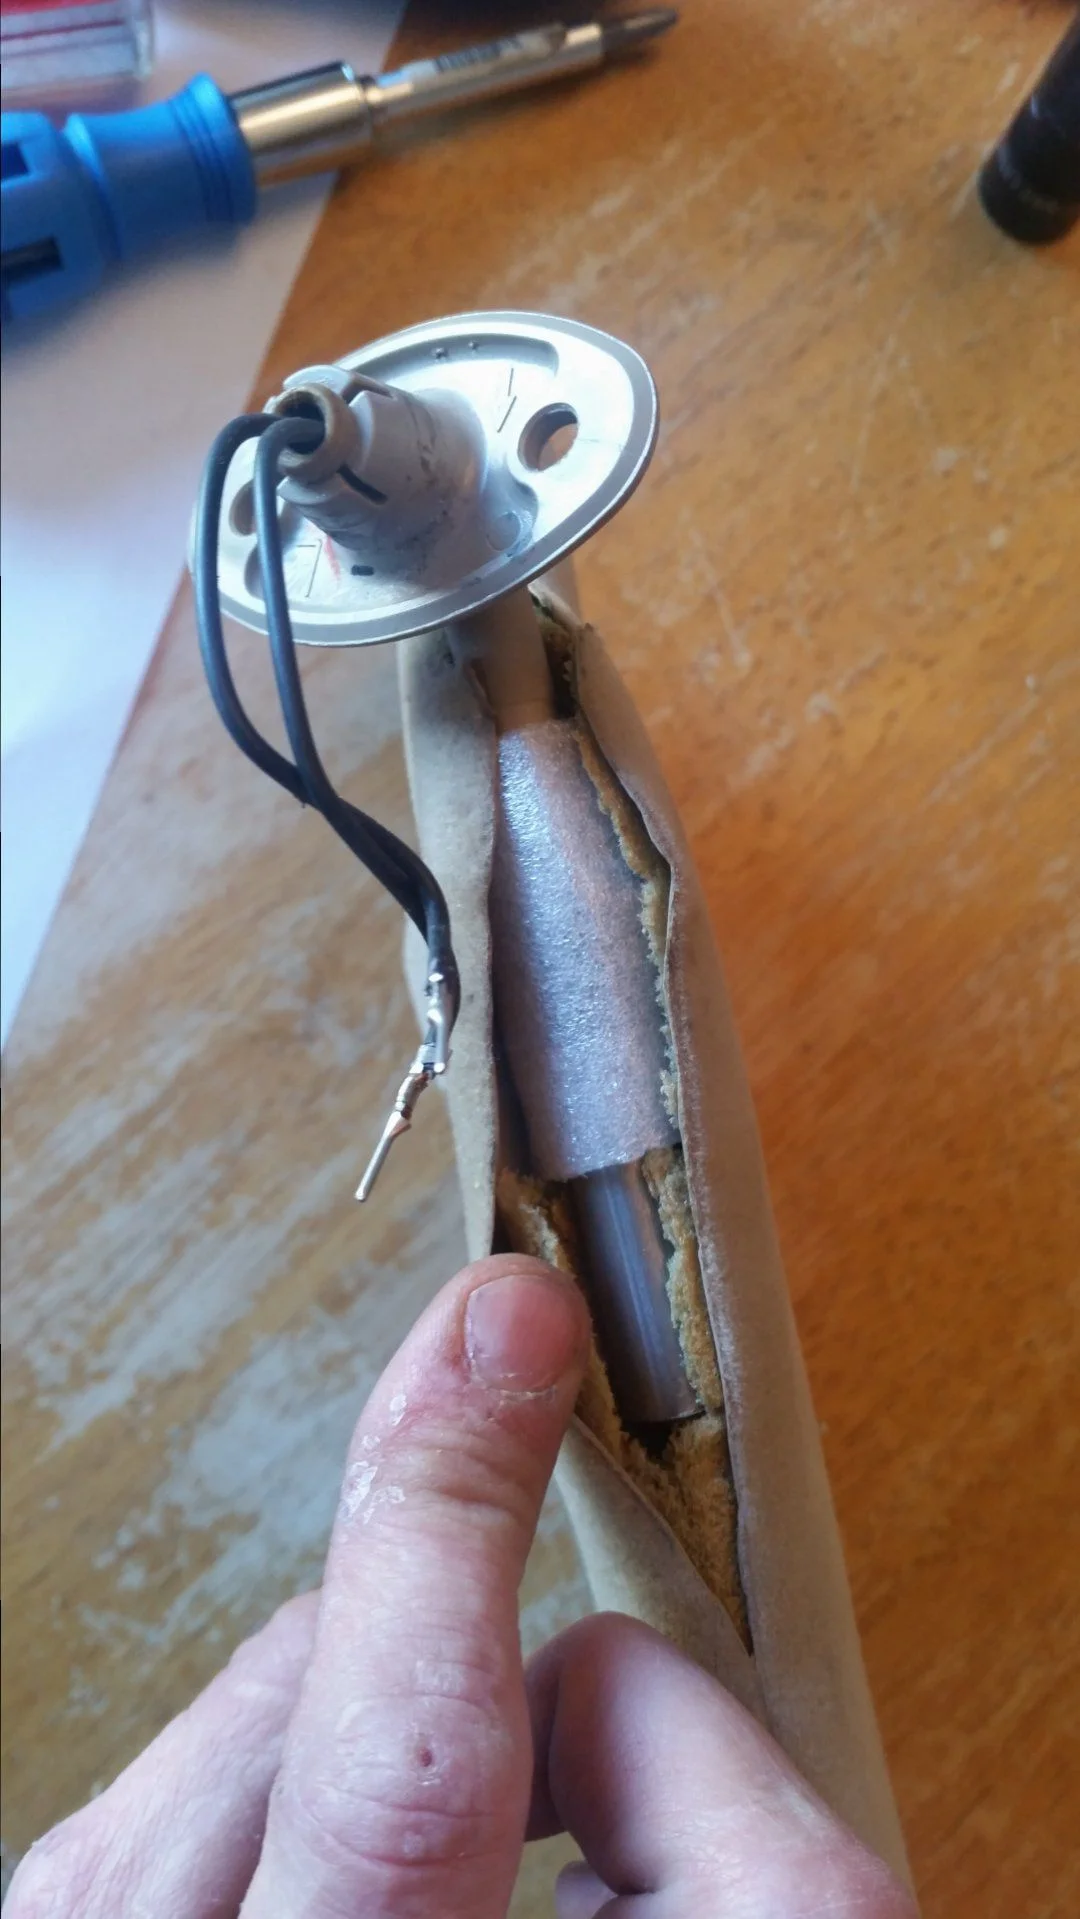
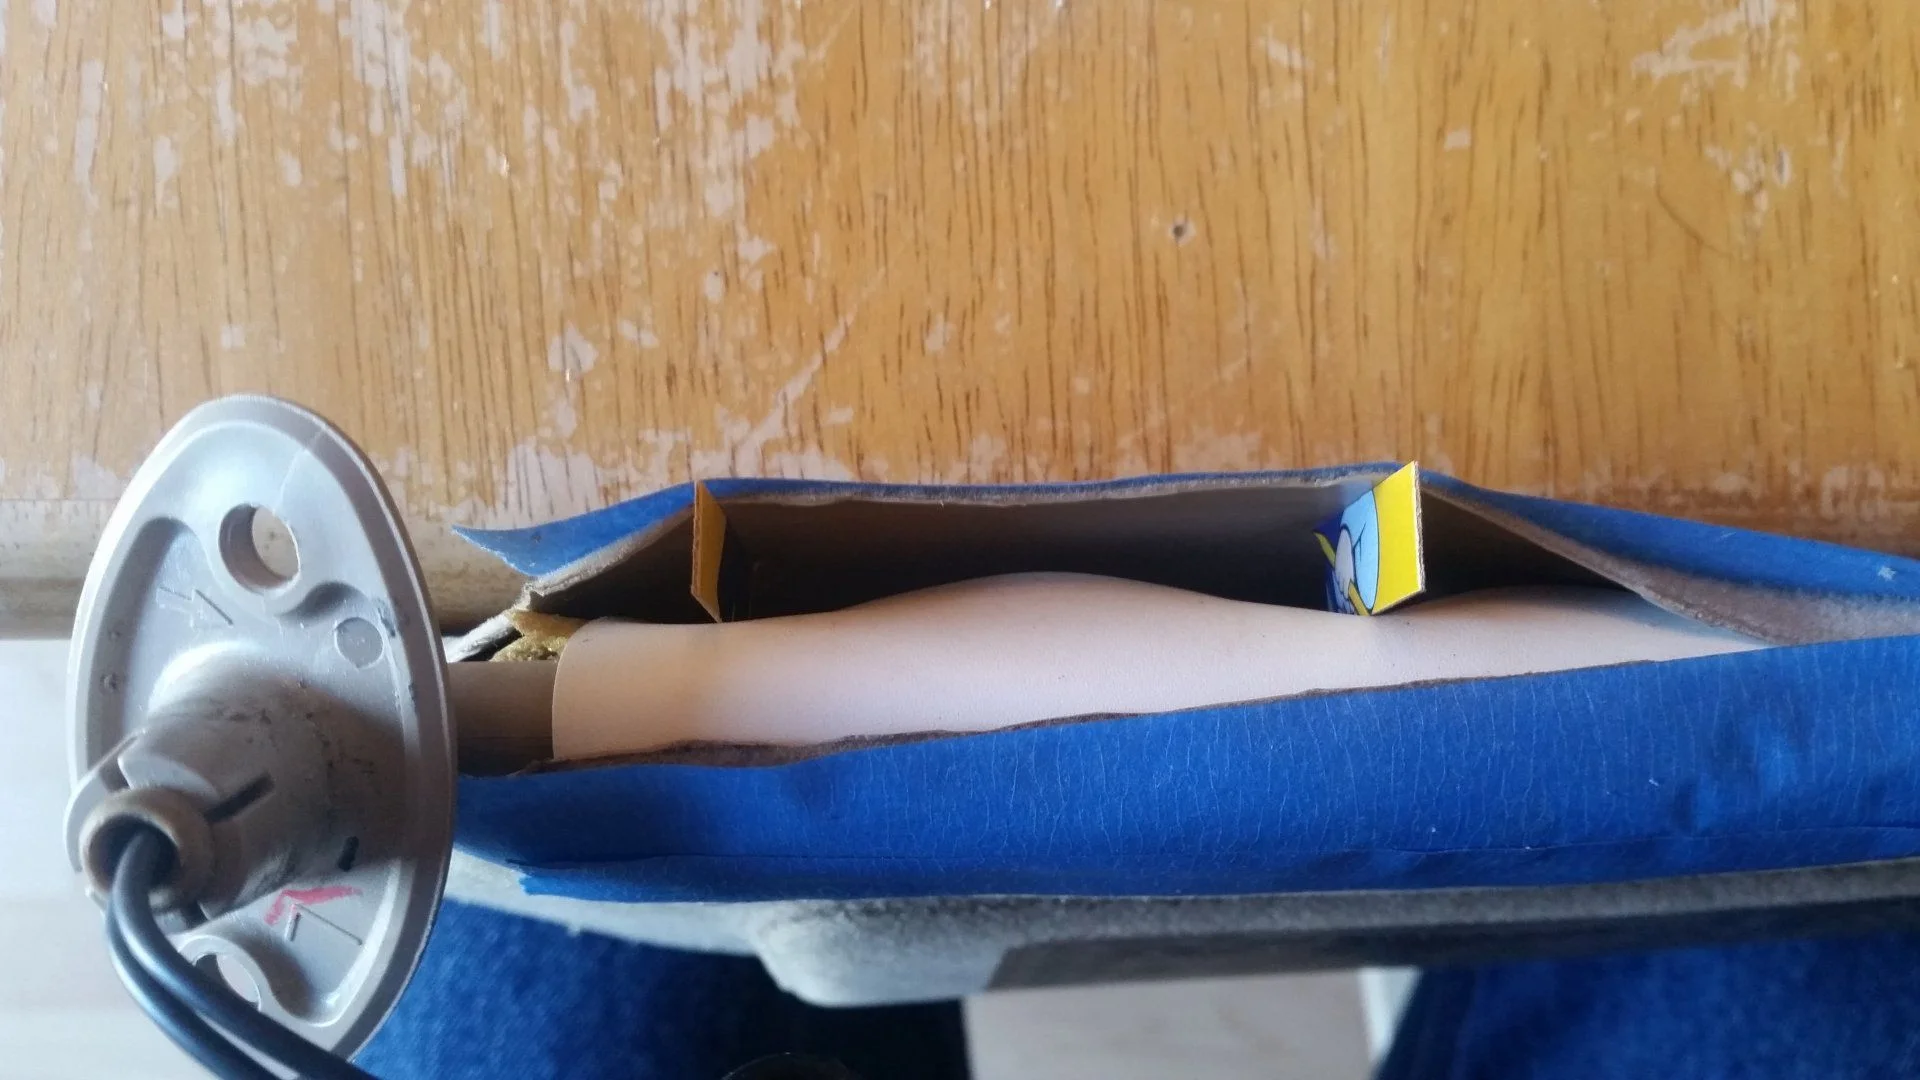
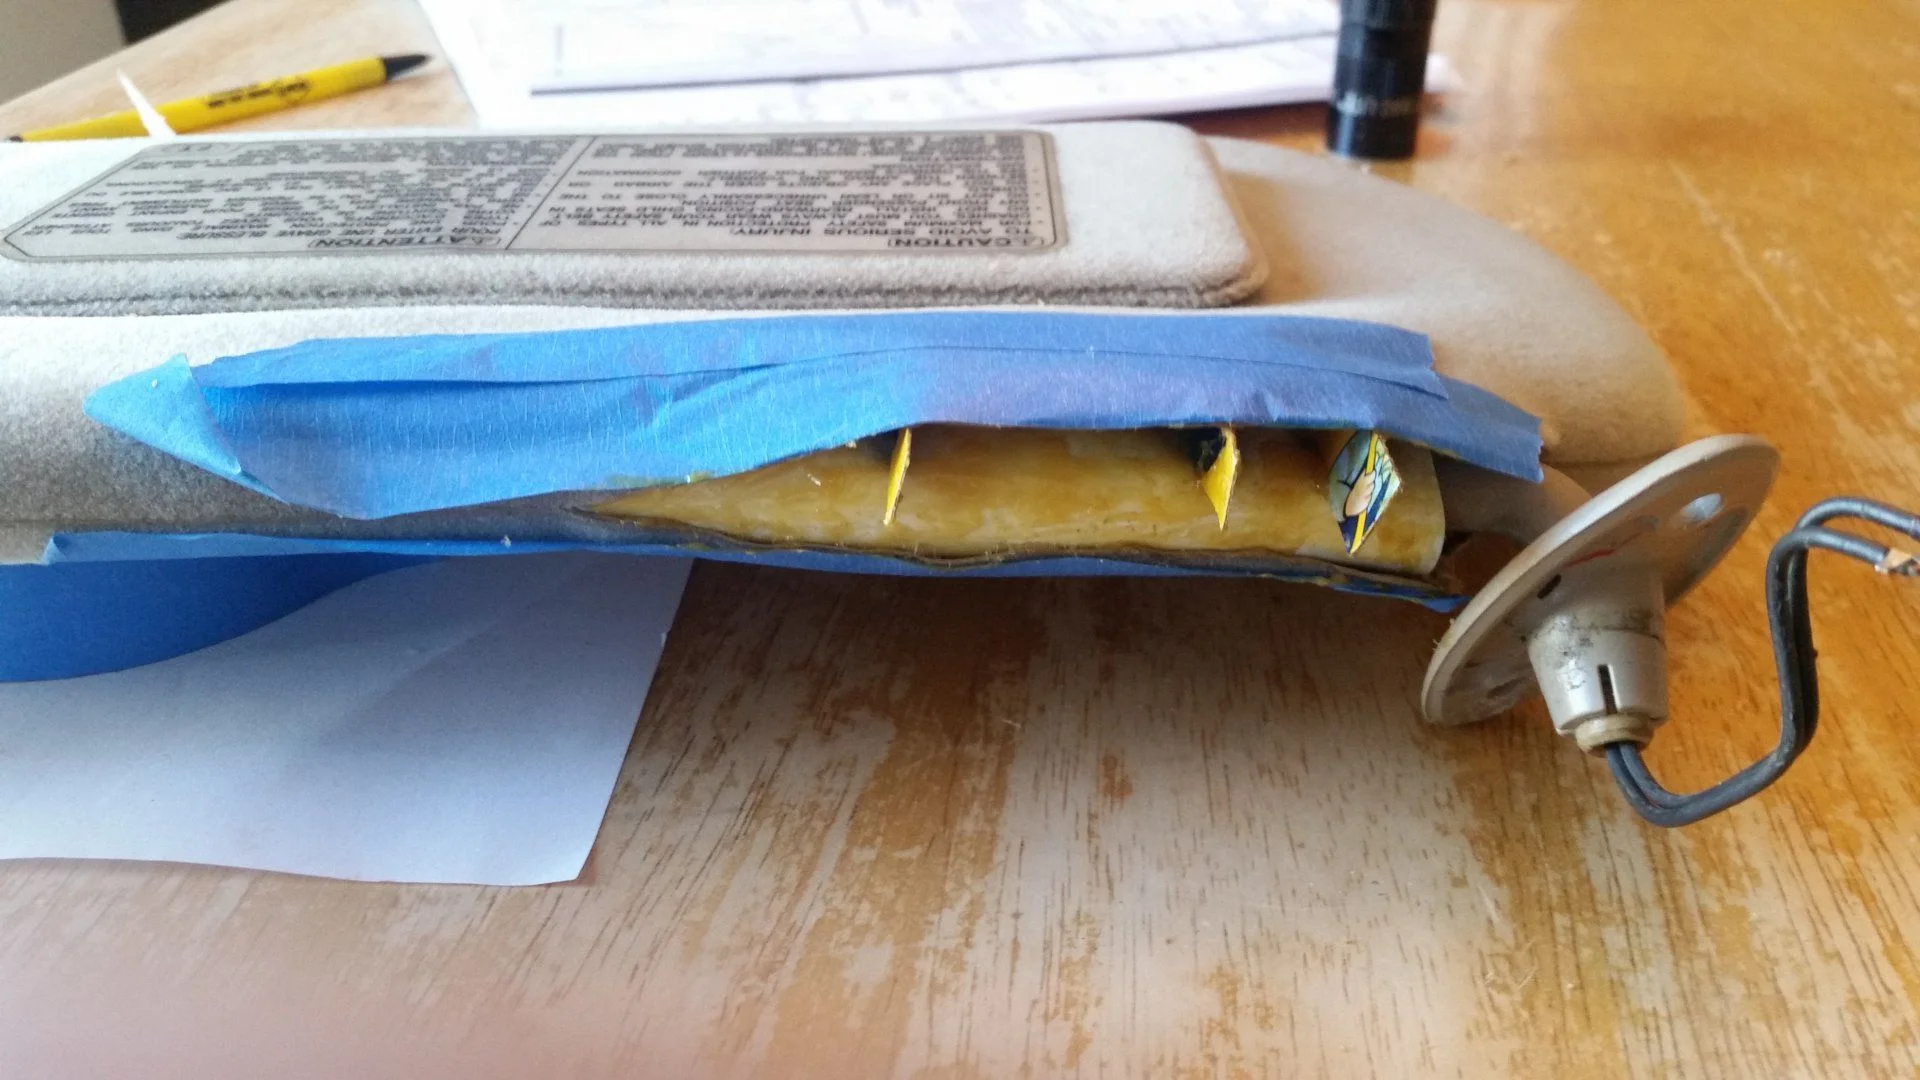
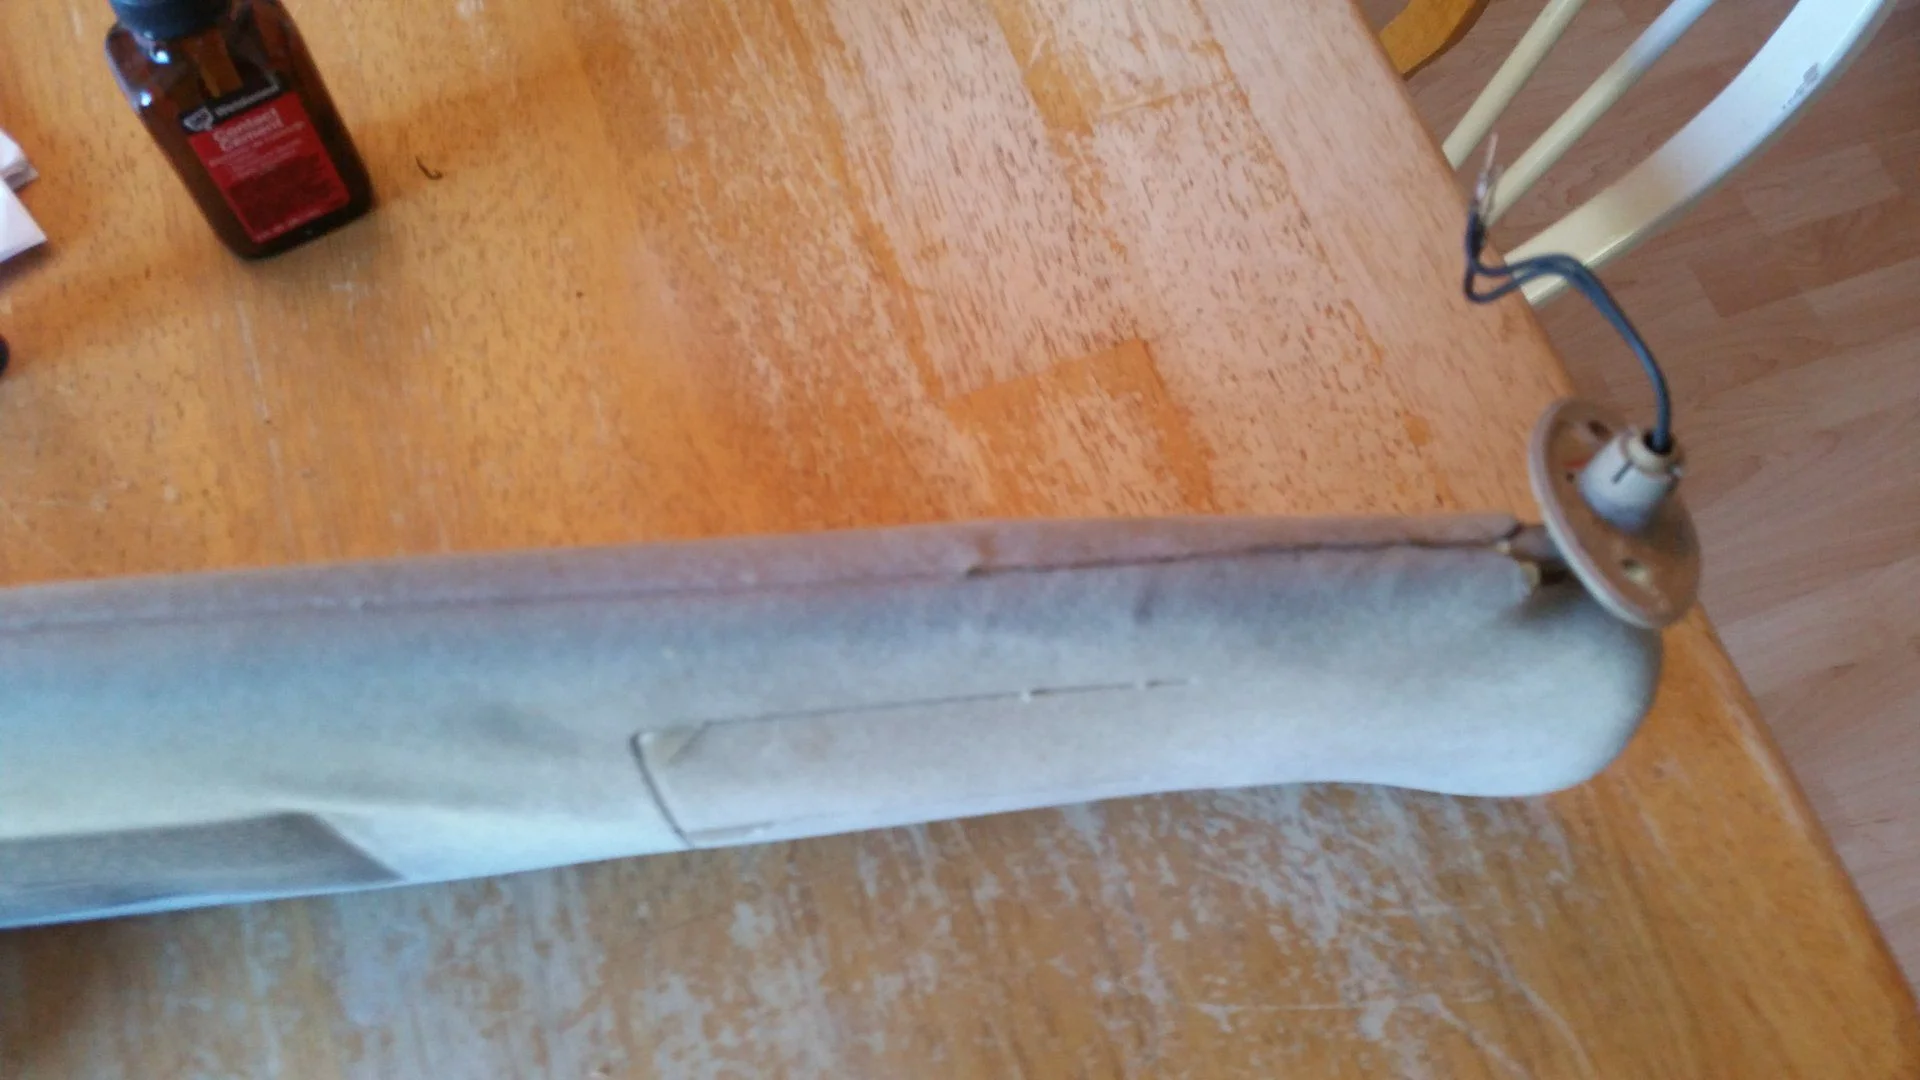
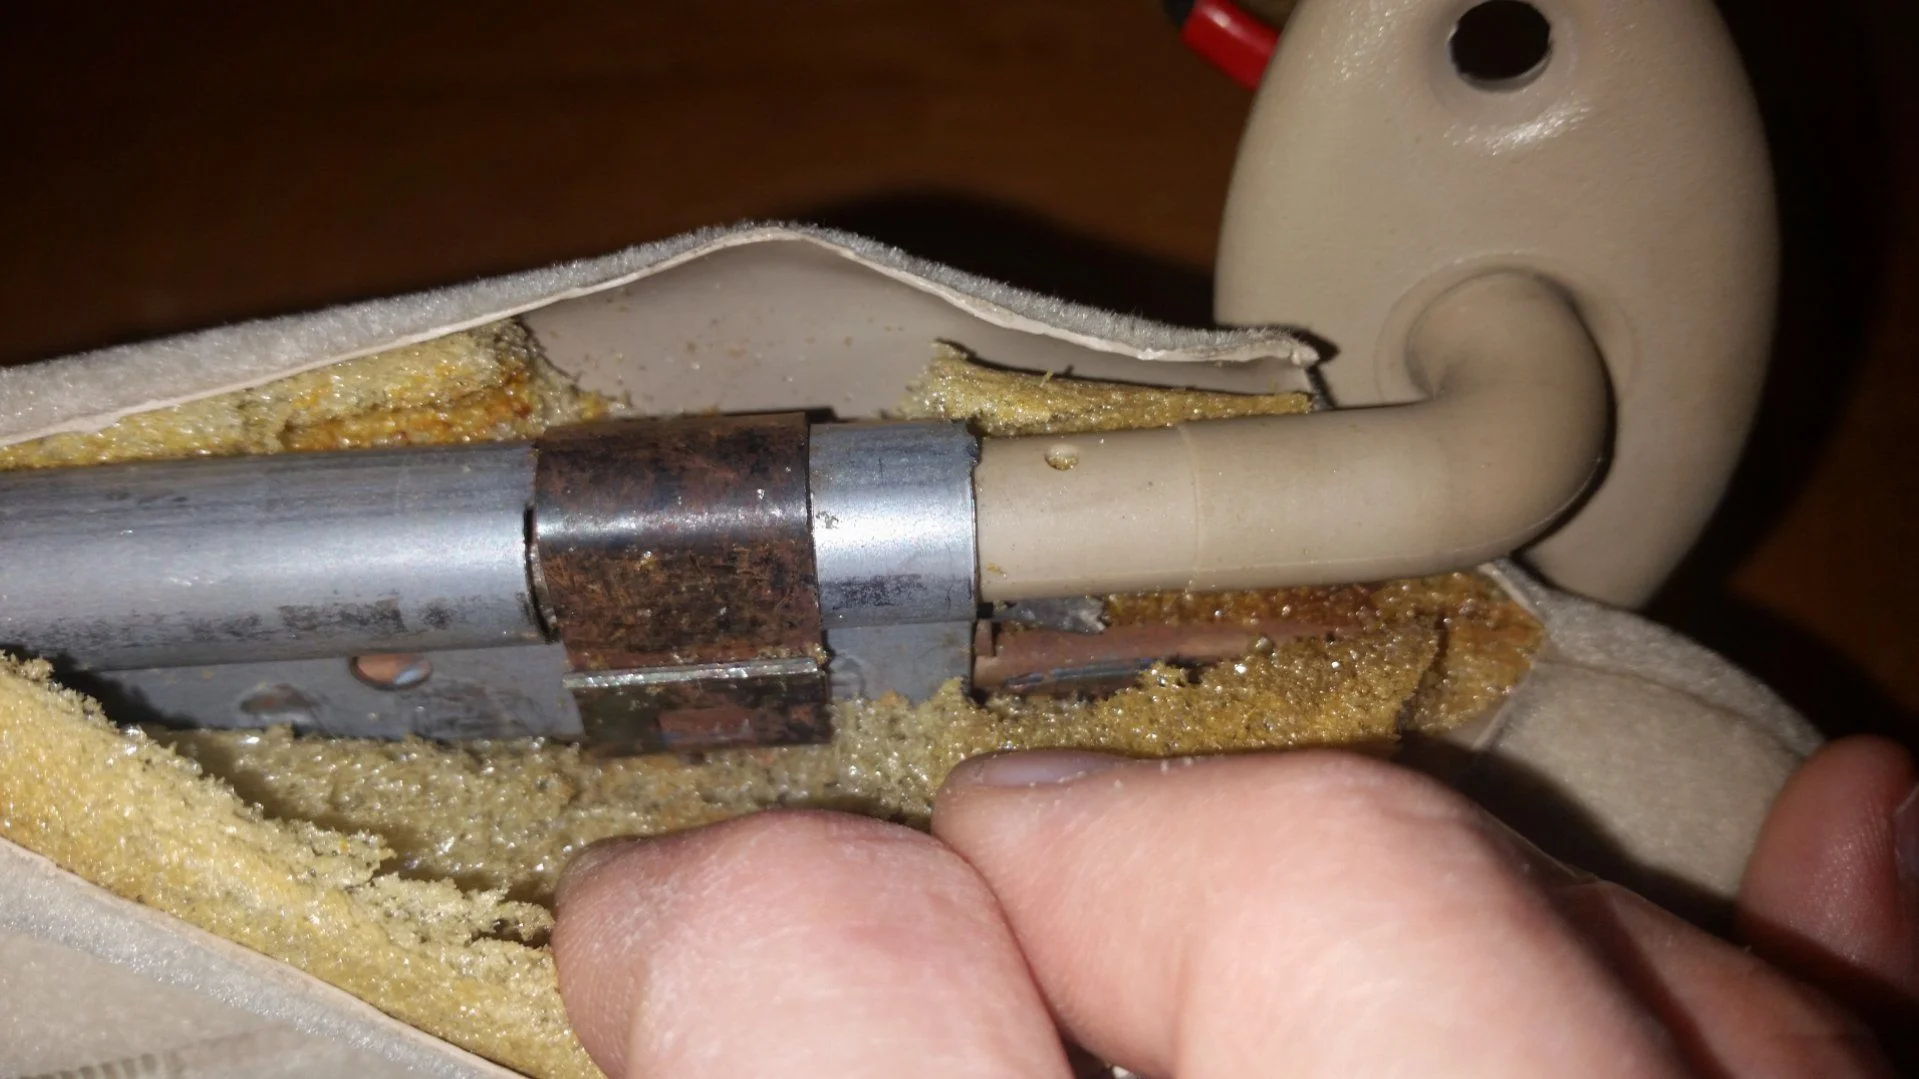
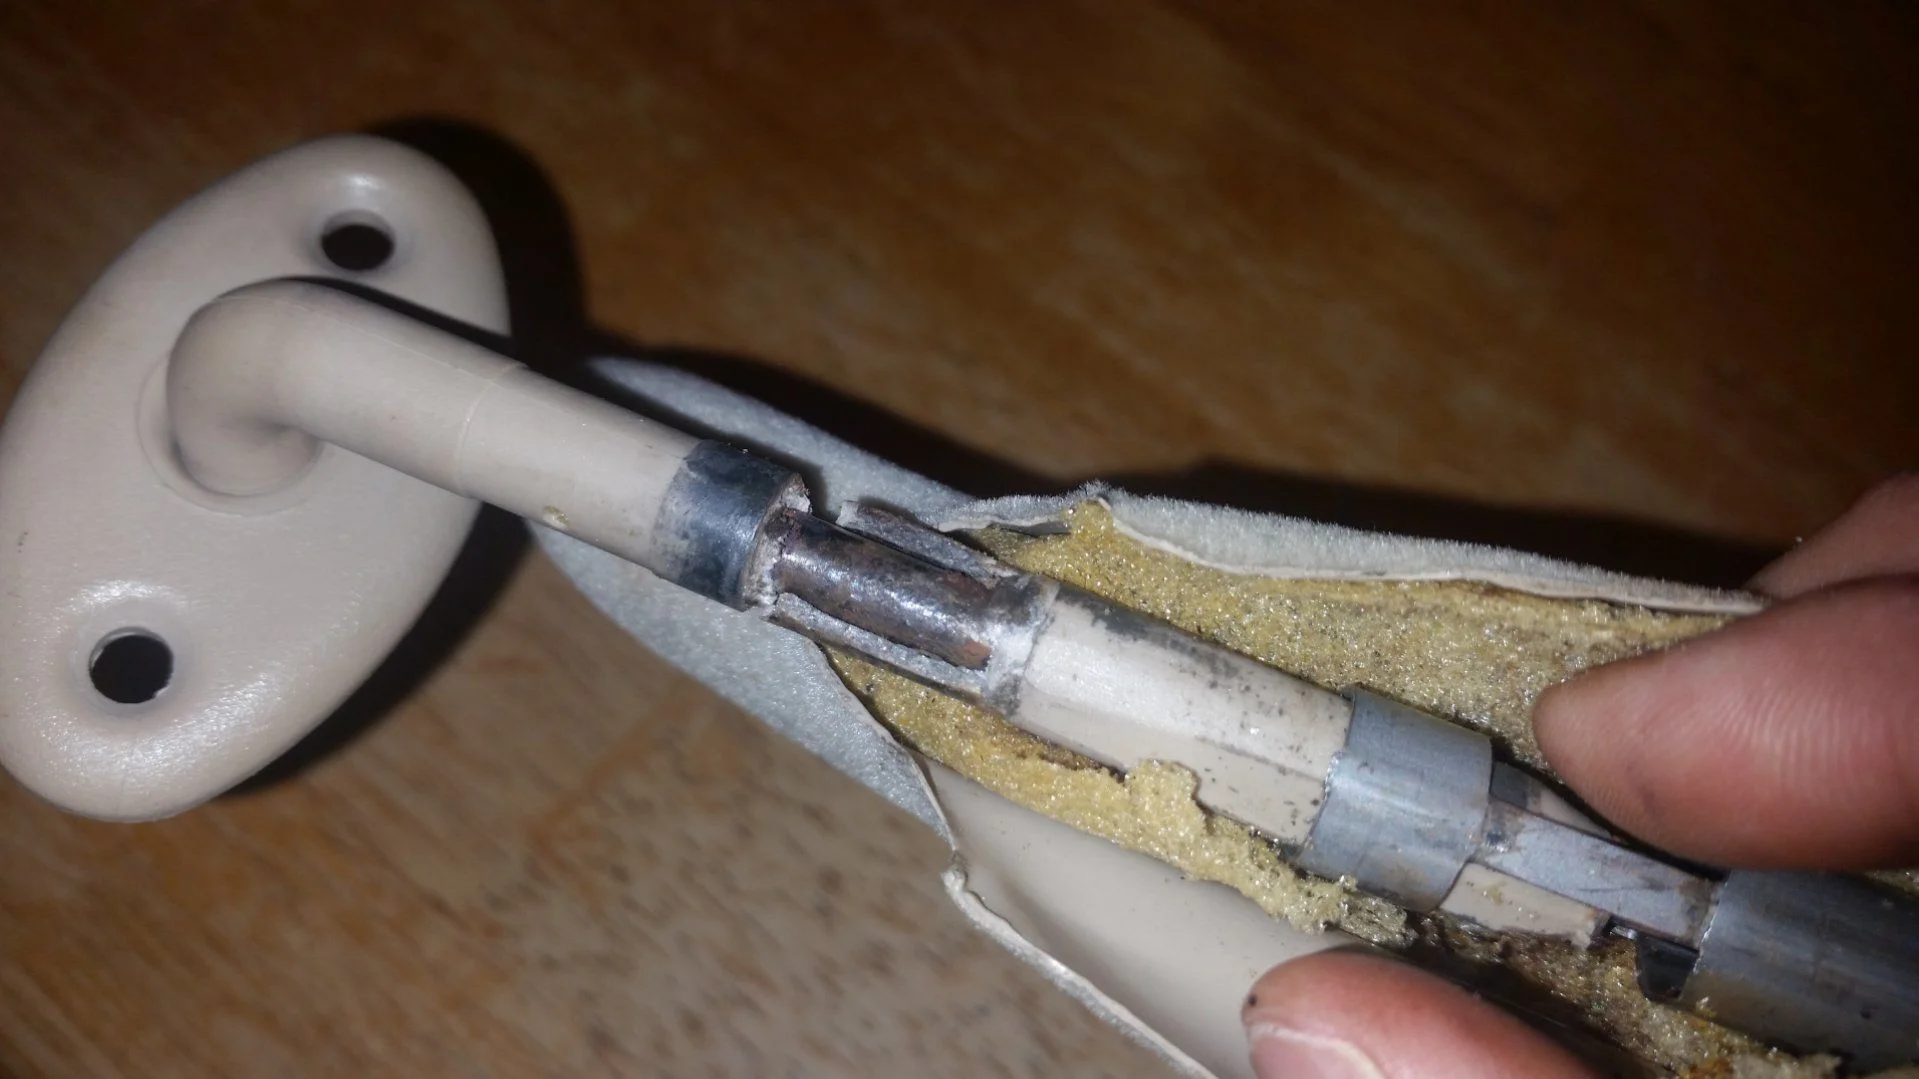
So I decided to dig into the visor issue once and for all. I made a slit in the fabric along the seam in the area where the shafts enters and plan to rubber cement or find some fairly cosmetic acceptable fix in the end, and find a real fix for these.

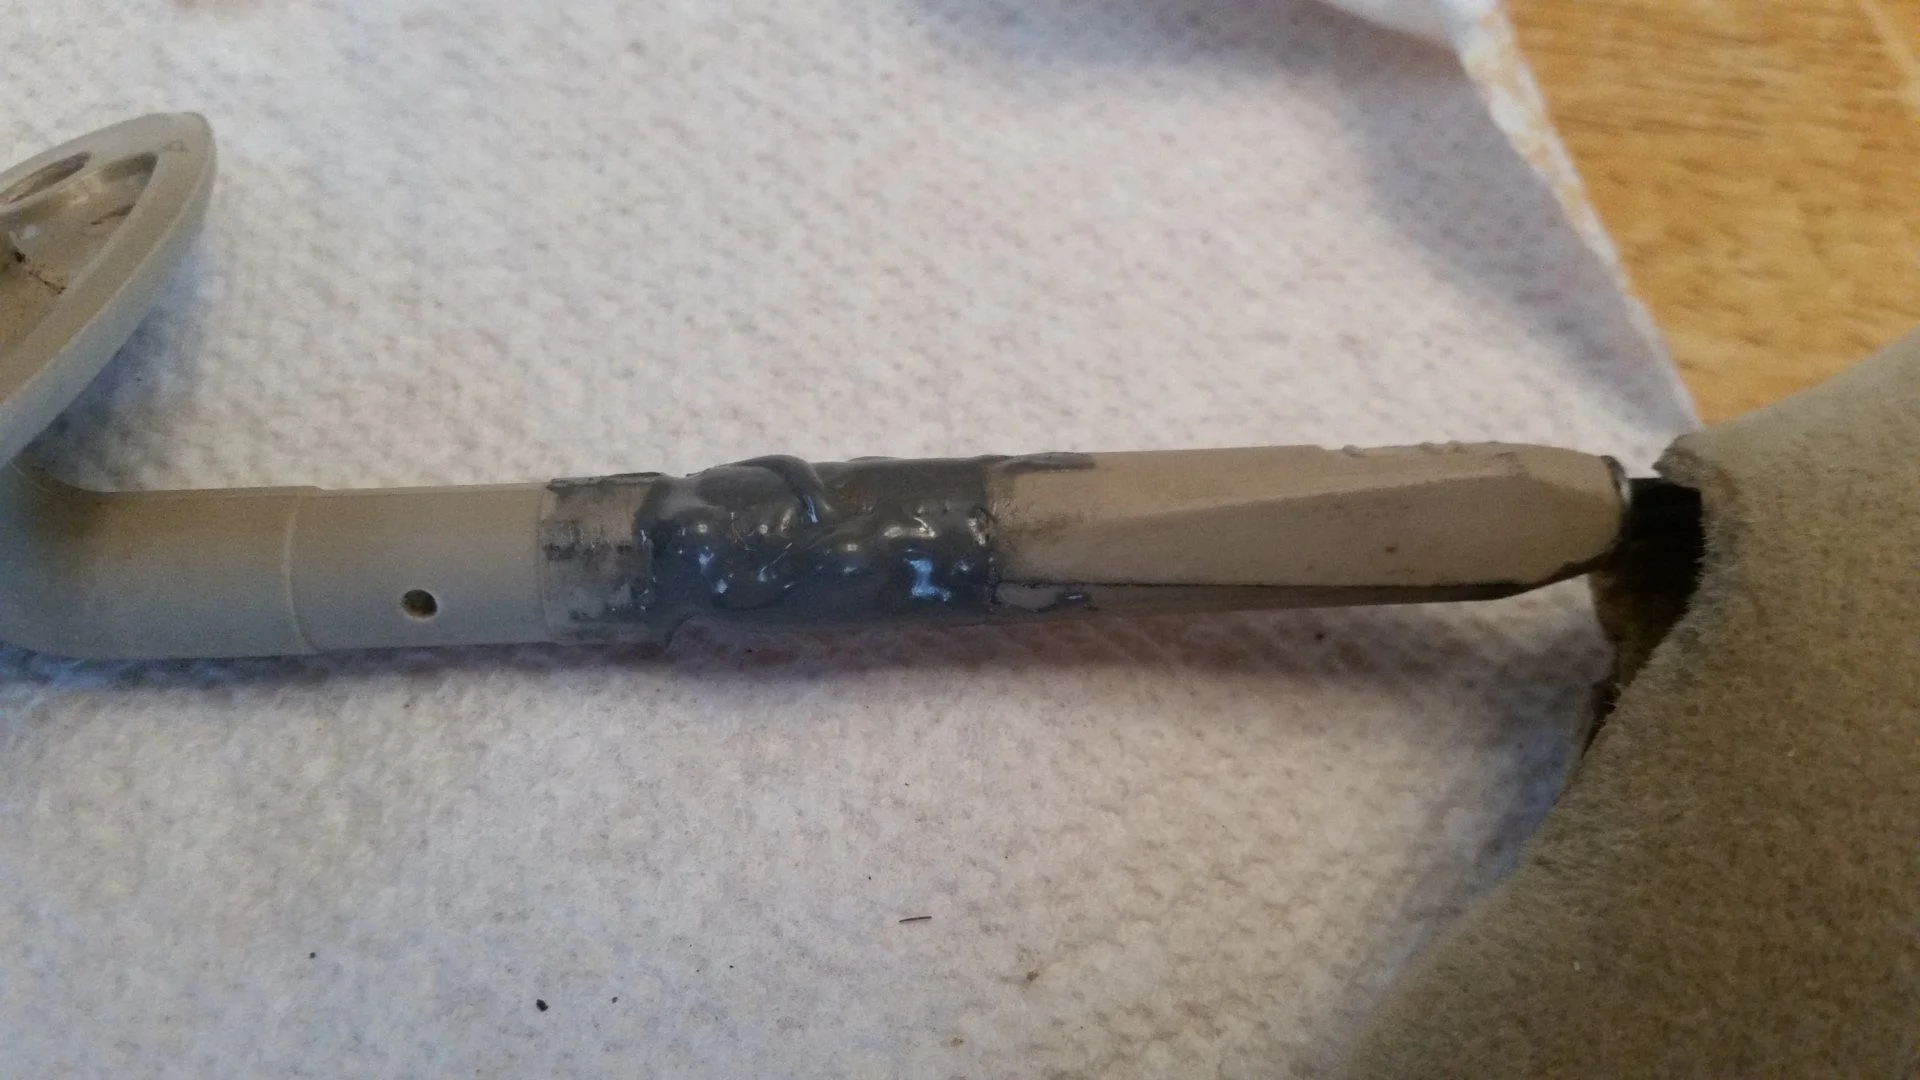
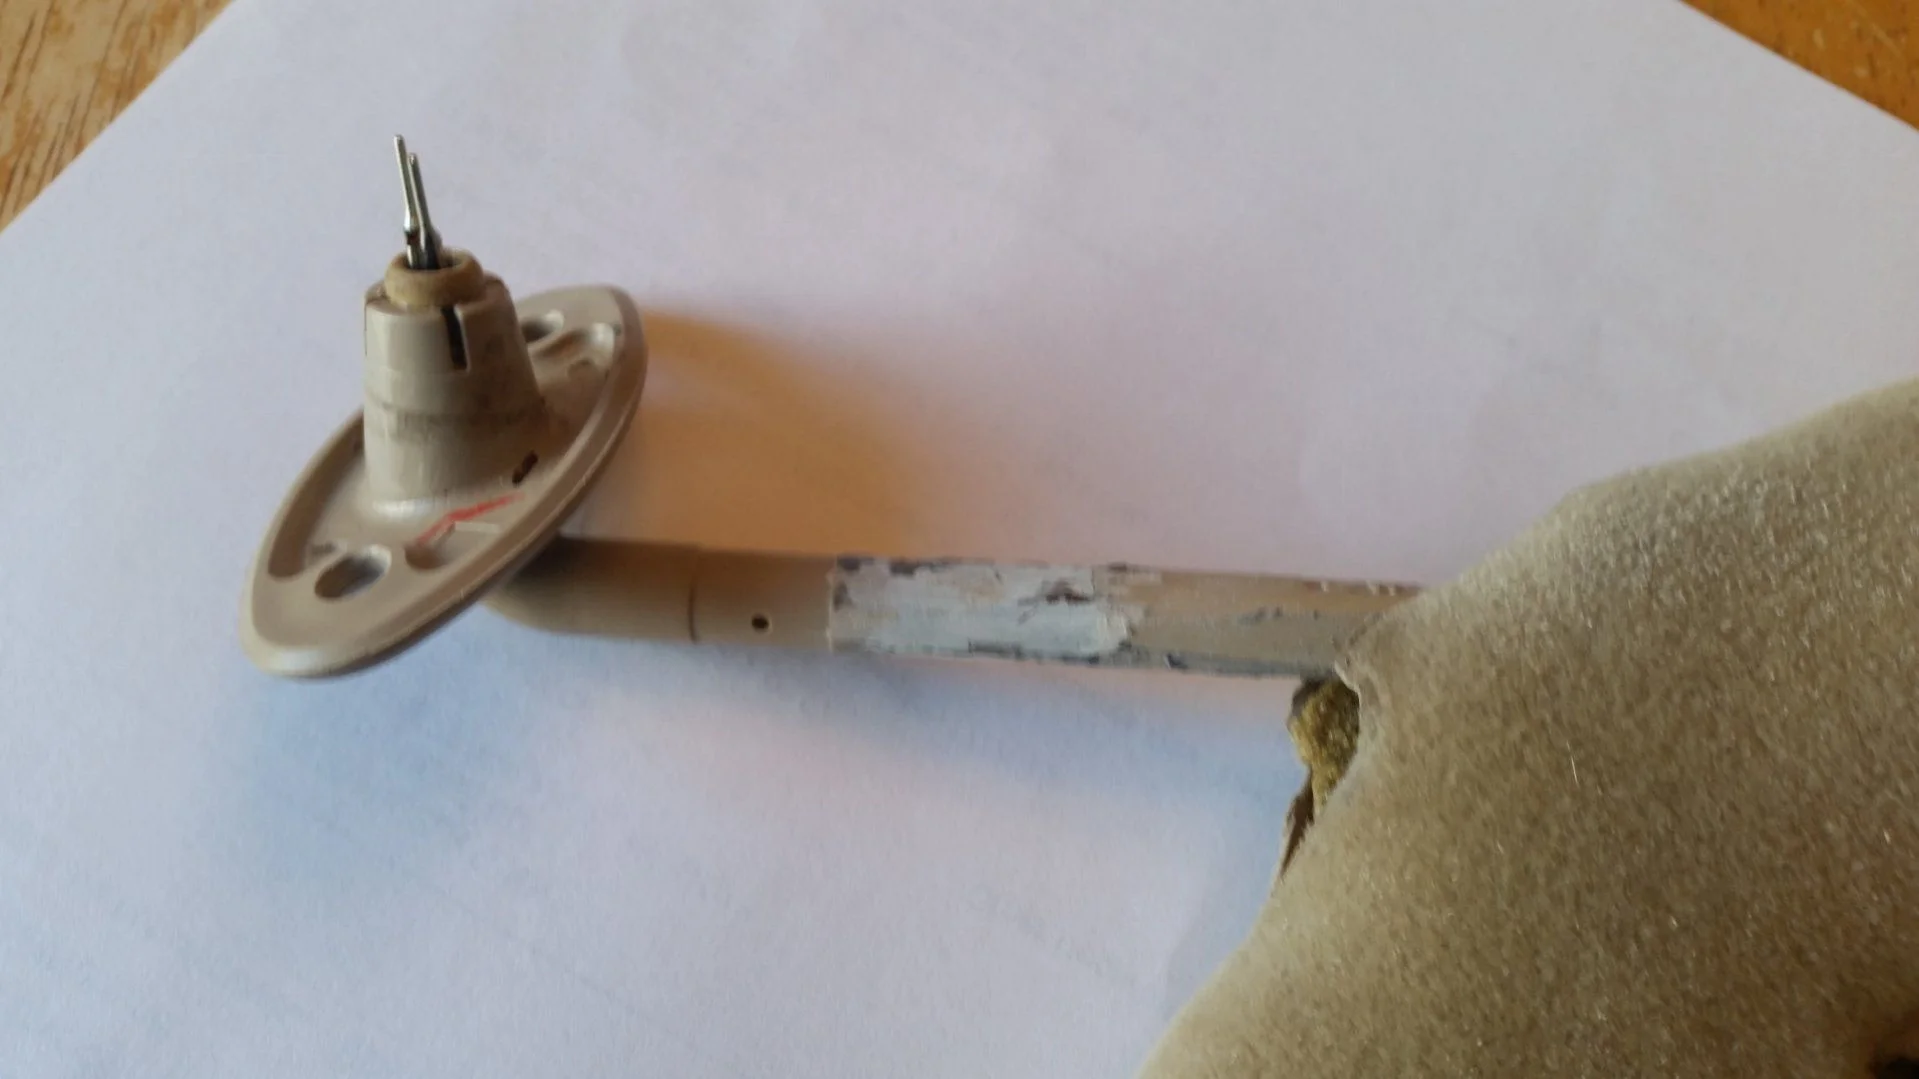
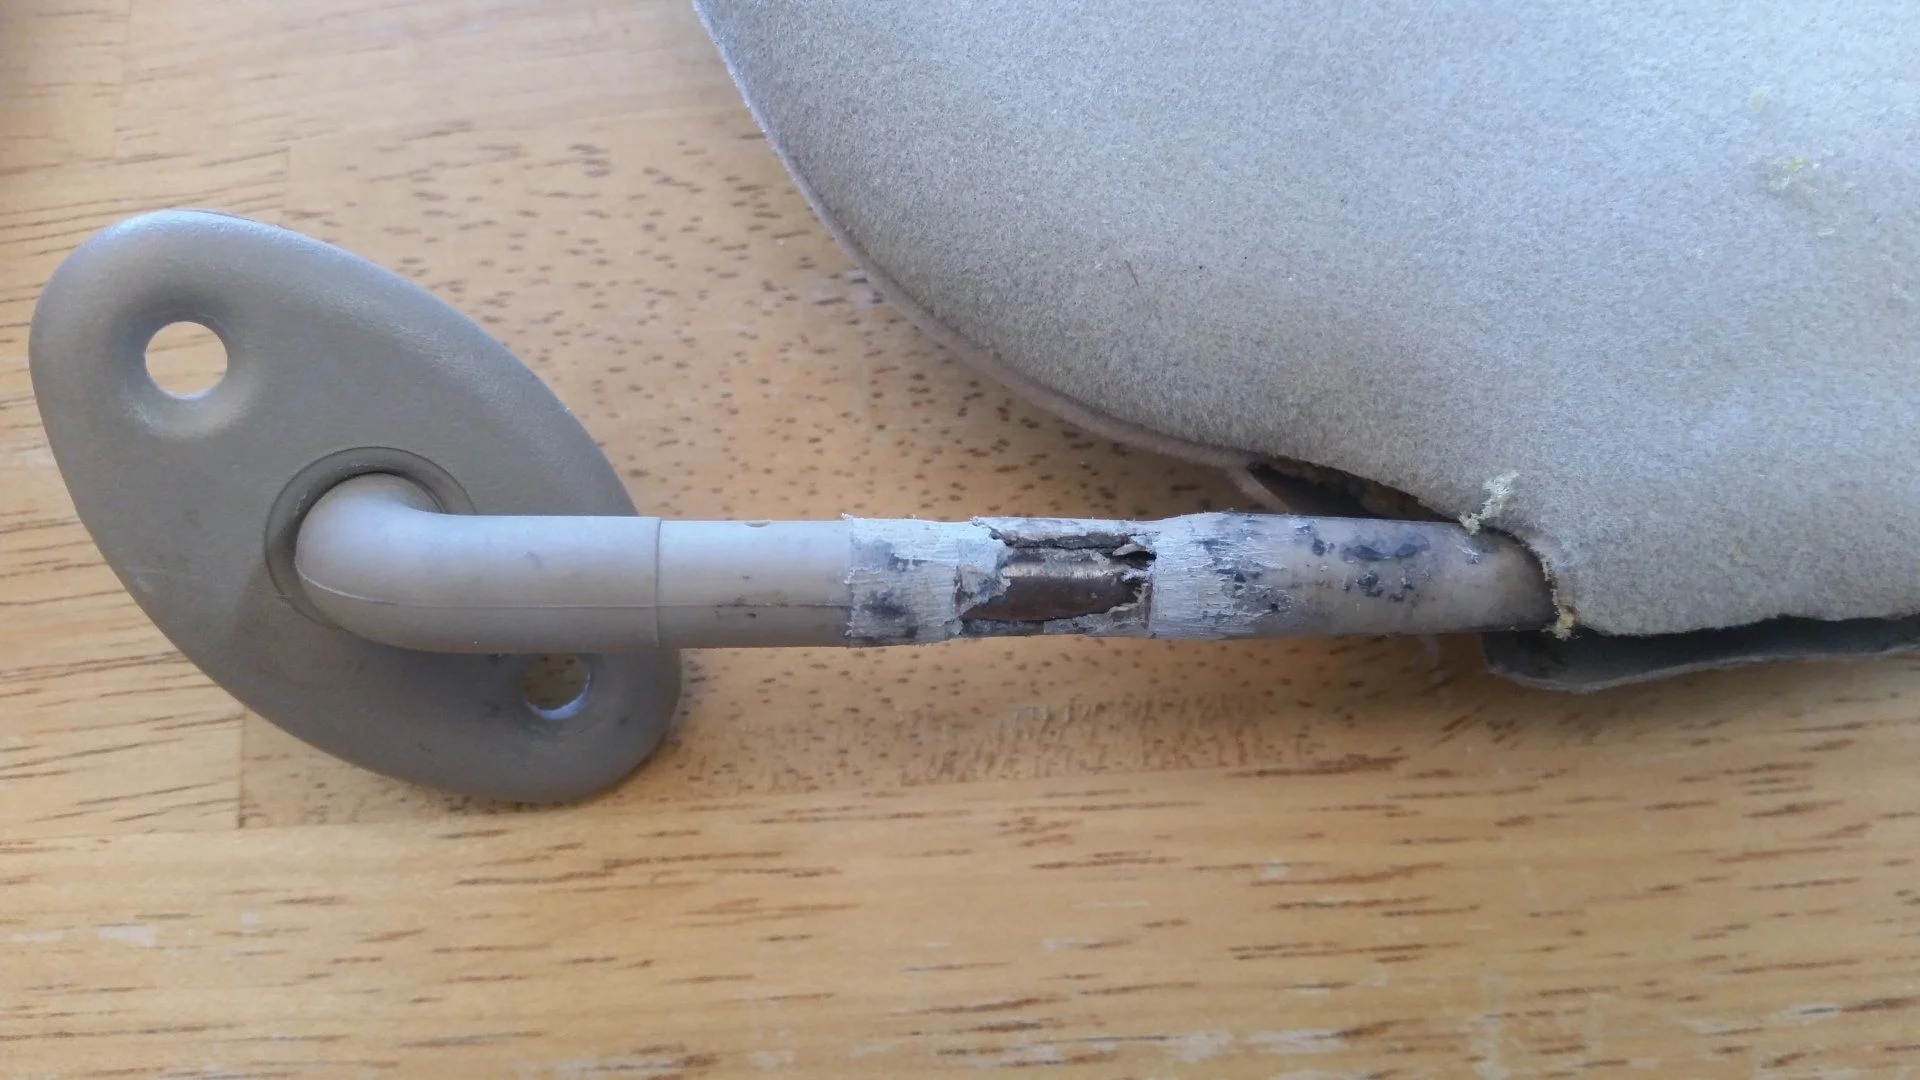
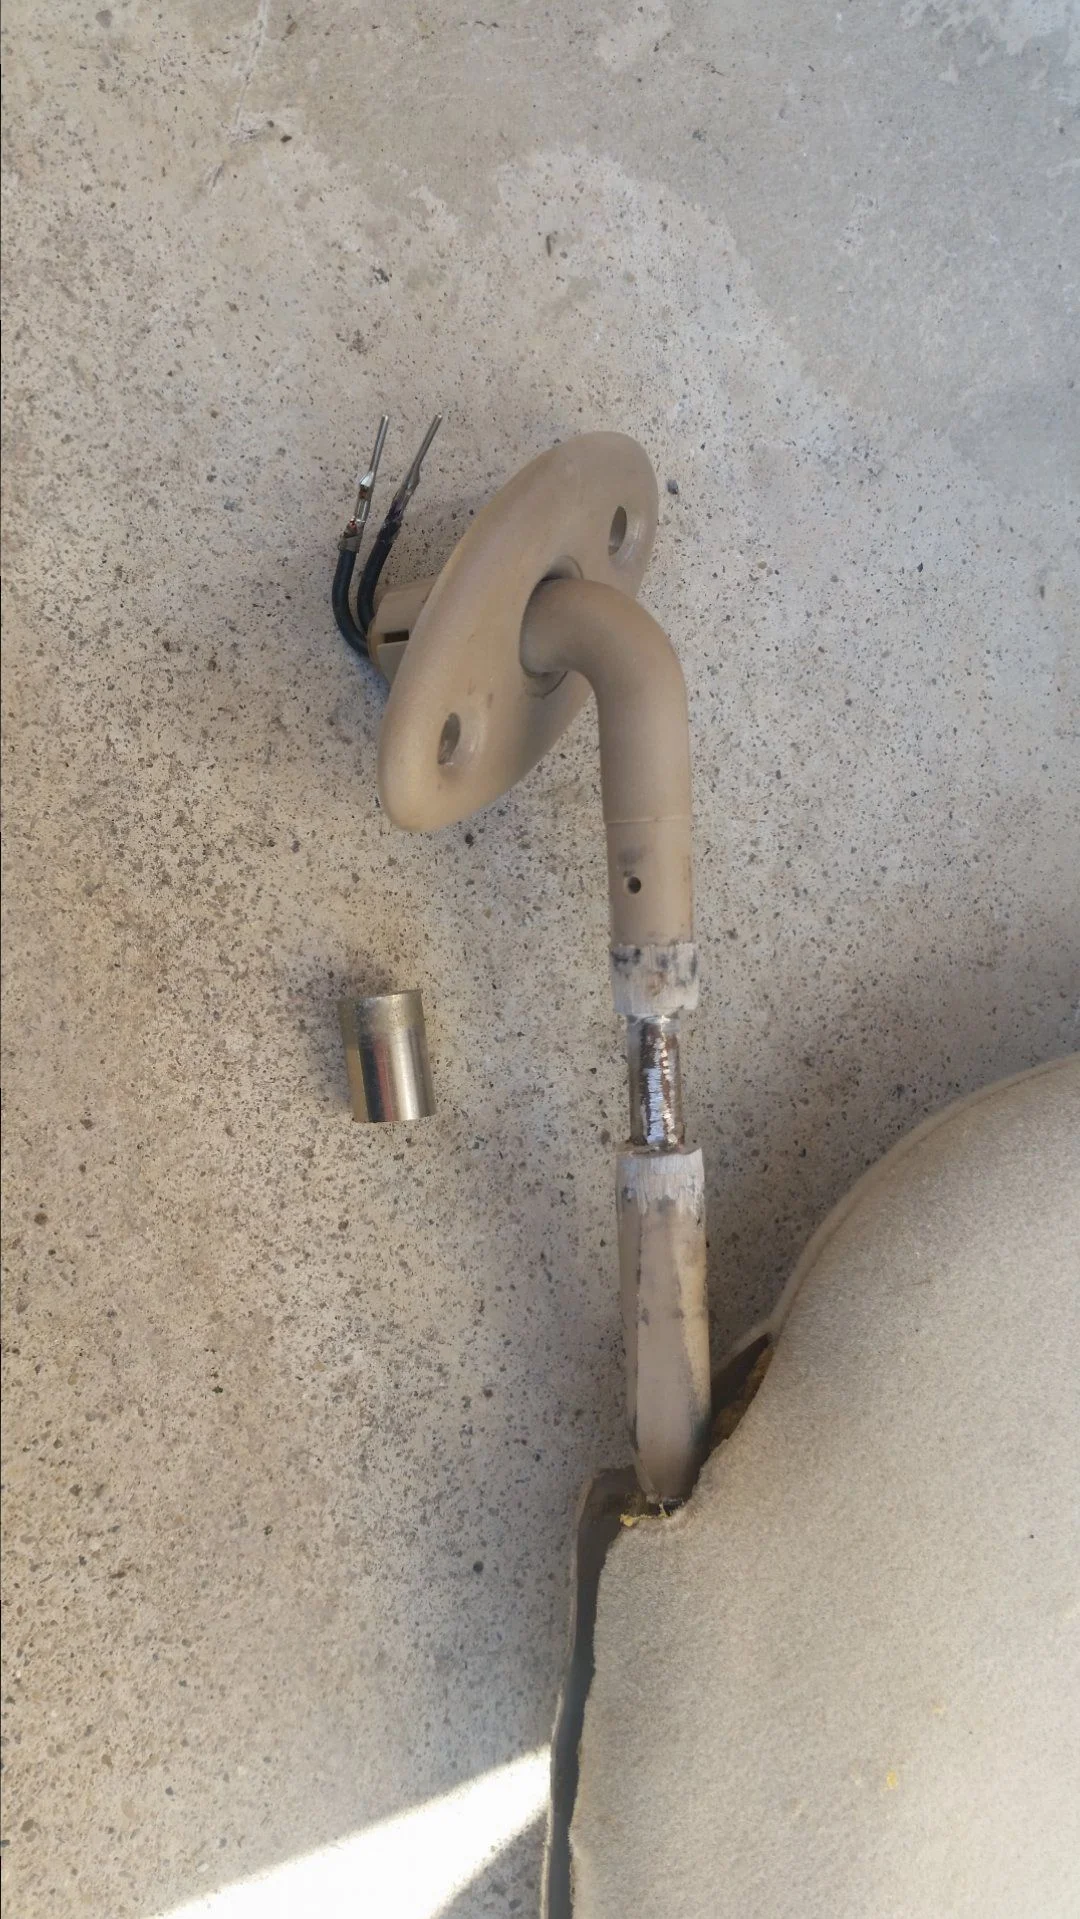
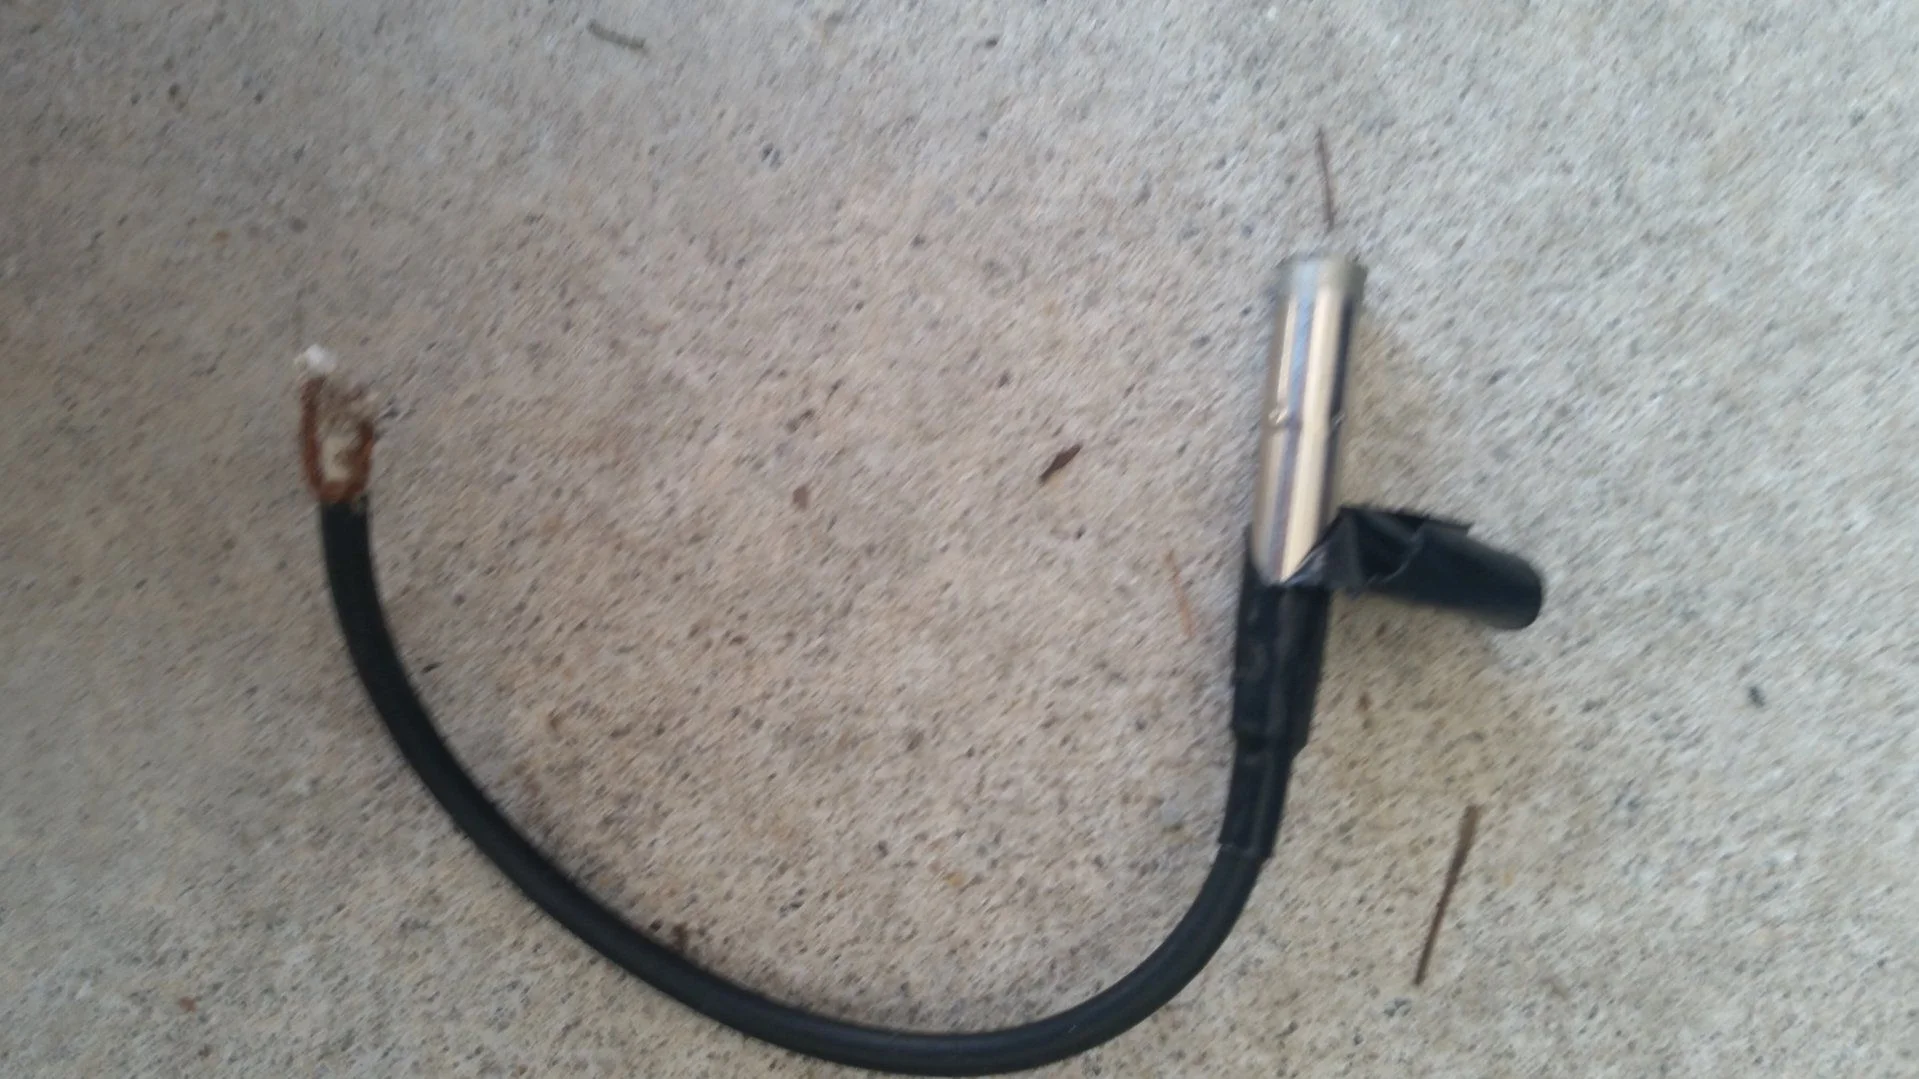
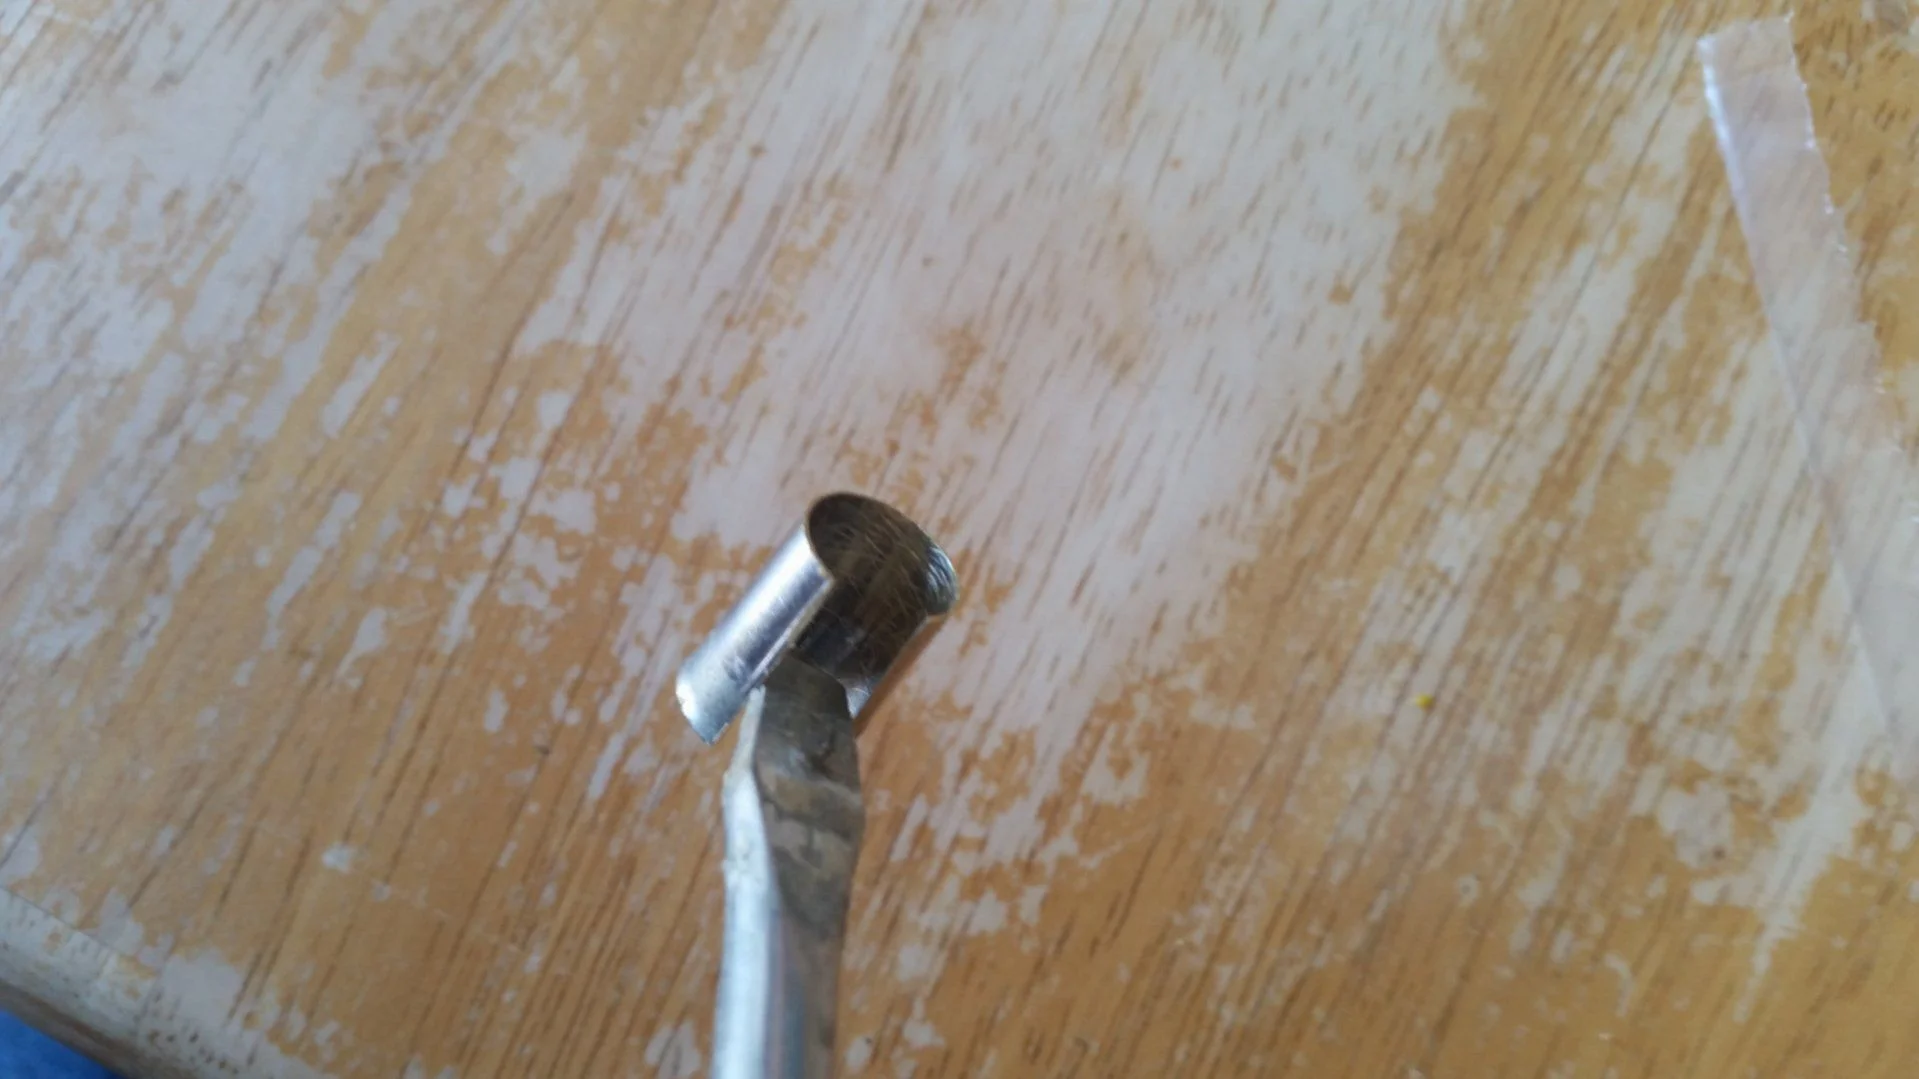
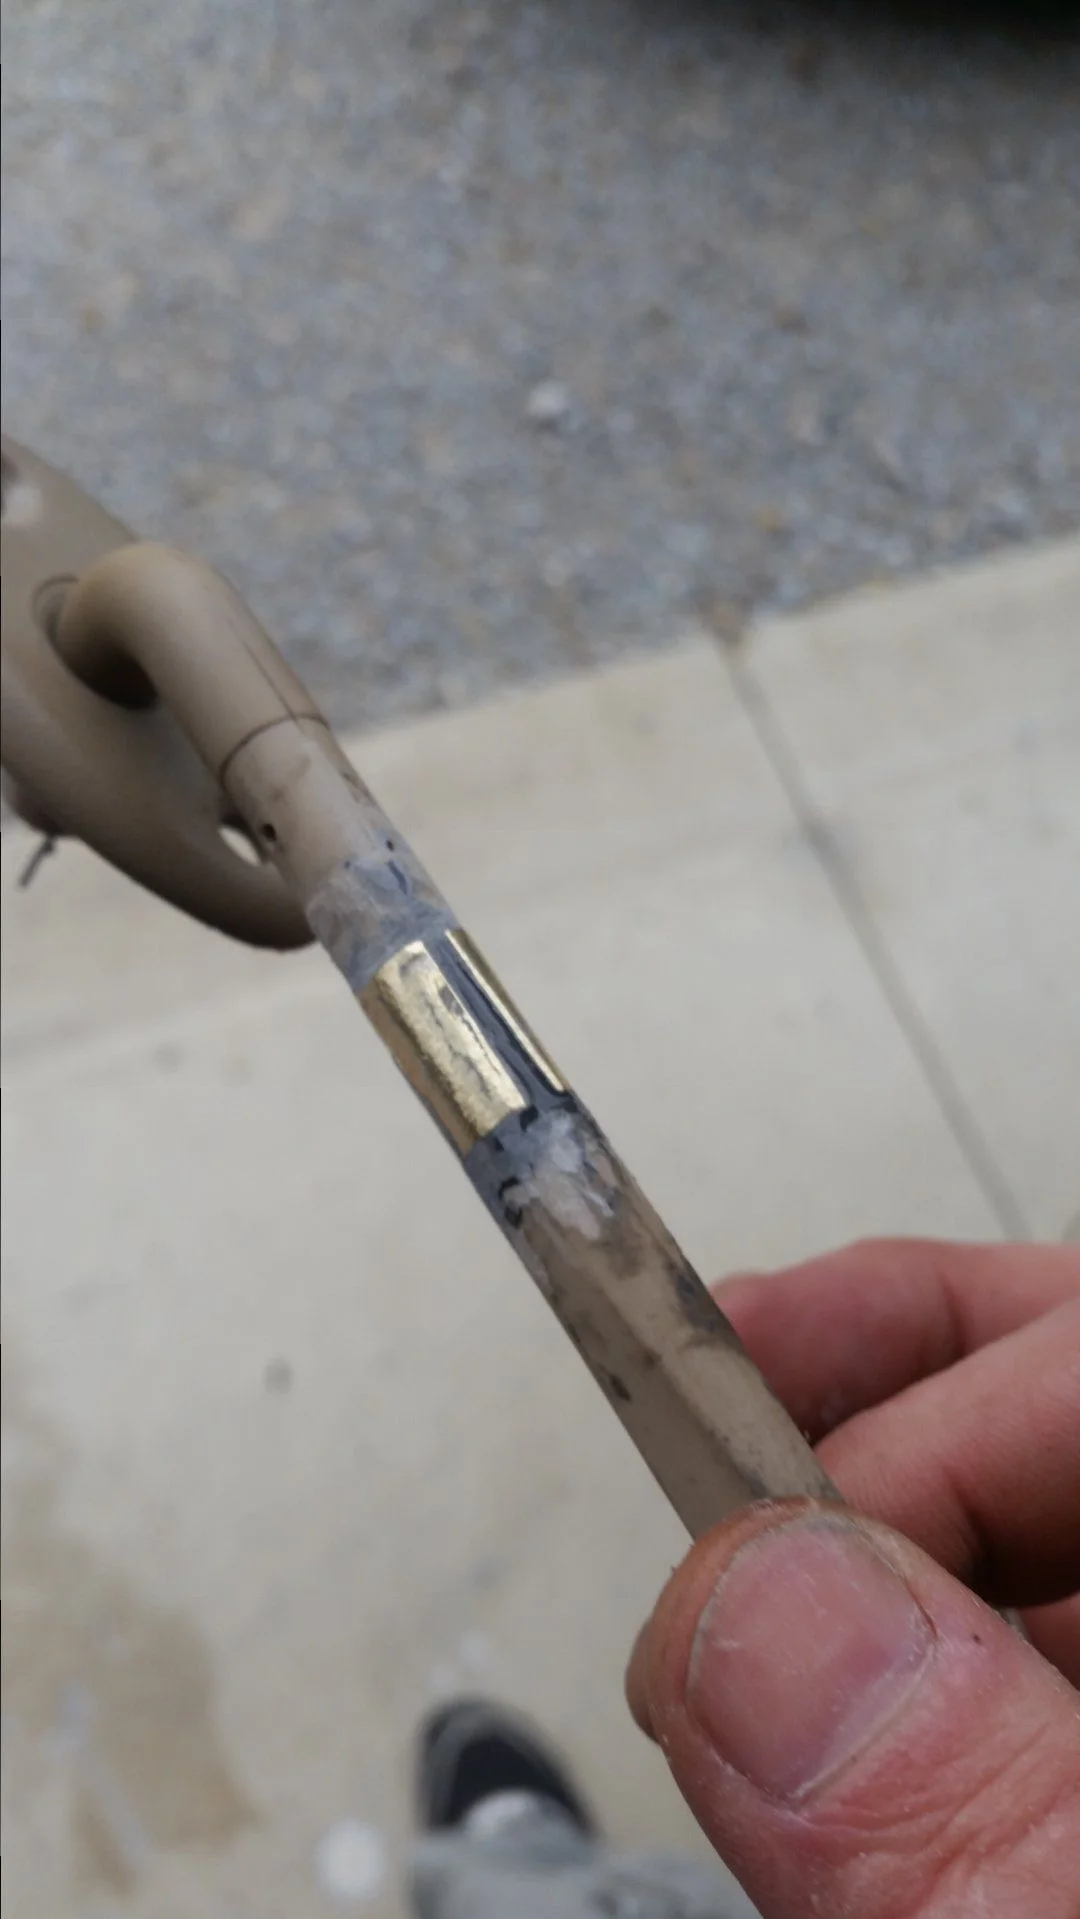
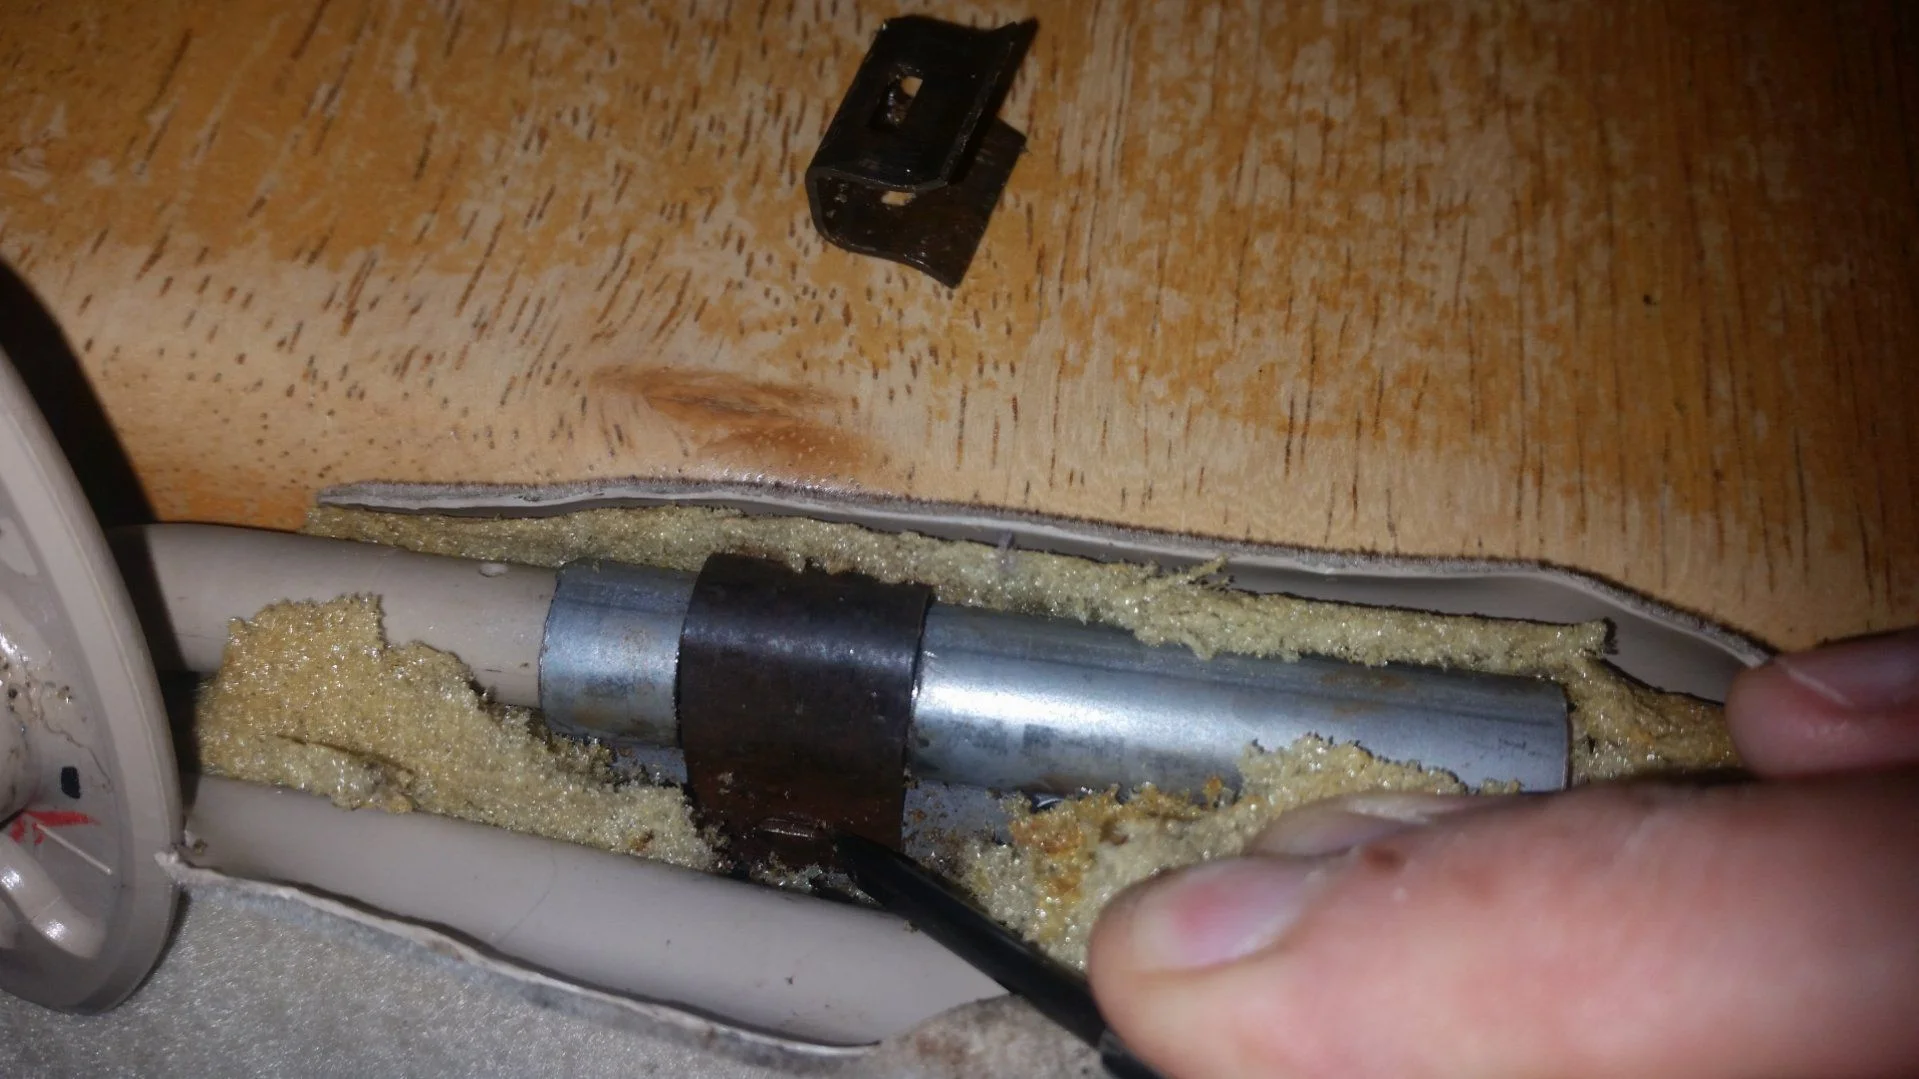
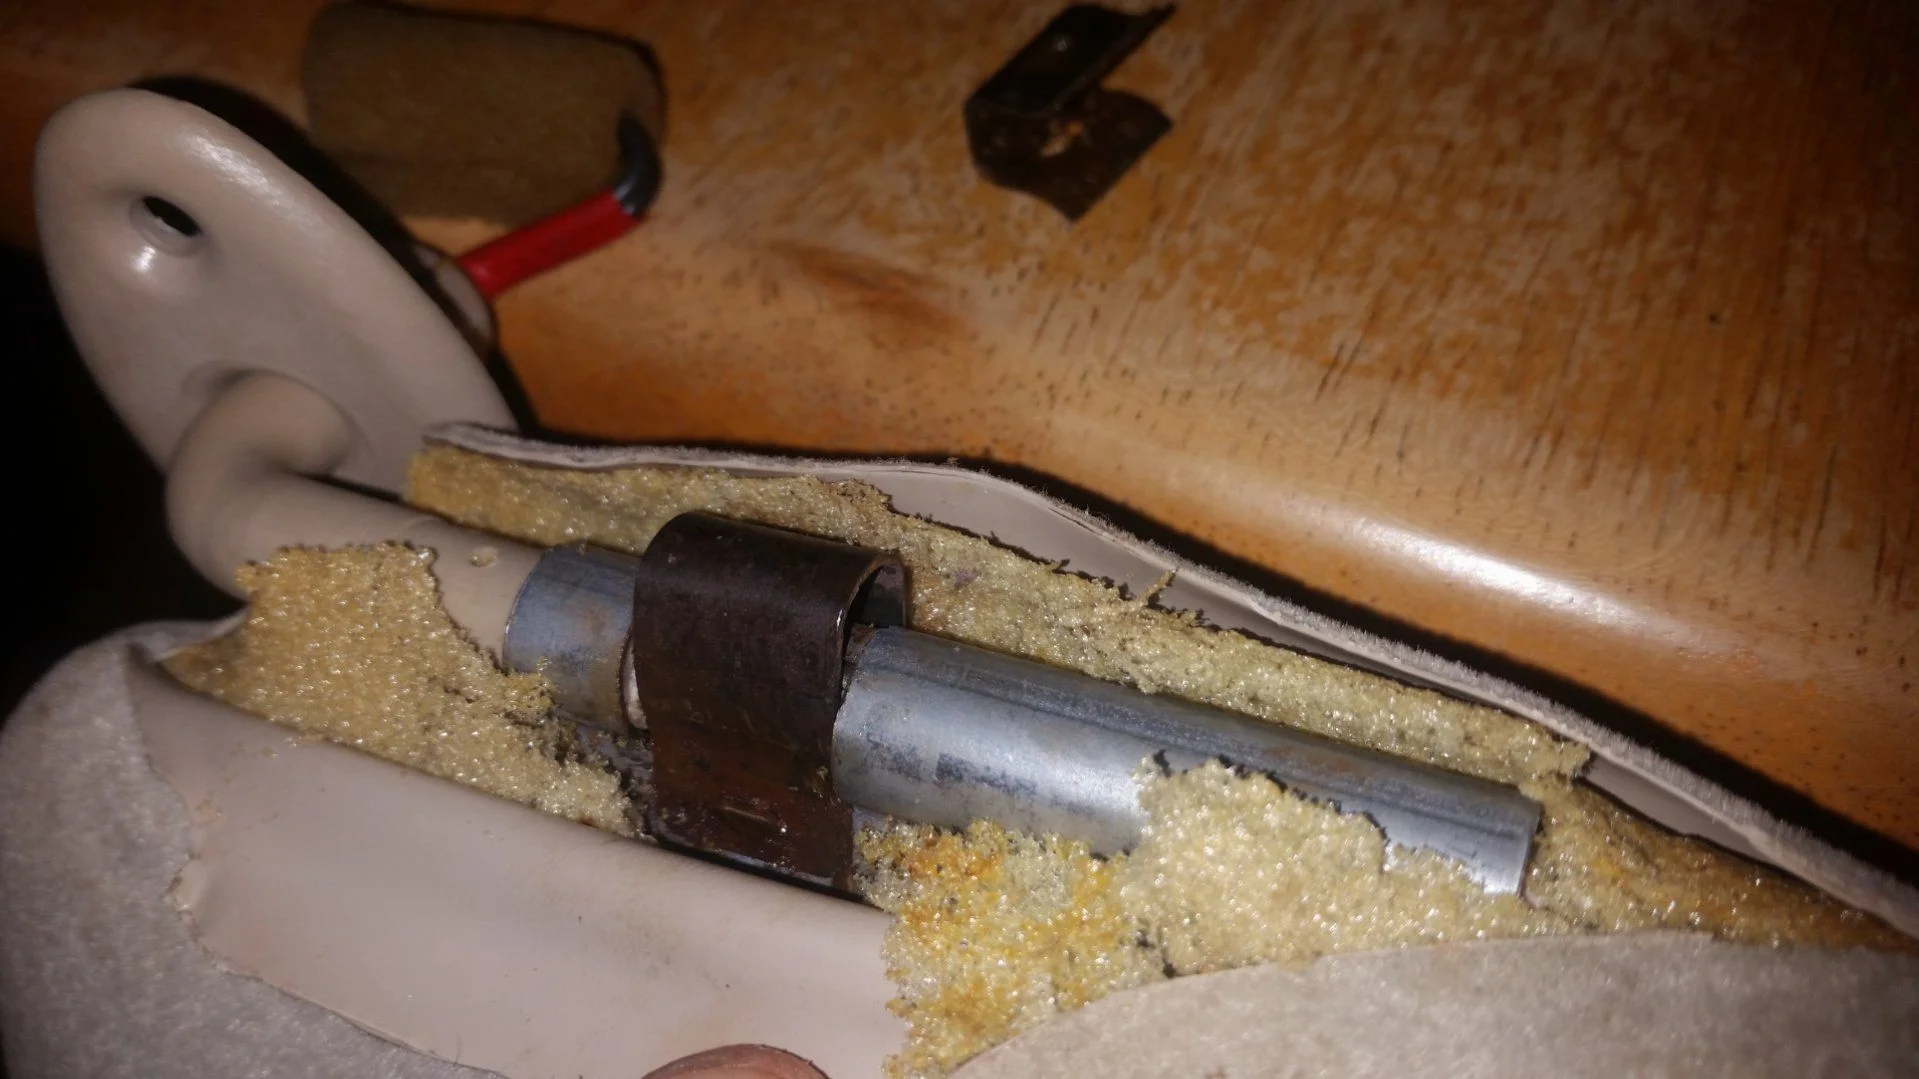
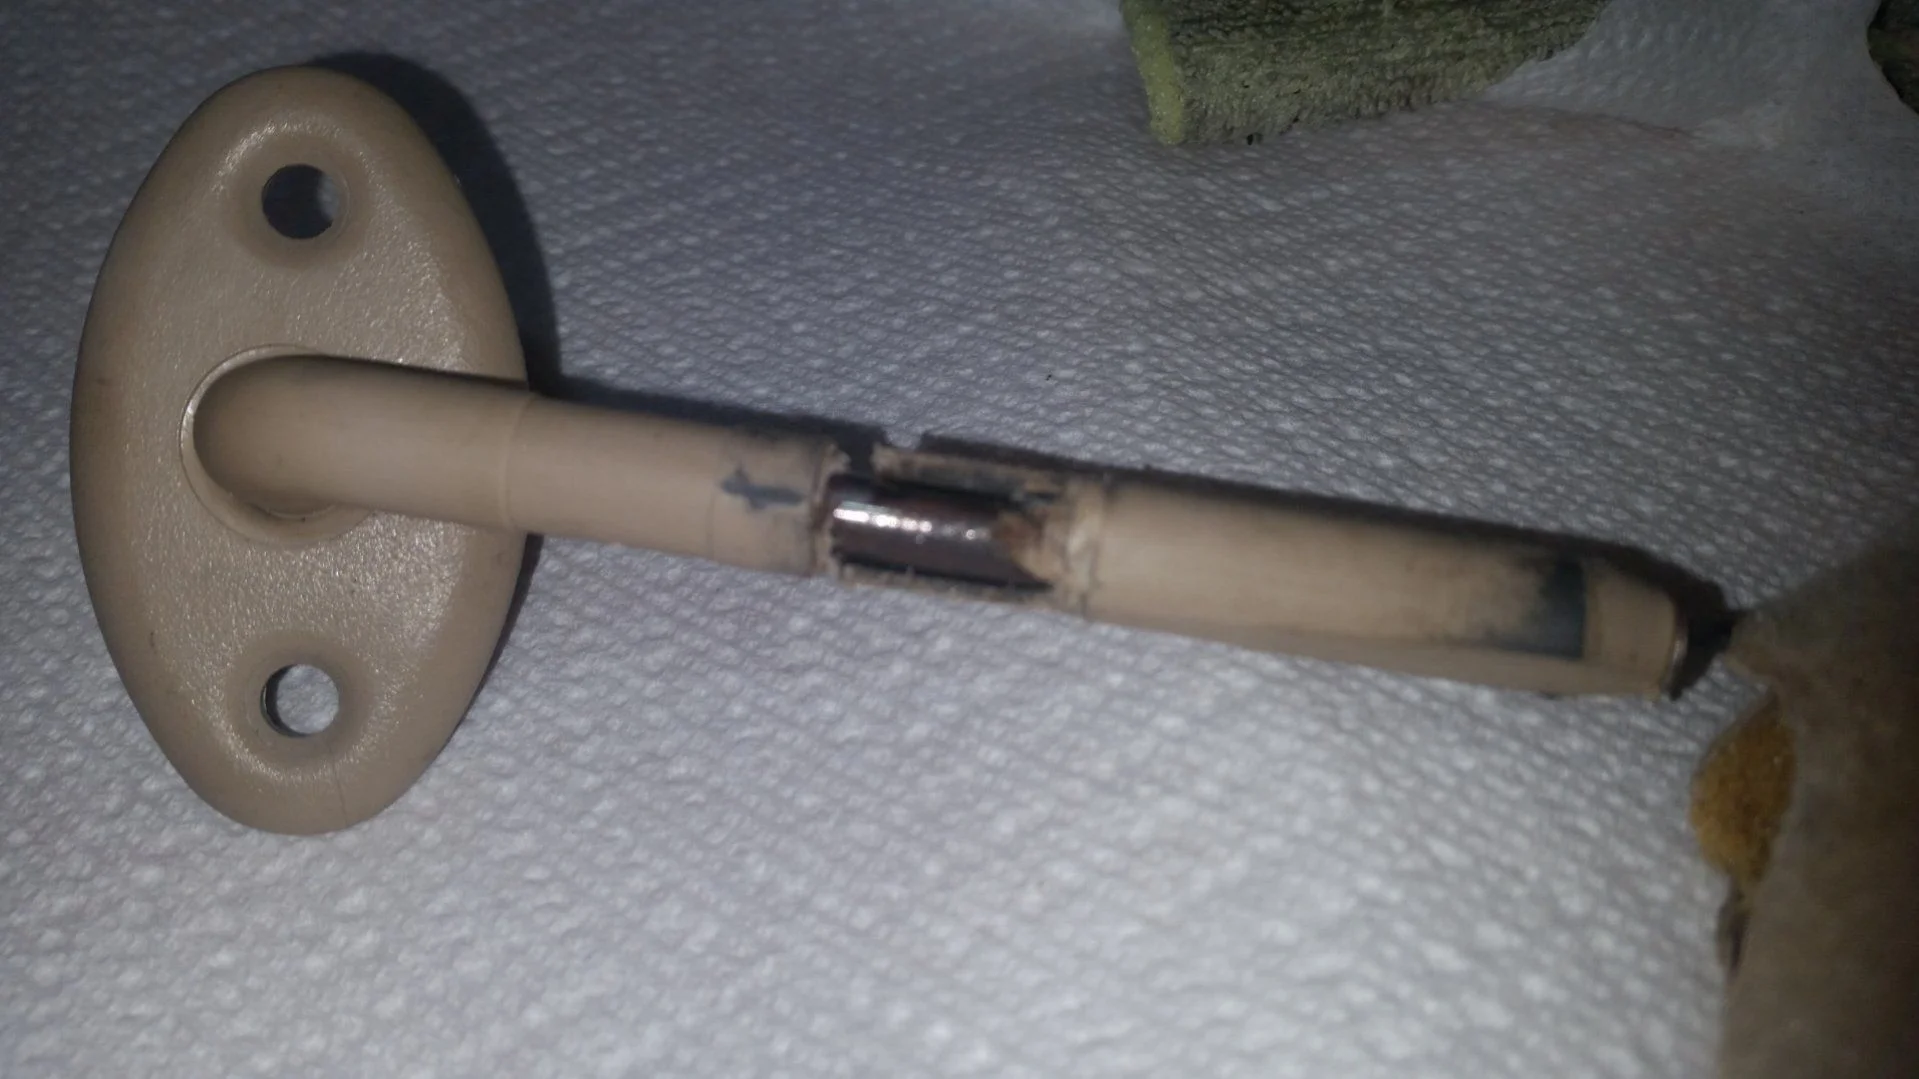
Once in the visor there is a clip that can be removed to allow the pivoting shaft to be removed. I removed the wiring connector and loosened the mirror assembly to get enough slack to slide the shaft out enough to work on. As you can see in the pics, the area where the clamp pinched the shaft and originally created the friction is pretty much worn away. I plan to fill the area back in with epoxy, etc and hope it will provide a strong and hard enough surface to renew the friction required to keep the visor from sagging. Since I probably only have one shot at this, I figured I'd post now looking for advice or opinions on my plan or recommendations for the product I should use to attempt the plastic repair.
 
Last edited:
Also thought of cleaning the degraded area out and using a section of hose close to the correct diameter but am concerned that since there are some voids and rough edges that I'm concerned about going that route. Might try it first since I'd have a second shot if it doesn't pan out. Any input welcome.
 
Last edited:
I learned from the Lexus GS forums you can use channel locks to squeeze the metal clip and restore the locking ability. For me I just took a flat head screw and hammer and made 2 indentations one on each side of the clip and it worked.
 
I tried squeezing the metal clip before I removed it. I had no luck with that, now realizing it was because almost all the material on the side that was mostly used (the side before full droop when installed) is totally worn away. Nothing left to grab.
 
Is the metal shaft solid or tubing, and is it steel or aluminum?
 
Is the metal shaft solid or tubing, and is it steel or aluminum?
Which shaft?

If you mean the one running through the middle of the main plastic part that's worn away then it is hollow (the light wires run through it), and appears to be steel
 
I tried this exact thing a while back. There was enough of the plastic left on mine to see that there was a flat spot in the shaft where the clip would hold the visor in the stowed position, and the edge of it has worn off allowing the clip to rotate more easily on the shaft. I used a dremel to remove some of the existing material and make a couple grooves for the infill material to lock into, and then tried two different strength epoxies/plastic fix and both of them cracked right out when I put the clip back on and tried to move the visor. The parts are still in a box on my bench in the garage waiting for a better idea/fill material.

Will be watching to see if you find something that works.
 
Started to fill it on with JB weld this evening. I'll post with results good or bad once I have time to finish
 
So got around to fishing this and seems to have worked. Long term durability is unknown and will repost if failure occurs. Jb weld seems harder then the original material so I am optimistic. I used some packaging foam to fill in a couple places where the foam disintegrated and a piece over the rod area. Then I used a small section of inground grade swimming pool liner to attach both sides to each other from underneath using contact cement. If I ever have to redo it I could probably do better the 2nd time but it was good enough for me if it works and is barely noticeable as it is. If I had or have to do it again I would make sure to leave the repaired area the same diameter as the rest of the shaft. I wound up sanding mine a little smaller as it almost seemed too tight but once assembled is a little looser then the passenger side which is still tight in my rig. Still holds in place but will find out what wheeling does to it. Also, in the last picture the fabric hasn't split back open, it's my sunshield I have in to block the sunlight poking up above the visor. Hopefully this might help so many with the useless and super annoying visor issue.
 
Last edited:
Nice, I'll be trying again with JB Weld tomorrow. Thanks for sharing your work.
 
Nice, I'll be trying again with JB Weld tomorrow. Thanks for sharing your work.
If yours is needing a lot of material filled in I'd also recommend the fast setting JB weld. I used the original slow setting product thinking I'd want the time to get it set but it takes too long and flows too much by the time it sets. I had to apply two applications because of that.
 
Update: after slightly less then 2 weeks the repair began to fail and in the last two days is back to how it was pre repair. I plan to dig back into it and see what failed. Almost has to be the jb weld wearing down due to the high pressure contact by the metal clip. If this is the case I'm suprised the original plastic shafts held up to the amount of contact. I had a feeling this could happen especially after ridgerunner78 sharing his experience but on the flip side figured it would be harder then the plastic.

I'll be trying to source some sort of sleeve (metal ?) of the correct diameter that could be attached in the area and see if that stands up and repost with results eventually.
 
So after the previous short lived repair I came up with a version 2 that seems to be a legitimate fix for these visors.

I figured a sleeve of some sort was had the best chance of surviving the rather stout pressure that metal retaining clip has to exert to hold the visor with the great amount of leverage it receives. I measured the in tact visor shaft at 10.2mm and found a radio antennae female end I had lying around to be right at the spec needed. I cut a length of the female antennae receiver and ground a slot in it to allow it to insert over the inner shaft. I used a file and wire brush to score the inner shaft and the inside of the anntenna segment for a better bond and decided to use the fast setting version of JB Weld this time around. The slow setting product has to be babysat for way too long when your using the amount it takes to fill in something like this and definitely was the right decision. I put the JB weld around the inner shaft as much as possible then installed the antenna section and packed more JB Weld in to fill all voids between them. It still takes a few minutes of keeping an eye on it to keep it perfectly lined up as the epoxy dries. (Note: This time I marked the position of the visor vs the shaft before I removed it and put the slot in the antenna section to be lined up with one side of the spring clip when in the closed position in an attempt to give it a "closed" position using the slight flat spot). Once it was dry I used a file to remove the excess JB Weld and reassembled the shaft and retainer clip. I've not reglued the vinyl back yet because I wanted to try and make sure it didn't fail again and plan to wait another week or two to make sure to finalize it cosmetically. With that said, It's been several weeks since I did the repair and I held off on posting this to try and make sure it seemed to hold up. So far it's perfect. At first it seemed like it may of been too tight and was stressing the visor internals but now seems to of worn in of broke in and holds firm in all positions and has about the same resistance that the passenger side has. If you barely flick it, it has that little springy reaction without changing position. I've been running on pretty rough roads with my OME heavies and it has not moved once.
 
Last edited:
Hey there @Haspin FJ, how did your version 2 work out.. my visor does not sag all the way (yet!).. just wont stay locked in the highest postion. I saw a post on youtube of a cat using velcro on another vehicle (Not LC).. and if was a quick fix for him.. thanks.
 
I tried version 1.2 several weeks ago. Wound up using the tube part of an adaptor at the following link as the tube overlapped with spring retention instead of having to slit the tube and was able to be expanded to slip over the leading part of the plastic rod to the repair area and spring back to maintain a full cylinder.

Also I filed both the steel rod in the visor and inside of the tube really well to give it as much bite as possible and used "Gorilla glue" epoxy. So far so good and I took it wheeling a couple weeks ago with no sag. It doesn't tuck quite as tight as I'd like as I couldn't replicate the notch to allow it to want to return to that position bit still very close and nice. I didn't want to do velcro or magnets ago I want to have the in between adjustability for maximum usefulness.

90 degree car antenna adapter - Google Search:
 
Back
Top Bottom