Fergytoy"s 1978 FJ40 frame off resto.

This site may earn a commission from merchant affiliate
links, including eBay, Amazon, Skimlinks, and others.

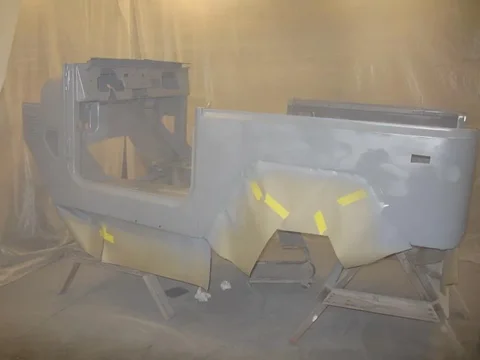
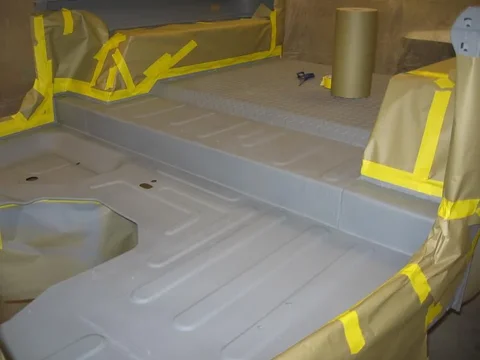
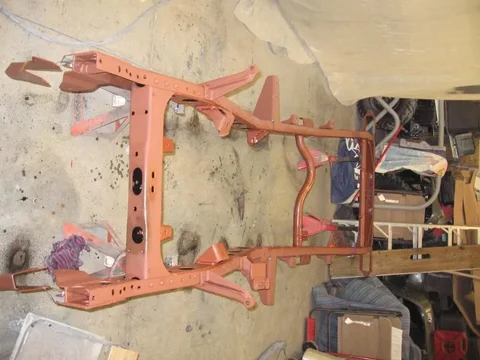
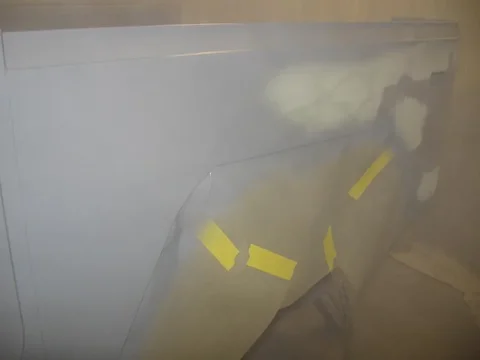
Layed down 2-3 coats of fresh epoxy primer to seal the tub. It smoothed out nicely. The filler all looks good and I do not see any spots that need any further attention. The interior of the tub looks so good that it makes me reconsider whether or not I even want to spray the EZ Liner on it. Having one consistent color, like the grey primer, gives a nice visual effect as it comes together. It makes me imagine how similar my tub is at this point to what it was like on the Toyota factory paint line 36 years ago........all clean fresh and looking new! However, I know that having the EZ Liner on the floor of the tub will give so much better protection. I'll let the epoxy primer dry over night then mask off everything else but the floor so I can spray the EZ Liner on Friday morning. I think while the EZ Liner dries Friday, I will prime the frame and perhaps topcoat it if it dries well enough.

FJ40 Restoration 103.webp

FJ40 Restoration 102.webp

FJ40 Restoration 105.webp

FJ40 Restoration 108.webp

FJ40 Restoration 111.webp

FJ40 Restoration 103.webp


FJ40 Restoration 102.webp


FJ40 Restoration 105.webp


FJ40 Restoration 108.webp


FJ40 Restoration 111.webp
 
Last edited:
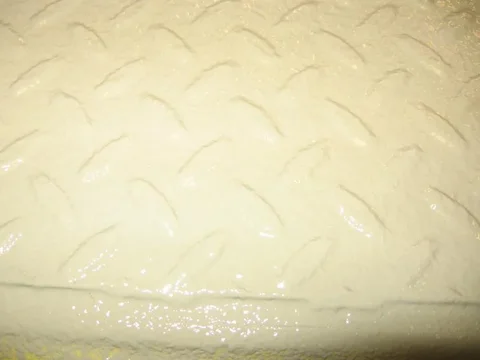
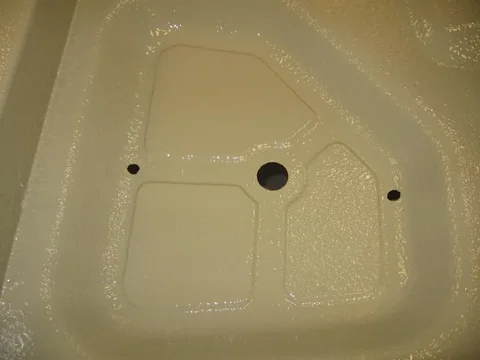
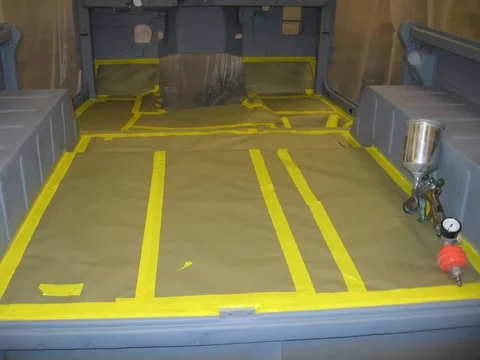
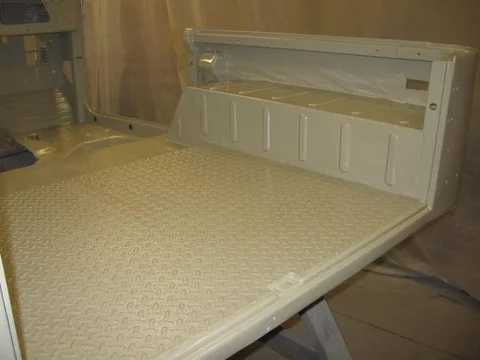
I taped off portions of the tub so I could shoot the tintable EZ Liner today. I have been looking at other build threads to see how much of the interior of the FJ40 tubs others have spraylined. I decided to just sprayline the floor and up the side of the wheelwells about 1/2 " inch so that all the seams along the edge of the floor would be spraylined as well. Three good coats of the tinted EZ Liner went on within an hour and it was tacking up a short time later. While the Liner was still tacky, I removed the tape and paper. I am really happy with how it turned out. :D

FJ40 Restoration 113.webp

FJ40 Restoration 114.webp

FJ40 Restoration 116.webp

FJ40 Restoration 118.webp

FJ40 Restoration 122.webp

FJ40 Restoration 113.webp


FJ40 Restoration 114.webp


FJ40 Restoration 116.webp


FJ40 Restoration 118.webp


FJ40 Restoration 122.webp
 
Once the tinted EZ Liner was dry on the tub floor, I began to mask it off to protect it from overspray as I continued prepping the tub for the topcoat.

FJ40 Restoration 121.webp

FJ40 Restoration 127.webp

FJ40 Restoration 133.webp

FJ40 Restoration 135.webp

FJ40 Restoration 140.webp

FJ40 Restoration 121.webp


FJ40 Restoration 127.webp


FJ40 Restoration 133.webp


FJ40 Restoration 135.webp


FJ40 Restoration 140.webp
 
After masking off the floor, I wet sanded a few drips I had in the epoxy primer. I then rewiped the tub and sprayed the PPG Surfacer/Sealer on to the tub. The Surfacer/Sealer dried quickly so I was able to use an Ultra Fine Scotchbrite pad to knock down the nibs and other dirt. Blew it off and recleaned it. I also found some time to get some more priming done on the frame. Woohoo!!

FJ40 Restoration 145.webp

FJ40 Restoration 150.webp

FJ40 Restoration 151.webp

FJ40 Restoration 153.webp

FJ40 Restoration 154.webp

FJ40 Restoration 145.webp


FJ40 Restoration 150.webp


FJ40 Restoration 151.webp


FJ40 Restoration 153.webp


FJ40 Restoration 154.webp
 
Last edited:
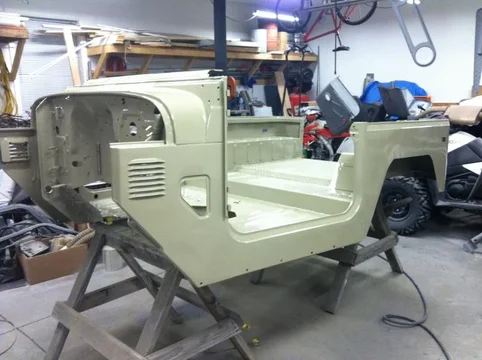
I like the PPG paints and have used them on several FJ40's in the past. I had decided to use my stock OEM color which is Dune Beige T416. I had a gallon mixed for me. My friend and coworker, Rocky, had offered to come over when I reached the point of painting the topcoat. I was at that point and he came over about 7:30 this evening and we began to mix paint. I tack clothed the tub one more time and Rocky began to apply the first topcoat under the dash. Rocky has an extensive auto body background and had owned his own auto body shop in the past. I learned a bunch of new things while he sprayed 4-5 coats of fresh Dune Beige onto the tub. His experience was quite evident as the paint layed down smoother and smoother with each coat. By the time he was done, the paint was nearly flawless. It had a near smooth finish with minimal orange peel and was about clear as glass. You would not think this was Single Stage paint. We were done by 11:00 oclock and cleaned the guns and other tools.
We removed the masking and I observed that the topcoat matched the tinted EZ Liner nearly perfectly! Great Choice! :cheers: :bounce:


FJ40 Restoration 155.webp

FJ40 Restoration 157.webp

FJ40 Restoration 159.webp

FJ40 Restoration 164.webp

FJ40 Restoration 162.webp

FJ40 Restoration 155.webp


FJ40 Restoration 157.webp


FJ40 Restoration 159.webp


FJ40 Restoration 164.webp


FJ40 Restoration 162.webp
 
Beautiful!
 
So I took down the "paint booth" as it may be a month or more until I get around to painting the fenders, hood and other body parts. I want to concentrate on finishing the frame along with several other chassis related parts. I just finished the primer coat on the frame tonight and will start on the topcoat tomorrow. My plan is to strip both axles, leaf springs, driveshafts, tie rods and anything else chassis related, clean them and then repaint everything. I want to get a clean fresh rolling chassis back together with all the parts looking as good as new before they get bolted on. I also want to reinstall the engine, tranny and t-case before I reset the tub back onto the chassis.
I had ordered a new front axle rebuild kit with new tie rod ends. I will repack the front wheel bearings while I am in there. Since I have a full floater rear axle, I might as well repack those bearings as well.
So, for the next several weeks or month or so, I'll let the tub sit while I focus on the chassis. I guess I better start making a list of the various little parts I will need for the reassembly such as brake line clamps, etc. as some of mine were perhaps too rusted. I would prefer to buy OEM if Toyota still produces them. Here are a few more pics of the tub as the paint continues to harden. :clap:

FJ40 Restoration 167.webp

FJ40 Restoration 169.webp

FJ40 Restoration 170.webp

FJ40 Restoration 168.webp

FJ40 Restoration 171.webp

FJ40 Restoration 167.webp


FJ40 Restoration 169.webp


FJ40 Restoration 170.webp


FJ40 Restoration 168.webp


FJ40 Restoration 171.webp
 
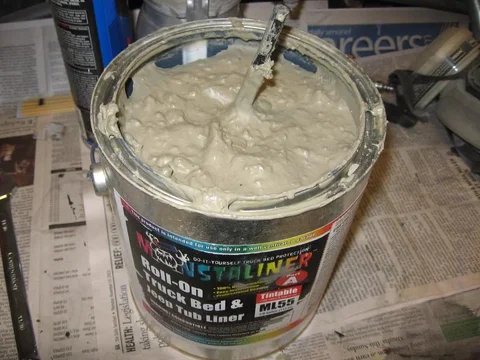
Here are a couple of pics of the "set-up" Monstaliner that I had mentioned earlier. I held on to the can just in case the company wanted it returned if they were considering refunding me. However, since they have not responded to my numerous contacts, I will now throw the can away. Just a reminder that not all businesses that advertise on "Mud" are reputable........lesson learned! You can see the "snapped" plastic paddle that Monstaliner sends in the kit.

FJ40 Restoration 172.webp

FJ40 Restoration 173.webp

FJ40 Restoration 172.webp


FJ40 Restoration 173.webp
 
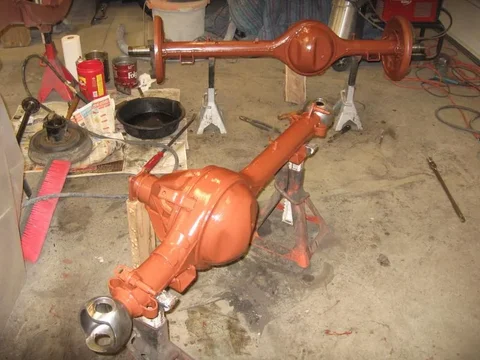
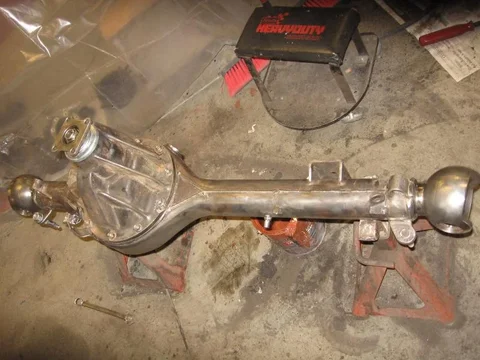
Decided to strip both axles today. Removed the springs, driveshafts, knuckles, drums and hubs. Used a wire wheel on a grinder to tackle the paint, dirt and grease to get it all down to bare metal. It was difficult to get into the nooks and crannies in the third member gussets. Switched to a paint scraper, flat screwdriver and hand held wire brush. Also, a liberal dousing of brake parts cleaner helped to loosen up the stingy stuff. The housings came out fairly clean and a good wiping down with laquer thinner had them ready for primer. After they dry overnite, I will topcoat them tomorrow with a semi-gloss oil based Rustoleum.
You sharp-eyed "Mudders" may have noticed that the rear axle housing looks a bit different than USA delivered 40's. It is actually a full-floater from New Zealand that I bought from Hugh at Safari Ltd several years ago. He had imported a bunch of Cruiser parts in a shipping container from overseas and this was one of the last two he had. He sold this one to me and kept the other for one of his rigs. When I bought it, the entire housing was a sky blue color. Don't why the PO had painted it that color but I had wire wheeled the blue off of it and repainted it black. I also expected to have to replace the wheel bearings but upon disasembly, the original KOYO bearings looked as good as new. Just repacked them, used new seals and put in new wheel cylinders and brake shoes. At the same time, I was looking into installing a Lock-Right into the rear axle. I was not sure if it would work in a full floater axle after asking around and checking several other sources, I still did not have a definitive answer. So, I called Lock-Right and spoke to one of their engineers and explained that I had a New Zealand full floater and wanted to install their Lock-Right and would it work/install just like in a semi-floater. The engineer actually told me he wasn't sure if it would work but thought that it should and asked me to call him back to let him know if it did work after I installed it. So, I went ahead and installed it and it works fine.


FJ40 Restoration 175.webp

FJ40 Restoration 198.webp

FJ40 Restoration 206.webp

FJ40 Restoration 207.webp

FJ40 Restoration 208.webp

FJ40 Restoration 175.webp


FJ40 Restoration 198.webp


FJ40 Restoration 206.webp


FJ40 Restoration 207.webp


FJ40 Restoration 208.webp
 
Damn, John. This is progress at warp speed in terms of frame off. Wish I'd had the time to be as thorough on the Pig. FYI, somewhere along the parts acquisition line I ended up with what I think is a new set of 40 rubber hood bumpers. Yours if you want 'em.
 
Thanks Jim. Yes, I would love to take those '40 series hood rest pads off your hands. Are you gonna make the next meeting?
All this restoration work keeps me out of the bars and strip clubs!!! LOL!!! I had read an article last year of a guy in California who did a similar resto but on a Toyota mini pick-up and he said he made a goal of trying to do something on his rig everyday even if it was small and not really time consuming. I have also read resto Threads from others who have taken anywhere from a year up to 15 years to do a frame off on a FJ40. That kind of scares me that my '40 could be in pieces for that long. My original plan is to have it back on the road by Springtime this year. I am still expecting that to happen. However, since I run a bikini top in the summer, I dont expect to have the hardtop and doors done until maybe next winter as I may wait and make that another winter project.
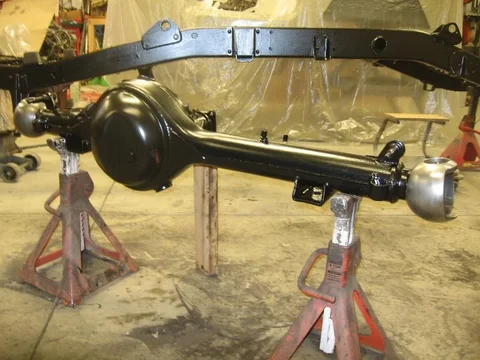
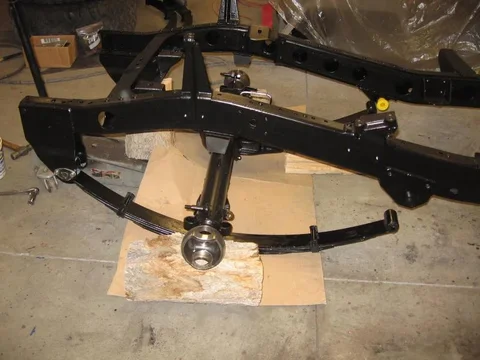
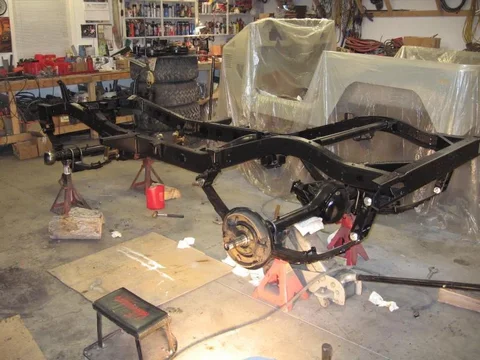
I topcoated the frame today and also both axles. Decided to use a semi gloss Rustoleum as I did not want the chassis too shiny. I like the satin look which is similar to a powdercoat look and I think the semi gloss gives that. I also wire wheeled all 4 spring packs as well as the tie and steering relay rods. I have the tie rod end clamps soaking in my solvent tank as well. All are in really good shape, just cleaning them up before fresh paint goes on. Would like to have the springs mounted back under the frame by next weekend and the axles as well. Some of that also depends on my Sandblaster taking care of a few smaller parts such as the front disc brake backing plates and the U-bolt plates as well. I will pick up new U-bolts for all 4 springs and I already have new black poly spring and frame bushings. Need to pick up wheel bearing seals for the full floater as well. Hopefully Hugh has them in stock.............


FJ40 Restoration 214.webp

FJ40 Restoration 213.webp

FJ40 Restoration 216.webp

FJ40 Restoration 217.webp

FJ40 Restoration 218.webp

FJ40 Restoration 214.webp


FJ40 Restoration 213.webp


FJ40 Restoration 216.webp


FJ40 Restoration 217.webp


FJ40 Restoration 218.webp
 
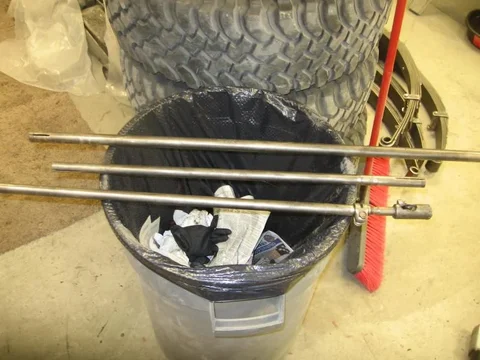
Cleaned up nearly all the front and rear axle parts parts with my solvent tank and wire wheel. Want to have them all ready for assembly next week. Primed and topcoated all 4 leaf spring packs as well as the 3 tie rods. I have a box of hubs, brake backing plates and a few other things ready to go the Sandblasters on Monday morning. While wire wheeling the tie rods, I noticed that Toyota had stamped an "L" on end of the tie rod and an "R" on the other end. Helpful during assembly since the threads are "left hand" on one end.

FJ40 Restoration 219.webp

FJ40 Restoration 224.webp

FJ40 Restoration 225.webp

FJ40 Restoration 219.webp


FJ40 Restoration 224.webp


FJ40 Restoration 225.webp
 
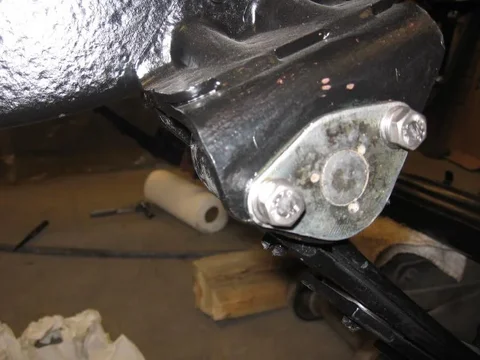
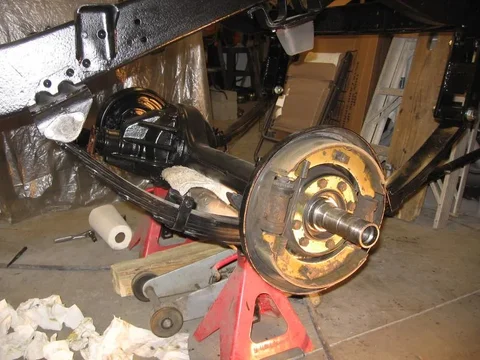
Started to drag the axles over to the frame and get them set under the frame in their proper position. Lubed up all my spring and frame bushings and attached the springs to the frame. Using all new poly bushings. Cleaned up and reused my front OEM spring pins as they were in great shape. Went with new shackles on the front as my OEM shackles broke during disassembly. I also had to cut off a few rusty and bent front u-bolts during disassembly. So, I had all new u-bolts bent up along with using new hardware.

FJ40 Restoration 227.webp

FJ40 Restoration 229.webp

FJ40 Restoration 230.webp

FJ40 Restoration 233.webp

FJ40 Restoration 234.webp

FJ40 Restoration 227.webp


FJ40 Restoration 229.webp


FJ40 Restoration 230.webp


FJ40 Restoration 233.webp


FJ40 Restoration 234.webp
 
Its nice to put together clean "fresh" parts instead of fighting rusty parts and hardware. I got a super great deal on stainless steel hardware for putting this 40 back together so just about everything will be stainless as I progress through the build.

FJ40 Restoration 248.webp

FJ40 Restoration 235.webp

FJ40 Restoration 231.webp

FJ40 Restoration 228.webp

FJ40 Restoration 248.webp


FJ40 Restoration 235.webp


FJ40 Restoration 231.webp


FJ40 Restoration 228.webp
 
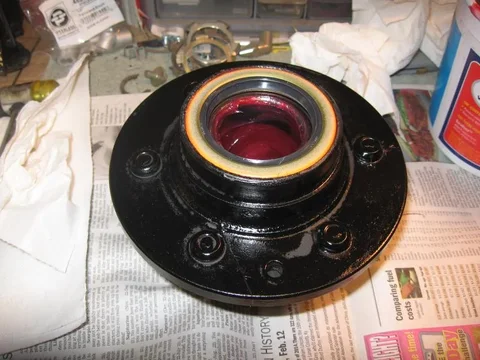
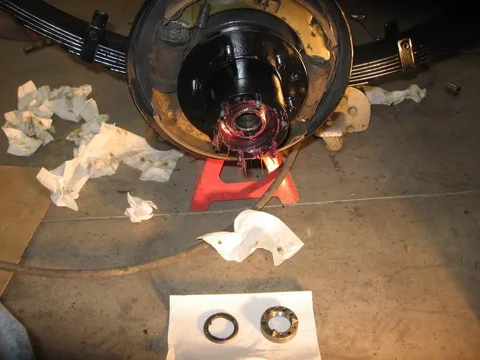
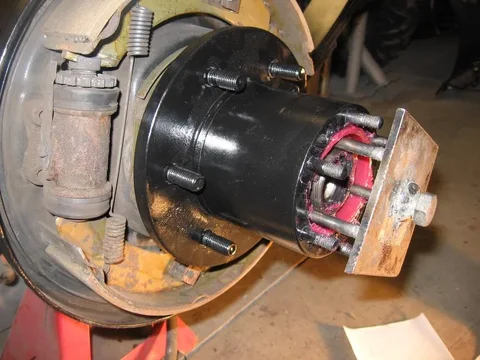
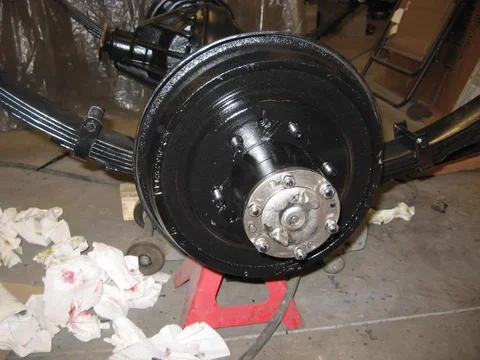
Here I am working on getting the drivers side rear full floater hub together. A fresh repacking of the OEM wheel bearings which still look and feel as good as new along with new seals. I had all 4 hubs from the axles sandblasted so I could start new with fresh paint and zero rust. The rear full floater hub uses the same wheel bearing seal as the front axle. You can see however, the locking nut is different than the front axle. It also uses 2 screws to lock the locking nut to the thrust washer inside next to the outer bearing. I torqued the wheel bearings to 43 ft lbs per my OEM chassis manual. My OEM manual also gives specs for rotational force measured in ft lbs and I used my fish scale to verify that it was also within factory specs. A fresh gasket under the large diameter full floater axle shaft with stainless hardware was used to secure it all. I found it funny that I had nearly all the gaskets and seals on hand in my spare parts supply and I did not have to buy much other than 2 outer axle seals from Safari Ltd.. Thanks Hugh for keeping those in stock!


FJ40 Restoration 236.webp

FJ40 Restoration 237.webp

FJ40 Restoration 238.webp

FJ40 Restoration 239.webp

FJ40 Restoration 244.webp

FJ40 Restoration 236.webp


FJ40 Restoration 237.webp


FJ40 Restoration 238.webp


FJ40 Restoration 239.webp


FJ40 Restoration 244.webp
 
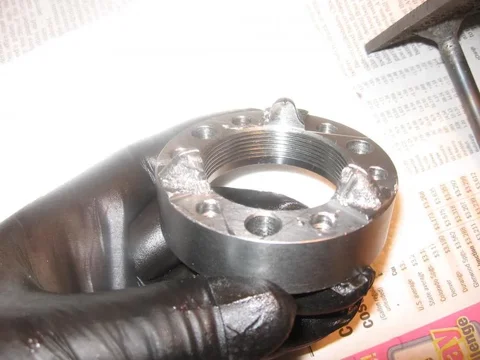
I took a pic of the locking nut to show the three raised nubs that have chisel marks all over them. I can only guess that the PO or his mechanic did not have the SST tool or something similar when they worked on this axle years ago in New Zealand. Since I never liked the chisel method for removing and installing locking nuts, I decided to make a simple and yet crude tool that is similar to the SST Toyota tool that is pictured in the OEM chassis manual but no longer available from Toyota. It works great.
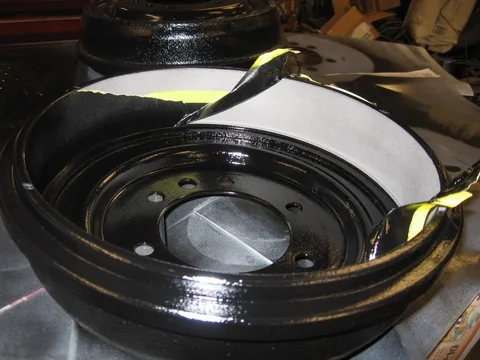
I also had the brake drums sandblasted inside and out. I taped off the brake friction surface prior to paint. Came out great.

FJ40 Restoration 241.webp

FJ40 Restoration 242.webp

FJ40 Restoration 243.webp

FJ40 Restoration 245.webp

FJ40 Restoration 247.webp

FJ40 Restoration 241.webp


FJ40 Restoration 242.webp


FJ40 Restoration 243.webp


FJ40 Restoration 245.webp


FJ40 Restoration 247.webp
 
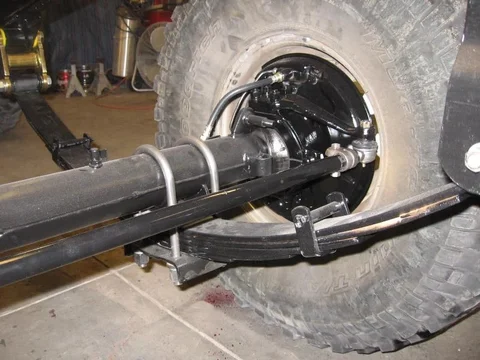
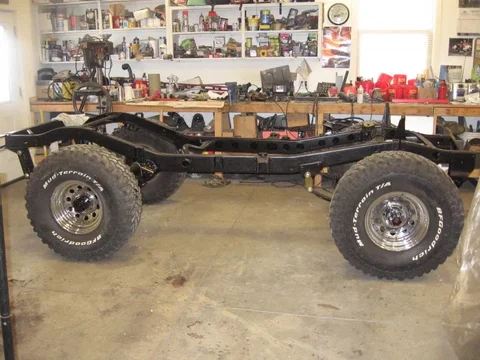
Finished up the hubs today. Put new tie rod ends on and mounted the tie rod up to the front end. I like to use anti-seize on the threads so that adjustment stays easy down the road. Had new rubber brake lines in my parts drawer and decided to use them. It is nice to finally get the tires back on after so long.

FJ40 Restoration 256.webp

FJ40 Restoration 250.webp

FJ40 Restoration 257.webp

FJ40 Restoration 253.webp

FJ40 Restoration 254.webp

FJ40 Restoration 256.webp


FJ40 Restoration 250.webp


FJ40 Restoration 257.webp


FJ40 Restoration 253.webp


FJ40 Restoration 254.webp
 
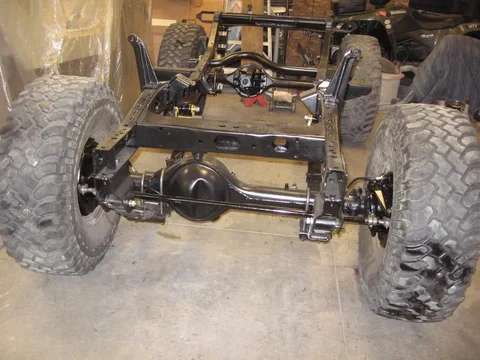
I wanted to have the tie rod attached so I could at least roll the chassis around the garage to get into the first bay so it was lined up with my drivetrain which was sitting on the engine hoist.

FJ40 Restoration 261.webp

FJ40 Restoration 262.webp

FJ40 Restoration 260.webp

FJ40 Restoration 258.webp

FJ40 Restoration 269.webp

FJ40 Restoration 261.webp


FJ40 Restoration 262.webp


FJ40 Restoration 260.webp


FJ40 Restoration 258.webp


FJ40 Restoration 269.webp
 
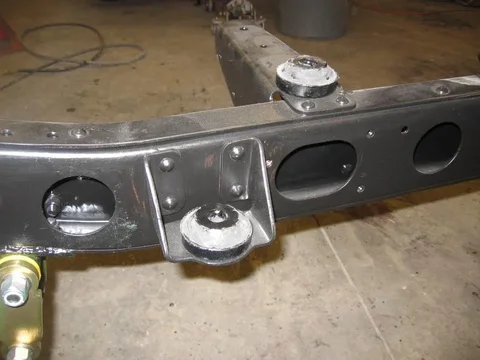
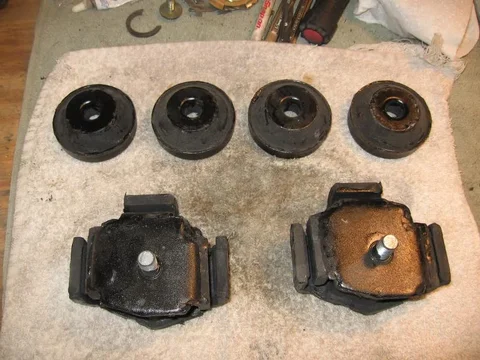
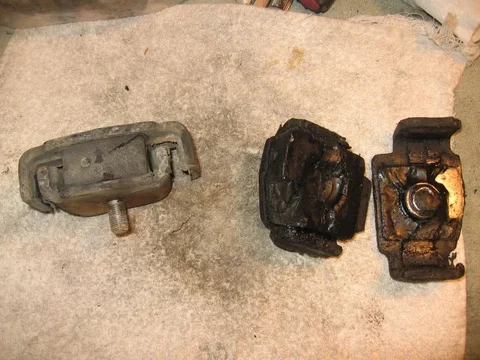
I bought new engine and tranny mounts as you can see my two original engine mounts were not in too good of shape. The driver's side mount was completely broken in half and you can see the passenger side had a tear in the rubber. My original tranny bolts were also a little too rusted to reuse so a couple of new Grade 8 bolts were purchased.

FJ40 Restoration 270.webp

FJ40 Restoration 271.webp

FJ40 Restoration 263.webp

FJ40 Restoration 264.webp

FJ40 Restoration 265.webp

FJ40 Restoration 270.webp


FJ40 Restoration 271.webp


FJ40 Restoration 263.webp


FJ40 Restoration 264.webp


FJ40 Restoration 265.webp
 

Users who are viewing this thread

Back
Top Bottom