- Thread starter
- #21
-
North American Clubhouses - East RegionCA.ON- SOTEC CA.ON- Upper Canada Land Cruisers CA.QC- Club TORQ CA.QC- Quebec Cruisers AL- DixieLand Cruisers AL- Hot South Cruisers FL- Florida Land Cruiser Association FL- Northwest Florida Toyota 4WD FL- Tampa Bay Land Cruiser Association GA- Pavement Pounders GA- Georgia Cruisers GA/FL/AL- Red Hills Land Cruiser Club GA- YOTA IL- Windy City Land Cruisers IN- Hoosier Cruisers IN- Indiana Land Cruisers KY- Kentucky Landcruiser MA/NH- Yankee Toys MI- Lake Michigan Land Cruisers MS- CottonLand Cruisers NC- Olde North State Cruisers NJ- Garden State Land Cruisers NY/CT/MA- FJNortheasters NY- Gotham City Land Cruisers OH- The Buckeye Birfield Syndicate PA- Keystone Cruisers PA- Steel City Land Cruiser Club SC- Palmetto State Land Cruiser Association SC- Upstate Cruisers SC- Swamp Fox Land Cruisers SC- Low Country Land Cruisers TN- Appalachia Cruisers TN- Bluff City Cruisers TN- STLCA VA- Bay to Blue Ridge Cruisers VA- COVA CRUISERS VA/DC/MD- Capital Land Cruiser Club VA/NC- Mid-Atlantic TLCA VA- Star City Land Cruisers VT/NH/MA/ME Acadian Overlanders WI- Land Cruiser Legends WV- Mountaineer Cruisers
-
North American Clubhouses - Central RegionCA.AB- Oil Country Cruisers CA.AB- Rocky Mountain Land Cruiser Association CA.AB- Toyota Ghost Wheelers AR- Razorback Land Cruisers AR/MO- Ozark Mountain Cruisers CO- BookCliff Cruisers CO- Colorado Land Cruisers CO- Derailed Cruisers CO- Rising Sun 4WD Club CO/WY- Horsetooth 4 Wheelers Cruiser Club IA- Tall Corn Cruisers KS/MO- Tornado Alley Cruisers LA- Bayou State Land Cruisers LA- Louisiana Land Krewesers MO- Gateway Cruisers MT- 406 Cruisers MT- Big Sky Cruisers NE- Flat Land Cruisers NM- High Desert Cruisers OK- Green Country Cruisers SD- Dakota Territory Cruisers TX- Alamo City Land Cruisers TX- Bayou City Land Cruisers TX- Lone Star Land Cruisers TX- Lone Star Land Cruisers - Austin Chapter TX- The White Trash of the Elwood Chapter TX- Toyota Trail Riders
-
North American Clubhouses - West RegionCA.BC- Coastal Cruisers CA.BC- Okanagan-Similkameen Land Cruisers CA.BC- Peace Canyon Toyota Swamp Donkeys CA.BC- Calgary Chapter: Swamp Donkeys
CA.BC- Vancouver Island Cruisers AZ- Copper State Cruisers CA- Beach-n-Toys CA- Central Coast Land Cruisers CA- Central Valley Crawlers CA- Gold Country Cruisers CA- Inland Empire Cruisers CA- L.A. County Trailcrew CA- Mountain Transit Authority CA- Pacific Mountain Cruisers CA- San Diego Cruisers CA - Santa Cruz Land Cruisers CA- SoCal 80's CA- Southern California Land Cruisers CA- Toyotally Awesome Cruisers HI- Hawaiian Island Land Cruisers ID- Treasure Valley Land Cruisers NV- Battle Born Cruisers of Northern Nevada NV- Southern Nevada Land Cruisers OR/CA- Jefferson State Cruisers OR- Cascade Cruisers OR- Central Oregon Cruisers OR- Portland Metro Cruisers UT- Red Rock Cruiser Club UT- Wasatch Cruisers WA- Central Washington Cruisers WA- North Sound Cruisers WA- South Sound Cruisers WA- Spokane Land Cruisers
Navigation
Install the app
How to install the app on iOS
Follow along with the video below to see how to install our site as a web app on your home screen.
Note: This feature may not be available in some browsers.
More options
Style variation
You are using an out of date browser. It may not display this or other websites correctly.
You should upgrade or use an alternative browser.
You should upgrade or use an alternative browser.
Fergytoy"s 1978 FJ40 frame off resto.
- Thread starter john657
- Start date
This site may earn a commission from merchant affiliate
links, including eBay, Amazon, Skimlinks, and others.
More options
Who Replied?- Thread starter
- #22
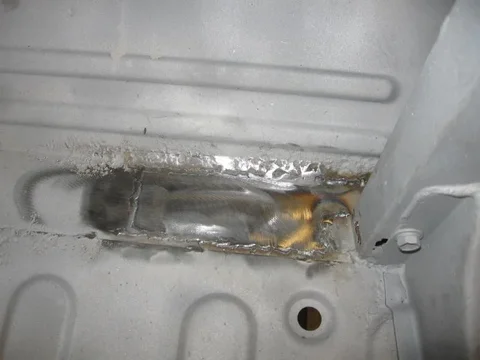
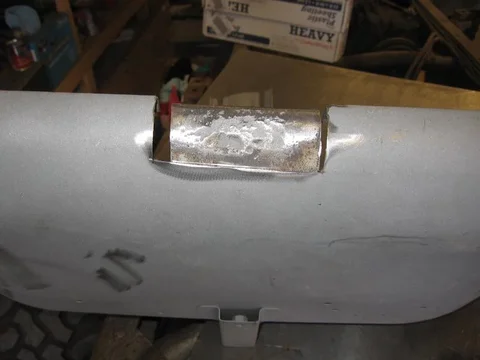
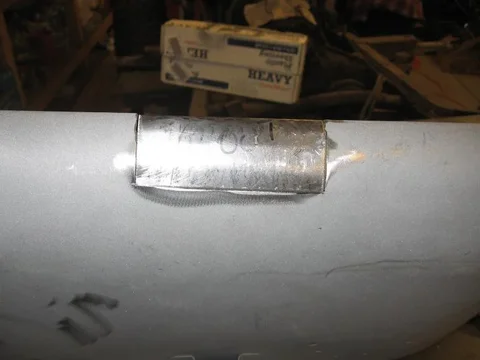
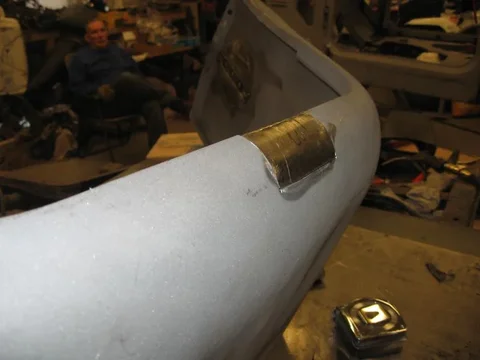
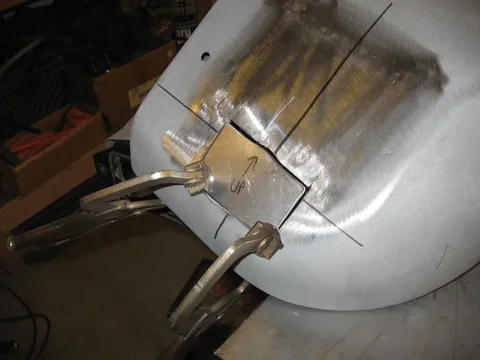
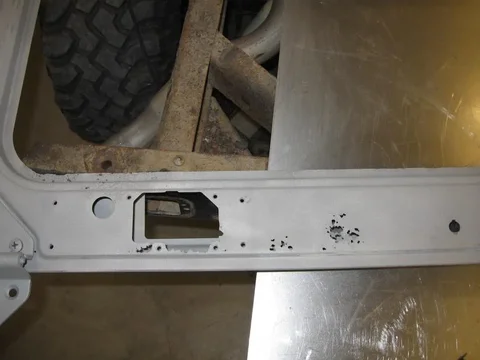
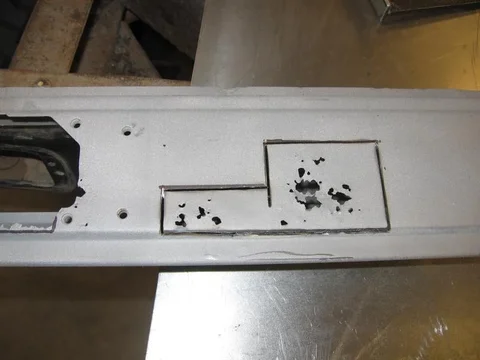
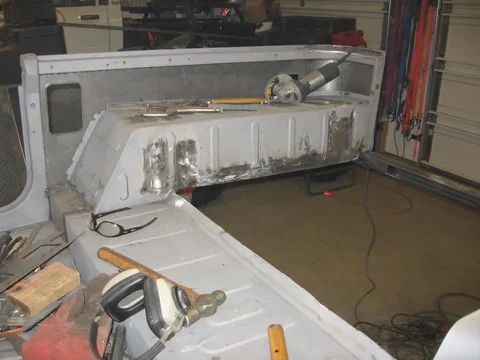
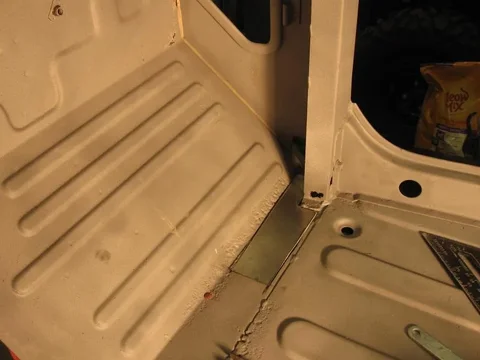
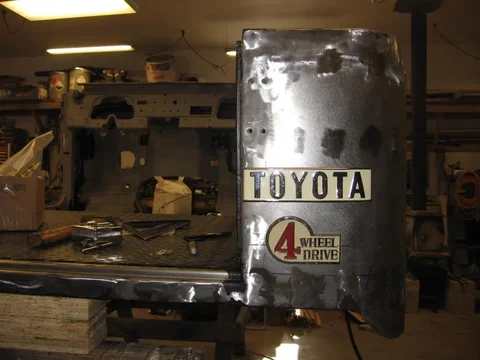
I was kicking around the idea of replacing the wheel well tops and sides or just patching them. Both wheel wells were in pretty good shape but had rust damage primarily where the supports are attached under the wheel wells. The rusted holes in the tops and sides of the wheel wells in these pics show this. I decided to just patch the rust damage with fresh 18 gauge steel.





- Thread starter
- #23
- Thread starter
- #24
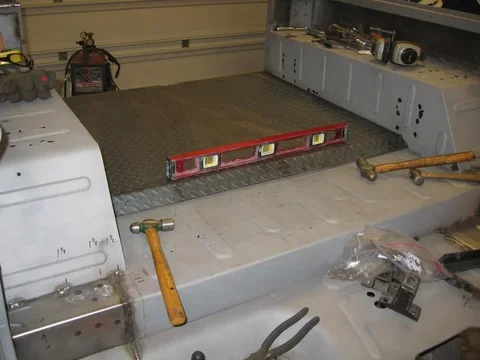
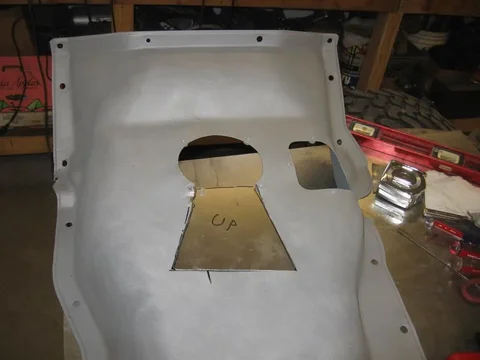
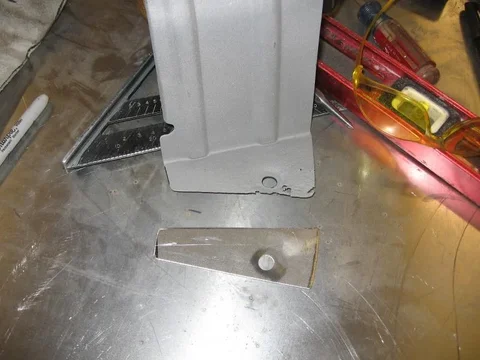
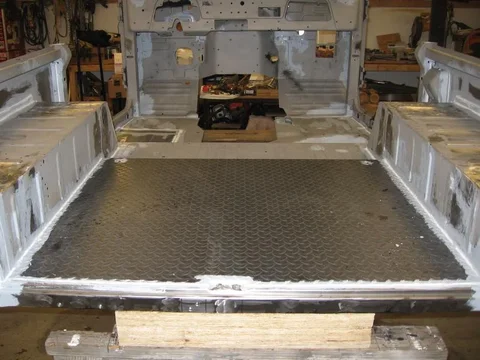
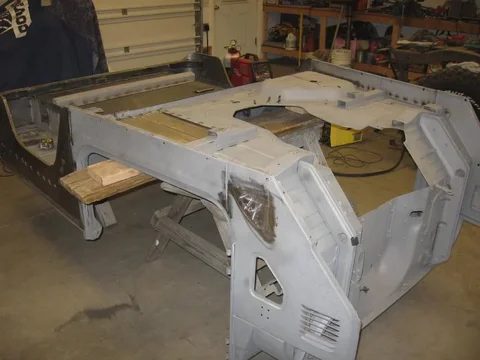
I had a new under bed support bent up to my specs by my local steel yard to replace the rusted out OEM support. Oddly enough, I found the other under bed support to be in suprisingly good shape. I was able to cut it away from the rusted OEM bed and have it sandblasted clean. No patching needed at all with it. Since it has an angled edge to it that rests against the top edge of the frame, I was not comfortable welding it to the bottom of the bed without verifying that it was in the correct location. With some help, I re-set the tub back onto the chassis and positioned the angled OEM bed support between the frame and the bed. Once it was in the correct position, I tacked it into place. It was later welded in completely after the tub was flipped back over.
Nothing like the look of real steel and knowing that the tub is 100% steel again and all the rust is gone.




Nothing like the look of real steel and knowing that the tub is 100% steel again and all the rust is gone.


- Thread starter
- #25
Since initially removing the OEM wheel well supports, I had been thinking how to repair/replace or fabricate a new and modified wheel well support to negate or at least minimize future rust problems that are all too common with the OEM supports. I decided to have my local steel yard bend up (4) 10 gauge supports with a 90 degree bend as replacements. I would still spot weld them onto the under side of the wheel wells but I also coated the backside of the supports as well as the underside of the wheel wells with POR-15. I intend to seal/caulk the edges of these new supports prior to paint to eliminate any chance of water gaining entry behind the supports. 10mm nuts were welded onto the supports as well for the factory roll bar to bolt up.


- Thread starter
- #26
Flipped the tub back upright. Figured I had better set the hardtop onto the tub since doing so much sheet metal repair and fabrication to the tub. Just wanted to be sure that the hardtop would still sit and fit properly. In these pics you can also see the POR-15 that I had brushed into all the seams. I also brushed a self-etching primer onto the top of the POR-15 so that the epoxy primer I would spray on later would stick.




- Thread starter
- #27
- Thread starter
- #28
- Thread starter
- #29
- Thread starter
- #30
- Thread starter
- #31
- Thread starter
- #32
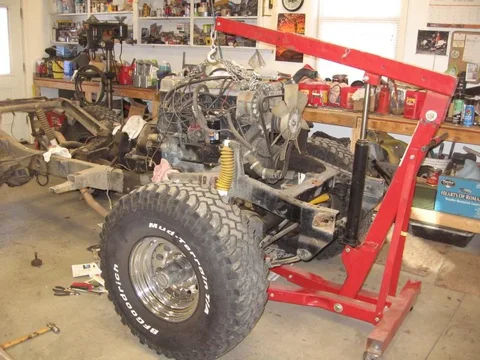
Well, I was still waiting on some more POR-15 self etching primer to arrive which was keeping me from finishing up the tub. So, I decided to turn my attention to the chassis. I rolled my chassis away from the pile of scrap OEM sheet metal I had removed from the tub along with a few other scraps. I took a pic to show how much was removed of which I had to replace on the tub.
I was planning on having the frame sandblasted clean before I primed and painted it. It took me about 1 1/2 hours to have the engine, tranny and t. case out with my engine hoist. Another hour and the axles/springs were unattached along with the steering linkage, brake lines and fuel lines. I ended up dragging the frame out of the garage and loading it into my utility trailer by myself as help was unavailable at the time. I dropped it off at my Sandblasters who said he would have it done early next week. I also plan on cleaning up the axles, springs, driveshafts amongst other items and paint them as well. I want everything looking new and well sealed as I put it all back together.
The POR-15 self etching primer arrived via Fed Ex just after I dropped the frame at the Sandblaster's. So, after changing the oil in my Tundra, I finished priming the underside of the tub and then finished caulking it. The tub is now ready to be epoxy primed and painted. After looking at numerous other builds here on 'Mud, I decided on buying and using tintable Monsterliner to spray the underside of my tub as well as the inside of the tub. I purchased 12oz. of pure pigmented paint in my OEM color code, T416 Dune Beige. This is to mix into the Monsterliner prior to spraying the underside of the tub. I plan on spraying the underside of the tub next week. Will post new pics when I am done.


I wish I could move through a project this quickly. Looks great so far.
- Thread starter
- #34
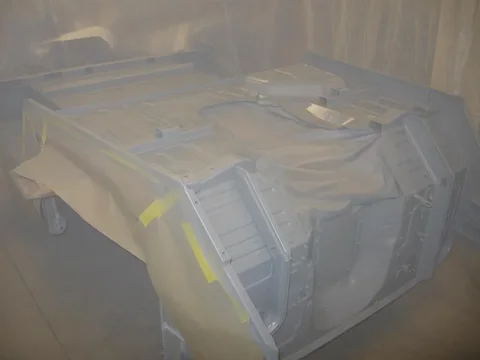
Pua came over last Saturday and helped me build the "paint booth". Got the tub set up in the booth and wiped it down with wax and grease remover. Taped off the sides of the tub and began to mix the epoxy primer. Shot it and liked the way the primer layed down on the tub.
The primer is able to be top-coated within 30 minutes so I began to mix the Monsterliner. Color came out great while mixing it in the can but the mixture hardened up very quickly in the can as soon as I added the Acetone. It became like clay while in the can almost immediately. Re-read the directions and I had followed it to a T. Called and emailed Monsterliner's Tech. dept and I am awaiting a response from them. I don't think I did anything wrong mixing it. Wondering if it was a defective mixture they sent me. Anxious for a remedy as I want to get this "lined" ASAP so I can flip the tub upright and move on with the bondo and painting the top side. So, at a standstill for now..................




The primer is able to be top-coated within 30 minutes so I began to mix the Monsterliner. Color came out great while mixing it in the can but the mixture hardened up very quickly in the can as soon as I added the Acetone. It became like clay while in the can almost immediately. Re-read the directions and I had followed it to a T. Called and emailed Monsterliner's Tech. dept and I am awaiting a response from them. I don't think I did anything wrong mixing it. Wondering if it was a defective mixture they sent me. Anxious for a remedy as I want to get this "lined" ASAP so I can flip the tub upright and move on with the bondo and painting the top side. So, at a standstill for now..................


- Thread starter
- #35
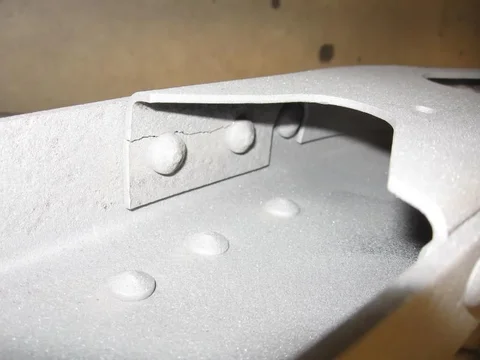
Picked up my freshly sandblasted frame from my Sandblaster today. Pretty quick turnaround. I noticed two cracks on the frame. They are both in the same identical location on opposing frame rails. The rivet locations may have something to do with it. I have not heard of frame cracks in these locations with an FJ40. Anyone out there experience the same problem or have heard of it? I will just weld the cracks closed.
I positioned the frame in the garage and up on jackstands so I can move around it to prime and paint it.
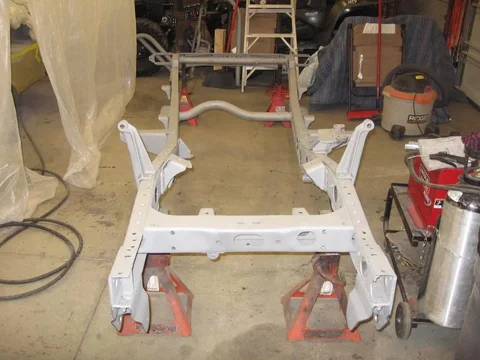




I positioned the frame in the garage and up on jackstands so I can move around it to prime and paint it.


- Thread starter
- #36
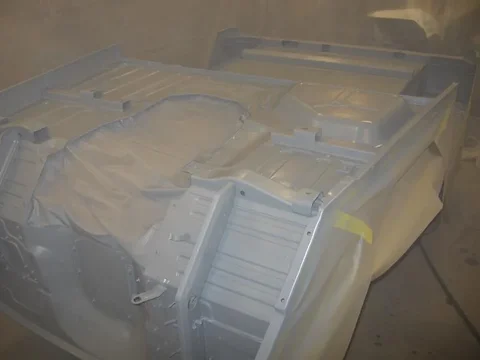
A couple of more pics of the primed underside of the tub ready for topcoating. The Monsterliner did not work out and repeated calls and emails to Monsterliner were not returned leaving me with the impression that customer service is non-existent. So, I would advise anyone looking at using the Monsterliner product, to look elsewhere as you may experience the same problem I had with no reputable customer service to assist in providing any sort of remedy with their product. Even the company President did not return my call or email.
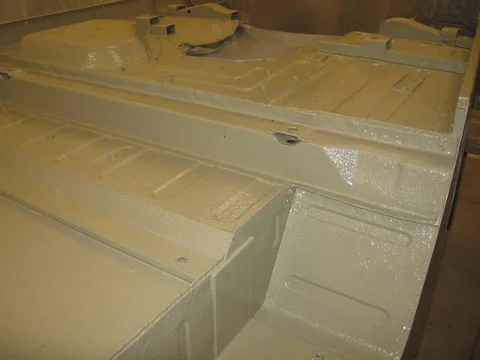
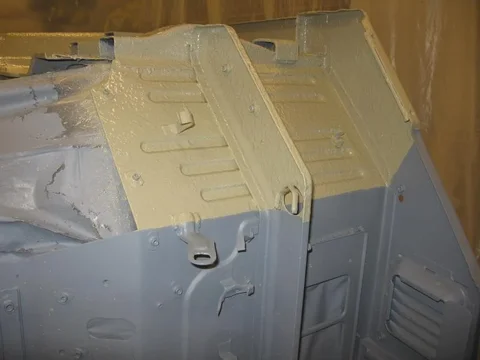
So, I checked my local and favorite paint shop in Grand Junction and discovered that they carried the EZ Liner tintable and sprayable bedliner product made by Simmons Industries. I purchased a gallon of it along with 8 oz. of T416 Dune Beige to tint it. All at a very reasonable price. Upon returning home, I prepared to shoot the EZ Liner onto the underside of the tub as I was still within the 7-10 days "flash" window of the PPG primer. The EZ Liner tinted very nicely with the T416. It was a nice consistency but I had to thin it a bit with Acetone as it was still a bit too thick to shoot properly even with the Schutz gun. Two moderately thick coats went onto the tub and laid down nicely. The texture was very good and not the sand or tire shards that other liners have. I decided to tape off the upper portion of the firewall to keep the upper portion for smooth topcoat only. Within an hour after shooting it, it was tacking up already. After a few days of drying, I'll flip the tub upright and begin the body work on the exterior. I am planning on using the EZ Liner on the interior floor and wheelwells of the tub as well for added scratch resistance and protection. I am planning to shoot it next week as well as priming and painting the frame.


So, I checked my local and favorite paint shop in Grand Junction and discovered that they carried the EZ Liner tintable and sprayable bedliner product made by Simmons Industries. I purchased a gallon of it along with 8 oz. of T416 Dune Beige to tint it. All at a very reasonable price. Upon returning home, I prepared to shoot the EZ Liner onto the underside of the tub as I was still within the 7-10 days "flash" window of the PPG primer. The EZ Liner tinted very nicely with the T416. It was a nice consistency but I had to thin it a bit with Acetone as it was still a bit too thick to shoot properly even with the Schutz gun. Two moderately thick coats went onto the tub and laid down nicely. The texture was very good and not the sand or tire shards that other liners have. I decided to tape off the upper portion of the firewall to keep the upper portion for smooth topcoat only. Within an hour after shooting it, it was tacking up already. After a few days of drying, I'll flip the tub upright and begin the body work on the exterior. I am planning on using the EZ Liner on the interior floor and wheelwells of the tub as well for added scratch resistance and protection. I am planning to shoot it next week as well as priming and painting the frame.


- Thread starter
- #37
- Thread starter
- #38
- Thread starter
- #39
Just finished sanding the last of the filler on the exterior of the tub. I got wrapped up in the debate of whether or not to use filler prior to epoxy primer or after epoxy primer. Most of the old timer body guys say to fill before primer and the younger body guys say to fill after a good coat of epoxy primer. I decided to fill prior to primer as I expect it will adhere to the bare metal better than after primer.
I did not have a whole lot to fill as I had replaced enough body panels that the need for filler was minimal overall with the new straight panels. I did follow a buddy's recommendation to use the Duraglass type of fiberglass infused filler on the tub where I had butt-welded panels to eliminate flex and cracking. I then topcoated it with Evercoat lightweight filler. Its all nice and smooth now. I caulked the exterior seams tonite as well and will begin the final prep on Thursday morning before I shoot a couple of coats of epoxy primer on the rest of the tub Thursday. I'll shoot the tinted EZ Liner on Friday morning then wet sand the rest of the tub Saturday morning in prep for topcoating Saturday afternoon.
Somewhere in there I will work on the frame. I have 1 broken front fender mounting bolt to remove and then begin to prime and topcoat the frame. Just trying to keep all facets of the restoration moving forward to get it back on the road sooner than later.
- Thread starter
- #40
Users who are viewing this thread
Total: 1 (members: 0, guests: 1)


