Hello all,
I recently purchased a 2013 LC and have been loving everything about it except one thing - headlight performance. Having done projector retrofits on every single car I've owned, I guess you can say I am spoiled by bright output and crisp cutoff. The LC output just did not cut it for me and I needed to do something about it, so I did a bit of researching and there are recommendations on bulb upgrades that could potentially help, but I knew that is not enough because OEM projector lenses have what you call "fresnel" lenses (great article on fresnel lens can be found here).
In short, fresnel lens soften output and cutoff - what you really want is a clear lens and this can be achieved by either swapping the lens on your projector or upgrading your projector altogether, upgrading projector is preferred cause most aftermarket projectors are bi-xenon (more on that later). My true end goal is to be able to swap the stock headlight projector and keep everything looking OEM as possible, an OEM+ upgrade if you will. This led me to a deep rabbit hole trying to research what options I had and trying to figure out what projector I could swap and still retain headlight leveling feature.
With so many unknowns, I decided to order a broken OEM headlight from eBay to take it apart to really understand how the internals looked and how everything is put together. During the process I had realized that the OEM headlight projector is the super common RX350 projector, this projector is used across several Toyota/Lexus vehicles. This realization is HUGE as this will make everything much easier. In addition, I remember seeing a lot of buzz on how well RX350 projector performance is when they are "tuned"
So how does having a RX350 projector stock make this easy? Well, you can buy bi-xenon RX350 projectors, swap the lens on them, tune them and you will have magnificent output all while having to do zero modification as everything will fit like original. Bi-xenon means the projector has high beams aswell, so this means if these are swapped into the LC you will have stock high beams plus the new bi-xenon high beams = quad (high) beam!
Let's get started and dive into pics and the meat of this project (bear with me as this is my first DIY post), also I am not responsible for any damage that may occur, perform these modifications at your own risk.
What you will need:
Important note: I had mentioned earlier about tuning the RX350 projectors, what this means is there are ways to optimize clarity and color when you swap the lens. This is out of my wheelhouse so once I received the new projectors, I sent them to LightWerkz and had them swap the lens and perform the necessary fine tuning it needed.
First step is to remove your bumper, I will not cover this as there are other threads/videos that cover this subject. Fairly straightforward, just take your time and be patient. Once bumper is removed there are four bolts holding the headlight assembly and two electrical connections to unplug:

With headlight removed, I then removed the ballast by unplugging the connector and turning the ballast, it will come undone and then remove the igniter that is on the bulb.

You will be left with something like this, there will be 9 screws to remove from back of the housing that run along the edge and a plastic shield that is near the ballast. I've circled a few of the locations in red, but make sure to remove them all. I did not remove wiring harness t or remove any bulbs before putting it in the oven, the temperature is so low that it will not cause any melting or damage.

Once you've removed the 9 screws, ballast and plastic shield the headlights are now oven ready. You can do hot and fast or low and slow for oven temp/time, I decided to do low and slow. It also helps to have BBQ gloves that can withstand heat, removing these from oven bare handed is not advised plus wearing the gloves allow you to work with the headlight and butyl while its nice and hot making splitting it open easier.
Adjust rack in oven and position headlight so it doesn't touch the sides to avoid melting, I believe mine touched a little but that is the reason I did low n slow heat as the heat is not enough to melt.
Low n slow: 190F for 15 minutes
Hot n fast: 275F for 8 minutes
I couldn't capture any pictures of the process of splitting the headlight open, but take the headlight pry tool or flathead and pry the tabs up at the bottom of the headlight. Starting at the bottom of the headlight take the headlight splitter pliers and work them open, having two allows you to simulatenousley move around the headlight, good video to watch here. As you split the lens, the butyl will be stringy, take caution to not get the butyl on any of the components inside because it is a PITA to remove when it dries.
Once opened we can remove the OEM shroud that is on the projector, three tabs that hold it onto place and taking a pry tool you can push the tabs in to release the shroud:


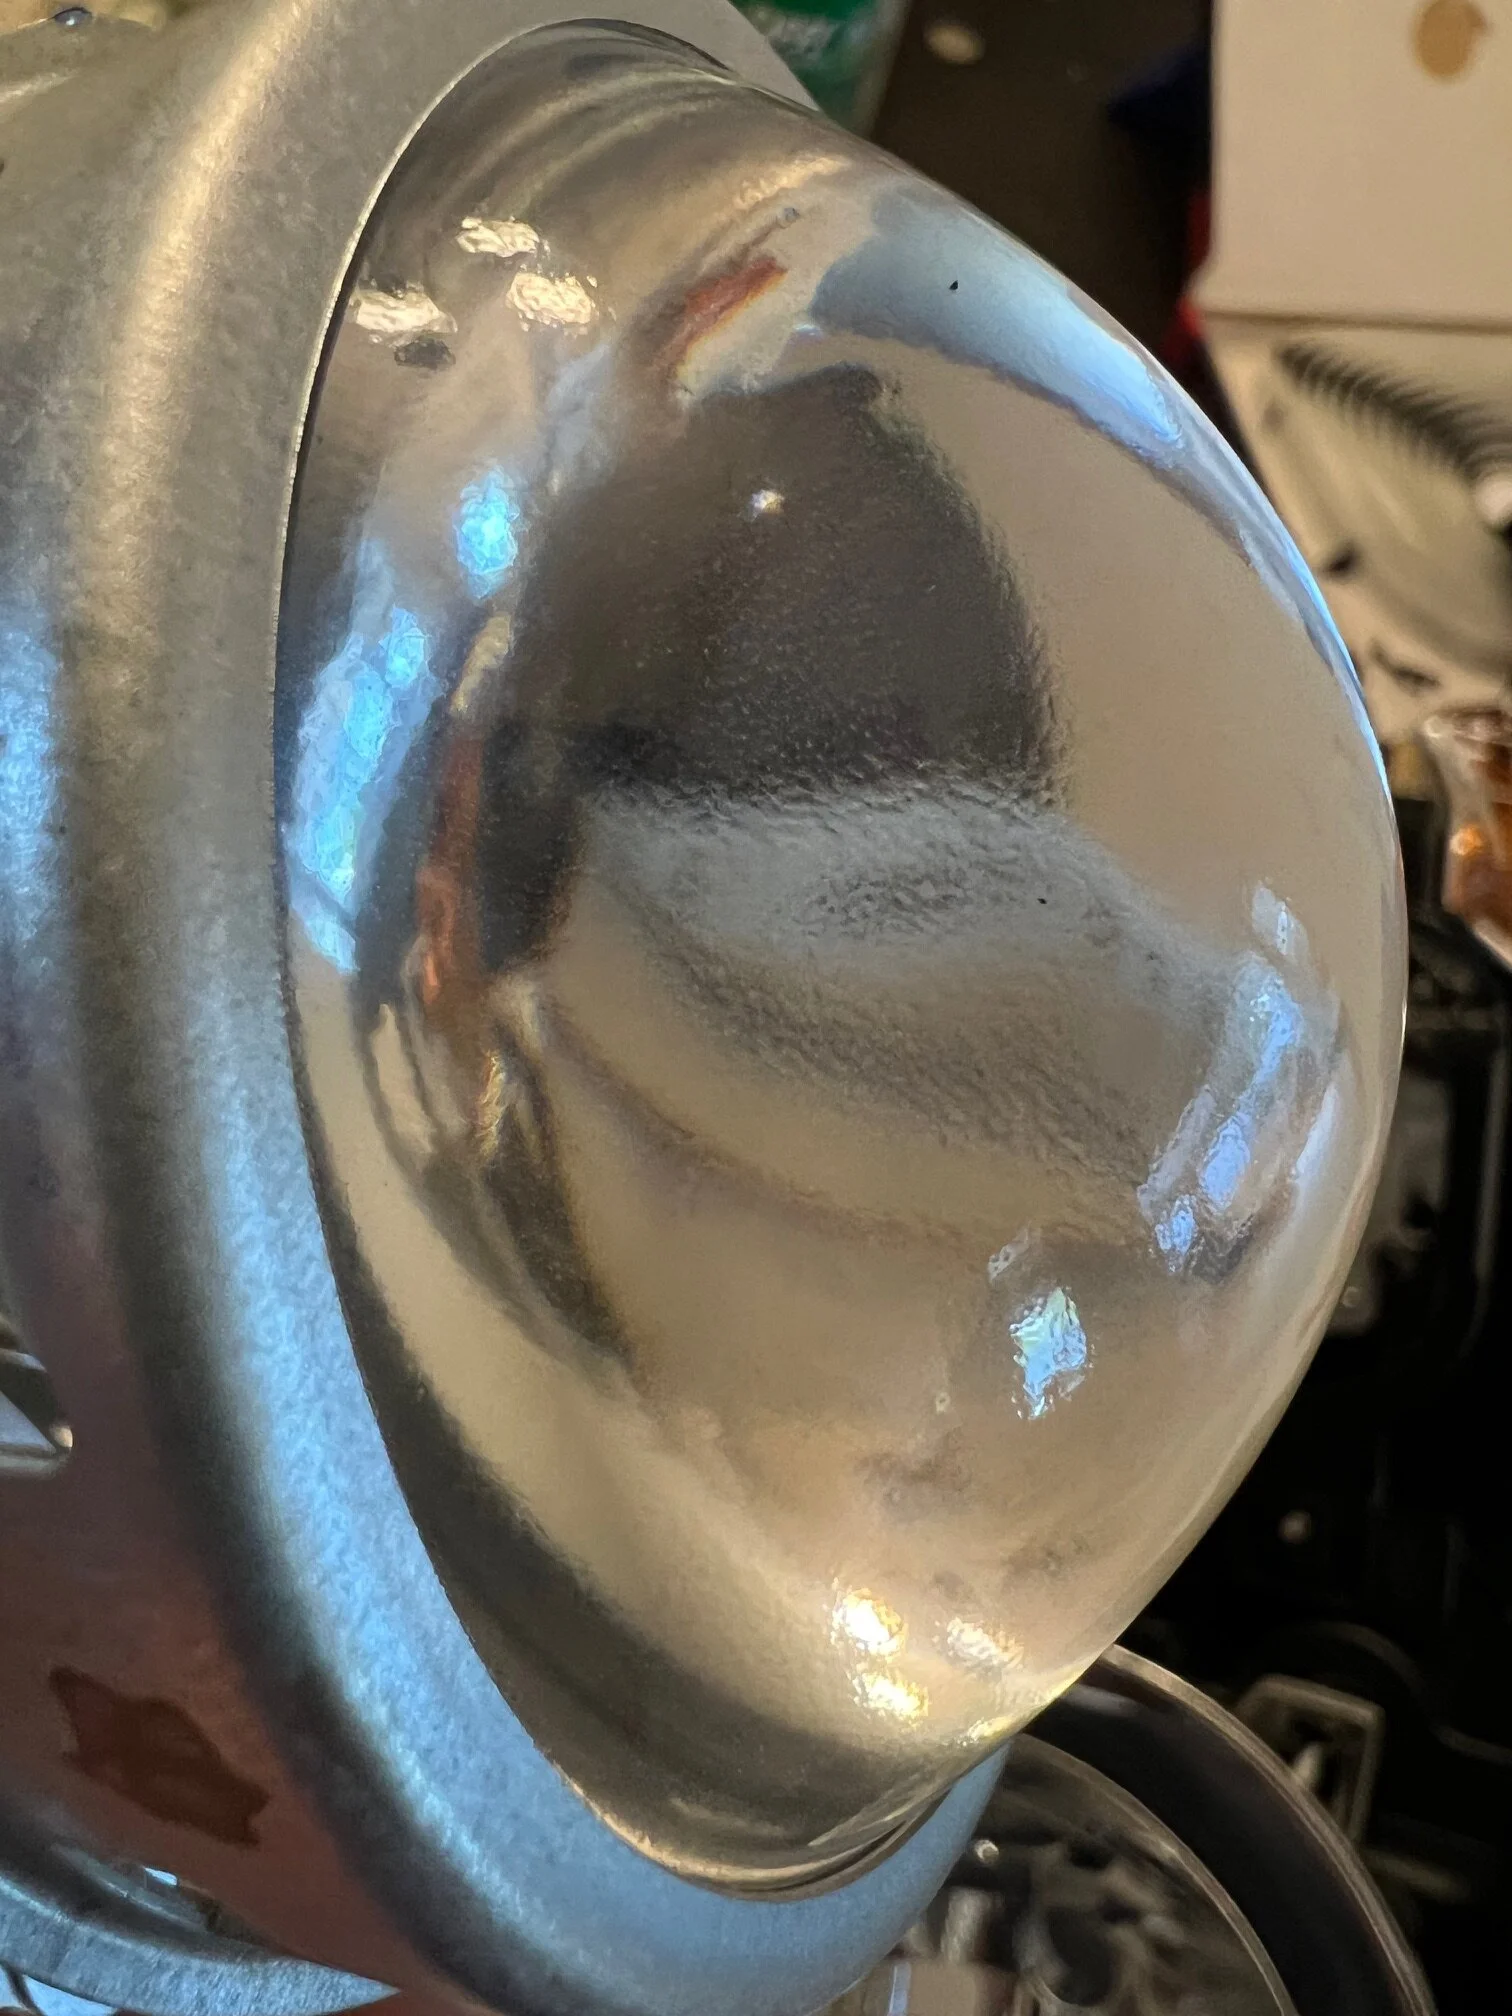
With the shroud removed lets take a second and examine the OEM lens, very orange peel-esque:
Now we can work on removing the OEM projector, the OEM projector is too large to come out in one piece from the back opening, you will need to disassemble the projector by removing these four screws:
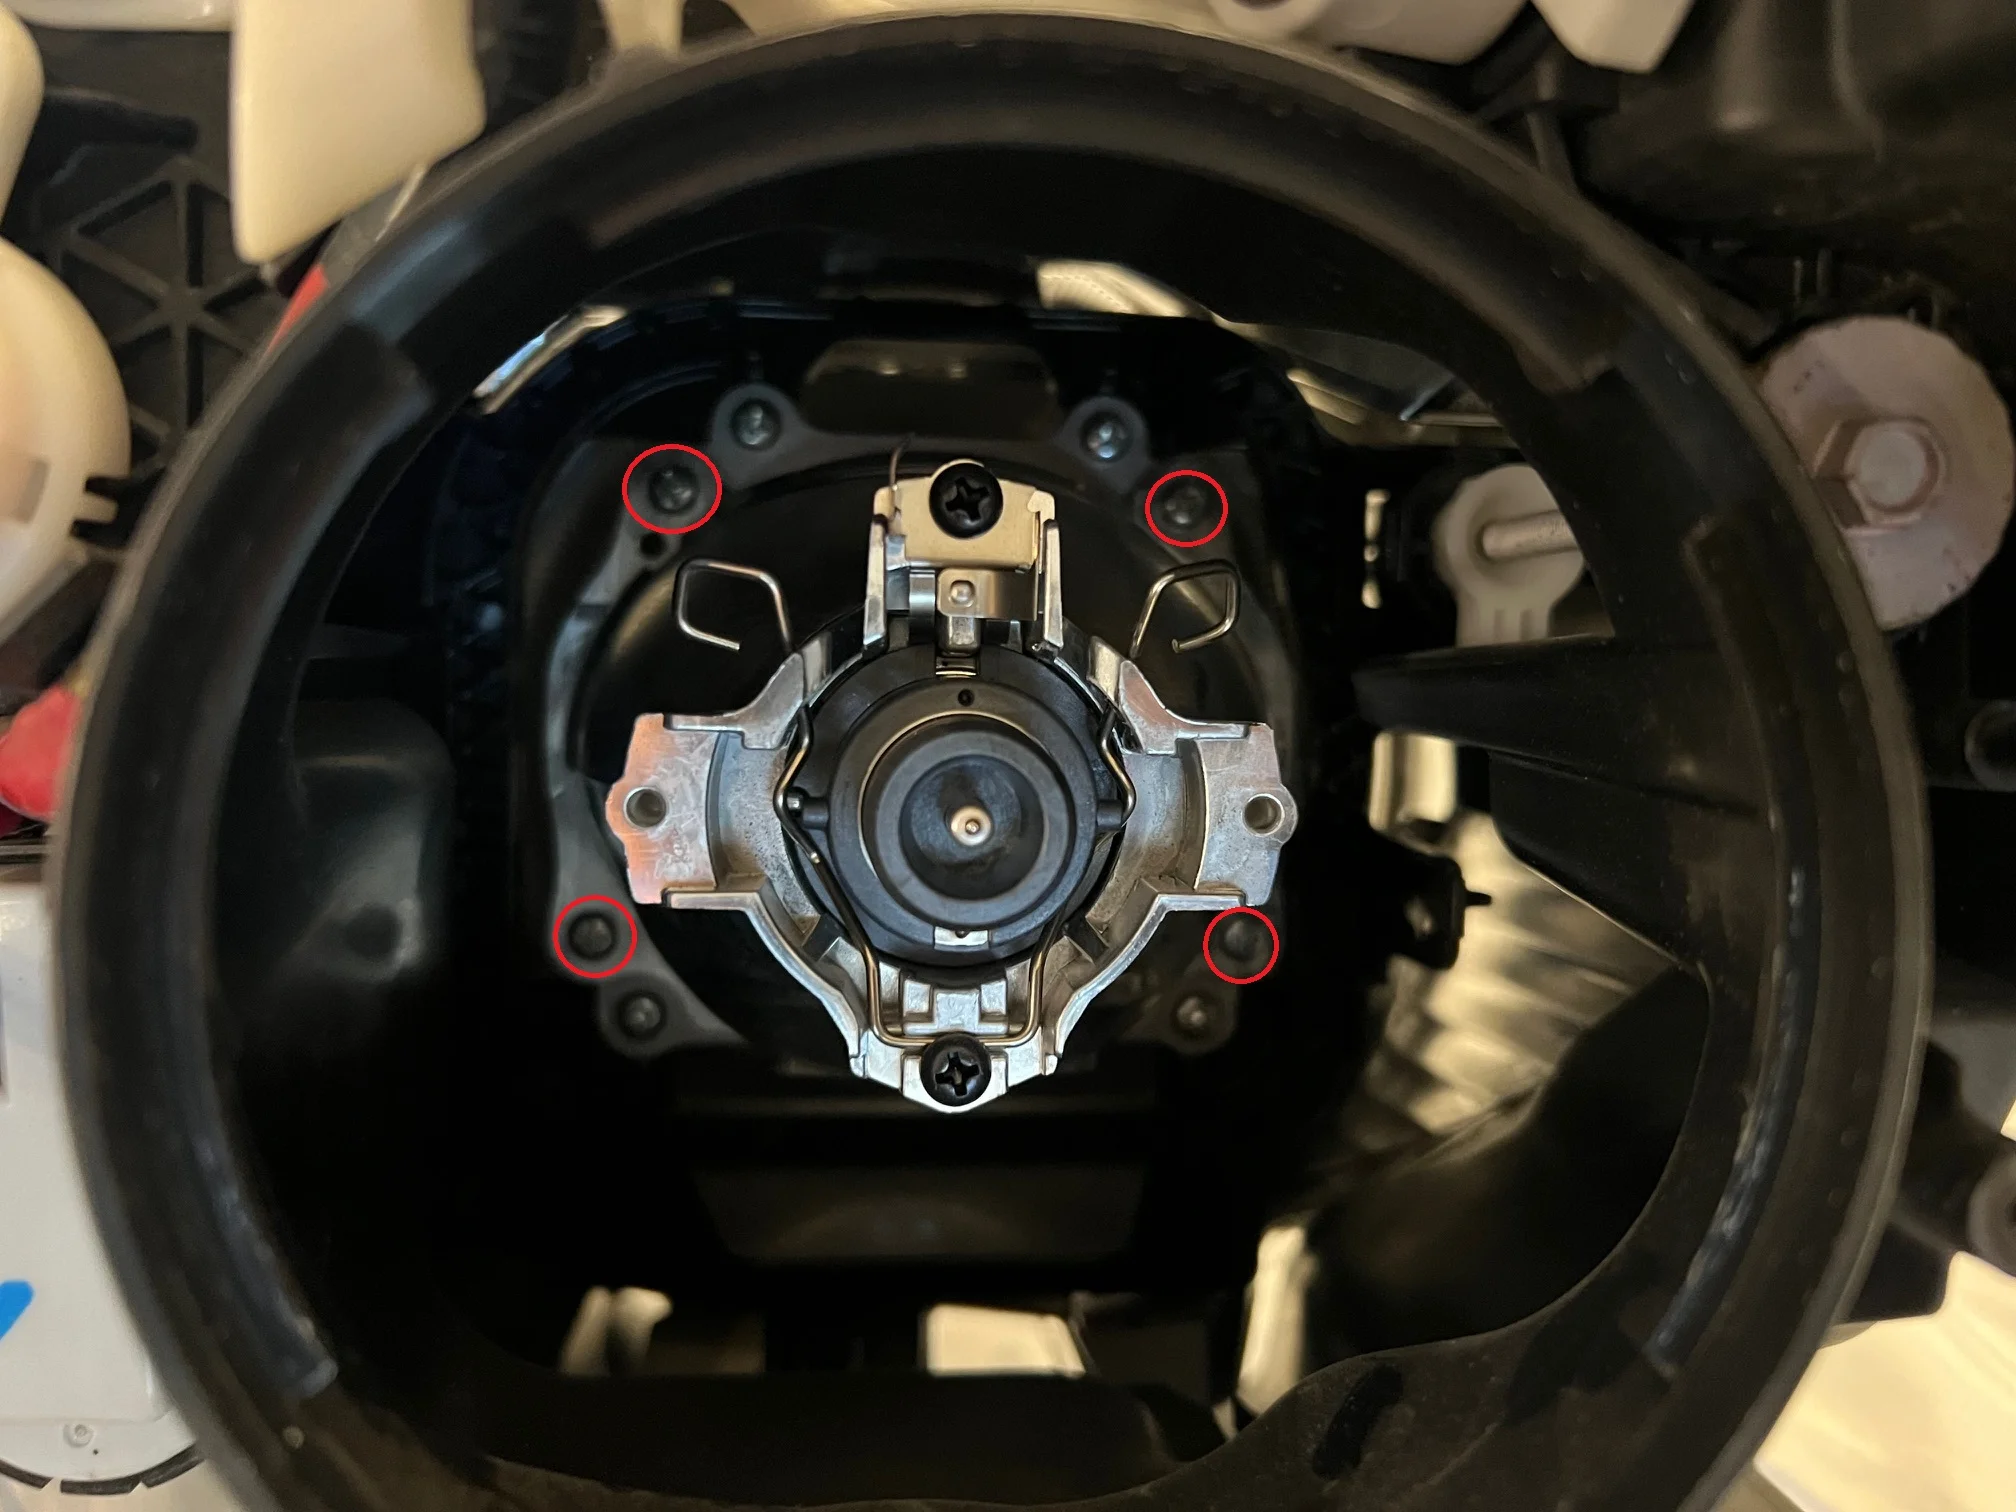
When removed, the bowl of the projector can be pulled out of the back opening, might need to angle it, but should come out easily. Be sure to hold onto the front lens when removing the four screws, it will fall off from the front of the headlight once the screws are removed. You will then be left the cutoff shield, this piece is what actually holds the projector into the housing. Remove the four screws that are not circled in red in above picture, the shield will come out from back opening at an angle.
Basically the OEM projector is composed of three parts:
Lens holder unit
Middle cutoff shield
Bowl that holds bulb

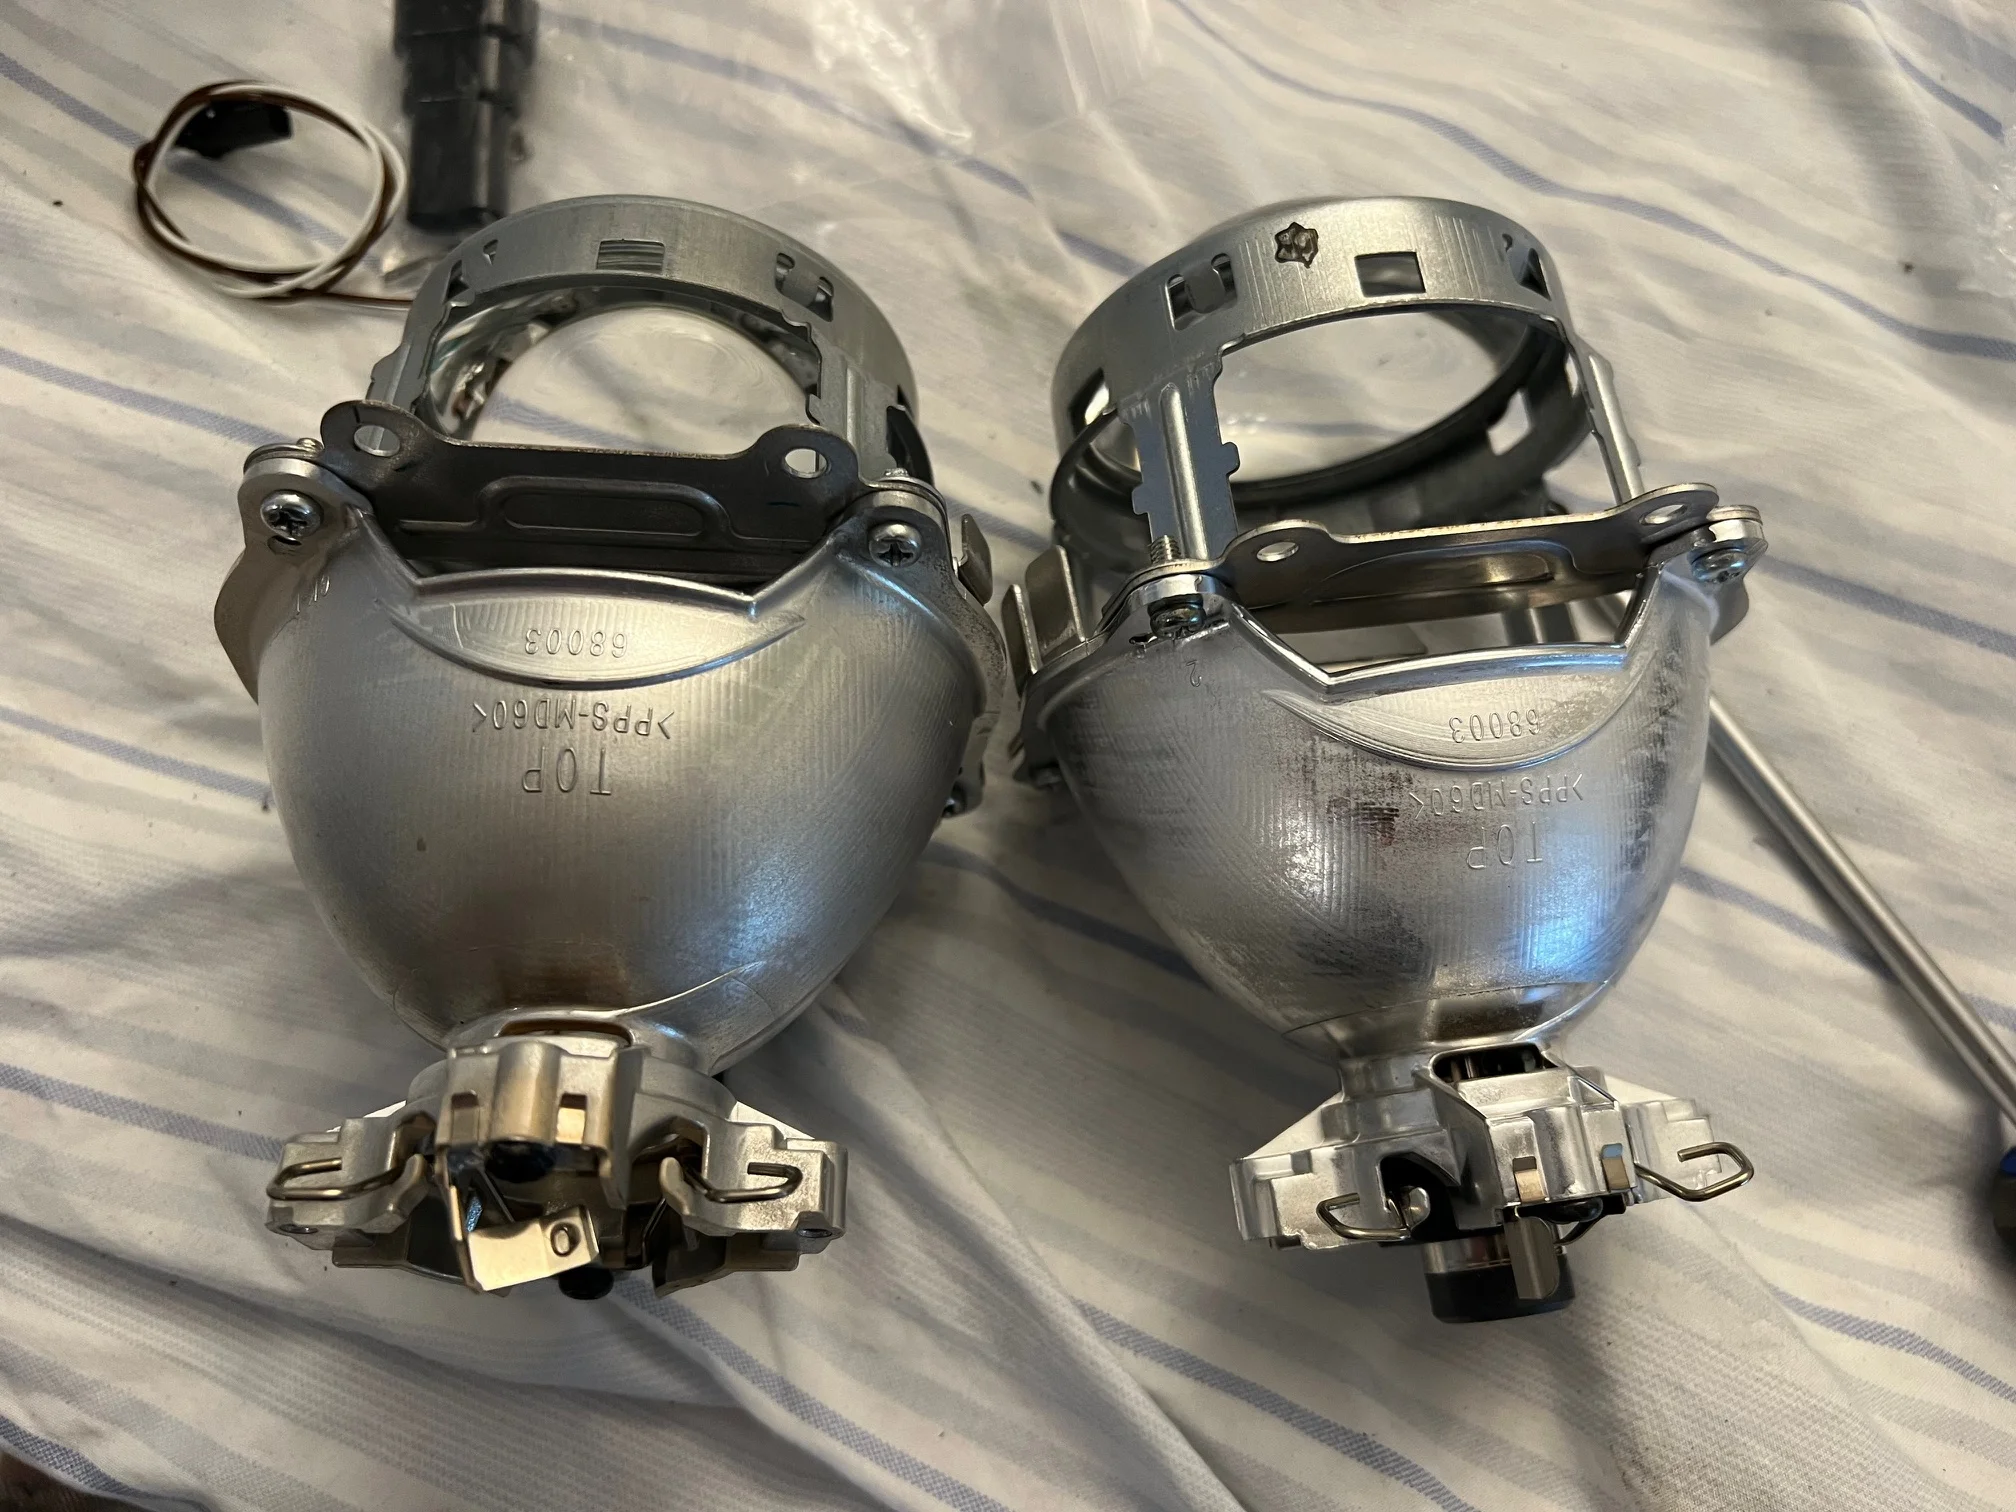
We are now ready to put in the new bi-xenon RX350 projector, here it is side by side, identical except we are gaining bi-xenon and clear lens. New on left, OEM on right:
Being that we had to disassemble for removal, we will need to disassemble to install new projector as well, same steps, super straight forward:
Before we reinstall OEM shroud onto projector, lets route the bi-xenon high beam pigtail wires. I've decided to have the high beam wires exit where the high beam bulb is, reason for this is you cannot feed anything out of low beam opening since it will be sealed by the ballast. Plug the wires that came with the projectors into the solenoid below the projector as shown below (white and brown wires):

I routed them behind the high beam reflector bowl and have them exit the opening:

You will need to remove the three screws that hold the bulb holder and then remove rubber gasket. I made a tiny incision in the rubber gasket to feed the wiring through it:

The new projectors will come with the bi-xenon wiring and connectors that you will need to crimp. Did not capture any of this, but crimp the connectors and then feed it into plastic connector. Reinstall high beam bulb holder with the three screws you've removed. At this point we can reinstall OEM shroud onto the projector, pushing it on so the three tabs lock onto projector.
Important note: take note of the +/- wire of the bi-xenon harness, white is positive and brown is negative, when hooking these up to the splitter cable you will want the polarity switched. Toyota has reverse polarity for this specific application, so you will want to pin the connector to be white going to negative and brown going to positive on the splitter cable.
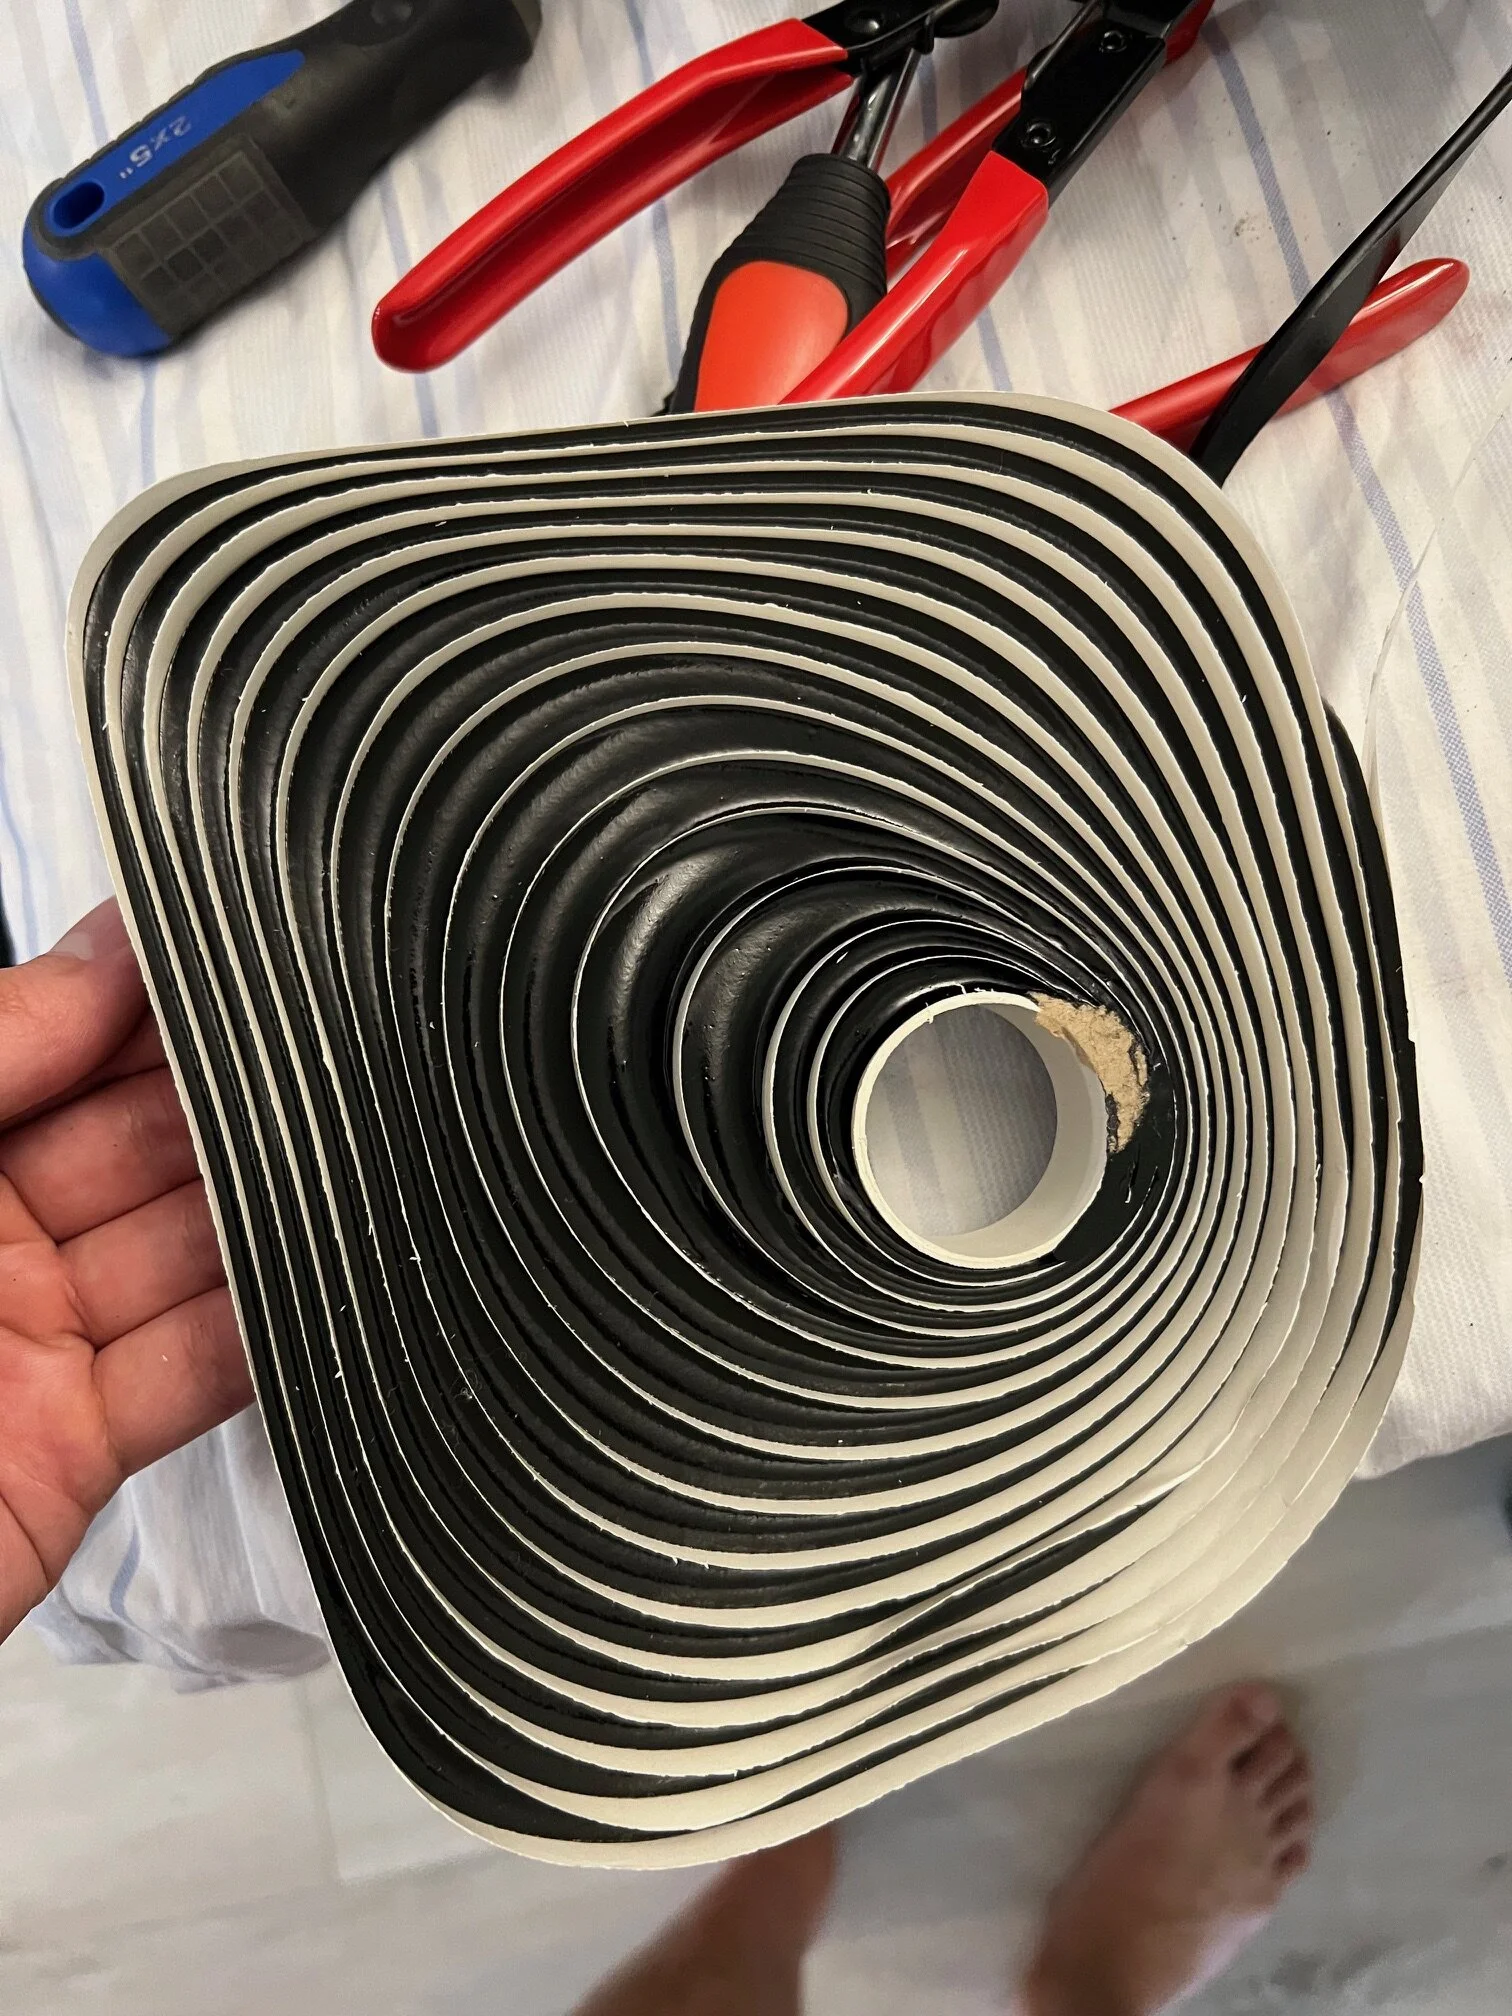
We are now almost ready to reseal the headlight, grab a clean microfiber towel to wipe any dust off the new lens, helpful to have air compressor too to blast any dirt or dust that might've gotten onto the components. Taking the new roll of butyl, pull it out to make it thin and apply it to the channel of the headlight housing, lay a nice thin piece onto the channel. Great video of this entire process here

Once you've laid an entire line of fresh butyl into the channel, blow or wipe any dust off the inside of the headlight lens and place headlight lens back on and be sure to line up the tabs and screw holes best you can. If its not perfect thats alright because after it comes back out from the oven the lens will be much easier to maneuver back into place. Pop the headlights back into oven for same amount of time you put them in. Take them back out and we can gently push the lens back onto the housing, take spring clamps and place them around various spots of the headlight to pull the lens and housing back together. When everything is seated and pulled together nicely, reinstall the 9 screws and plastic shield.
Note: this is a perfect time to upgrade/swap turn signal bulbs or fog light bulbs.
Remaining steps:
Reassemble bumper and test to make sure everything fires on, you may have to adjust beam height. I had to adjust my passenger side to come up higher, to adjust use a 7mm hex on this part of headlight, to go higher turn it clockwise, lower counterclockwise:

Final results with new bulbs (night breaker lasers) while on low beam and headlight leveling dial on "0":


DRL functions like normal, headlight leveling works just like before as well, I need to check the width of the "steps" in the projector output as I want to make sure they are spaced out correctly. But as of now super thrilled with the outcome. Hope this helps anyone looking for better headlight performance all while retaining stock appearance and functionality
Additional notes:
I recently purchased a 2013 LC and have been loving everything about it except one thing - headlight performance. Having done projector retrofits on every single car I've owned, I guess you can say I am spoiled by bright output and crisp cutoff. The LC output just did not cut it for me and I needed to do something about it, so I did a bit of researching and there are recommendations on bulb upgrades that could potentially help, but I knew that is not enough because OEM projector lenses have what you call "fresnel" lenses (great article on fresnel lens can be found here).
In short, fresnel lens soften output and cutoff - what you really want is a clear lens and this can be achieved by either swapping the lens on your projector or upgrading your projector altogether, upgrading projector is preferred cause most aftermarket projectors are bi-xenon (more on that later). My true end goal is to be able to swap the stock headlight projector and keep everything looking OEM as possible, an OEM+ upgrade if you will. This led me to a deep rabbit hole trying to research what options I had and trying to figure out what projector I could swap and still retain headlight leveling feature.
With so many unknowns, I decided to order a broken OEM headlight from eBay to take it apart to really understand how the internals looked and how everything is put together. During the process I had realized that the OEM headlight projector is the super common RX350 projector, this projector is used across several Toyota/Lexus vehicles. This realization is HUGE as this will make everything much easier. In addition, I remember seeing a lot of buzz on how well RX350 projector performance is when they are "tuned"
So how does having a RX350 projector stock make this easy? Well, you can buy bi-xenon RX350 projectors, swap the lens on them, tune them and you will have magnificent output all while having to do zero modification as everything will fit like original. Bi-xenon means the projector has high beams aswell, so this means if these are swapped into the LC you will have stock high beams plus the new bi-xenon high beams = quad (high) beam!
Let's get started and dive into pics and the meat of this project (bear with me as this is my first DIY post), also I am not responsible for any damage that may occur, perform these modifications at your own risk.
What you will need:
- An oven (to bake open the headlights)
- Heat resistant gloves for grilling (Amazon)
- Plastic pry tool set
- RX350 bi-xenon projectors w/ clear lens added
- Osram Night breaker laser bulbs (optional, but I decided to get these to maximize this mod)
- High beam splitter cables (9005M > 9005F / 9006F)
- Phillips head screwdriver
- Flathead screw driver or Headlight pry tool (optional, but recommend)
- Headlight splitter pliers (optional, but recommend two of these)
- Headlight butyl sealant (here or here), I like the Diode Dynamics one as it will match factory sealant color.
- Wire stripper
- Wire crimper
- Spring clamps (3 or 4)
Important note: I had mentioned earlier about tuning the RX350 projectors, what this means is there are ways to optimize clarity and color when you swap the lens. This is out of my wheelhouse so once I received the new projectors, I sent them to LightWerkz and had them swap the lens and perform the necessary fine tuning it needed.
First step is to remove your bumper, I will not cover this as there are other threads/videos that cover this subject. Fairly straightforward, just take your time and be patient. Once bumper is removed there are four bolts holding the headlight assembly and two electrical connections to unplug:
With headlight removed, I then removed the ballast by unplugging the connector and turning the ballast, it will come undone and then remove the igniter that is on the bulb.
You will be left with something like this, there will be 9 screws to remove from back of the housing that run along the edge and a plastic shield that is near the ballast. I've circled a few of the locations in red, but make sure to remove them all. I did not remove wiring harness t or remove any bulbs before putting it in the oven, the temperature is so low that it will not cause any melting or damage.
Once you've removed the 9 screws, ballast and plastic shield the headlights are now oven ready. You can do hot and fast or low and slow for oven temp/time, I decided to do low and slow. It also helps to have BBQ gloves that can withstand heat, removing these from oven bare handed is not advised plus wearing the gloves allow you to work with the headlight and butyl while its nice and hot making splitting it open easier.
Adjust rack in oven and position headlight so it doesn't touch the sides to avoid melting, I believe mine touched a little but that is the reason I did low n slow heat as the heat is not enough to melt.
Low n slow: 190F for 15 minutes
Hot n fast: 275F for 8 minutes
I couldn't capture any pictures of the process of splitting the headlight open, but take the headlight pry tool or flathead and pry the tabs up at the bottom of the headlight. Starting at the bottom of the headlight take the headlight splitter pliers and work them open, having two allows you to simulatenousley move around the headlight, good video to watch here. As you split the lens, the butyl will be stringy, take caution to not get the butyl on any of the components inside because it is a PITA to remove when it dries.
Once opened we can remove the OEM shroud that is on the projector, three tabs that hold it onto place and taking a pry tool you can push the tabs in to release the shroud:
With the shroud removed lets take a second and examine the OEM lens, very orange peel-esque:
Now we can work on removing the OEM projector, the OEM projector is too large to come out in one piece from the back opening, you will need to disassemble the projector by removing these four screws:
When removed, the bowl of the projector can be pulled out of the back opening, might need to angle it, but should come out easily. Be sure to hold onto the front lens when removing the four screws, it will fall off from the front of the headlight once the screws are removed. You will then be left the cutoff shield, this piece is what actually holds the projector into the housing. Remove the four screws that are not circled in red in above picture, the shield will come out from back opening at an angle.
Basically the OEM projector is composed of three parts:
Lens holder unit
Middle cutoff shield
Bowl that holds bulb
We are now ready to put in the new bi-xenon RX350 projector, here it is side by side, identical except we are gaining bi-xenon and clear lens. New on left, OEM on right:
Being that we had to disassemble for removal, we will need to disassemble to install new projector as well, same steps, super straight forward:
- Take apart new projector by removing the four screws
- Put cutoff shield in housing first via back opening and reinstall four screws that you removed earlier (not circled in red in above pic), will have to go in at an angle again.
- Align lens holder unit to the cutoff shield via front and put in bulb bowl via back opening
- Get those screw holes aligned and reinstall screws
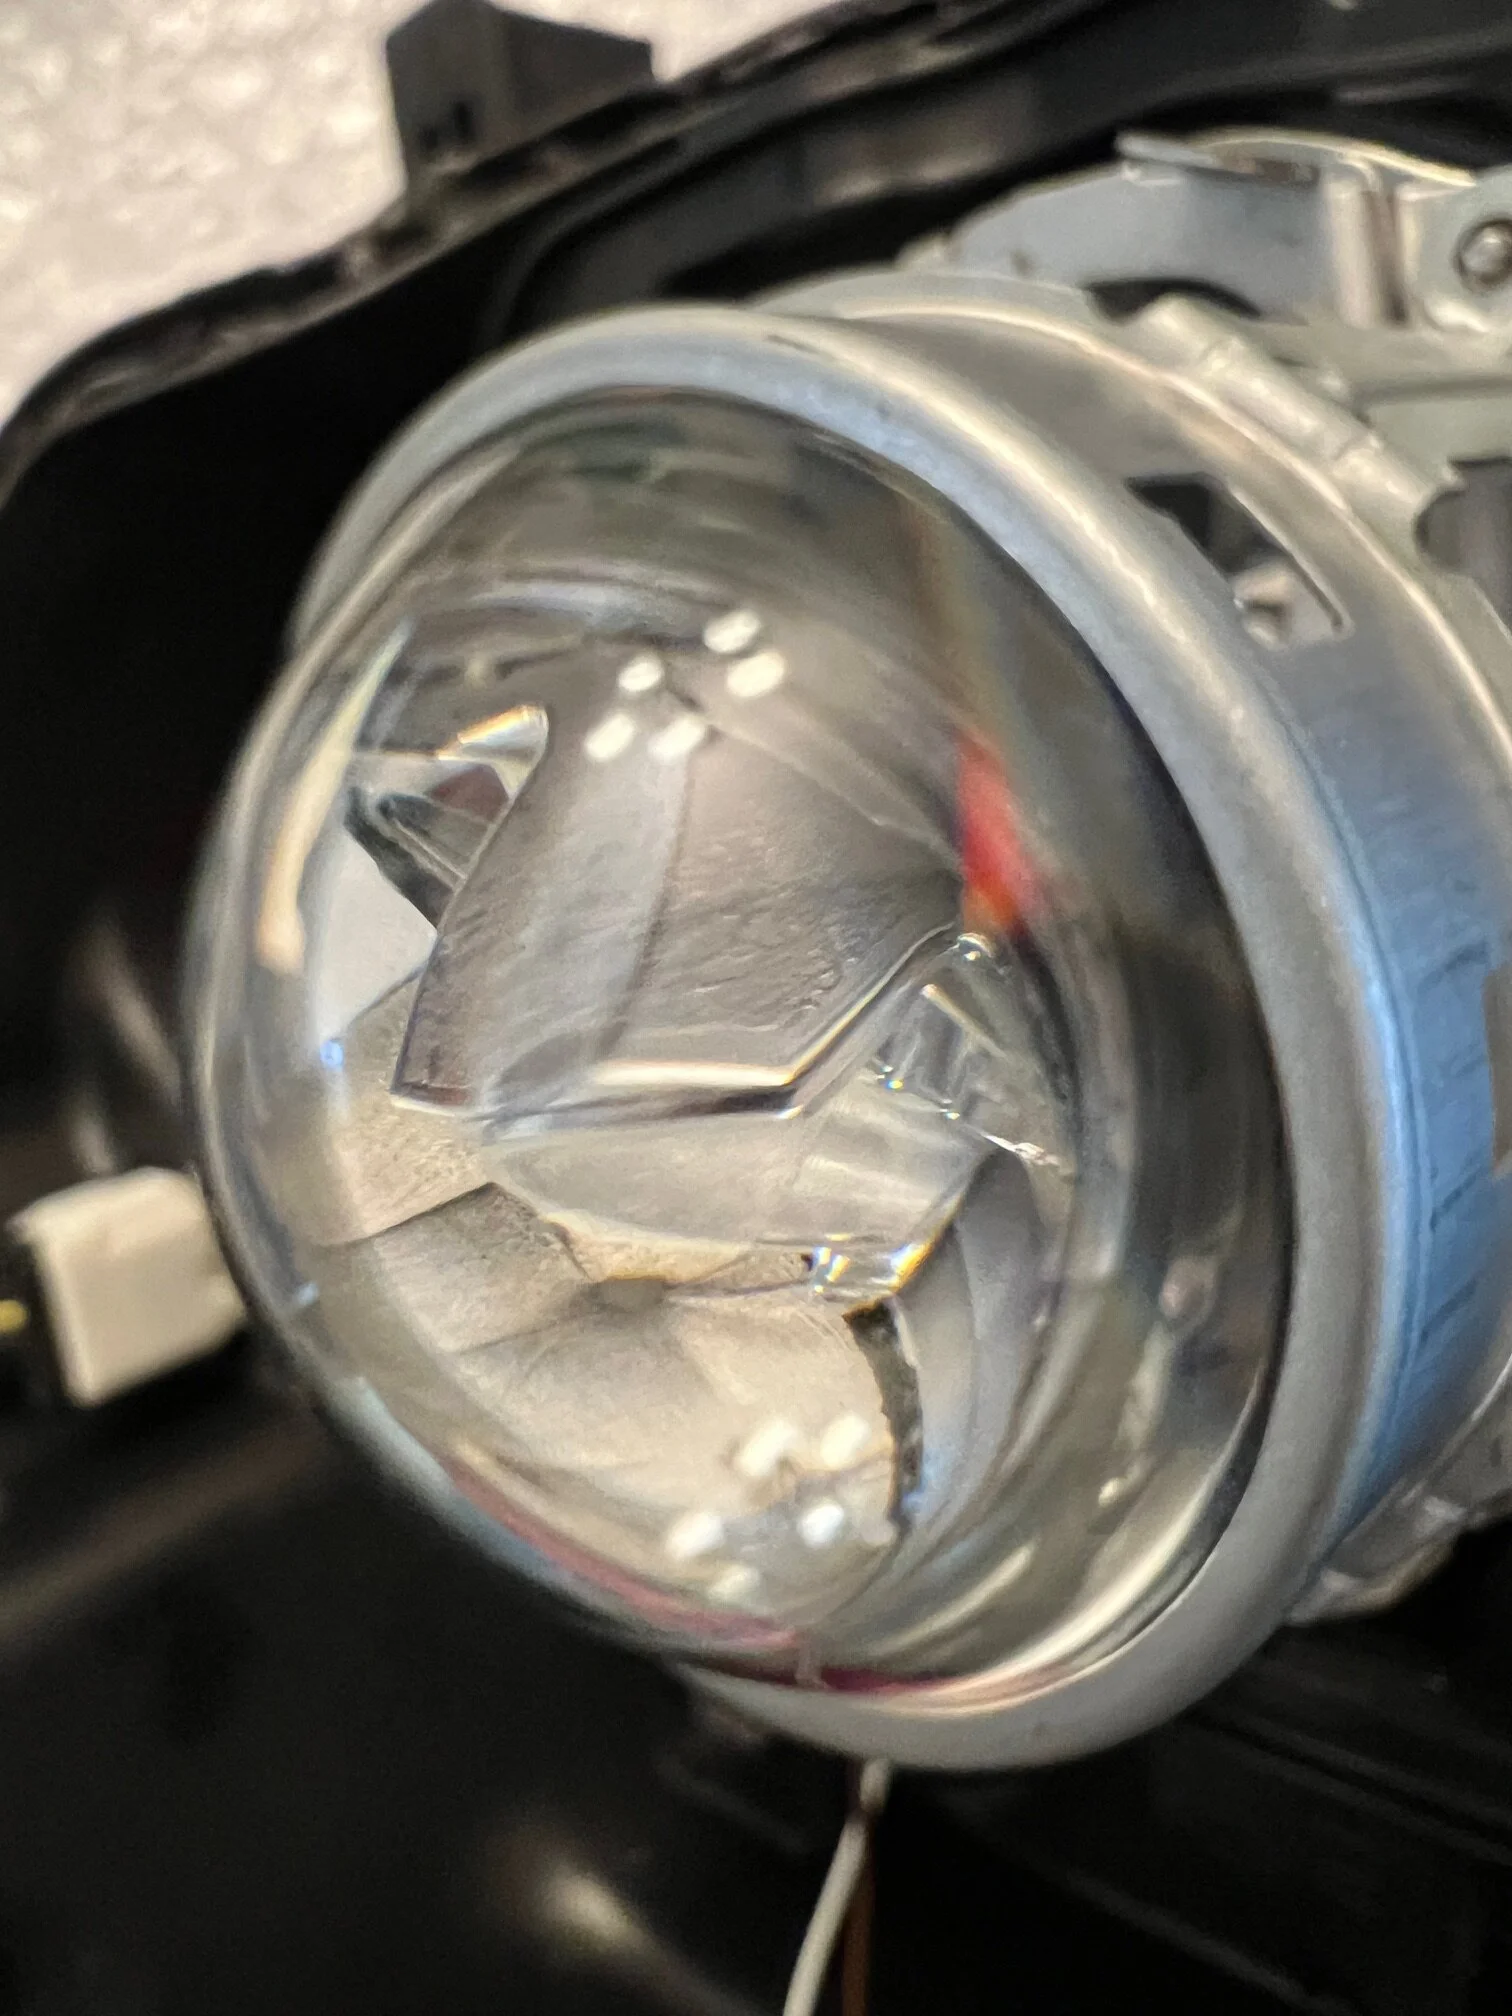
- Now we admire the clarity of new projector
Before we reinstall OEM shroud onto projector, lets route the bi-xenon high beam pigtail wires. I've decided to have the high beam wires exit where the high beam bulb is, reason for this is you cannot feed anything out of low beam opening since it will be sealed by the ballast. Plug the wires that came with the projectors into the solenoid below the projector as shown below (white and brown wires):
I routed them behind the high beam reflector bowl and have them exit the opening:
You will need to remove the three screws that hold the bulb holder and then remove rubber gasket. I made a tiny incision in the rubber gasket to feed the wiring through it:
The new projectors will come with the bi-xenon wiring and connectors that you will need to crimp. Did not capture any of this, but crimp the connectors and then feed it into plastic connector. Reinstall high beam bulb holder with the three screws you've removed. At this point we can reinstall OEM shroud onto the projector, pushing it on so the three tabs lock onto projector.
Important note: take note of the +/- wire of the bi-xenon harness, white is positive and brown is negative, when hooking these up to the splitter cable you will want the polarity switched. Toyota has reverse polarity for this specific application, so you will want to pin the connector to be white going to negative and brown going to positive on the splitter cable.
We are now almost ready to reseal the headlight, grab a clean microfiber towel to wipe any dust off the new lens, helpful to have air compressor too to blast any dirt or dust that might've gotten onto the components. Taking the new roll of butyl, pull it out to make it thin and apply it to the channel of the headlight housing, lay a nice thin piece onto the channel. Great video of this entire process here
Once you've laid an entire line of fresh butyl into the channel, blow or wipe any dust off the inside of the headlight lens and place headlight lens back on and be sure to line up the tabs and screw holes best you can. If its not perfect thats alright because after it comes back out from the oven the lens will be much easier to maneuver back into place. Pop the headlights back into oven for same amount of time you put them in. Take them back out and we can gently push the lens back onto the housing, take spring clamps and place them around various spots of the headlight to pull the lens and housing back together. When everything is seated and pulled together nicely, reinstall the 9 screws and plastic shield.
Note: this is a perfect time to upgrade/swap turn signal bulbs or fog light bulbs.
Remaining steps:
- Reinstall bulb
- Hook up ballast by attaching igniter to bulb and screwing ballast back onto the housing
- Plug in connector into ballast
- Reinstall headlight onto car
- Plug in two electrical connectors
Reassemble bumper and test to make sure everything fires on, you may have to adjust beam height. I had to adjust my passenger side to come up higher, to adjust use a 7mm hex on this part of headlight, to go higher turn it clockwise, lower counterclockwise:
Final results with new bulbs (night breaker lasers) while on low beam and headlight leveling dial on "0":
DRL functions like normal, headlight leveling works just like before as well, I need to check the width of the "steps" in the projector output as I want to make sure they are spaced out correctly. But as of now super thrilled with the outcome. Hope this helps anyone looking for better headlight performance all while retaining stock appearance and functionality
Additional notes:
- You could drop a projector into high beam for even better high beams, but I opted to keep it simple.
- You are not limited to swapping low beam projector to only RX350 projectors, you can swap in anything so long as they have a RX350 adapter bracket, meaning if you wanted to run Morimoto Mini D2S 5.0 projectors you could. Just purchase the RX350 to Morimoto 5.0 adapter for example.
- I do think this mod is best paired with new bulbs, first time having night breaker lasers and I am impressed.