Builds 97 HZJ80 Build in Uganda (1 Viewer)

This site may earn a commission from merchant affiliate
links, including eBay, Amazon, Skimlinks, and others.

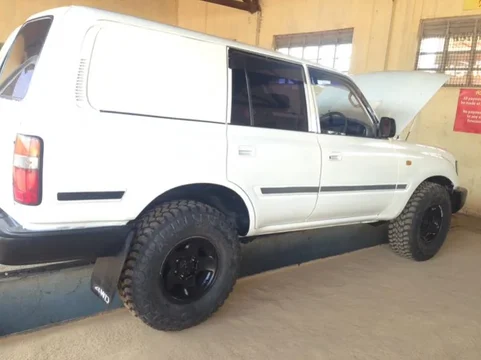
Is that split rear window standard or something you built?
That picture is kind of deceiving. That truck doesn't have a rear hatch. It has 2 side swinging doors like full-size van would have. Most LC guys call them ambulance doors.
 
That picture is kind of deceiving. That truck doesn't have a rear hatch. It has 2 side swinging doors like full-size van would have. Most LC guys call them ambulance doors.

Doh! I thought he was talking about the rear side windows.

Yep, rear has "barn doors."
 
They are everywhere here - made it hard not to buy one.

And yes, big lack of tools/parts here, but we will make up for it in ingenuity I hope. If you ever make it back, give me a shout and come visit Jinja.

Totally agree when I was in Mali I had my a winch installed in my non winch ARB and they did an awesome job never had a problem.
 
Well, paint/body are pretty much finished. Still have to black out the side strips, but the flares are gone, the rear sliding windows are gone, and the hood scoop is in.


Yesterday: replaced both fuel filters. The old ones were completely full of gunk.


Today: tore apart both front hubs.


Going in tomorrow:

new inner/outer bearings
new seals
new u-joints on rear driveshaft
new rear pinion seal
new brake rotors
new brake pads


Coming this week:

Ironman 2" kit
Ironman bushing kit
285/75/16 MTs brand TBD
Ironman front commercial bull bar
 
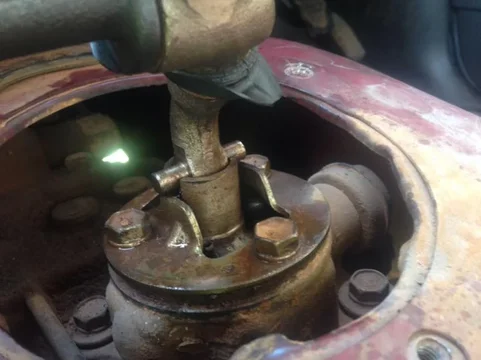
Well, I have the HF1A part-time 4WD transfer case after all. Still can't manage to get the CDL to lock, but at least I've got the satisfaction of a selectable transfer case into 2WD.

The CDL journey continues, as does the wiring woes. After charging the AC completely today, still no cold air inside and the CDS fan was barely moving.

Pipes had frost on them, so it's charged at least.

image-1364629450.jpg

image-1364629450.jpg
 
Great build. Is that split rear window standard or something you built? Looks pretty cool, but not sure of the purpose unless there is a ladder or something that goes over it that would make it a regular point of impact from shoes, tools, etc? Just curious.

If it's the rear door Window your asking about they come with barn doors that open outward in Africa and aussie

Sent from my SM-N9005
 
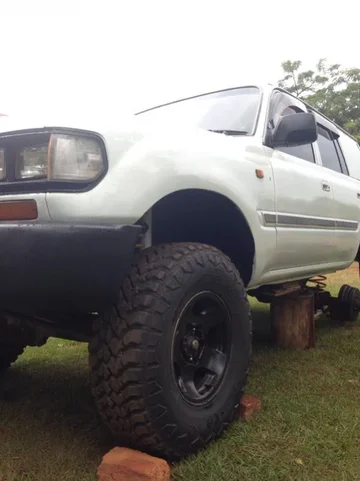
Well, finally found new tires. Unfortunately, 285s were the largest I could find in Uganda.

285/75/16 Hankook Dynapro MTs were a whopping $360 each here in Uganda. Ouch.

I love them. Truck has a rake since the entire interior is out. Ironman springs are on their way.


image-2425607335.jpg


image-3836731335.jpg

image-2425607335.jpg


image-3836731335.jpg
 
$360/ea? Woah- you'd better get wheel locks on those babies!
 
Seats are done! I may have paid $360 for tires, but you'd all kill me if you knew what I paid to have all 4 seats recovered :)


image-2593698428.jpg


image-2669625355.jpg

image-2593698428.jpg


image-2669625355.jpg
 
Seats are done! I may have paid $360 for tires, but you'd all kill me if you knew what I paid to have all 4 seats recovered :)

Do tell!!
 
geez, at least you could have had them done in Zebra skin or somethin'... :)
 
geez, at least you could have had them done in Zebra skin or somethin'... :)

I actually considered doing zebra-stripes in vinyl on the truck. That idea lasted all of a few seconds. I can't get past the look of a clean, white 80.

As for the seats, material was $80, labor was $40. $120 for all new seats, new foam included. Not everything is expensive in Africa :cool:
 
Well, the Ironman lift is on. Took all of 3 hours to do, and that was with having to "make do" with limited tools and only one jack. And tree stumps as jack stands. This is Africa :)

Overall, I'm pleased the truck leveled out and there is no more stinkbug. Haven't tested it on the road yet, will have a chance to do that tomorrow after it gets the alignment checked.

Was disappointed to see a product that ironman makes such a big deal about being made in China. From their website and all of their videos, I was assuming they churned these things out in Australia.

image-3821245860.jpg


image-141932539.jpg


image-2023335761.jpg


image-2688146744.jpg

image-3821245860.jpg


image-141932539.jpg


image-2023335761.jpg


image-2688146744.jpg
 
Work has had me too busy to work on the truck lately, but watching Jose's thread has kept me determined to continue modding the truck for my needs here in Uganda.

After putting the Ironman suspension on, the ride became uncomfortably stiff. This put a rush on the rear bumper to get some additional weight in the rear.

The lack of tools, machine shops, metal presses, etc here can be frustrating. But, I brought a container over this year of tools to start a local mechanic shop for our organization. This at least provided me with a good Lincoln Electric stick welder and some nice welding accessories. I brought a pipe bender but I can't seem to get it to bend tube without kinking them. Newbie problems.

Anyways, I was able to pay a local bender to make a few simple bends for me. I tried to keep cutting to a minimum as my plasma cutter is still held up in customs. I took some ideas from some other bumpers around mud, and came up with this:

ImageUploadedByIH8MUD Forum1406543610.629820.jpg

ImageUploadedByIH8MUD Forum1406543630.360569.jpg

ImageUploadedByIH8MUD Forum1406543645.945429.jpg


It isn't the prettiest bumper out there, but it's stout enough to get rear ended by a sugar cane truck and show no signs of damage. And the pintle hook will serve as a tow point for the trailer build I have in mind. It also makes for a solid recovery point.

Last week, I finally found time to install my EGT, Water temp and volt gauges. Installing the sensors on the 1HZ was a cake walk. It has a great spot for the EGT probe and I simply removed the small part holding the factory temp gauge and drilled and tapped it with the new sensor.

I used a universal 3 gauge mount upside down to get the most factory look possible. The blue color matches my alpine head unit.

ImageUploadedByIH8MUD Forum1406543893.983841.jpg

ImageUploadedByIH8MUD Forum1406543929.337724.jpg

ImageUploadedByIH8MUD Forum1406543948.920922.jpg

ImageUploadedByIH8MUD Forum1406544007.342656.jpg


And lastly, Jose's roof rack build gave me the final bit of inspiration needed to start mine. The frame is welded up and I'm starting to mount bits and pieces to it as I have time. I chose to add small sides to it as I'll be carrying lumber and other long items, and the sides will help keep everything in place.

Light bar is 42" wide, purchased from Amazon from the same seller I have bought other bars from, MicTuning.

ImageUploadedByIH8MUD Forum1406544177.857011.jpg


Jose, thanks for being diligent with your build thread. It gives design-illiterate folks like me a shot at doing something decent!
 

Users who are viewing this thread

Back
Top Bottom