1978 FJ40 clutch job in progress (1 Viewer)

This site may earn a commission from merchant affiliate
links, including eBay, Amazon, Skimlinks, and others.

Joined
Mar 10, 2008
Threads
33
Messages
506
Location
Holly Springs NC
Hi All,

Eric and I (and Eric's sone Garrett) started the clutch job around 2:30 today after stopping by Joe's and then Eric had a few errands to run. So far we...

- Pulled Front/Rear driveshafts
- pulled seats/console and gas tank cover/bolts
- Pulled parking brake assembly
- Pulled gas pedal partially as the bracket was over the top left edge of hump
- Removed shift levers for tranny/transfer
- Broke a bolt holding exhaust to header (need to get 3 new).
- Almost dropped tranny/transfer off of jack after unbolting and sliding it back.
- Placed 2x8 across inside of truck and used straps to hold tranny/transfer until we could get the motorcycle jack :) underneath tranny and strapped down.
- Jacked passenger rear
- Rolled tranny/transfer out
- Removed clutch disc/pplate and Flywheel.
- Called Joe to see if they were still working since I am still greasy, left VM.

Need to order clutch fork boot and exhaust bolts and alignment tool tonight.

Crappy pics to follow in the next couple of days :) not many and not too good as I was busy working.

Breaking for the night and having a captain and coke.

Brad
 
Damn you guys got a ton accomplished! Sorry for not answering the phone, I was filthy and Clint and I were buttoning up the 80. Brad if you need help weekends/weeknights just shout - I have no brains to offer but have a little grunt to lend.
 
to think that after 131 years of wear and tear we only broke a couple exhaust bolts.
 
Last edited:
Thanks Joe, no worries...was already filthy and thought I would come by.
Eric, thanks again for the help. She looks good for 131 years old :)

Got the fork boot and alignment tool ordered from JTOutfitters. We will see how long it takes them to get here, in the meantime, I will get the flywheel turned and clean up a bit inside. Hell I may even wirebrush the tranny/transfer while it is out.
 
Greg - do you have the power to correct the title to 1978 :) I want to make sure others can find it if needed.
 
Thanks Greg
 
Updated with pics

Hi All,

Here are some pics of the progress, yes it is slow :D

Tranny/Transfer out
IMG_1106.jpg


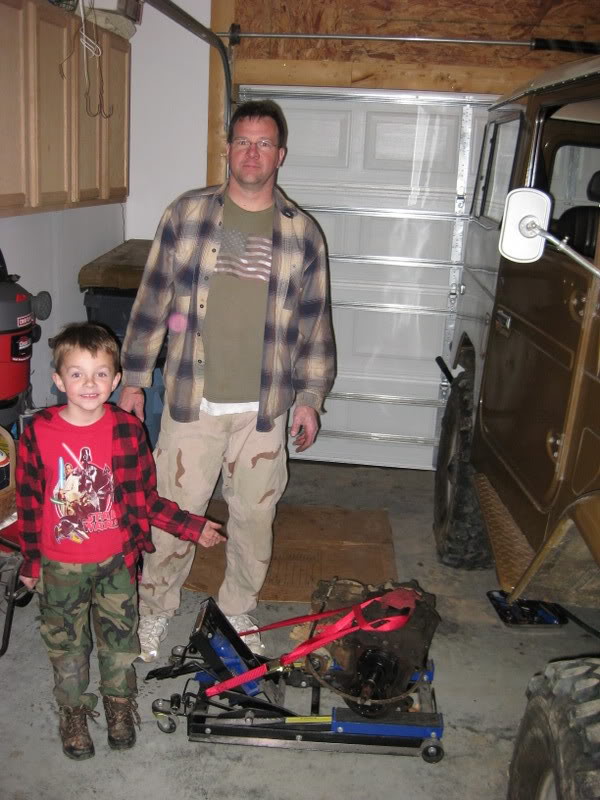
My helpers (Thanks again Eric and Garrett)
IMG_1107.jpg


All out and a mess.
IMG_1110.jpg


More mess
IMG_1114.jpg


Cleaning things up and another helper (Thanks Maddy, my oldest daughter).
IMG_1117.jpg


Next project and gas tank cover and tranny hump.
IMG_1122.jpg


Freshly turned flywheel.
IMG_1124.jpg


Tranny/transfer on my custom tranny jack :D (dirty).
IMG_1125.jpg


Tranny/transfer after 6 cans of carb cleaner/scraper/wirebrush and rags.
IMG_1126.jpg


A little scotch bright and the pilot bearing fits great.
IMG_1128.jpg


New release/throwout bearing persuaded on.
IMG_1136.jpg


New tranny input shaft seal and gasket and a couple of rear main seals.
IMG_1138.jpg


My persuaders and pilot bearing removal setup.
IMG_1144.jpg


Another of the pilot bearing remover :)
IMG_1146.jpg


Next up is the input shaft seal install...still thinking about how to do this one.
IMG_1149.jpg


More to come later all.

Brad
 
Glad you were able to get the pilot bearing issue resolved, you had me thinking on that one, though it's been some time.

T-Case and Tranny look awfully nice, you sure you want to put them back under there?
 
Your making good progress.. It cleaned up nice.
 
A little more progress

Hi All,

A little more progress last coupe of nights.

Got the inside and out of the bell housing cleaned up.
IMG_1154.jpg


A shot of the new rear main and pilot bearing installed.
IMG_1155.jpg


Decided to go ahead and prime and paint the tranny so here is a shot of that...no it is NOT professionally done although it appears that way from the spray booth :D
IMG_1157.jpg


IMG_1158.jpg


IMG_1159.jpg


Next up is scotch bright and another coat or 2 of primer then plastikote semi gloss black...then on to draining the oil, dropping the pan, cleaning and painting the pan...then fighting with the new OEM gasket :D

Done for the night.

Brad
 
Tranny painted...

Hi All,

OK, the tranny is painted now. I just got the oil pan off (that was a pain):bang:. Now I am trying to get the gasket cleaned off which is now petrified. Using gasket cleaner and letting it soak.

IMG_1166.jpg

IMG_1167.jpg

IMG_1168.jpg


Picked up some more sandable primer and will paint the oil pan while it is out as well. Next steps.

- Remove rear heater/old hard lines and replace with soft 5/8 lines (cracked hard lines getting tranny hump out)
- Install the new gasket
- Install pan back on the block
- Install flywheel/clutch disk/pressure plate
- Call a friend for a cherry picker hopefully tomorrow
- Get tranny in place and bolt back up.


Now back to the garage. :flipoff2:

Brad
 
Lookin real good Brad, you'll probably just need to park this thing when you are finished reinstalling everything, you wouldn't want to get any dirt on that tranny/trans would you...
 
And a little more progress...

Hi All,

Another little update. Nothing special.

- Take more pics of tranny and send to Greg :) Yeah, Greg it is purrty
- Pain pulled, cleaned, primed and painted.
- New pan gasket ready.
- pulled rear heater (what a mess) had cracked the hard lines a little.
- New 1/2" line for rear heater installed (according to the performance place, this is made for fuel, heater hose and coolant lines for tranny coolers and should be better than fine for heat and pressure).

Pics.

Oil Pan painted (Those marks/dents on the pan are from rocks, it is still solid.
IMG_1169.jpg


IMG_1170.jpg


Gasket settling in place
IMG_1176.jpg


New lines installed for rear heater
IMG_1177.jpg


IMG_1178.jpg


Old lines and rear heater out
IMG_1179.jpg


Ohh and putting this under the tranny hump when it goes back in
IMG_1147.jpg


And while I am at it, a couple of pics of my daughters 80 in the driveway
IMG_1172.jpg


IMG_1173.jpg


IMG_1171.jpg


Next steps

- get another set of hands
- Install oil pan
- Install flywheel, pressure plate and clutch disk

Maybe I will be finished in time for GSMTR'09

Brad
 
Hah, you have no idea how much I have tried to convince her that she should just take my K5 and I basically got:flipoff2: from her.

Ohh well, I am still pretty excited that it will be around for a few months before she is off to school...and hopefully I will not be called very much to 'fix' stuff.

She thinks you are cute Greg, so perhaps a few words could encourage the K5 :D

Brad
 
Finally installed...just have to button everything back up

Alright all - one of my last updates. Eric (fourtrax) and his son and I made a lot of progress Saturday. I will just throw some pics up and get back to the garage.

Thanks again Eric and Garrett.

Flywheel and clutch fork installed.
IMG_1181.jpg


Pressure plate and disk installed and aligned.
IMG_1183.jpg


Getting started with a borrowed lift from my friend Mike
IMG_1187.jpg


Starting to get tranny poked in (a pain the butt).
IMG_1186.jpg


Finally got it in (had to pull the tranny out once and re-align with clutch tool).
IMG_1188.jpg


New clutch fork boot installed.
IMG_1189.jpg


Another shot with transfer linkages on.
IMG_1192.jpg


2wheel low mod while I had everything out :D
IMG_1193.jpg


Tank cover back on and wired.
IMG_1196.jpg


Tranny hump back in with weather stripping installed under it.
IMG_1197.jpg


New rear heater lines routed.
IMG_1198.jpg


Seats back in...:bounce:
IMG_1199.jpg


Rear heater installed and plumbed back up.
IMG_1200.jpg


And went ahead and sanded and primed the console while I had it out, yeah, I am a little anal.
IMG_1203.jpg


Now painted up (plastikote cast finish, pretty close to original color).
IMG_1205.jpg


IMG_1206.jpg


IMG_1207.jpg


Well anyway, just a few more items left to finish up and then I will be starting it up and adjusting the clutch. It was a long slow job, but well worth it so far...and I hope the new parts last a while.

Thanks again for the help Eric and Garrett :D

Brad
 

Users who are viewing this thread

Back
Top Bottom