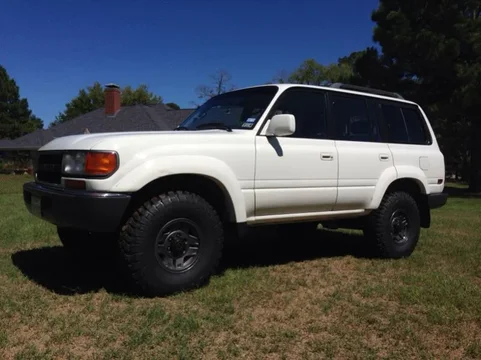
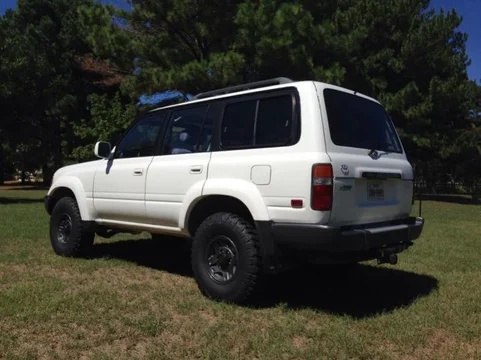
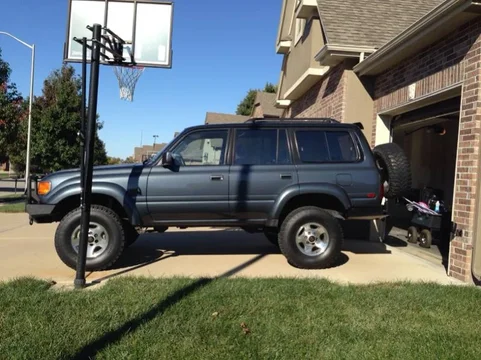
Again, I do not want to rip too hard on Plasti Dip for wheels as I have not used it for that purpose.
Some rather wordy thoughts (none of this is earth shattering or new):
This Duplicolor graphite color is a bit darker than the silver-grey bumpers on the 40th Aniv. sage model.
IMO, painting wheels at home takes a lot of prep time to do it right. I spent at least a couple hours hours per wheel. I prepped and painted both side of the wheels...many guys do not do that. A lot of my time was prepping the wheel back sides. If you just want to wheel your rig, then what I have below is overkill.
The back sides of my wheels were covered in a moderate amount of aluminum oxide corrosion (white) and a hard and very tough rust-colored mystery coating. I suspect this coating was a combination of brake dust and associated rust, and mud from 16 years of use. I used an angle grinder with a aggressive wire wheel to get 90% of this rust-colored stuff off the back sides. I then used a drill with various wire wheels to get the rest of the crap on the back sides. I used a nice 3M dust mask to protect my lungs. Please consider that this grinding could be producing toxic dust, including possibly asbestos from the brake dust, aluminum dust, etc. Use PPE that is appropriate for all sanding and painting. It might make sense to have your wheels media blasted to save time and your lungs/body.
I painted the back sides because I am OCD that way. I also want to have tire balance weights placed on the back sides of the wheels (I do not like how the weights look), and the local tire shop advised that old dirty rims do not hold the weights well, which seems to be true in my experience.
Note that the rattle-can spray paints do not have a lot of hardener in them so the paint normally ends up rather soft. Powder coating is probably a harder and tougher coating, but more difficult to touch up after typical rock rash. Some folks will not have their wheels powder coated for this reason...and to avoid the tire removal/wheel transport/vehicle down-time hassle.
Some guys suggest not clear coating over the paint so as to make touch ups easier. I think the clear coat makes the Duplicolor graphite wheel coating look much better. YMMV.
I first marked the tires as to where the weights go and removed the balance weights. I replaced them when I was all done. I will have the tires rebalanced in a couple weeks; again, I am just OCD that way (and one set flew off a couple months back).
I washed the rims with a strong dish soap and brush.
I left the tires on for all this painting. I let all the air out (using an ARB deflator). I used file folders (thick paper essentially) slipped under the rim edge to mask the tire. With the tire deflated it is easy to slip the file folders between the tire and rim. Lots of pics of guys doing this on the web.
I sanded the front of the rim with a 220 sanding sponge to roughen the OEM coating and to smooth some of the cracked clear coat and rash. If your OEM finish is not too bad, a light sanding here is likely best to make the new paint grab. If your current finish is quite rough, then it might be best to strip it all off. I cleaned the rim with a paint prep cleaner. I taped off the valve stem.
With each of the 4 paint steps I utilized 2 light coats and then 1 or 2 medium coats. I made sure even with all the sanding that I had a layer of the self-etching primer on all surfaces before top-coating. I used the fill primer to fill in small gashes after my initial sanding of the front surface and the self-etching primer.
I sanded the fill primer, then primed again, then lightly sanded with the 320 sponge. Then dusted it off with the compressor, then cleaned with the paint prep. Then top coated.
If you are painting the back sides of the wheel, finish painting the back side before you do your final top coating of the front side of the wheel. This is because the metallic paint will end up quite rough if painted lightly, so any spray that has made it through the wheel openings (windows) will "contaminate" the front of the wheel with rough metallic paint.
It is important that your last color top coating be "wet" enough to get the paint (and its metal) to lay out smoothly, but not so wet to run. This can be a fine line. Experimentation helps here. I was much better at this on my last couple wheels than my first. I painted the spare first for practice. The metallic coating has an reflection "angle" so I suggest on your final color coat that you get the window openings just wet/thick enough to be smooth and wet, then paint the spokes and outer rim in an (wet) even pattern so the metallic sheen and color is even. Also, make sure you get the full edge of the rim next to the tire, which can be a challenge depending on your masking, angle, etc.
If you spray the clear coat too thick it will run and discolor a bit. Too thin and it will be kinda rough. May sure your temp and humidity levels are with the specs on the labels.
I painted the hubs as well. I used an old non-USA Toyota steel split rim to mask the rotor, etc., when I painted the hubs. I masked the lug stud threads with tape.
** CAUTION: If you paint the back sides of the wheels the paint of the wheel mounting surface will likely move or shrink once the wheels are initially mounted (causing your lugs nuts to become loose). You can clear off the mounting surface of the wheels of all paint, or repeatedly check your lug nut torque values until they settle. I have found that my lugs nuts have settled after tightening twice at 15 mile intervals.
I used more paint than most reported here on MUD, with a bit more than can of color top coat per wheel. Several of my local auto parts stores carry the all the paints.
And yes, those are the puny stock sized tires that my 80 came with when I bought it, and it does have the stink bug...
Copenhagen1 has a killer collection.
Cheers, Jon


