
I made this rear bar over Christmas and figured some might like to read how I went about it and maybe inspire others to have a go. Like the front one I made earlier, this rear bar was a combination of what I wanted to achieve with the design regarding departure angle clearance, rear quarter protection and over all looks. I also took inspiration from other custom rear bars, many right here on IH8MUD 
As always, even the best laid plans can change as a project evolves and this rear bar was no different. Here's some build pics (lots) and a bit of a description along the way...
Starting with a blank canvas
http://www.servimg.com/image_preview.php?i=418&u=14684539
I have a 25mm body lift and have lifted the long range tank to gain better departure clearance and thus lessen the chances of damage. I needed the underside of the rear bar to clear the top of the fuel tank so I tacked on 2pc of 30mm angle. This helped to support the rear bar during construction and ensured it went back into the same position each time.
http://www.servimg.com/image_preview.php?i=419&u=14684539
After much convincing from a guy I worked with, I got a packet of these silver pencils. Old mate was a fitter/machinist/welder from way back and totally raved about how good these pencils were to work with black steels. He was dead right, they are bloody awesome and $hit load more accurate, easier to see and longer lasting than chalk, pencil or texta. They're only about $10 for a pack of 3.
http://www.servimg.com/image_preview.php?i=420&u=14684539
A project like this that gets taken on and off so many times needs to have a reference point to build from. I marked the centre line of the chassis and took all measurements from that. Unfortunately, it may just highlight discrepancies in body panel alignment
http://www.servimg.com/image_preview.php?i=421&u=14684539
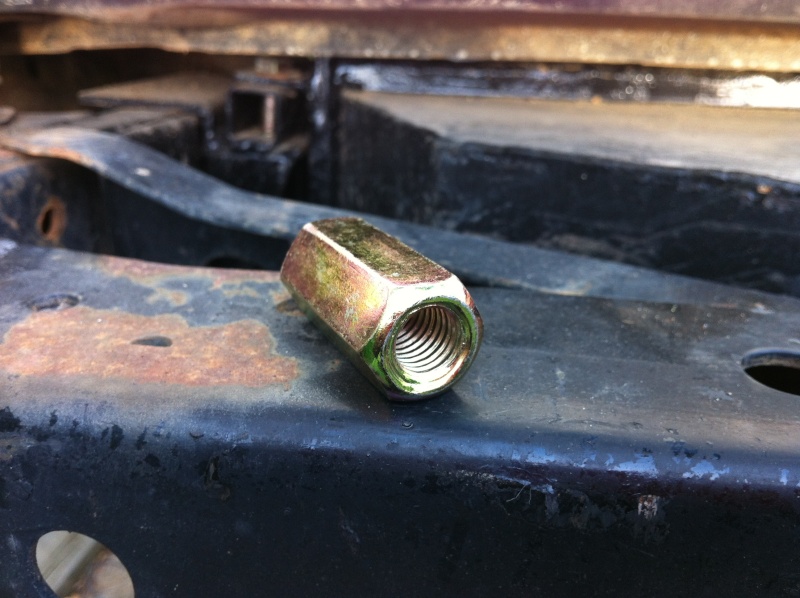
I also wanted to take advantage of the factory fixing points. Mine had rusted and the threads destroyed so I had to fix them. Cue two, 10x1.5mm x 40mm threaded rod couplers...
http://www.servimg.com/image_preview.php?i=422&u=14684539
Grind down for a friction fit onto the 20mm hole I drilled into the original fixing points...
http://www.servimg.com/image_preview.php?i=423&u=14684539
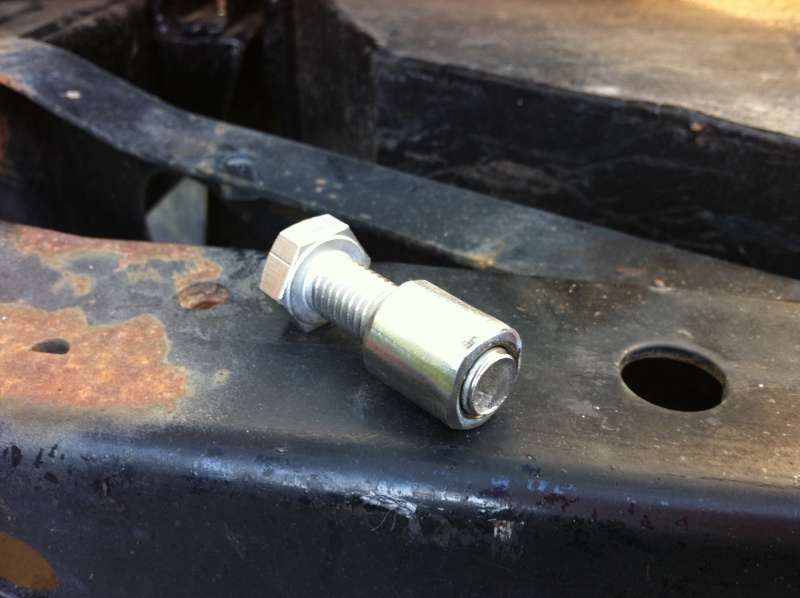
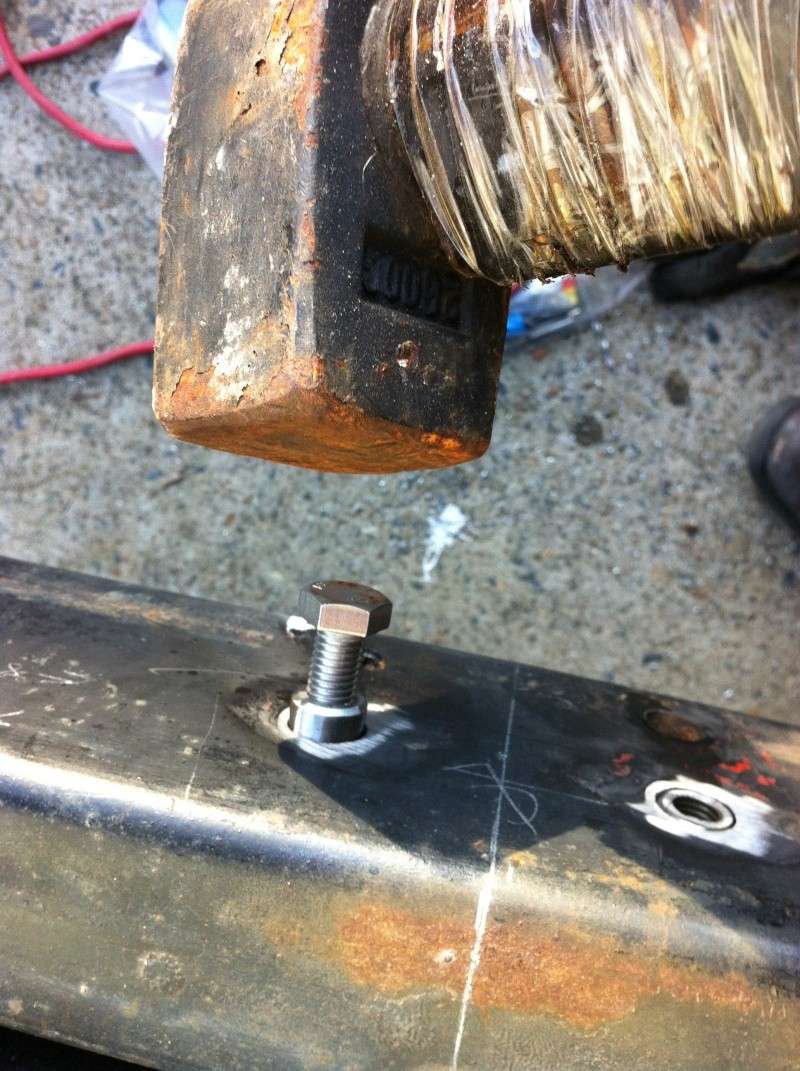
Bevel the outside edge for better weld performance and tap into position...
http://www.servimg.com/image_preview.php?i=424&u=14684539
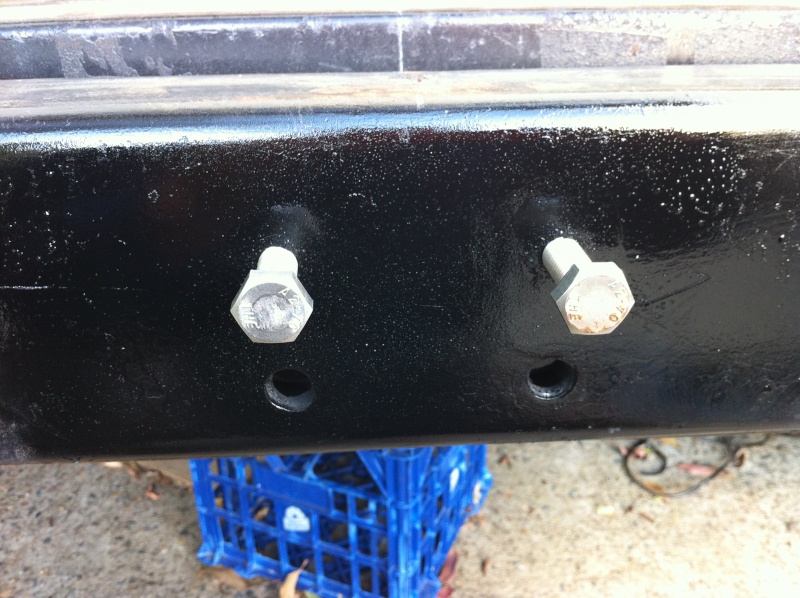
Weld, grind and paint and you're good to go. Note: to protect the threads from weld splatter, I screwed in a old bolt covered in grease. The bolt got binned but the threads were as good as new. repeat process for all four holes.
http://www.servimg.com/image_preview.php?i=425&u=14684539
As always, even the best laid plans can change as a project evolves and this rear bar was no different. Here's some build pics (lots) and a bit of a description along the way...
Starting with a blank canvas
http://www.servimg.com/image_preview.php?i=418&u=14684539

I have a 25mm body lift and have lifted the long range tank to gain better departure clearance and thus lessen the chances of damage. I needed the underside of the rear bar to clear the top of the fuel tank so I tacked on 2pc of 30mm angle. This helped to support the rear bar during construction and ensured it went back into the same position each time.
http://www.servimg.com/image_preview.php?i=419&u=14684539

After much convincing from a guy I worked with, I got a packet of these silver pencils. Old mate was a fitter/machinist/welder from way back and totally raved about how good these pencils were to work with black steels. He was dead right, they are bloody awesome and $hit load more accurate, easier to see and longer lasting than chalk, pencil or texta. They're only about $10 for a pack of 3.
http://www.servimg.com/image_preview.php?i=420&u=14684539

A project like this that gets taken on and off so many times needs to have a reference point to build from. I marked the centre line of the chassis and took all measurements from that. Unfortunately, it may just highlight discrepancies in body panel alignment
http://www.servimg.com/image_preview.php?i=421&u=14684539

I also wanted to take advantage of the factory fixing points. Mine had rusted and the threads destroyed so I had to fix them. Cue two, 10x1.5mm x 40mm threaded rod couplers...
http://www.servimg.com/image_preview.php?i=422&u=14684539
Grind down for a friction fit onto the 20mm hole I drilled into the original fixing points...
http://www.servimg.com/image_preview.php?i=423&u=14684539
Bevel the outside edge for better weld performance and tap into position...
http://www.servimg.com/image_preview.php?i=424&u=14684539
Weld, grind and paint and you're good to go. Note: to protect the threads from weld splatter, I screwed in a old bolt covered in grease. The bolt got binned but the threads were as good as new. repeat process for all four holes.
http://www.servimg.com/image_preview.php?i=425&u=14684539


 You'll notice I also brought the side-wings outside and past the flare. Every rear flare I've torn off in the bush as been because it got hit on the inside edge. The intention is this will go some way to deflecting the offending branch or rock face.


")

