
Posting up my most recent fix. Didn't have any issues yet but decided to be proactive. Keep in mind my cruiser is gutted inside with no carpet, no transmission hump, etc. I decided to do it because I had read enough threads about "coolant smell inside truck" or "coolant on the passenger side carpet" or "No heat from front heater".
I dreaded this fix because I read about how it takes all day to pull the dash and its a nightmare, etc. The journey began by sourcing a heater core out of a junk 60 near me. Only one I have seen in a yard in the year I have owned my cruiser so I am really going through this one.
No pics though.
What got me was that it took me 1 hour to pull the heater core out of the junk truck. Granted, a lot had been removed but it did not take long and I slid it over under the dash to the passenger side and it fell right into the footwell.
Hmmmm....
So, I got home and started slowly taking things apart:
I don't have pictures but I took the glove box apart (door, inside liner, etc.). Then I took out the radio, the little facia covering the heater / AC controls, defrost button, etc. 7 screws for this with 4 up accross the top and 3 accross the bottom.
Pull that off very carefully and you can then loosen the 5 screws that hold the slider controls for the heater / AC and the little accessory storage.
Disconnect all of the plugs for the radio and and remove. Disconnect plugs for defrost, cig lighter, etc., and remove. Leave the slider control thing in place. I DID NOT DISCONNECT ANY CABLE FROM THIS CONTROL UNIT.
Nextthing was to remove the lower heater ducts:

You have the middle junction that bolts where the two lowest holes are. Then you have a long duct that goes from the left side to the left most vent by the driver's door window.

Off the right side are two ducts. One goes up to the driver's side of the glove box and attaches to a bracket. Another piece slips onto that and then connects to the passenger side duct near the window.
Then I just started loosening all of the screws and bolts that hold the fan, AC box, and heater box in the truck. Disconnect the cable on the fan and the power lead on the bottom. Take all fan screws and bolts out. With everything loose I was able to rotate to clockwise (if looking DOWN at the fan) and it popped right out!
With that out of the way I disconnected the electrical connection on top of the AC box and with some wiggling (hoses through firewall just pop out) and the AC box was out!

At this point I went back to the heater box. I disconnected a black plug on the driver's side of the box and a cable on the bottom. There are three screws that hold the heater box in. Two on the bottom and one at the top right of the box. Got all of this I used a 1/4 inch drive with two 8"-10" extensions with a universal at the end. Got in there with no problem.
One the screws were out and with a little care in pulling the core hoses through the firewall it was laying in the passenger floorboard.
End result:

Did not tough steering wheel or any of the bolts actually holding the dash to the truck. It was all about removing ducts and then the heat and AC boxes and then the fan. disassembly time about 2 hours in 105 degree heat in carport.
So, I set to replacing the original heater core with one I had soldered at the local radiator shop. Welded core on right:

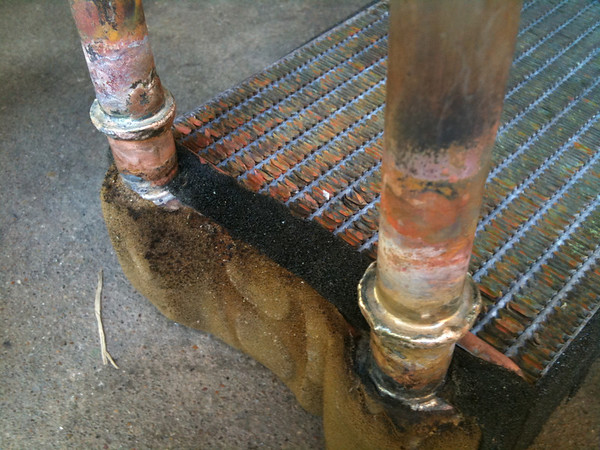
Here a closer look at the welded core. Looks fine to me and they cleaned and pressure tested it. They have been in business for 46 years and sold me my CSF radiator. I think it's good:
Swapping cores was easy. Remove brackets and clamps securing old heater core and wiggle it out. Slid new core in and fully seat. I installed the clamps on the actual tubes themselves but left the top bracket off to aid in getting it back in. Here's the bracket:

Reinstalling everything was not a really bid deal. I bagged everything as I removed it and took my time reinstalling everything. The worst part for me was to reinstall the fan after putting in the heater box and the AC box. It is a tight fit but eventually it did pop back in.
Make sure the antenna goes behind and over the heater box as you install. I had to snake mine through after I forgot.
I also used single sided adhesive weather stripping at the junctions of the ducts to tighten up the connections.
Done!

Total install time for new core was 5 hours including disassembling the fan and cleaning out any loose stuff and washing the fan blade.
I dreaded this fix because I read about how it takes all day to pull the dash and its a nightmare, etc. The journey began by sourcing a heater core out of a junk 60 near me. Only one I have seen in a yard in the year I have owned my cruiser so I am really going through this one.
No pics though.
What got me was that it took me 1 hour to pull the heater core out of the junk truck. Granted, a lot had been removed but it did not take long and I slid it over under the dash to the passenger side and it fell right into the footwell.
Hmmmm....
So, I got home and started slowly taking things apart:
I don't have pictures but I took the glove box apart (door, inside liner, etc.). Then I took out the radio, the little facia covering the heater / AC controls, defrost button, etc. 7 screws for this with 4 up accross the top and 3 accross the bottom.
Pull that off very carefully and you can then loosen the 5 screws that hold the slider controls for the heater / AC and the little accessory storage.
Disconnect all of the plugs for the radio and and remove. Disconnect plugs for defrost, cig lighter, etc., and remove. Leave the slider control thing in place. I DID NOT DISCONNECT ANY CABLE FROM THIS CONTROL UNIT.
Nextthing was to remove the lower heater ducts:
You have the middle junction that bolts where the two lowest holes are. Then you have a long duct that goes from the left side to the left most vent by the driver's door window.
Off the right side are two ducts. One goes up to the driver's side of the glove box and attaches to a bracket. Another piece slips onto that and then connects to the passenger side duct near the window.
Then I just started loosening all of the screws and bolts that hold the fan, AC box, and heater box in the truck. Disconnect the cable on the fan and the power lead on the bottom. Take all fan screws and bolts out. With everything loose I was able to rotate to clockwise (if looking DOWN at the fan) and it popped right out!
With that out of the way I disconnected the electrical connection on top of the AC box and with some wiggling (hoses through firewall just pop out) and the AC box was out!
At this point I went back to the heater box. I disconnected a black plug on the driver's side of the box and a cable on the bottom. There are three screws that hold the heater box in. Two on the bottom and one at the top right of the box. Got all of this I used a 1/4 inch drive with two 8"-10" extensions with a universal at the end. Got in there with no problem.
One the screws were out and with a little care in pulling the core hoses through the firewall it was laying in the passenger floorboard.
End result:
Did not tough steering wheel or any of the bolts actually holding the dash to the truck. It was all about removing ducts and then the heat and AC boxes and then the fan. disassembly time about 2 hours in 105 degree heat in carport.
So, I set to replacing the original heater core with one I had soldered at the local radiator shop. Welded core on right:
Here a closer look at the welded core. Looks fine to me and they cleaned and pressure tested it. They have been in business for 46 years and sold me my CSF radiator. I think it's good:
Swapping cores was easy. Remove brackets and clamps securing old heater core and wiggle it out. Slid new core in and fully seat. I installed the clamps on the actual tubes themselves but left the top bracket off to aid in getting it back in. Here's the bracket:
Reinstalling everything was not a really bid deal. I bagged everything as I removed it and took my time reinstalling everything. The worst part for me was to reinstall the fan after putting in the heater box and the AC box. It is a tight fit but eventually it did pop back in.
Make sure the antenna goes behind and over the heater box as you install. I had to snake mine through after I forgot.
I also used single sided adhesive weather stripping at the junctions of the ducts to tighten up the connections.
Done!
Total install time for new core was 5 hours including disassembling the fan and cleaning out any loose stuff and washing the fan blade.