
Toggle bolts to the rescue
Navigation
Install the app
How to install the app on iOS
Follow along with the video below to see how to install our site as a web app on your home screen.
Note: This feature may not be available in some browsers.
More options
Style variation
You are using an out of date browser. It may not display this or other websites correctly.
You should upgrade or use an alternative browser.
You should upgrade or use an alternative browser.
Show me your additional 12v sockets
- Thread starter eatSleepWoof
- Start date
This site may earn a commission from merchant affiliate
links, including eBay, Amazon, Skimlinks, and others.
That was the spot I originally wanted to use! When I pulled back the side panel (passenger side) it didn't look like there was any space underneath the panel to allow the sockets to fit. How did you make it work?
I cut out the piece that forms the space for the ash trays. If you carefully cut/melt them out, there is juuuuust enough room for the pictured blue sea panel to fit. Also handy is...if you ever want to swap in a different option, it’s just 4 little screws to access.
Good stuff. Before I can get to this mod, I need to get the basic 12v and cig lighter working. I just brought home a new to me '09 LX and there's no power in either DC plug. From what I can see, the fuse is common to other things that are working in my vehicle. Does anyone have a suggestion on where I should start troubleshooting?
Julian73
SILVER Star
I like you location choice. What circuit did you pull power from and what ground point did you use?I came up with a solution this afternoon that seems to work. I stole the ears off of a couple of old work electrical boxes, drilled holes for the screws in the panels and then used the ears to clamp the panel in place. I may paint the screw heads black later, but this solution seems to solve the problem. It's a bit tricky getting them in and out, but only a philips head screwdriver is needed. I used the exact same setup on both the driver's side and the passenger's side.
I used the ground connection that's behind the trim panel at the very back of the vehicle (there's one on each side about 15" above the floor). For power, I ran an 8 gauge cable direct from the battery (with fuses at the battery and on each port in the back) to each side in the back. I ran both 8 gauge wires along the passenger side because there's more stuff in the way on the driver's side. So the cable that ends up on the driver's side goes underneath the floor trim panel at the very back (the one with the flap that covers the gap when the tailgate is open).I like you location choice. What circuit did you pull power from and what ground point did you use?
Last edited:
Julian73
SILVER Star
Does anyone know the trick to remove the panel cover on back side of center console, below the 2nd seat AC controls? I worked it from both ends, but could never release the middle without risk of snapping it. It must come out, as I attach a photo of a vehicle with power outlets added.

IIRC, the entire rear console panel, with the rear heat controls comes off. The smaller panel with the installed accessory outlets is screwed to the bigger panel, so you can’t just pry it off. I’m pretty sure I posted a few photos in one of the threads showing the panel removed on mine (if no, I should have some I can post). I don’t recall it being too difficult to remove it.Does anyone know the trick to remove the panel cover on back side of center console, below the 2nd seat AC controls? I worked it from both ends, but could never release the middle without risk of snapping it. It must come out, as I attach a photo of a vehicle with power outlets added.
Julian73
SILVER Star
Thanks for the tipIIRC, the entire rear console panel, with the rear heat controls comes off. The smaller panel with the installed accessory outlets is screwed to the bigger panel, so you can’t just pry it off. I’m pretty sure I posted a few photos in one of the threads showing the panel removed on mine (if no, I should have some I can post). I don’t recall it being too difficult to remove it.
So here's a pretty good service manual picture showing how to take the console cover off. You carefully pry along each side with a trim removal tool (make sure you put the tape on first) and it pops right off.

Here's what the back side of the panel look like after you pop it off (note that I've already removed the panel that you would want to add outlets to):

Here's what the rear side of the center console looks like with the cover off:

And here's what it looks like with a couple of USB ports and an on/off switch added:

I ended up switching to a different switch because this one was too flimsy.
Make sure you check carefully for clearance behind anything you want to add to that panel below the heating controls before drilling any holes. That small panel can be ordered separately and is fairly cheap, so I bought a spare in case I want to switch back to stock at some point. The part number for the Heritage Edition panel is 55548-60050-C0. For models with rear screens, I believe this panel has controls for the rear screens.
Here's what the back side of the panel look like after you pop it off (note that I've already removed the panel that you would want to add outlets to):
Here's what the rear side of the center console looks like with the cover off:
And here's what it looks like with a couple of USB ports and an on/off switch added:
I ended up switching to a different switch because this one was too flimsy.
Make sure you check carefully for clearance behind anything you want to add to that panel below the heating controls before drilling any holes. That small panel can be ordered separately and is fairly cheap, so I bought a spare in case I want to switch back to stock at some point. The part number for the Heritage Edition panel is 55548-60050-C0. For models with rear screens, I believe this panel has controls for the rear screens.
Julian73
SILVER Star
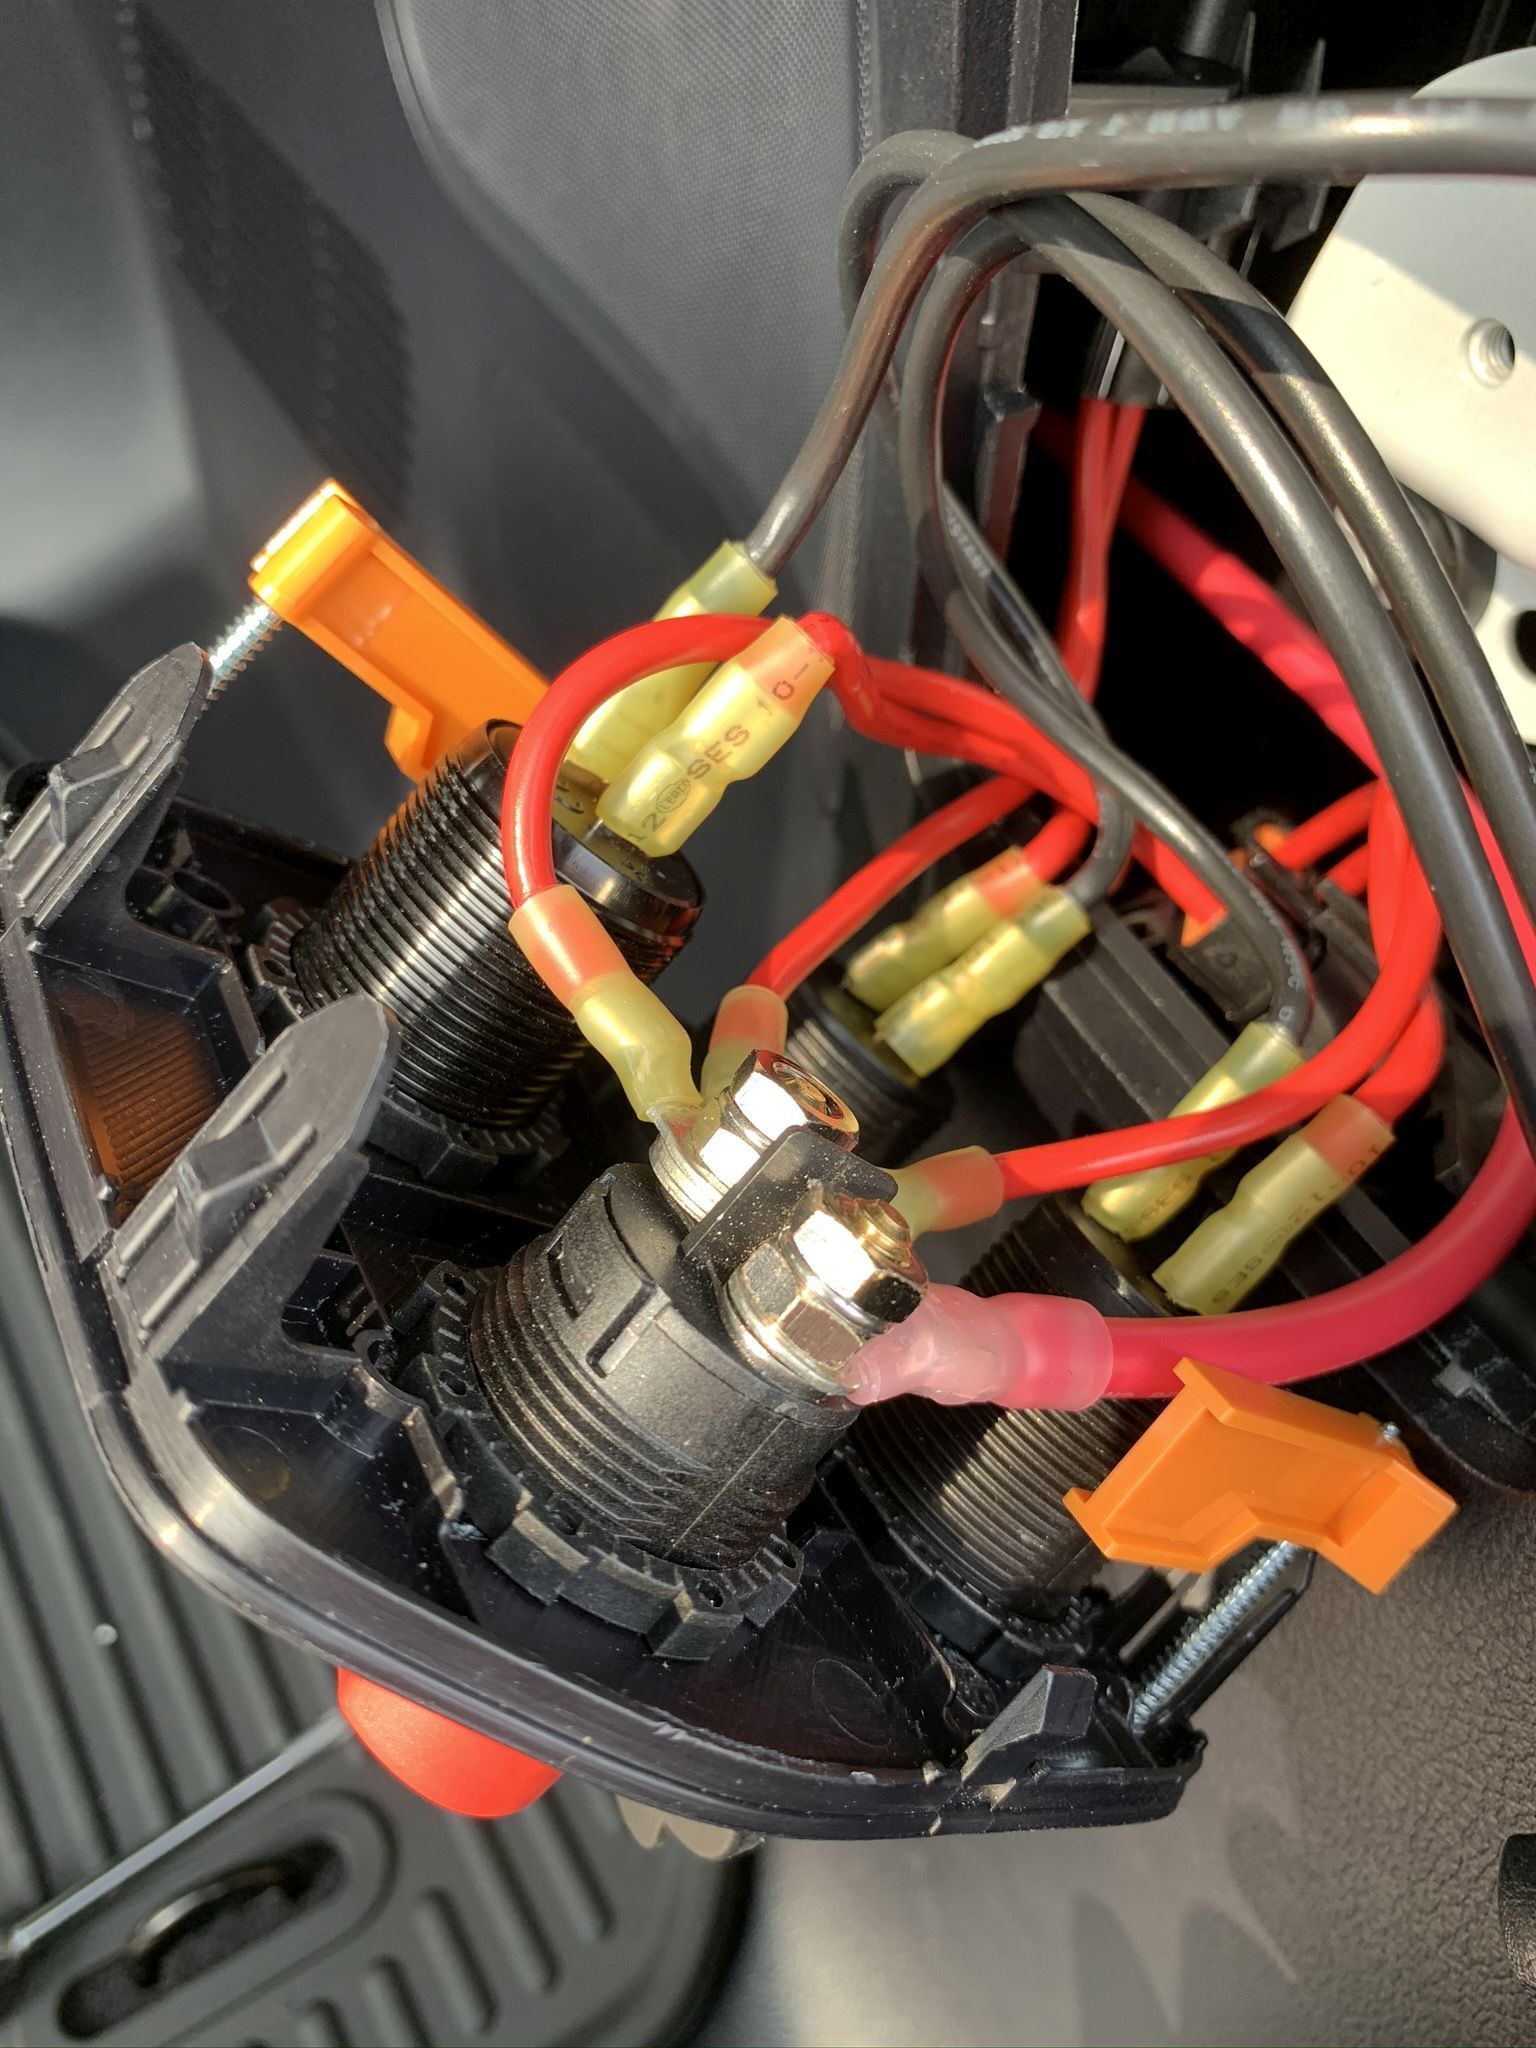
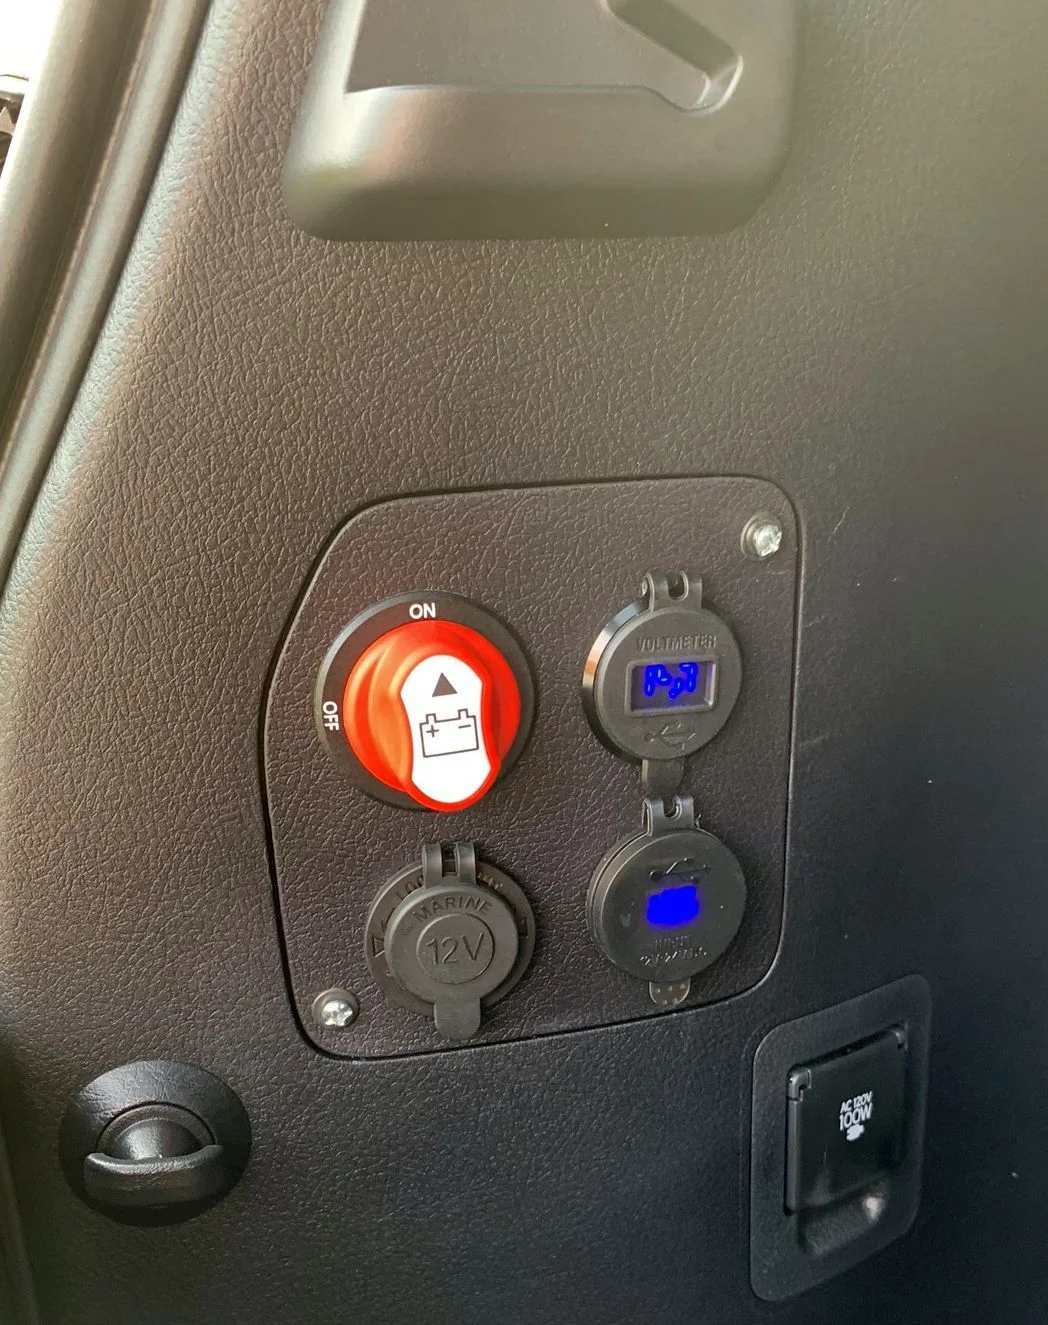
Well after first planning to mount Blue Sea accessory panels #4363 and #4366 to the OEM Quarter Trim Covers, I made a change of course after doing one and not accepting the aesthetics. I have now pulled the guts and mounted the sockets and switches directly onto the cover pieces. Final conf on RHS is a switch-15A CB, 12V socket and dual USB on one circuit, plus a switch-15A CB and 12V socket in a another. LHS has a a switch-15A CB, 12V socket, dual USB and mini voltmeter on a third circuit branch, each using 10g wires. Distribution is through a Blue Sea 4-circuit Fuse Block #5045 powered through a 4g wire to eventually be feed from an auxiliary battery.


Nicely doneWell after first planning to mount Blue Sea accessory panels #4363 and #4366 to the OEM Quarter Trim Covers, I made a change of course after doing one and not accepting the aesthetics. I have now pulled the guts and mounted the sockets and switches directly onto the cover pieces. Final conf on RHS is a switch-15A CB, 12V socket and dual USB on one circuit, plus a switch-15A CB and 12V socket in a another. LHS has a a switch-15A CB, 12V socket, dual USB and mini voltmeter on a third circuit branch, each using 10g wires. Distribution is through a Blue Sea 4-circuit Fuse Block #5045 powered through a 4g wire to eventually be feed from an auxiliary battery.
View attachment 2627411
View attachment 2627413
View attachment 2627416
View attachment 2627418
View attachment 2627419

For sleeping in the truck....

Nice job! That's pretty much the same solution I went with and I still think these panels are the perfect location for this sort of thing for those of us without 3rd row seats as we don't have to modify any expensive panels. I used power switches that worked with round holes in the panels (easier for my skill set to mount cleanly) and I ran 2 8g wires direct to the main battery for power (1 for the passenger side and 1 for the driver side). I connected fuses for each 8g wire at the battery terminal rated to carry the total load which will protect from a short along the long wire run and then fuses for each circuit close to each socket.Well after first planning to mount Blue Sea accessory panels #4363 and #4366 to the OEM Quarter Trim Covers, I made a change of course after doing one and not accepting the aesthetics. I have now pulled the guts and mounted the sockets and switches directly onto the cover pieces. Final conf on RHS is a switch-15A CB, 12V socket and dual USB on one circuit, plus a switch-15A CB and 12V socket in a another. LHS has a a switch-15A CB, 12V socket, dual USB and mini voltmeter on a third circuit branch, each using 10g wires. Distribution is through a Blue Sea 4-circuit Fuse Block #5045 powered through a 4g wire to eventually be feed from an auxiliary battery.
Julian73
SILVER Star
Yeah, I ran a single 4g wire fused at main battery (to later be moved over to a future auxiliary) with a 60A fuse to support four branches of the sub fuse block, one brach is an open spare.Nice job! That's pretty much the same solution I went with and I still think these panels are the perfect location for this sort of thing for those of us without 3rd row seats as we don't have to modify any expensive panels. I used power switches that worked with round holes in the panels (easier for my skill set to mount cleanly) and I ran 2 8g wires direct to the main battery for power (1 for the passenger side and 1 for the driver side). I connected fuses for each 8g wire at the battery terminal rated to carry the total load which will protect from a short along the long wire run and then fuses for each circuit close to each socket.