Powder Coat Cure Oven Build (1 Viewer)

This site may earn a commission from merchant affiliate
links, including eBay, Amazon, Skimlinks, and others.

Joined
Aug 22, 2015
Threads
17
Messages
1,572
Location
Ohio
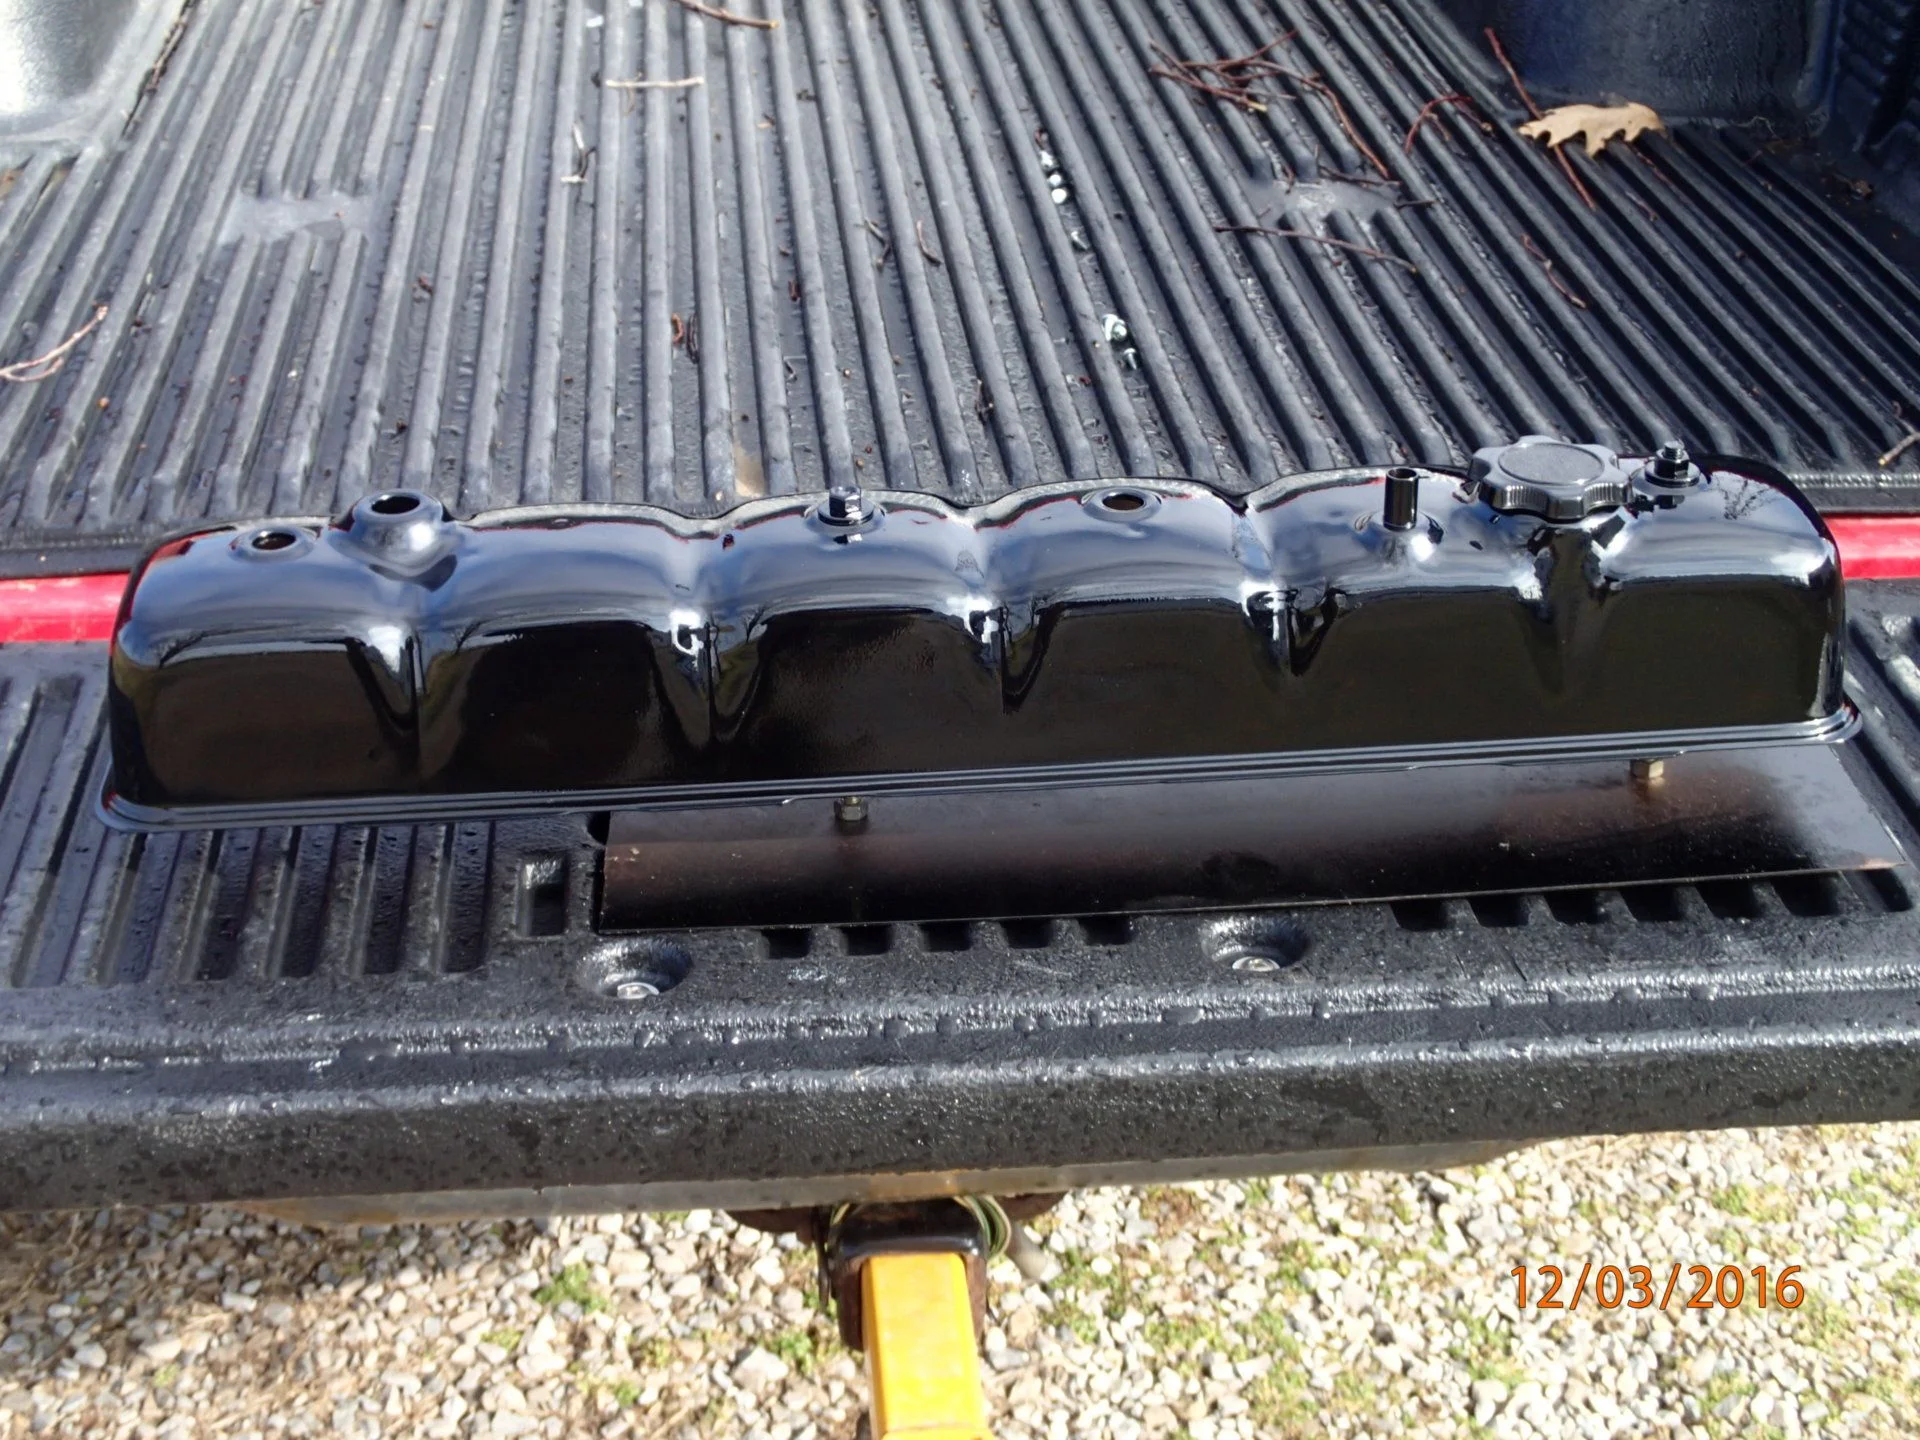
Not a lot of powder coat oven build threads out there that I see. I've had a decent gun set-up for awhile (Columbia Coatings Kool Koat or something.) I'm sure it's a re-badged system made by someone else. In any event I really like it but have been constrained to cure the paint in a kitchen oven and even made a "pregnant" kitchen oven. The 3FE valve cover barely fit in that one,

full


So with advice and inspiration from Patrick @dogfishlake I decided to build a proper oven.

Getting started on the base. In hind sight should have definitely upsized the casters. This thing is a heavy beast.

2032374


Construction is steel framing studs riveted together. The Harbor Freight air over hydraulic rivet gun was worth it's weight in gold. I had to have shot over 6 or 7 hundred rivets said and done. As you can see I'm recessing the heaters. It's more work but worth it I think.,

2032366


Coming together.

2032367


So as I said recessed heaters. Also being uptight I'm adding an additional heat shield behind the heaters and kind of polished them up. I want to keep the heat in the oven. The studs here are just to space the shield away from the back panel.

2032368


To be continued.
 
Last edited:
More of the heater recesses.

2032375


Using old angle iron as support for the heaters and heat shields.

2032376


Mounting up the heaters gotten from curb alert ovens.

2032377


Heat shield detail. Should act like a mirror at infrared wavelengths.

2032378


Talking to guys at work and they were asking what I was going to use it for. I said car stuff up to plate bumpers. Then I got to thinking about the weight. So I added 1/4" steel strapping to the studs on the center sides to transfer the weight down to the bottom.

2032379
 
Hidden here but I also put 1/4" steel up here at the top in case I want to add angle iron later to allow for a slide in/out rack just like a kitchen oven. For lots of small parts.

2032380


Ok so as I said uptight about things. The steel framing is obviously bad for insulation. The studs would be thermal bridges. I had some insulation board leftover from a wood stove install. Some kind of ceramic - basically space shuttle tile material. Anyway sawed it to 1/4" thick and glued it to all the studs. Overkill...yeah. But I had it sitting around so what the hell.

2032381


Roof and lights in. Lights also from the curb alert ovens.

2032382


Top view. You can see the insulation squished in there.

2032383


Looking like an oven.

2032387
 
Interior skinned.

2032390


Rock wool insulation. Lots of guys use fiberglass but rock wool is much higher temp tolerance and also better R value.

2032391


Skinning the outside and also rough wiring.

2032392


Lots of pics like this for reference to be able to find mounting points for grab handles, hinges, etc later.

2032394


Scored these handles at the mil-surp store. Handle, Grab, Vehicular.

2032397
 
Angle aluminum on the corners to cover sharp metal. Little detail of the convection fan recirc feature in the back.

2032400


Looking good.


2032401


Carcass is done. Door opening trimmed out.

2032402


Door time.

2032403


Insulated.

2032404
 
Door hung.


2032405


I hate crutches. But the door was sagging. Not that the door was sagging but the frame was flexing. Should have had more structure in the hinge side. Anyway this levels it up and takes the weight off the hinges.

2032406


Window in. Curb alert oven of course.

2032407


Done except for control panel and final wire.

2032410


Yes that's a banker's lock box that I picked up at a garage sale for $2 about 6 years ago.

2032411
 
No....not sketchy at all. That was about all my Kubota wanted. I'm guessing north of 800 lbs.

2032412


That's it for the pics. Got it turned on for the first time last night. Sucking every bit of 46 amps at 220V. I may dial the heat back some. Have yet to bring it up to process temp. Maybe tomorrow. Then it's time to coat away.

Thanks for looking.
 
No....not sketchy at all. That was about all my Kubota wanted. I'm guessing north of 800 lbs.

View attachment 2032412

That's it for the pics. Got it turned on for the first time last night. Sucking every bit of 46 amps at 220V. I may dial the heat back some. Have yet to bring it up to process temp. Maybe tomorrow. Then it's time to coat away.

Thanks for looking.
That'll work great. Nice job. It will be a little stinky at first cooking the crap off the steel but will go away quick. Keep an eye out that the recirc fan moves the air around nice for even cure. You can even multi speed the fan to keep movement minimal til parts gel at around 220° then ramp it up for real even heat. Keep max temp down under 400 and cure a little long to make sure the powder is cross linked properly.

Have fun!
 
Thanks Patrick! Can't wait to use it I've got a pile of parts to do.
 
That's amazing.....
 
Thanks! It was a ton of work and some money. I don't keep a spreadsheet or anything but if I counted every rivet and wirenut probably $1500. But to buy one this size with comparable featured (lights, convection fan etc) I think it easily be $5000.
 
Thanks! It was a ton of work and some money. I don't keep a spreadsheet or anything but if I counted every rivet and wirenut probably $1500. But to buy one this size with comparable featured (lights, convection fan etc) I think it easily be $5000.


make it a side buiseness to get back some of the cost, and perfect your skills on someone elses parts
 
make it a side buiseness to get back some of the cost, and perfect your skills on someone elses parts

Yeah me being me I'll do it the other way. Practice on my stuff before taking on paying jobs. But yeah eventually I'll do work for people I know to pay for the setup. Not sure I want to deal with the general public.
 
Great work. Question - do you hang the items or have shelves or ?

Thanks. If you look close at the 4th pic in post 6 you can see a piece of angle iron running side to side at the top. It's in a "V" position so you can hang hooks on it. It's an idea I got off the internet.
 

Users who are viewing this thread

Back
Top Bottom