Overhead console install
This is a junkyard find from a 1997ish GMC Safari minivan, but I also saw the exact same console in some S10 Blazers and I think some other GM trucks of the same era. If you see one at a yard all you need to get it is a phillips screwdriver and wire cutter. One screw in the front and two in the back under the dome light cover. Cut the wires so you keep the connectors to the digital display and the lights, they are small connectors and may come in handy later. I think I paid $10 or $12 for the console, so this should easily cost less than $50, not counting the GPS unit, or the digital fuel guage.
Steps:
1. get it ready - install LEDs in all the lights and gut the digital compass and temp display at the front.
2. install it and get lights working - add a 3-way switch like the OEM dome light.
3. install a GPS mount with power to it from a 3way switch (ign on, always on, off)
4. install the reverse backup sensor display in the digital display area, along with my digital LED fuel gauge for the WVO tank.
Later I'd like to wire the front & rear dome lights together and put a 3way swtich on the dash. (credit for that goes to the best under $50 mods thread)
This, so far has been a "no-drill mod" meaning, no new holes were made in my cruiser.
1. Get it ready, I replaced the map lights and dome light with LEDs. To get to a map light bulb, push lightly on the lens and twist it a quater turn and they should fall right out.
I also cut the front of the console where the front screw is, I don't have a pic, but I wanted this to be as far forward as possible so I could use the garage door opener button area for a swing down GPS. I believe I cut a little further inward past where the single front screw was to achieve this.
2. Install it and get lights working.
Mounting: I used some scrap aluminum I had left over from my roof rack build (coming soon), This is 3in wide x 1/8in thick aluminum, I wanted to use one piece, but it was free so two worked fine, and later ended up using a third to mount to both dome light mounting holes. I got the alum from Speedy metals (no compensation was given to me for their endorsement, but it will be gladly accepted if offered).
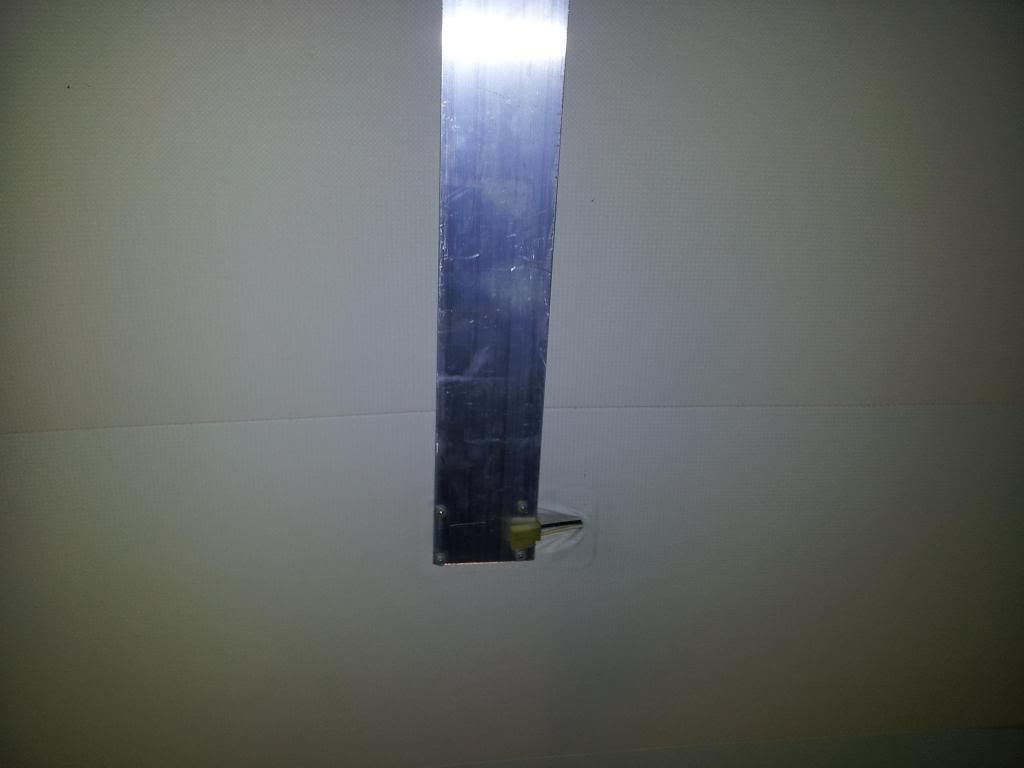
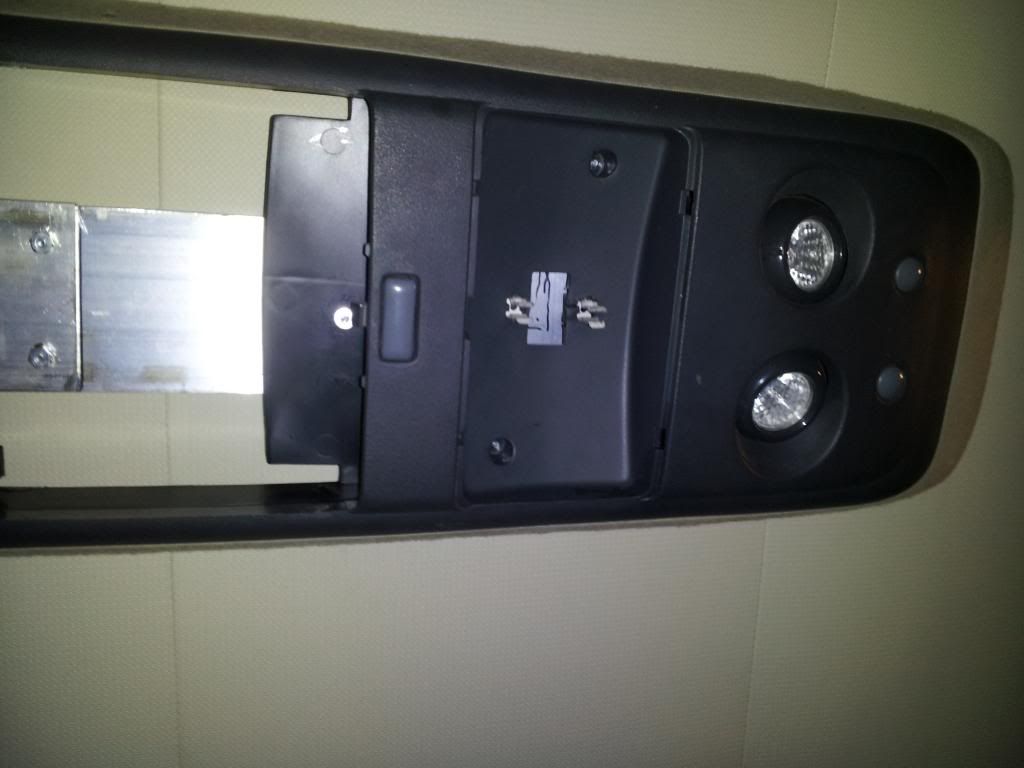
I unscrewed the dome lights and rear view mirror and mocked up the aluminum strips, traced the mounting hole patterns of the mirror and dome light on their own strips of aluminum, and mounted the dome light one.
http://i947.photobucket.com/albums/...rhead console/20130112_175640_zps15988157.jpg
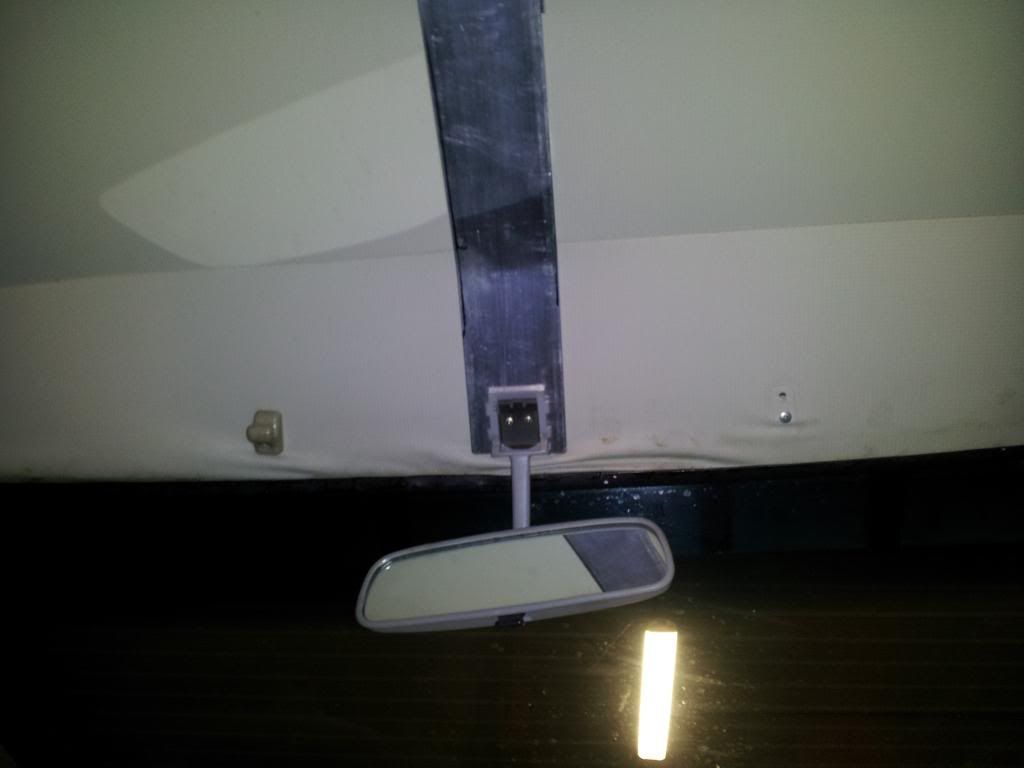
The mirror strip took a little measuring and bending, then it was bolted up. It looks a little off center becasue it is, but the console is centered when it's mounted to the bracket.
http://i947.photobucket.com/albums/...rhead console/20130112_175659_zps18dd7b24.jpg
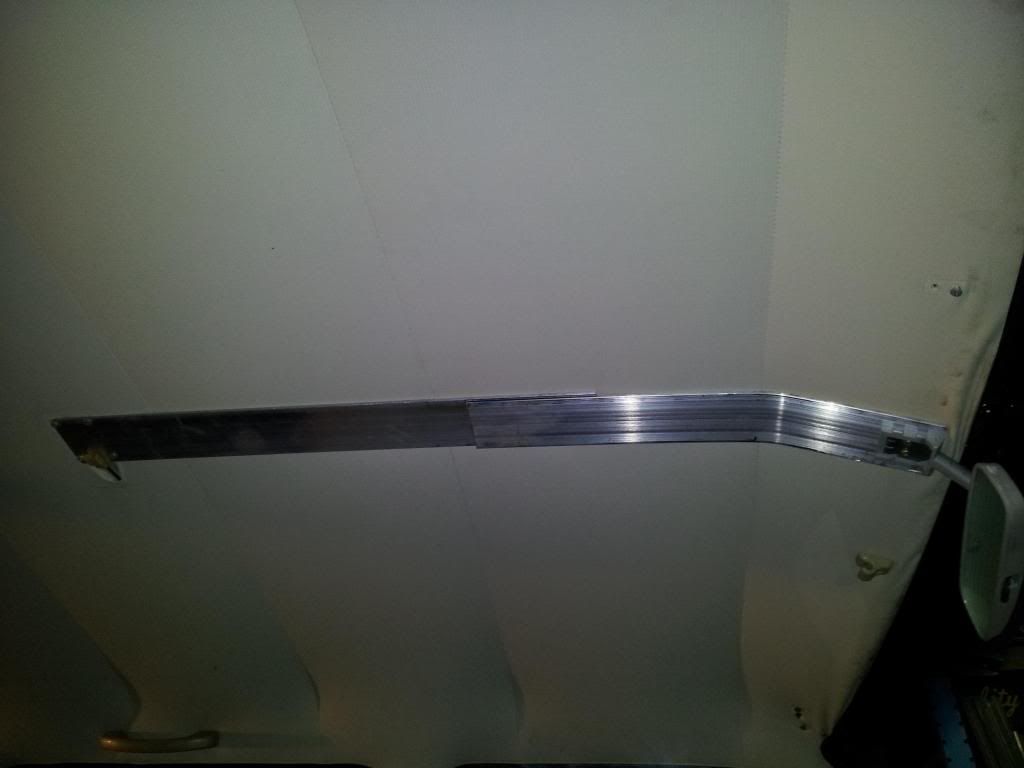
After they were mounted I marked it and bolted them together and figured out how to mount the console to it.
http://i947.photobucket.com/albums/...rhead console/20130112_175623_zps57c8455e.jpg
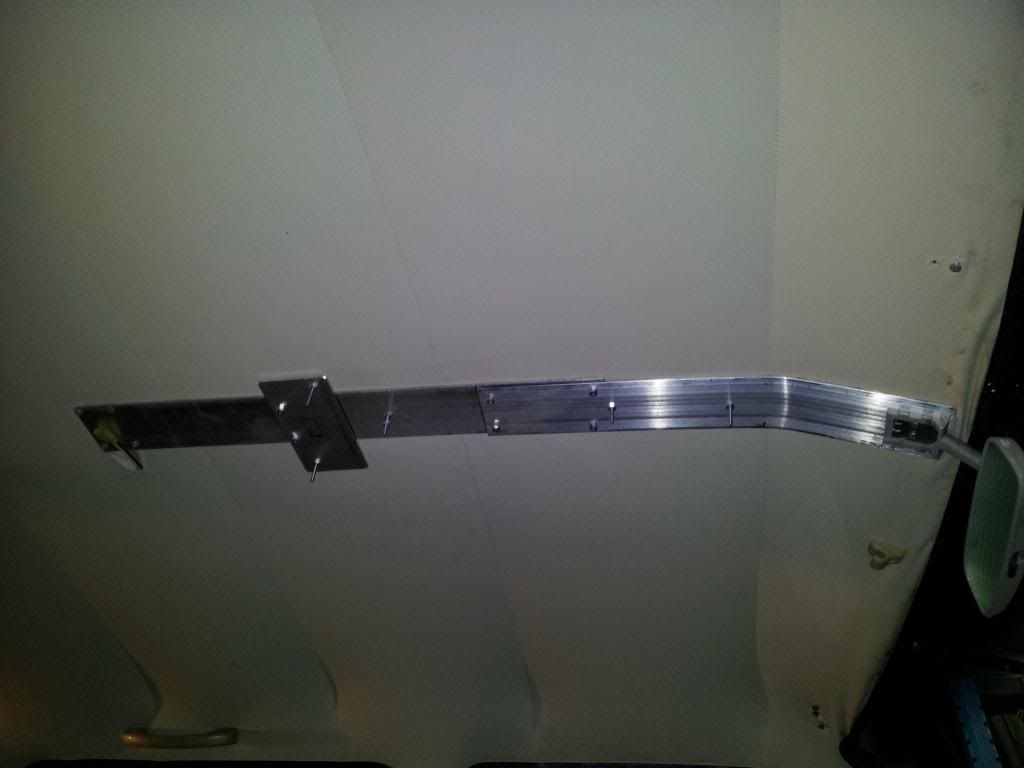
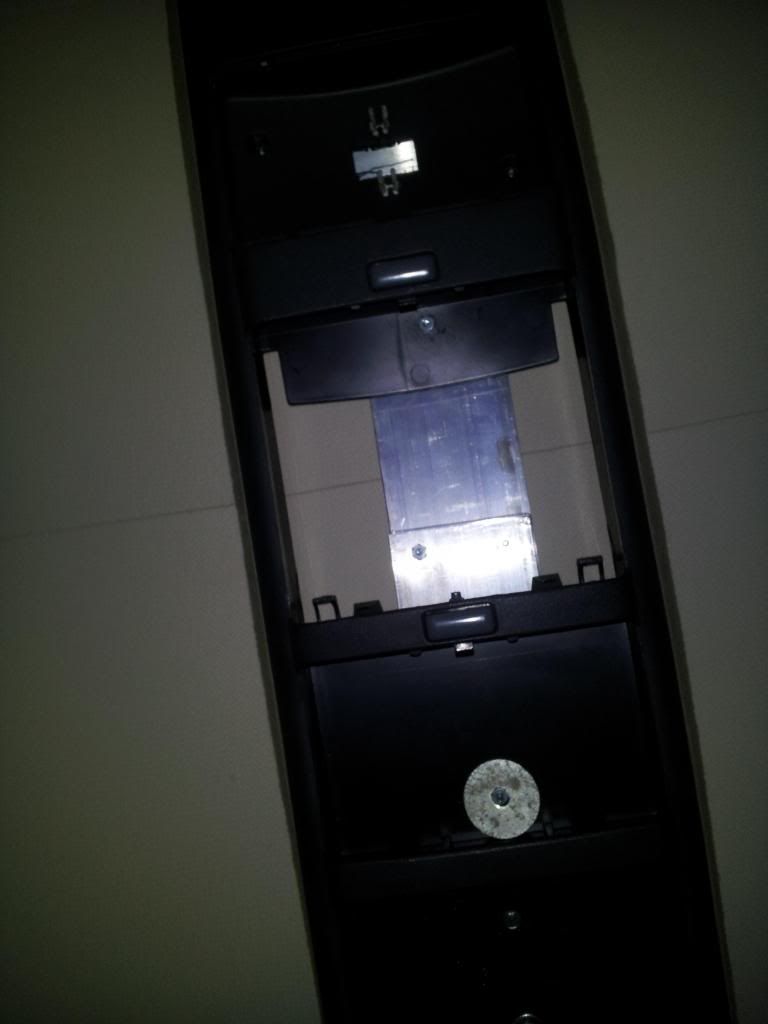
I ended up putting some very thin bolts to act as mounting studs, sticking down at least an inch from the mounting bracket. 5 studs total, along with the cross piece to allow use of the holes under the dome light cover.
http://i947.photobucket.com/albums/...rhead console/20130112_185816_zpsa6e362fd.jpg
To secure it I drilled some holes in the console above the swing down compartments and held it up with fender washers and nuts.
http://i947.photobucket.com/albums/...rhead console/20130112_190625_zpsbc0308a7.jpg
http://i947.photobucket.com/albums/...rhead console/20130112_190632_zps9f879e02.jpg
Don't have a great shot of it, but here's a decent one:
http://i947.photobucket.com/albums/...sole/20130112_191257-brighter_zps2e1ad935.jpg
I still need to get the lights working, and the contour of the headliner to the top of the console is a little off, but I'm please to have map/reading lights for the front and second row and a place for GPS, Sunglasses and a little bit of storage behind that. I also plan to get a big 48LED dome light or a few 36LED dome lights to go in it.
In the last pic, from front to back are the compartments:
1. originally for a garage door opener, I'm going to modify the latch so it's easier to open and put my GPS up there with power to it (explained earlier)
2. sunglasses.
3. originally a CD case holder? or for flat stuff, it seems too small to me for a CB or HAM radio, I'm not sure what will go up there.
I hope to get pics of the rest later, but this is as far as I've completed, and it will be a while since I won't have access to the truck for quite a while.
Thanks for all the inspriation and help, I've learned a lot here. I hope this inspires someone or helps them get a decent console into their ride for fairly cheap.
This is a junkyard find from a 1997ish GMC Safari minivan, but I also saw the exact same console in some S10 Blazers and I think some other GM trucks of the same era. If you see one at a yard all you need to get it is a phillips screwdriver and wire cutter. One screw in the front and two in the back under the dome light cover. Cut the wires so you keep the connectors to the digital display and the lights, they are small connectors and may come in handy later. I think I paid $10 or $12 for the console, so this should easily cost less than $50, not counting the GPS unit, or the digital fuel guage.
Steps:
1. get it ready - install LEDs in all the lights and gut the digital compass and temp display at the front.
2. install it and get lights working - add a 3-way switch like the OEM dome light.
3. install a GPS mount with power to it from a 3way switch (ign on, always on, off)
4. install the reverse backup sensor display in the digital display area, along with my digital LED fuel gauge for the WVO tank.
Later I'd like to wire the front & rear dome lights together and put a 3way swtich on the dash. (credit for that goes to the best under $50 mods thread)
This, so far has been a "no-drill mod" meaning, no new holes were made in my cruiser.
1. Get it ready, I replaced the map lights and dome light with LEDs. To get to a map light bulb, push lightly on the lens and twist it a quater turn and they should fall right out.
I also cut the front of the console where the front screw is, I don't have a pic, but I wanted this to be as far forward as possible so I could use the garage door opener button area for a swing down GPS. I believe I cut a little further inward past where the single front screw was to achieve this.
2. Install it and get lights working.
Mounting: I used some scrap aluminum I had left over from my roof rack build (coming soon), This is 3in wide x 1/8in thick aluminum, I wanted to use one piece, but it was free so two worked fine, and later ended up using a third to mount to both dome light mounting holes. I got the alum from Speedy metals (no compensation was given to me for their endorsement, but it will be gladly accepted if offered).
I unscrewed the dome lights and rear view mirror and mocked up the aluminum strips, traced the mounting hole patterns of the mirror and dome light on their own strips of aluminum, and mounted the dome light one.
http://i947.photobucket.com/albums/...rhead console/20130112_175640_zps15988157.jpg
The mirror strip took a little measuring and bending, then it was bolted up. It looks a little off center becasue it is, but the console is centered when it's mounted to the bracket.
http://i947.photobucket.com/albums/...rhead console/20130112_175659_zps18dd7b24.jpg
After they were mounted I marked it and bolted them together and figured out how to mount the console to it.
http://i947.photobucket.com/albums/...rhead console/20130112_175623_zps57c8455e.jpg
I ended up putting some very thin bolts to act as mounting studs, sticking down at least an inch from the mounting bracket. 5 studs total, along with the cross piece to allow use of the holes under the dome light cover.
http://i947.photobucket.com/albums/...rhead console/20130112_185816_zpsa6e362fd.jpg
To secure it I drilled some holes in the console above the swing down compartments and held it up with fender washers and nuts.
http://i947.photobucket.com/albums/...rhead console/20130112_190625_zpsbc0308a7.jpg
http://i947.photobucket.com/albums/...rhead console/20130112_190632_zps9f879e02.jpg
Don't have a great shot of it, but here's a decent one:
http://i947.photobucket.com/albums/...sole/20130112_191257-brighter_zps2e1ad935.jpg
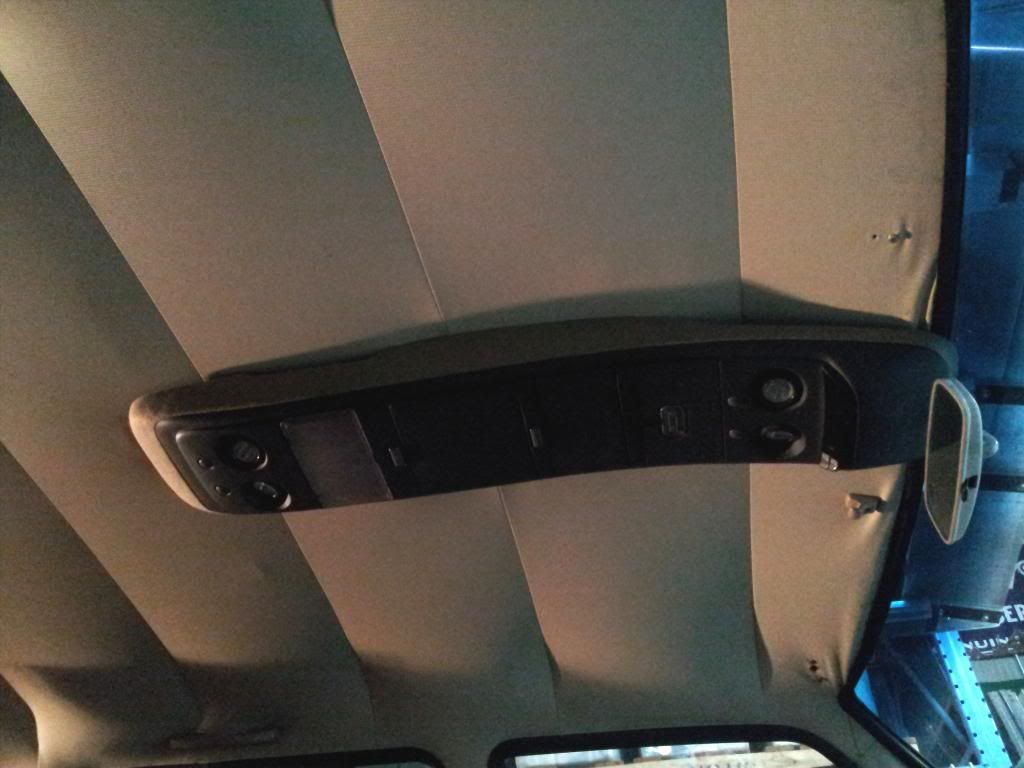
I still need to get the lights working, and the contour of the headliner to the top of the console is a little off, but I'm please to have map/reading lights for the front and second row and a place for GPS, Sunglasses and a little bit of storage behind that. I also plan to get a big 48LED dome light or a few 36LED dome lights to go in it.
In the last pic, from front to back are the compartments:
1. originally for a garage door opener, I'm going to modify the latch so it's easier to open and put my GPS up there with power to it (explained earlier)
2. sunglasses.
3. originally a CD case holder? or for flat stuff, it seems too small to me for a CB or HAM radio, I'm not sure what will go up there.
I hope to get pics of the rest later, but this is as far as I've completed, and it will be a while since I won't have access to the truck for quite a while.
Thanks for all the inspriation and help, I've learned a lot here. I hope this inspires someone or helps them get a decent console into their ride for fairly cheap.