-
Vehicle-Trailer ClassifiedsStolen Vehicles/Parts FJ40 | BJ40 BJ42 | FJ43 | BJ44 | FJ45 | FJ45LV | HJ47 FJ55 | FJ56 FJ60 | FJ62 | BJ60 | HJ61 BJ74 | VZJ95 | HZJ75 | KZJ90 FJ80 | FZJ80 | LX450 | HDJ81 UZJ100 | LX470 VDJ200 | LX570 GX460 | GX470 LC250 | GX550 FJ Cruiser Stout | Hilux | Minitruck Tacoma Surf | 4Runner Tundra | Sequoia Other Vehicles Trailers | Campers | RVs
Navigation
Install the app
How to install the app on iOS
Follow along with the video below to see how to install our site as a web app on your home screen.
Note: This feature may not be available in some browsers.
More options
Style variation
You are using an out of date browser. It may not display this or other websites correctly.
You should upgrade or use an alternative browser.
You should upgrade or use an alternative browser.
Lids for 100s
- Thread starter popawoody
- Start date
This site may earn a commission from merchant affiliate
links, including eBay, Amazon, Skimlinks, and others.
More options
Who Replied?kevinmrowland
Forum Lifer
Couple reasons, as you mention removability is key, but so is ease of installation. Bolts thread in with no real special tools, and if you back into something, or wreck your tailgate, or have the truck repainted, etc, you can unthread them and remove the lid and frame with ease.
Kevin-
I posted a question in the install thread on the 100 series forum, but I figure you're more likely to see it here.
Have you determined if the stainless latches interfere with the set plate? If the bolts interfere with the set plate then rivets might be a good alternative. We'd have to drill out the rivets to remove the lid, but that's what it takes to make the set plate work without catching on the screws then count me as one vote in favor of the rivets.
kevinmrowland
Forum Lifer
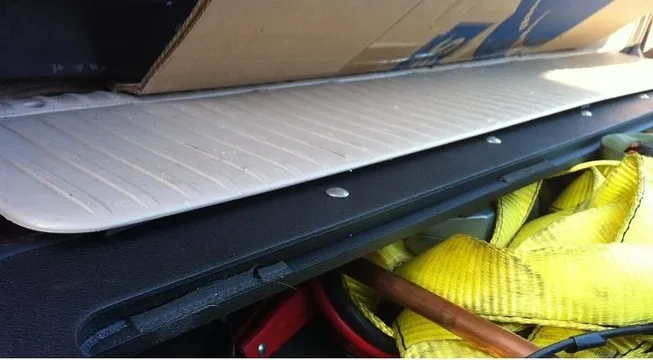
The stainless latches don't have an abrupt edge like those plastic ones did, pretty much anything will ramp over them, and the bolts do not actually interfere with the plate at all, it is the edge of the frame and the edge of the lid that can catch.
In the production versions I have also switched the five bolts on the leading edge to carriage bolts so they are even lower profile.
I'll check in on the other thread and copy this there.
KR
In the production versions I have also switched the five bolts on the leading edge to carriage bolts so they are even lower profile.
I'll check in on the other thread and copy this there.
KR
Yeah had some self adhesive felts, not sure if they will last, but works well. Now i just nee a super hd helper spring
The lift assist is drawn...I just need to test it out. For us 'weak in the arm Hundy types'
I'll take one!
This is a great product. Loaded up its quite heavy. Since my hundy has been recruited as the family kid hauler grocery getter and is piloted by my 105 lb wife, a HD lift support would be great. Since I am super strong, its no biggy for me, lol
This is a great product. Loaded up its quite heavy. Since my hundy has been recruited as the family kid hauler grocery getter and is piloted by my 105 lb wife, a HD lift support would be great. Since I am super strong, its no biggy for me, lol
The lift assist is drawn...I just need to test it out. For us 'weak in the arm Hundy types'
So... Have these moved into production yet?
kevinmrowland
Forum Lifer
There are still only the 6 test lids, they are getting beat on but things seems to be going well so far....
There are still only the 6 test lids, they are getting beat on but things seems to be going well so far....
Well let's get going on production!!!!!!
Just kidding! I appreciate that you take the time to make sure things work first before sending them out to the masses.
kevinmrowland
Forum Lifer
Sounds great, nice to have folks that already have a lid think they need another. 
Roberto is it?
(hard to keep track of what usernames go with real word names. )
)
Be sure to drop me an email so I can put that in the 100 series folder, I'm keeping track of interest that way.
KR
Roberto is it?
(hard to keep track of what usernames go with real word names.
 )
)Be sure to drop me an email so I can put that in the 100 series folder, I'm keeping track of interest that way.
KR
Well, finally got around to installing the Beta lid I received.
Having installed one on my 80 and using DesertYeti's thread for the unknowns, fairly easy and straight forward install.
Some on the caveats:
Watch the wires and the cables for the tailgate latches. I broke the little plug that goes on the head of the key barrel for the auto unlock. Also, somewhere I broke one of the nipples on the cable for the tailgate latch.
Awesome tailgate. Great work Kevin!

Sent from my iPhone using IH8MUD

Having installed one on my 80 and using DesertYeti's thread for the unknowns, fairly easy and straight forward install.
Some on the caveats:
Watch the wires and the cables for the tailgate latches. I broke the little plug that goes on the head of the key barrel for the auto unlock. Also, somewhere I broke one of the nipples on the cable for the tailgate latch.
Awesome tailgate. Great work Kevin!

Sent from my iPhone using IH8MUD
Toyota p/n 84903-60040, dont ask me how I know 
Watch the wires and the cables for the tailgate latches. I broke the little plug that goes on the head of the key barrel for the auto unlock. Also, somewhere I broke one of the nipples on the cable for the tailgate latch.
Last edited by a moderator:
kevinmrowland
Forum Lifer
Did you run into the same damaged terminal Carl?
Anyone have a pic of the trouble spot?
What should be done to avoid the damage? (just take into account what and where the wires go during install?)
Alex, do you have any trouble with the set plate catching?
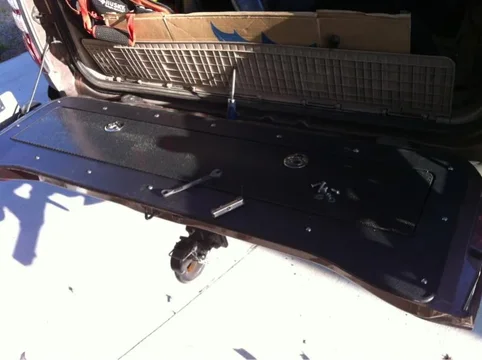
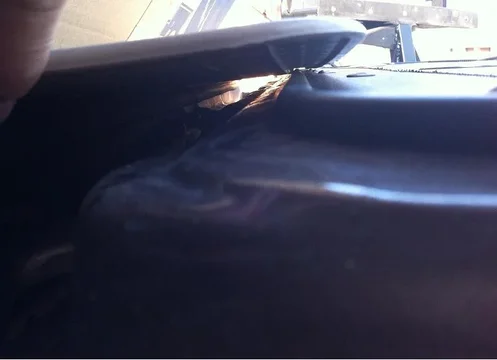
So far I have only had one test lid that seems to have an issue with it, made a nice little bumper/slider that seems to work, but the hole locations on it are not perfect yet:
Kevin,
Yes, the set plate catches. I don't think it catches on the bolt heads, I think it catches on the edge of the lid. I am going to break out the Dremel and fool around with it this weekend and come up with some suggestions for you as to where it catches.
With the unlock switch and wiring in general, I think I may have tugged on the wire loom, not a big deal, a foot of black electrical tape fixed that all up The latch cable, I don't know when it broke either, but you could remove the cables prior to cutting. Same with the wire loom, you could un-plug the wires and cut all the cable ties securing the loom to the chunk you cut off the tail gate. Then drop all the wiring in the tailgate while you cut.
Also for the tailgate assist, 1/2 inch pipe/tube works for the assist spring. I'll measure the length I cut and pass it along.
Yes, the set plate catches. I don't think it catches on the bolt heads, I think it catches on the edge of the lid. I am going to break out the Dremel and fool around with it this weekend and come up with some suggestions for you as to where it catches.
With the unlock switch and wiring in general, I think I may have tugged on the wire loom, not a big deal, a foot of black electrical tape fixed that all up
 The latch cable, I don't know when it broke either, but you could remove the cables prior to cutting. Same with the wire loom, you could un-plug the wires and cut all the cable ties securing the loom to the chunk you cut off the tail gate. Then drop all the wiring in the tailgate while you cut.
Also for the tailgate assist, 1/2 inch pipe/tube works for the assist spring. I'll measure the length I cut and pass it along.
Wish this was possible for 2nd gen 4Runners.  Stupid ass electric window motor is in the tail gate.
Similar threads
- Replies
- 6
- Views
- 988
Users who are viewing this thread
Total: 1 (members: 0, guests: 1)


