Tube Bumper With Winch Install

This site may earn a commission from merchant affiliate
links, including eBay, Amazon, Skimlinks, and others.

Joined
Feb 3, 2008
Threads
44
Messages
328
Location
MCAS Miramar
I had been looking at bumpers for about a year, and couldn't find one that I really liked...that was before I got in touch with Stan at toyoutfitters.com. He contacted me on this site and asked me what type of bumper I wanted, I told him my specifications and he acomidated down to the last detail...He constantly stayed in contact with me throughout the build and gave me almost weekly updates...In my opinion this is the best tube bumper on the market, The quality and time that was put into it was amazing. When I recieved the bumper it was in a custom box and bolted down so there was no chance of it moving during shippin...It came with comprehensive instructions, and was by far the easiest after market install that I have ever done...everything lined up like it was supposed to. It was a pleasure doing business with Stan and he has definately earned my business when it comes time to do my LCAs and my rear bumper...

So without further ado here are the install pics...

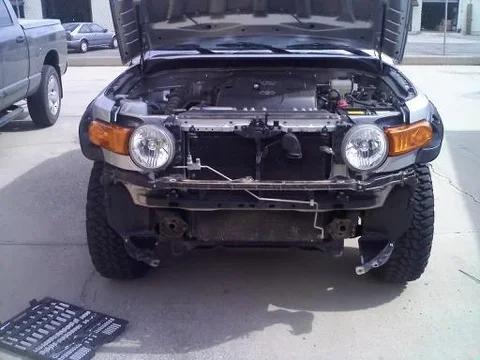
This is my truck prior to stripping off my bumper
bumper10.webp

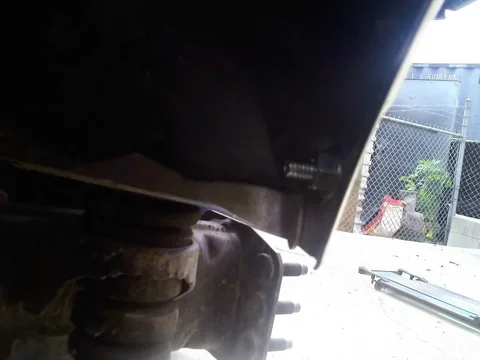
Removing the Stock bumper was the most difficult part of the install
bumper7.webp

Here is the custom crate that it was shipped in
bumper9.webp
bumper10.webp
bumper7.webp
bumper9.webp
 
After I pryed the crate open I got the first look at my awesome new bumper, and was almost ready to bolt it on
bumper8.webp

The one last thing that had to be done before the bolt up was move the A/C line back towards the radiator so that the bumper would clear
bumper5.webp

This was easy enough to do, it just takes a little finess and time, simply remove the center bracket, bend the A/C line back and replace it.
bumper4.webp
bumper8.webp
bumper5.webp
bumper4.webp
 
Next he inner fender lining needed to be trimmed to match the body lines, that way it wouldnt hang down and flap in the wind...after cutting it you can can drill a hole in the body and use a plastic push pin to hold it down...I however chose to use a bolt to hold the two pieces together.
bumper6.webp

Since this bumper already had the winch installed it was quite heavy so I enlisted the help of a fork lift and a few family members...however a floor jack will serve the same purpose as the fork lift...
bumper3.webp

After we go the bumper all lined up we bolted it down to the factory mounting points and wired up the winch
bumper2.webp
bumper6.webp
bumper3.webp
bumper2.webp
 
This is the final result...like I said before it was one of the easiest installs I have done, and it is an amazing product...the install took about three hours total. Thanks again Stan for a great product!
bumper1.webp
bumper1.webp
 
Thanks much Joey, glad that you like your new bumper. Cant wait to see your rig with the lift as well.

Stan
 
Nice bumper. I like it. GOOD thing cause I am waiting for one of Stan's bumpers myself.
Like the flat black paint?
 
Nice Bumper, looks like you took off the ac line support, did you anchor that line? If its just floating around and rubs on something like the the center bracket or crossmember you may find yourself without ac. It took about 6 months for the guy I got my ARB roof rack from to wear his enough to leak, it didnt touch when it was parked but at highway speeds it rubbed and slowly worked its way through. I cut the middle of the bracket out and welded it back together to support mine closer to the radiator.

It must be the angle of the picture but it looks like your fairlead is 6 inches off the ground?
 
I like the flat black paint, its nice because when i bang it up I just do a bit of light sanding and re-spray it, and its as good as new...at this moment my a/c line is not anchored, I am making a small clamp for it that has a soft foam around the inside so it wont be able to rub on anything...As far as the fairlead, its the angle of the picture, I am going to take some more pictures in the next few days of the approach angle and an eye level pic so that everyone can see the clearance.
 
here are two more pics of the different angles of the bumper from ground level so you can see the clerance I have...

downsized_0307091352.webp

downsized_0307091353.webp
downsized_0307091352.webp
downsized_0307091353.webp
 
Wow, I like it!

I had a guy at my work make mine. He has a tube bender, notcher and welder. I showed him a picture of a bumper I liked from a place called Demello Offroad and by chance he said he used to work for Demello! So for about half the price I have a tube bumper. There's still room to build a winch mount behind the skid plate later, just been lazy.
fj.webp
IMG_3843.webp
 
sounds like you got a pretty good deal...i love mine too the winch is awesome...now i just need to add my lift...
 
Here is the latest pic of the bumper I just got done installing two 7in HID lights there will be five more goin on the roof for desert running...

downsized_0313091205.webp
 
thank you props go to stan at toyoutfitters
 
Oh man, that looks awesome! I have the Metal Tech and love it, but I really like the stinger bar on yours.
 
thanks its a tough bumper i love it!
 
Have you used the winch yet Joey?

Stan
 
Nice work, Here is my Expedition One ..


Bumper pic [].webp
Bumper pic [].webp
 
ya i have used the winch once to pull myself out of some sand, and another time to pull my buddy out...worked flawlessly both times.
 

Users who are viewing this thread

Back
Top Bottom