Hi,
First of all, I want to say thanks to Atoyot1031. His Offroad Camper Build was the inspiration for this one!
Check his work out:
https://forum.ih8mud.com/trailer-tech/354638-offroad-popup-camper-build.html
I started out by buying an old popup. I have no idea what brand it was, and am kind of kicking myself for spending the coin on it as I haven't used much of it in the end!
Original popup:


The things I wanted to change are the bed size, chassis and suspension. So I went to work ripping the guts out of it

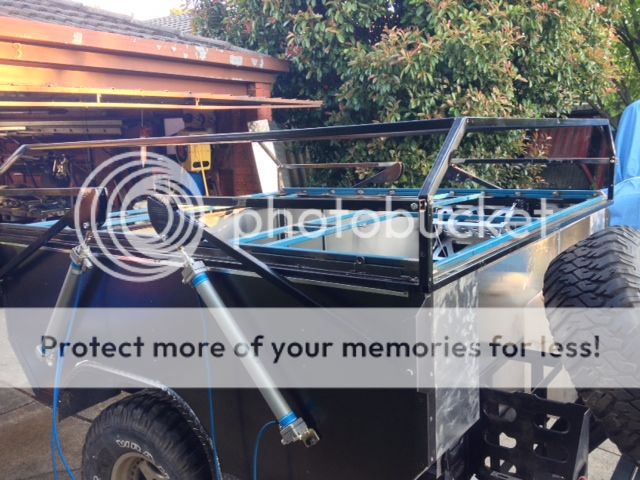
After refitting the side frames and increasing their height by 200mm.

I wanted to beef up the chassis and suspension, and decided that I would use the chassis off my old gear trailer. It actually fit perfectly so that was a win!
Old gear trailer:


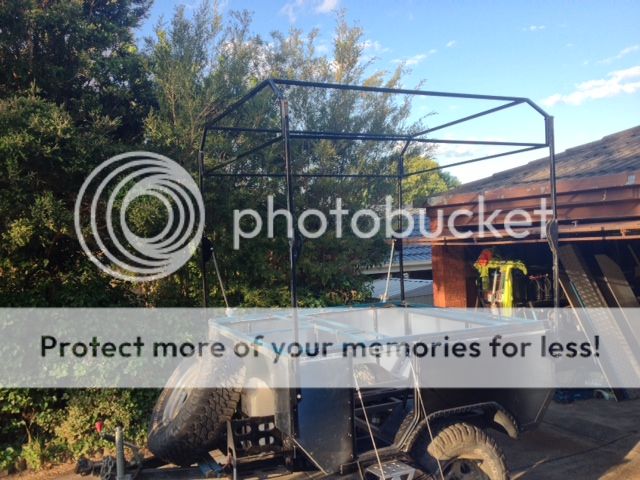
Popup frame on the new (old) chassis:

These are the plans for the body and roof once it's all done.
I am planning on using pneumatic cylinders to raise and lower the roof which will be supported by the OEM arms.


I haven't drawn in the bed frames yet, but there will be a queen size bed sliding out at either end of the camper.
I'll post up some more pics once I get the sheet metal finished off.
First of all, I want to say thanks to Atoyot1031. His Offroad Camper Build was the inspiration for this one!
Check his work out:
https://forum.ih8mud.com/trailer-tech/354638-offroad-popup-camper-build.html
I started out by buying an old popup. I have no idea what brand it was, and am kind of kicking myself for spending the coin on it as I haven't used much of it in the end!
Original popup:


The things I wanted to change are the bed size, chassis and suspension. So I went to work ripping the guts out of it

After refitting the side frames and increasing their height by 200mm.

I wanted to beef up the chassis and suspension, and decided that I would use the chassis off my old gear trailer. It actually fit perfectly so that was a win!
Old gear trailer:


Popup frame on the new (old) chassis:

These are the plans for the body and roof once it's all done.
I am planning on using pneumatic cylinders to raise and lower the roof which will be supported by the OEM arms.


I haven't drawn in the bed frames yet, but there will be a queen size bed sliding out at either end of the camper.
I'll post up some more pics once I get the sheet metal finished off.