In 2001 I became a Toyota man in Texas. My bronco went up in flames and was a total loss, so I had a check in hand and on the prowl for a new 4x4 (because that’s all I’ve ever owned). Luckily I was acquiring wisdom and had decided to pause a few weeks before taking the plunge. As I began searching for something more refined, reliable, capable, "Toyota" continued to pop up. To make a long story short, I was at the dealership looking at used Tacomas when the guy said, "Well, we just got a 2001 with 11K highway miles that the manager is driving, would you be interested in looking at it?" Apparently I was, and drove off the lot with it.
This was the newest vehicle I had ever owned. Had the new car smell, and looked like it had never been used. It was a white extended cab 4wd with the 3.4 and 5 speed plain-jane, but I loved it. The only problem was I didn’t like the looks of the new front clip, so what better way to cover it up then a black brush guard. A note on brush guards: save up a little more and get a replacement bumper. However, I did have a good size bird fly into the wire grate protecting the headlights. If it wasn’t for that, I would have had to replace a housing, so it kind of paid for it self, but I think "bird guard" is the threshold of protection.
The year was 2004, and we were now in Kansas. What a great truck, decent mpg, great power, cold ac (never had that), but… it wasn’t a TRD darn it. And those ugly 4-doors I had disliked so much, sure did look good and made sense. So I mentioned this to my wife, who said, "They just don’t look as tough as yours, but 4 doors would be great. I guess if you swapped things over, it wouldn’t look so bad." As I made a tactical maneuver into a lot that had a used ’01 double cab TRD. After explaining to the salesman how I wasn’t paying that price unless my tires & wheels were swapped on that one, (besides the TRD wheels were fancier than my 4runner wheels) and I was keeping the bird guard. He yielded to my superior logic. I don’t know what it is, but I just can’t stand the 01-04 wheels.
This is where my long-term project begins. I pulled in the garage, and off came the running boards. A day later I was pulling out the driver’s side kick panel to perform the grey wire mod, and also found an after market car alarm brain. Of course the dealer knew nothing about this, so I did a little research, ordered a key fob, wired things up, and presto, now I’m armed. Next the fluids were drained in favor of the synthetics, and the front pads were replaced as they were on the wear indicators.
My wheeling started out very modest. Some dirt roads around the farm, some areas on the farm, and figuring out the quirks because this is a daily driver that averages 60+ miles a day. So a small lift was the next rational step, and since I’m tight I went with a daystar. Spacers and progressive rate springs equal junk. But we bought a new house, I was landscaping, finishing a basement, working all the time, etc, and the mods were put off.
Over time I’ve added some things. An optima red top, a large transmission cooler for the slush box, and intake mods (although the deck plate mod is a waste of time, mine is closed back up with an oem filter and it runs so much better). I made some removable decking to fill in the rear foot-wells so my dogs would have a nice big flat surface. Talked to a guy about a bed bar, because I wasn’t spending the going rate for some tube bending and tabs, and it was done.
The stock coil springs were shot, and living in the rust belt I wasn’t buying coil-over bling. So after a lot of reading, some patience, and a smoking deal, on went the TRD tundra coils. Wow, what a difference. While I was in there I went ahead and slapped in some OME shocks and yanked out the stabilizer bar. Pleaded at how worn out my rear leaf springs were (negative arch), and got some Alcans. Per Alcan instructions, I modified my daystar shackles so they were 1.5" longer than the stock ones (because the leaves are slightly longer). Rides great!
My tacoma’s body is still straight, clean, and uncut (or at least it was, but we’ll get to that). This was about the time I discovered Ih8mud. There was going to be a local meet-n-greet (Tornado Alley Cruisers), and the wife and I went. This was a totally different group than the ‘angry adolescents’ I had become accustomed to. This was a group of mature, easy going, fun and helpful people (hopefully I didn’t offend any). As I was admiring KSCruiser’s rear bumper on his 80, I said I had never seen this design. He casually mentioned that he made it in his garage, and still had some more work to do for a complete rear tire carrier. Little did I know he would become my new pal. Now we were excited and looking forward to events.
So for X-mas ’06 I got some unfinished un-welded sliders. For bolt on sliders similar to the 80s, I would be required to get a body lift. I was anti-body lift, and 1" was too much. But after being intimidated by KScruiser and IBCRUSN, I went with a 4crawler .75" BL. For the outriggers to come out straight in the middle of the plate we only needed about .5", but I stepped it up a whole .25" to help with tire rub. Get some guys together burning metal and the bright plasma starts to generate brain waves. Pretty soon I’m talking about a rear bumper and once again, I crumble under the peer pressure. Before I know it, we’ve got schematics, metal, hinge, latch, and working on the weekends. Yet again, the voices start up and are telling me to cut the rear quarter panels on that truck. Okay.
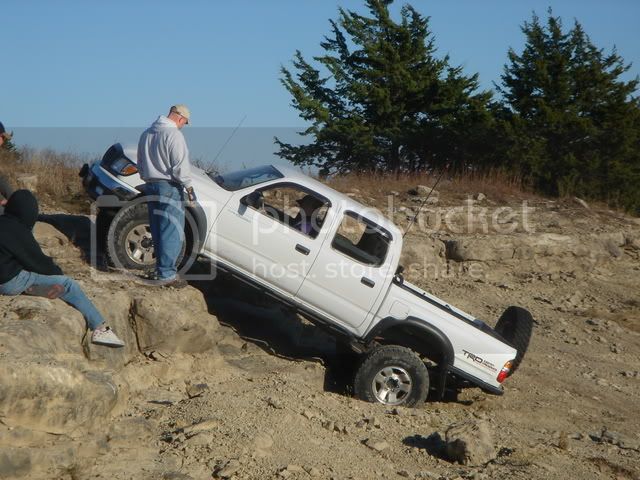
Now for some pictures...

Here you can count 4 Toyotas, there's also a 40 just behind me.


This was the newest vehicle I had ever owned. Had the new car smell, and looked like it had never been used. It was a white extended cab 4wd with the 3.4 and 5 speed plain-jane, but I loved it. The only problem was I didn’t like the looks of the new front clip, so what better way to cover it up then a black brush guard. A note on brush guards: save up a little more and get a replacement bumper. However, I did have a good size bird fly into the wire grate protecting the headlights. If it wasn’t for that, I would have had to replace a housing, so it kind of paid for it self, but I think "bird guard" is the threshold of protection.
The year was 2004, and we were now in Kansas. What a great truck, decent mpg, great power, cold ac (never had that), but… it wasn’t a TRD darn it. And those ugly 4-doors I had disliked so much, sure did look good and made sense. So I mentioned this to my wife, who said, "They just don’t look as tough as yours, but 4 doors would be great. I guess if you swapped things over, it wouldn’t look so bad." As I made a tactical maneuver into a lot that had a used ’01 double cab TRD. After explaining to the salesman how I wasn’t paying that price unless my tires & wheels were swapped on that one, (besides the TRD wheels were fancier than my 4runner wheels) and I was keeping the bird guard. He yielded to my superior logic. I don’t know what it is, but I just can’t stand the 01-04 wheels.
This is where my long-term project begins. I pulled in the garage, and off came the running boards. A day later I was pulling out the driver’s side kick panel to perform the grey wire mod, and also found an after market car alarm brain. Of course the dealer knew nothing about this, so I did a little research, ordered a key fob, wired things up, and presto, now I’m armed. Next the fluids were drained in favor of the synthetics, and the front pads were replaced as they were on the wear indicators.
My wheeling started out very modest. Some dirt roads around the farm, some areas on the farm, and figuring out the quirks because this is a daily driver that averages 60+ miles a day. So a small lift was the next rational step, and since I’m tight I went with a daystar. Spacers and progressive rate springs equal junk. But we bought a new house, I was landscaping, finishing a basement, working all the time, etc, and the mods were put off.
Over time I’ve added some things. An optima red top, a large transmission cooler for the slush box, and intake mods (although the deck plate mod is a waste of time, mine is closed back up with an oem filter and it runs so much better). I made some removable decking to fill in the rear foot-wells so my dogs would have a nice big flat surface. Talked to a guy about a bed bar, because I wasn’t spending the going rate for some tube bending and tabs, and it was done.
The stock coil springs were shot, and living in the rust belt I wasn’t buying coil-over bling. So after a lot of reading, some patience, and a smoking deal, on went the TRD tundra coils. Wow, what a difference. While I was in there I went ahead and slapped in some OME shocks and yanked out the stabilizer bar. Pleaded at how worn out my rear leaf springs were (negative arch), and got some Alcans. Per Alcan instructions, I modified my daystar shackles so they were 1.5" longer than the stock ones (because the leaves are slightly longer). Rides great!
My tacoma’s body is still straight, clean, and uncut (or at least it was, but we’ll get to that). This was about the time I discovered Ih8mud. There was going to be a local meet-n-greet (Tornado Alley Cruisers), and the wife and I went. This was a totally different group than the ‘angry adolescents’ I had become accustomed to. This was a group of mature, easy going, fun and helpful people (hopefully I didn’t offend any). As I was admiring KSCruiser’s rear bumper on his 80, I said I had never seen this design. He casually mentioned that he made it in his garage, and still had some more work to do for a complete rear tire carrier. Little did I know he would become my new pal. Now we were excited and looking forward to events.
So for X-mas ’06 I got some unfinished un-welded sliders. For bolt on sliders similar to the 80s, I would be required to get a body lift. I was anti-body lift, and 1" was too much. But after being intimidated by KScruiser and IBCRUSN, I went with a 4crawler .75" BL. For the outriggers to come out straight in the middle of the plate we only needed about .5", but I stepped it up a whole .25" to help with tire rub. Get some guys together burning metal and the bright plasma starts to generate brain waves. Pretty soon I’m talking about a rear bumper and once again, I crumble under the peer pressure. Before I know it, we’ve got schematics, metal, hinge, latch, and working on the weekends. Yet again, the voices start up and are telling me to cut the rear quarter panels on that truck. Okay.
Now for some pictures...
Here you can count 4 Toyotas, there's also a 40 just behind me.


 It still amazes me the departure angle you've created, almost on par with a bed bob. So that's what a roo bar looks like on a Taco?


