@scottm, thanks are in order for being the pioneer here. Your post about the AGM version of this battery helped me make a decision on my power system upgrade path (check
this thread).
Comparing specs of the "gold standard" aka Sears Diehard Platinum (DHP) Group 31 vs the Sam's club Duracell Group 49 AGM:
CCA: 1150 vs 850 A (OEM is 710A)
RC: 205 vs 170 mins
Capacity: 100 vs 92 Ah
Capacity@50% discharge: 50 vs 46 Ah
Weight: 75 vs 60 lbs
Dimensions LxWxH: 13x6.8x9.5 vs 14x6.9x7.4
Post configuration: Marine vs OEM style and location
Warranty: Identical (3yr Free Repl)
MSRP: $310 vs $170
Installation Cost: Slee Kit for ~$90 vs Free
Country of manufacture: Identical (USA)
On paper at least this group 49 seems like a no-brainer. You've already proven the "direct fit" aspect of it, the CCA is adequate, and the amp-hours are almost too close to call. Now as far as the deep cycle aspect of it, I've been told the weight of the battery is a good indicator of that (heavier the better). It's interesting to note that although it's not sold as deep cycle, it's weight is almost identical to the sams club group 31 marine, which IS a deep cycle. Take that for what it's worth. I thought it is worth a try, at roughly half the cost, as a starting point. If it turns out to be too soft, I can always add a real deep cycle later on.
So anyway, I completed the install differently to what you did, mainly because this is an off-road vehicle and will be used as such. Clearly just dropping it in has worked for you but I'm very particular about any potential area of degrading the reliability of the vehicle.

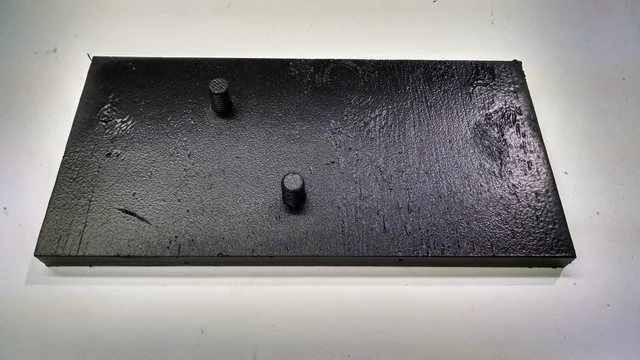
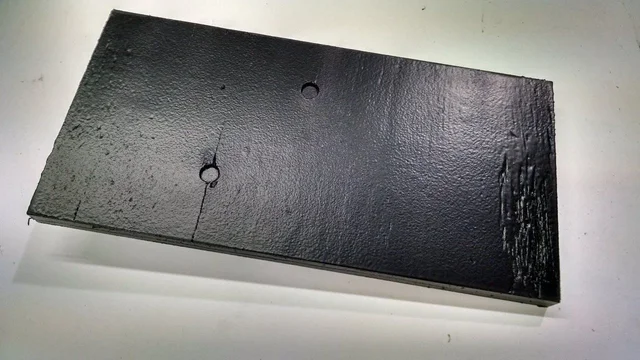
First I discovered that if you pull up the carrying handles, the stock top clamp fits securely in the available slot to locate the battery laterally. And the height deficit to the OEM battery is exactly 3/4"at that point. So I cut a piece of 3/4" plywood the same size as the battery footprint, and used the original plastic tray as a template to insert two "dowels" (pic taken after several coats of dupli-color truck bed coating)

I used 5/8" threaded rod because I had it laying around, but you could just as easily glue some wood dowels). Finished "spacer tray":

Next issue was to ensure that the OEM clamping system works as designed, which is basically by two mechanisms:
1.Positive location in the fore-aft direction using the angle plates on the top clamp
2. Friction due to clamping force between the plastic tray and top clamp.
So to get this correct, I cut two pieces of delrin to fit exactly between the battery and the angle plates. These are height as well as fore-aft locators.

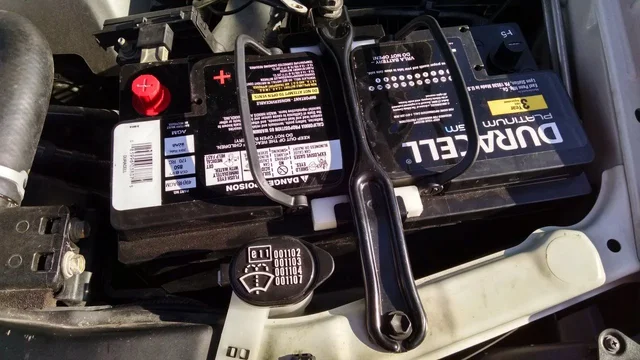
Here is the finished install, fits like a glove!! I added thin rubber pieces at all contact points on top and the truck bed coating on the ply to seal and help make the surface grippy. I'm pretty sure this plays a large role in preventing the battery from sliding around.

Like you said the a/c lines come close on the right, but there's still about 3/8" of clearance so I'm not terribly worried about it. The radiator side is not even close to cause any worry.
It remains to be seen how this performs. I'll report back since I have a week long trip coming up where I test how good the setup is.


