
-
North American Clubhouses - East RegionCA.ON- SOTEC CA.ON- Upper Canada Land Cruisers CA.QC- Club TORQ CA.QC- Quebec Cruisers AL- DixieLand Cruisers AL- Hot South Cruisers FL- Florida Land Cruiser Association FL- Northwest Florida Toyota 4WD FL- Tampa Bay Land Cruiser Association GA- Pavement Pounders GA- Georgia Cruisers GA/FL/AL- Red Hills Land Cruiser Club GA- YOTA IL- Windy City Land Cruisers IN- Hoosier Cruisers IN- Indiana Land Cruisers KY- Kentucky Landcruiser MA/NH- Yankee Toys MI- Lake Michigan Land Cruisers MS- CottonLand Cruisers NC- Olde North State Cruisers NJ- Garden State Land Cruisers NY/CT/MA- FJNortheasters NY- Gotham City Land Cruisers OH- The Buckeye Birfield Syndicate PA- Keystone Cruisers PA- Steel City Land Cruiser Club SC: Land Cruisers: Charleston SC- Palmetto State Land Cruiser Association SC- Upstate Cruisers SC- Swamp Fox Land Cruisers SC- Low Country Land Cruisers TN- Appalachia Cruisers TN- Bluff City Cruisers TN- STLCA VA- Bay to Blue Ridge Cruisers VA- COVA CRUISERS VA/DC/MD- Capital Land Cruiser Club VA/NC- Mid-Atlantic TLCA VA- Star City Land Cruisers VT/NH/MA/ME Acadian Overlanders WI- Land Cruiser Legends WV- Mountaineer Cruisers
-
North American Clubhouses - Central RegionCA.AB- Oil Country Cruisers CA.AB- Rocky Mountain Land Cruiser Association CA.AB- Toyota Ghost Wheelers AR- Razorback Land Cruisers AR/MO- Ozark Mountain Cruisers CO- BookCliff Cruisers CO- Colorado Land Cruisers CO- Derailed Cruisers CO- Rising Sun 4WD Club CO/WY- Horsetooth 4 Wheelers Cruiser Club IA- Tall Corn Cruisers KS/MO- Tornado Alley Cruisers LA- Bayou State Land Cruisers LA- Louisiana Land Krewesers MO- Gateway Cruisers MT- 406 Cruisers MT- Big Sky Cruisers NE- Flat Land Cruisers NM- High Desert Cruisers OK- Green Country Cruisers SD- Dakota Territory Cruisers TX- Alamo City Land Cruisers TX- Bayou City Land Cruisers TX- Lone Star Land Cruisers TX- Lone Star Land Cruisers - Austin Chapter TX- The White Trash of the Elwood Chapter TX- Toyota Trail Riders
-
North American Clubhouses - West RegionCA.BC- Coastal Cruisers CA.BC- Okanagan-Similkameen Land Cruisers CA.BC- Peace Canyon Toyota Swamp Donkeys CA.BC- Calgary Chapter: Swamp Donkeys
CA.BC- Vancouver Island Cruisers AZ- Copper State Cruisers CA- Beach-n-Toys CA- Central Coast Land Cruisers CA- Central Valley Crawlers CA- Gold Country Cruisers CA- Inland Empire Cruisers CA- L.A. County Trailcrew CA- Mountain Transit Authority CA- Pacific Mountain Cruisers CA- San Diego Cruisers CA - Santa Cruz Land Cruisers CA- SoCal 80's CA- Southern California Land Cruisers CA- Toyotally Awesome Cruisers HI- Hawaiian Island Land Cruisers ID- Treasure Valley Land Cruisers NV- Battle Born Cruisers of Northern Nevada NV- Southern Nevada Land Cruisers OR/CA- Jefferson State Cruisers OR- Cascade Cruisers OR- Central Oregon Cruisers OR- Portland Metro Cruisers UT- Red Rock Cruiser Club UT- Wasatch Cruisers WA- Central Washington Cruisers WA- North Sound Cruisers WA- South Sound Cruisers WA- Spokane Land Cruisers
Navigation
Install the app
How to install the app on iOS
Follow along with the video below to see how to install our site as a web app on your home screen.
Note: This feature may not be available in some browsers.
More options
Style variation
You are using an out of date browser. It may not display this or other websites correctly.
You should upgrade or use an alternative browser.
You should upgrade or use an alternative browser.
Build What did you do to your Land Cruiser/Toyota/Lexus 4X4 this week?
- Thread starter murf
- Start date
Member Builds and Stories
This site may earn a commission from merchant affiliate
links, including eBay, Amazon, Skimlinks, and others.
- Thread starter
- #1,742
Was Jason "wine-ing" without you? 
More pics... Not sure why they are the full images... Only wanted Thumbs... SORRY! Going to try to fix that on this post!
Still have to install my proportioning valve, bleed the brakes and refill my differential. Fun project ALL and ALL despite my obvious errors to start with, but I will blame that on having no directions... Definitely made it a PITA at first!
View attachment 1236701
View attachment 1236702
sorry to hear you had that much trouble with it - but I remember we did, too
 - had to have the studs pressed into the rotors twice because we got it wrong the first time
 there were no directions at the time, either; I think I pulled pictures for a similar (not identical) kit off of the BTB website at the time: DISC BRAKE CONVERSION KIT REAR FJ40 FJ55 TOYOTA LAND CRUISER EARLY THRU 1980 (you should have called or sent a PM, I would have told you to look there)
Finally got the 60 out on a shakedown run after a full engine, and axle teardown and rebuild. Beautiful day on Castle Hot Springs road.
View attachment 1236430
View attachment 1236431
View attachment 1236432
Love the black & white photo
Been doing a lot of water crossings figured it was time to check water in places it should not be. All fluid appeared to be clean and no sign of water intrusion. I was there so I replaced all gear fluid. Should be good for another couple years.
Dropped mine off at CBT last week for 4.88's to be installed and some minor maintenance. I was overdue for a "come to Jesus" moment and admitted I was never going to get around to dropping the thirds myself so off to the pros she went. Would have liked to give Zuk the work for the gear replacements, my bad.
Thx again to Murf for the daily updates and attention to detail. Can't wait!!


Thx again to Murf for the daily updates and attention to detail. Can't wait!!
Just had the 100 at CBT myself for both CV boot replacements. Also had rear rotors resurfaced and new pads. 80 is next.
Amazing service as always.
Amazing service as always.
Changed the cabin filter on the GX. Pretty sure it was 12 years old. Petri dish of allergens and winged insects.
Erin, was the engine running with the glass of wine on the hood of the Lexus? Seems like a commercial from some years ago to show how smooth the engine was, or Jason was saying "hey I just sold your 200".
@tlin , please update us on the gearing change on your 3FE'ed 80 in a few weeks, especially after you have run up some long grades. Thanks!
Broke the newly rebuilt engine in via a trip to Mojave and Death Valley. It did great, just had to tighten a couple hose clamps and an exhaust hanger (unrelated issue to the rebuild). A big thanks to Murf, Robert and John at Camelback Toyota. About 2,000 miles on the rebuild so far so good!
If you feel like reading and looking at pics:
Part 1
huber
Part 2
huber
Part 3
huber
Part 4
huber
A few photos


If you feel like reading and looking at pics:
Part 1
huber
Part 2
huber
Part 3
huber
Part 4
huber
A few photos


Great Pictures !!!!!!!!!Broke the newly rebuilt engine in via a trip to Mojave and Death Valley. It did great, just had to tighten a couple hose clamps and an exhaust hanger (unrelated issue to the rebuild). A big thanks to Murf, Robert and John at Camelback Toyota. About 2,000 miles on the rebuild so far so good!
If you feel like reading and looking at pics:
Part 1
huber
Part 2
huber
Part 3
huber
Part 4
huber
A few photos
Been doing a bunch of water crossings
Checked all oils for water intrusion and condition. After 2 years everything looked great. Replaced all gear oil and transfer case, trans gets done with each engine oil change.
Thankfully I have factory allen drain plugs

Checked all oils for water intrusion and condition. After 2 years everything looked great. Replaced all gear oil and transfer case, trans gets done with each engine oil change.
Thankfully I have factory allen drain plugs
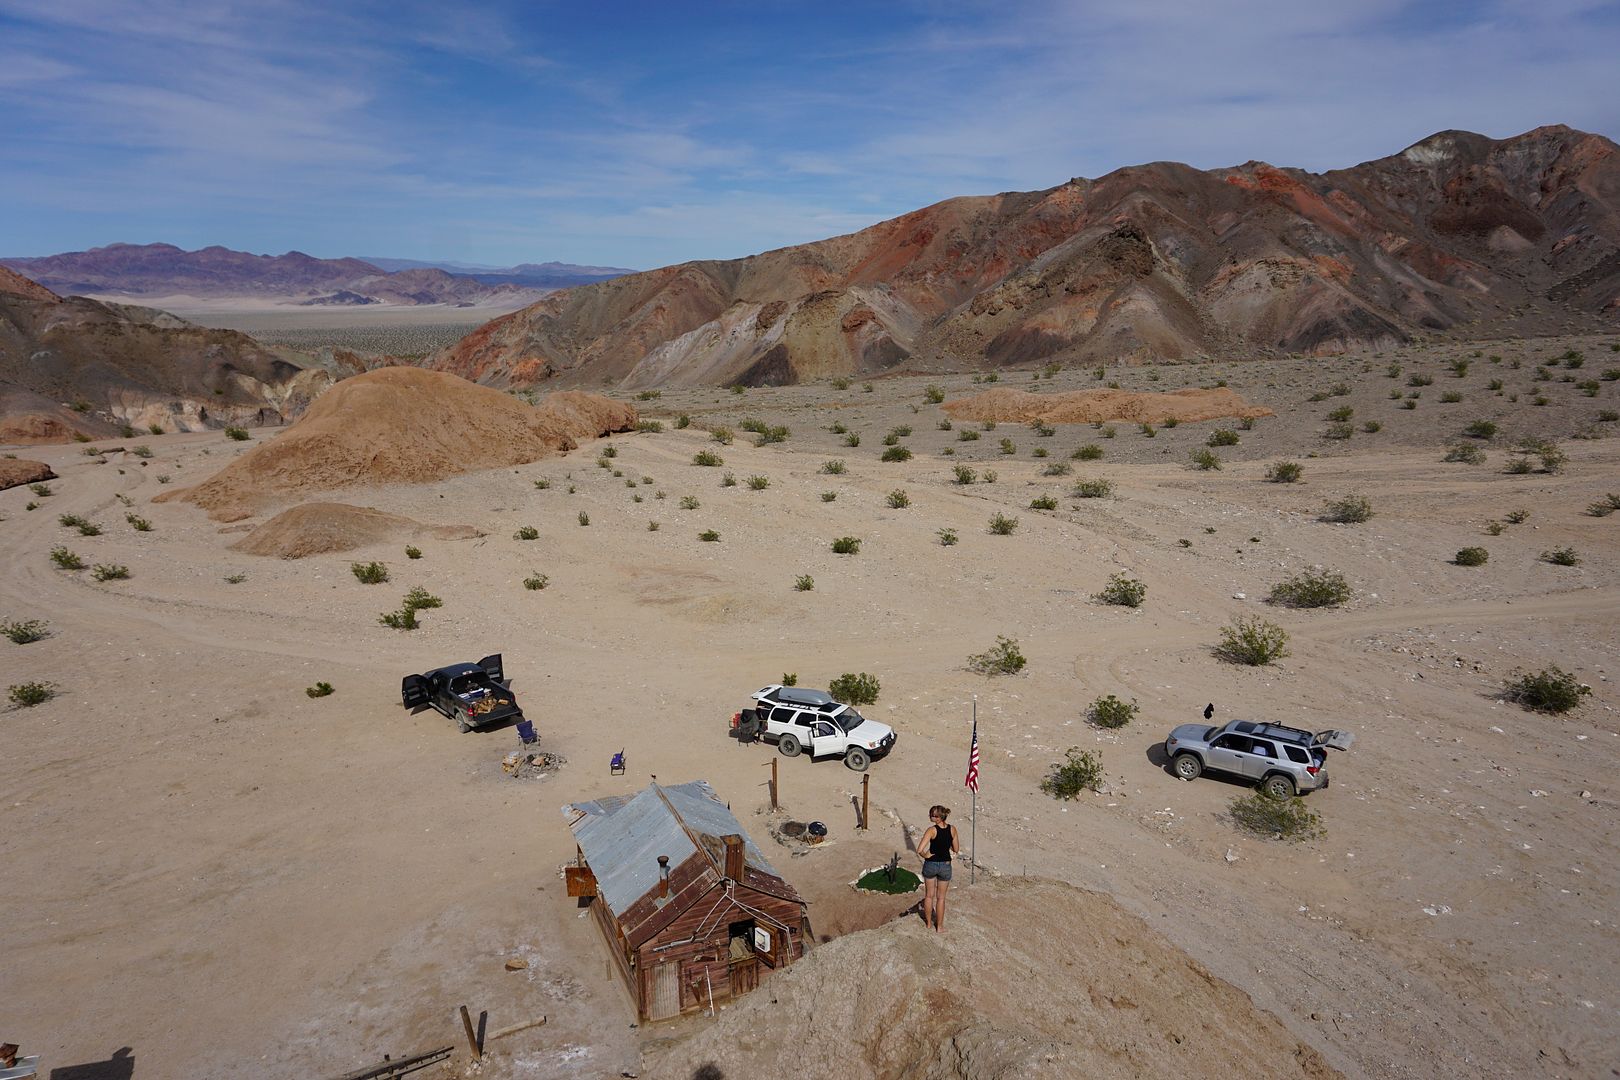
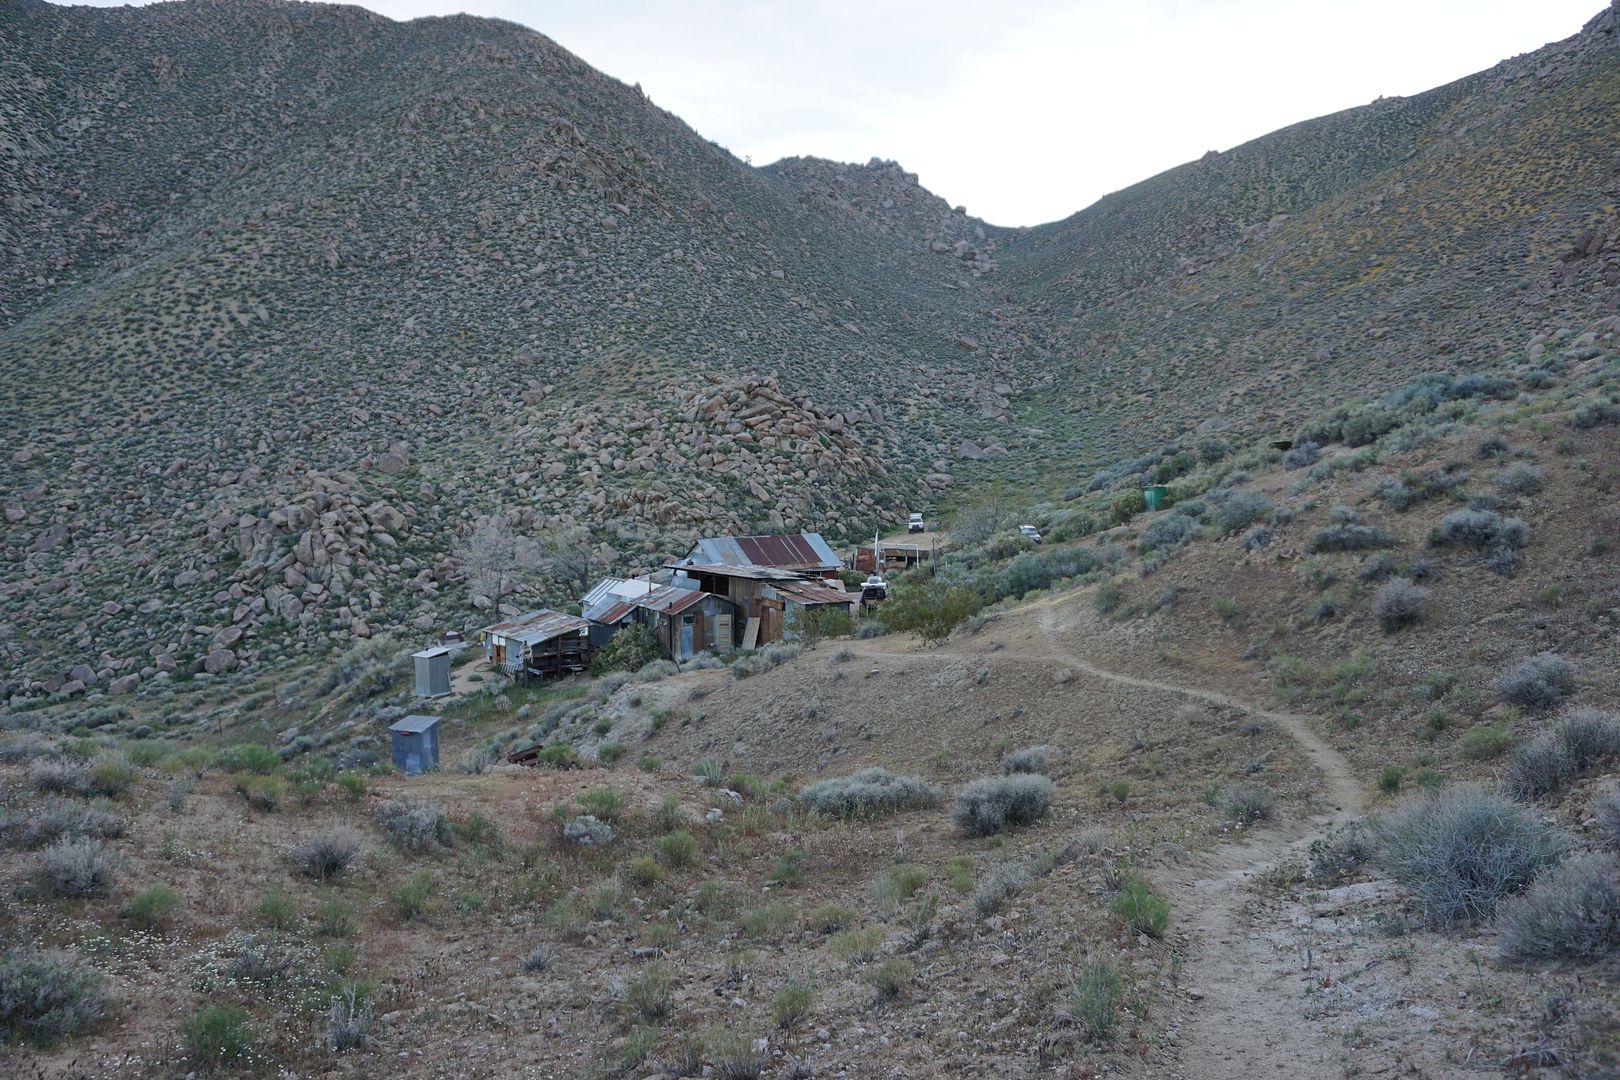
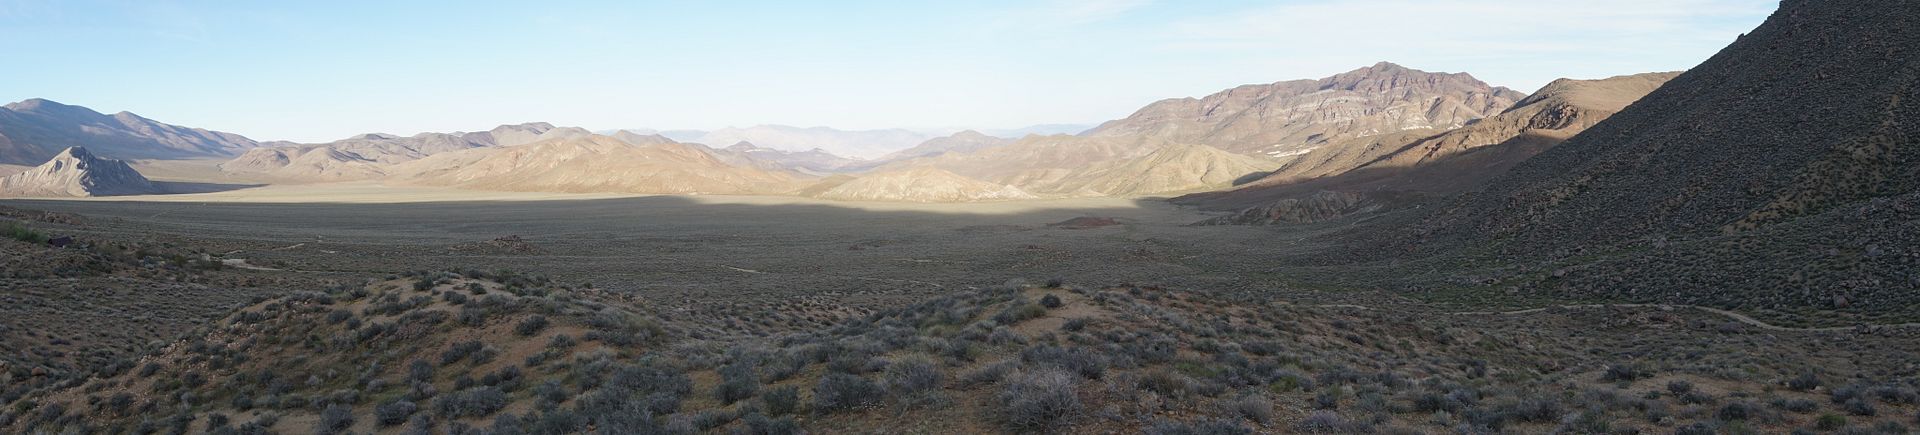
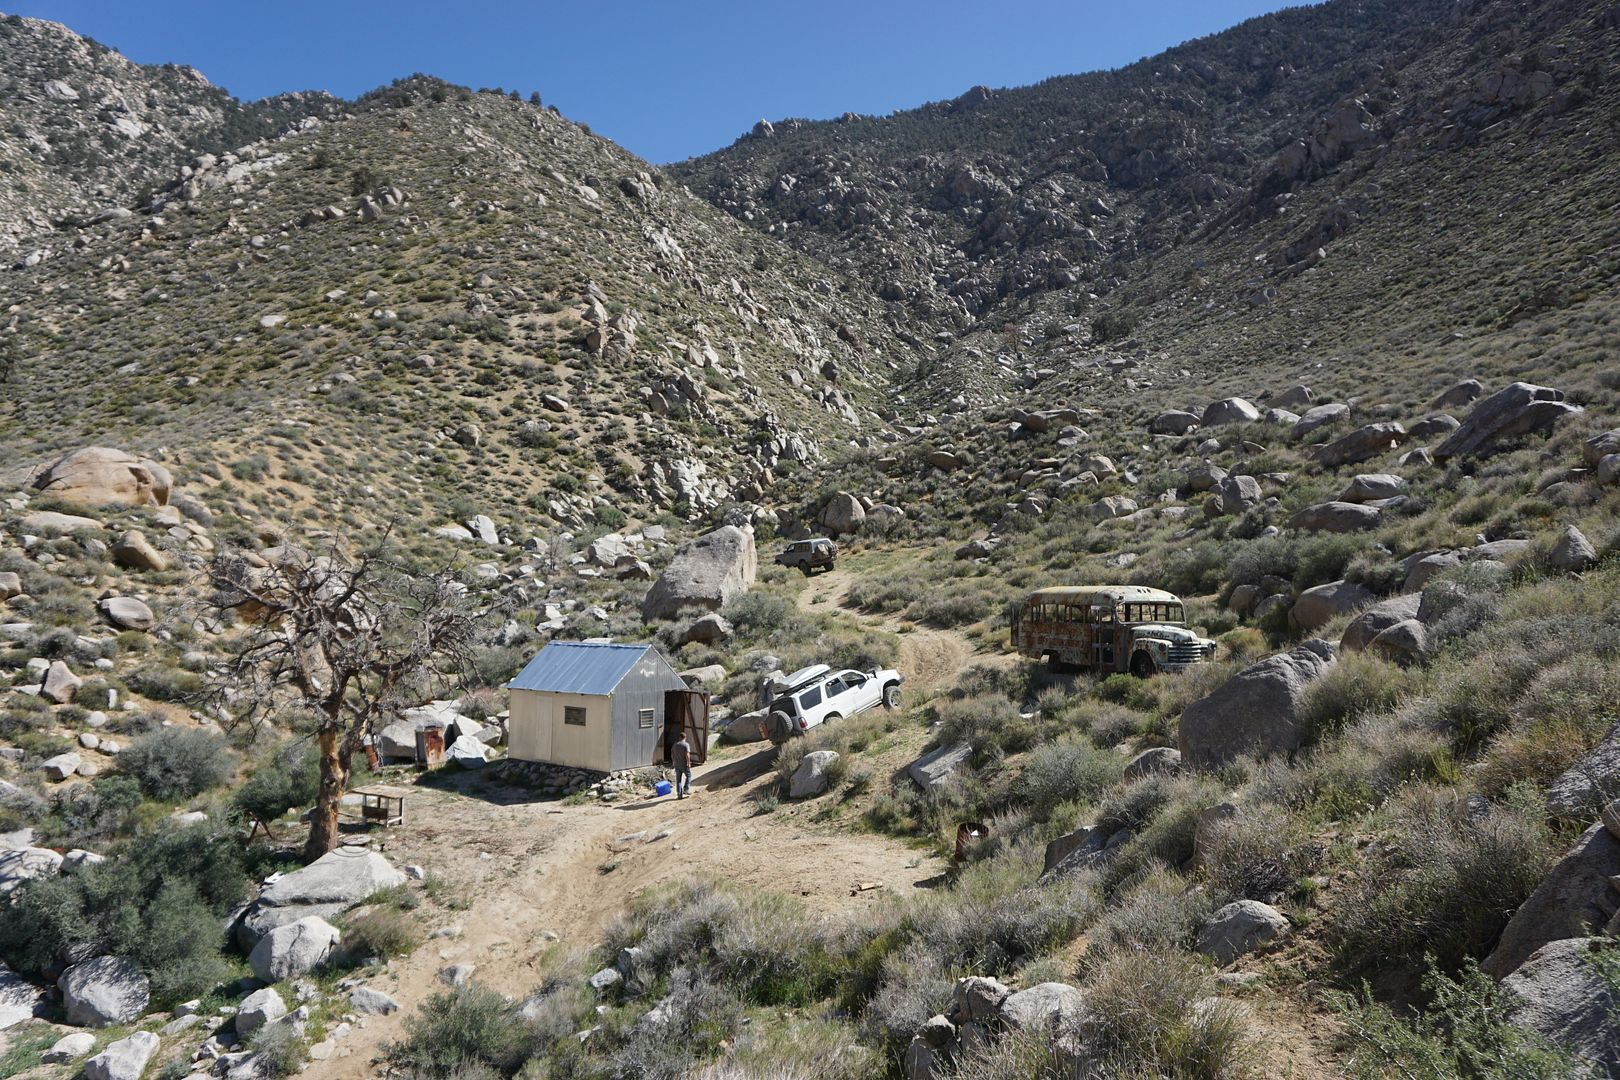
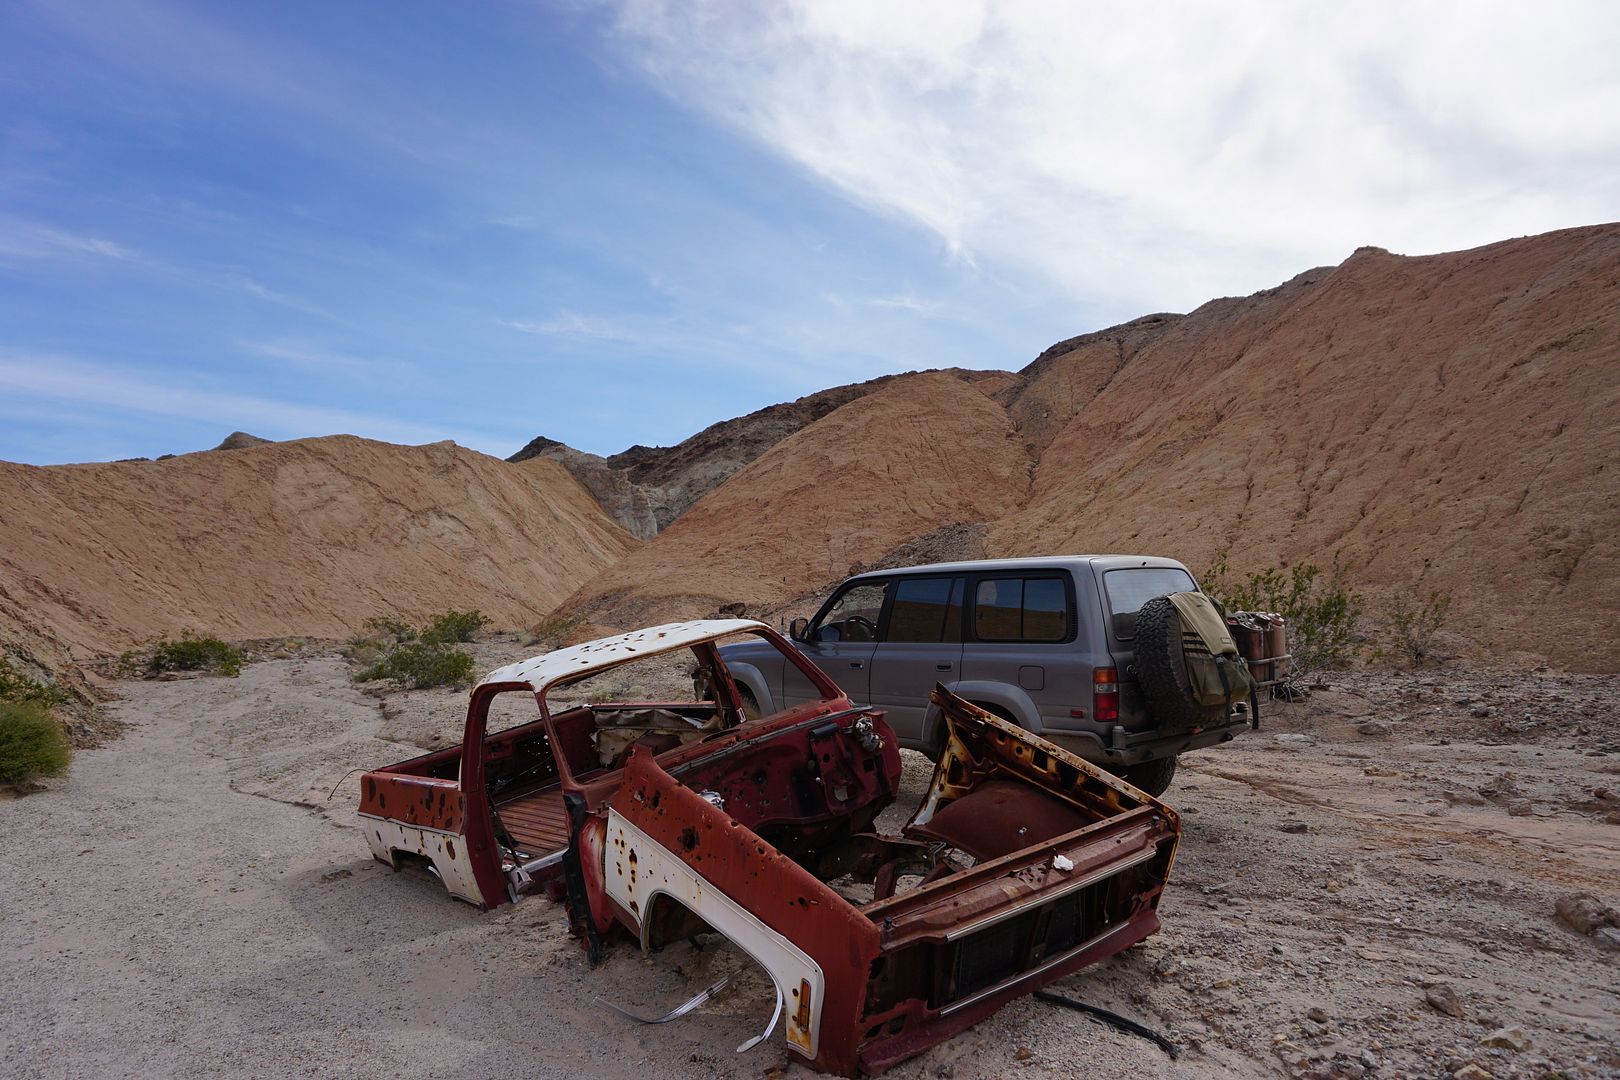
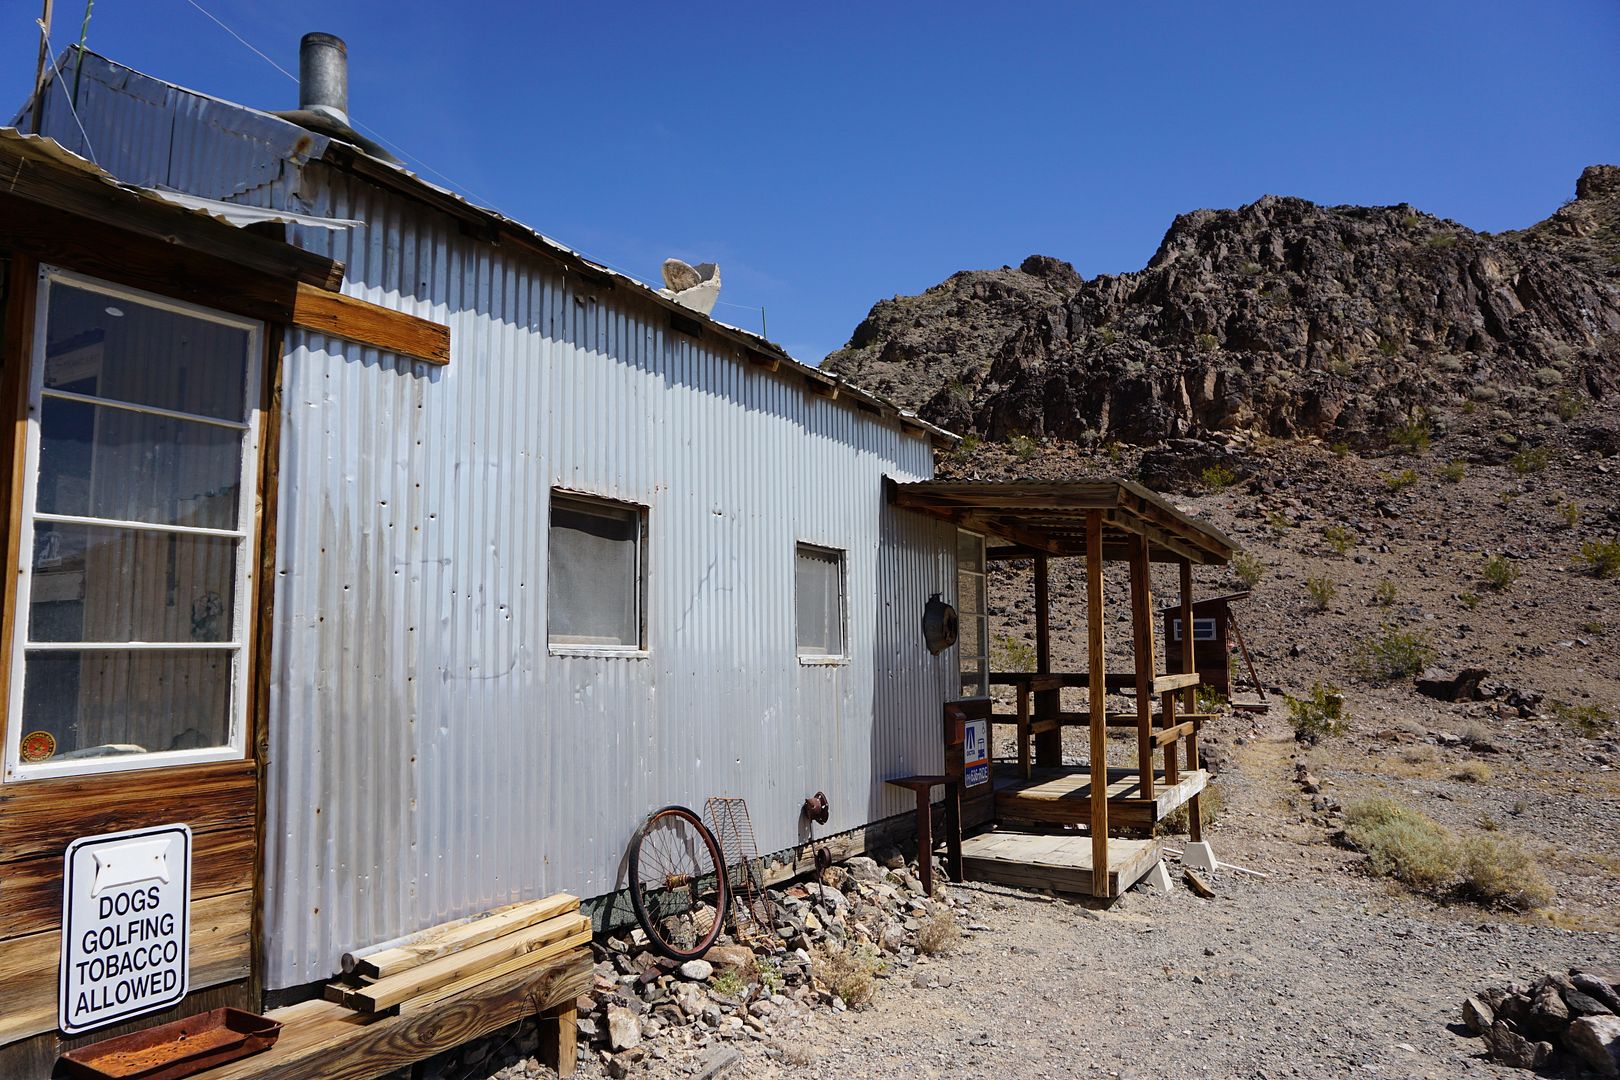
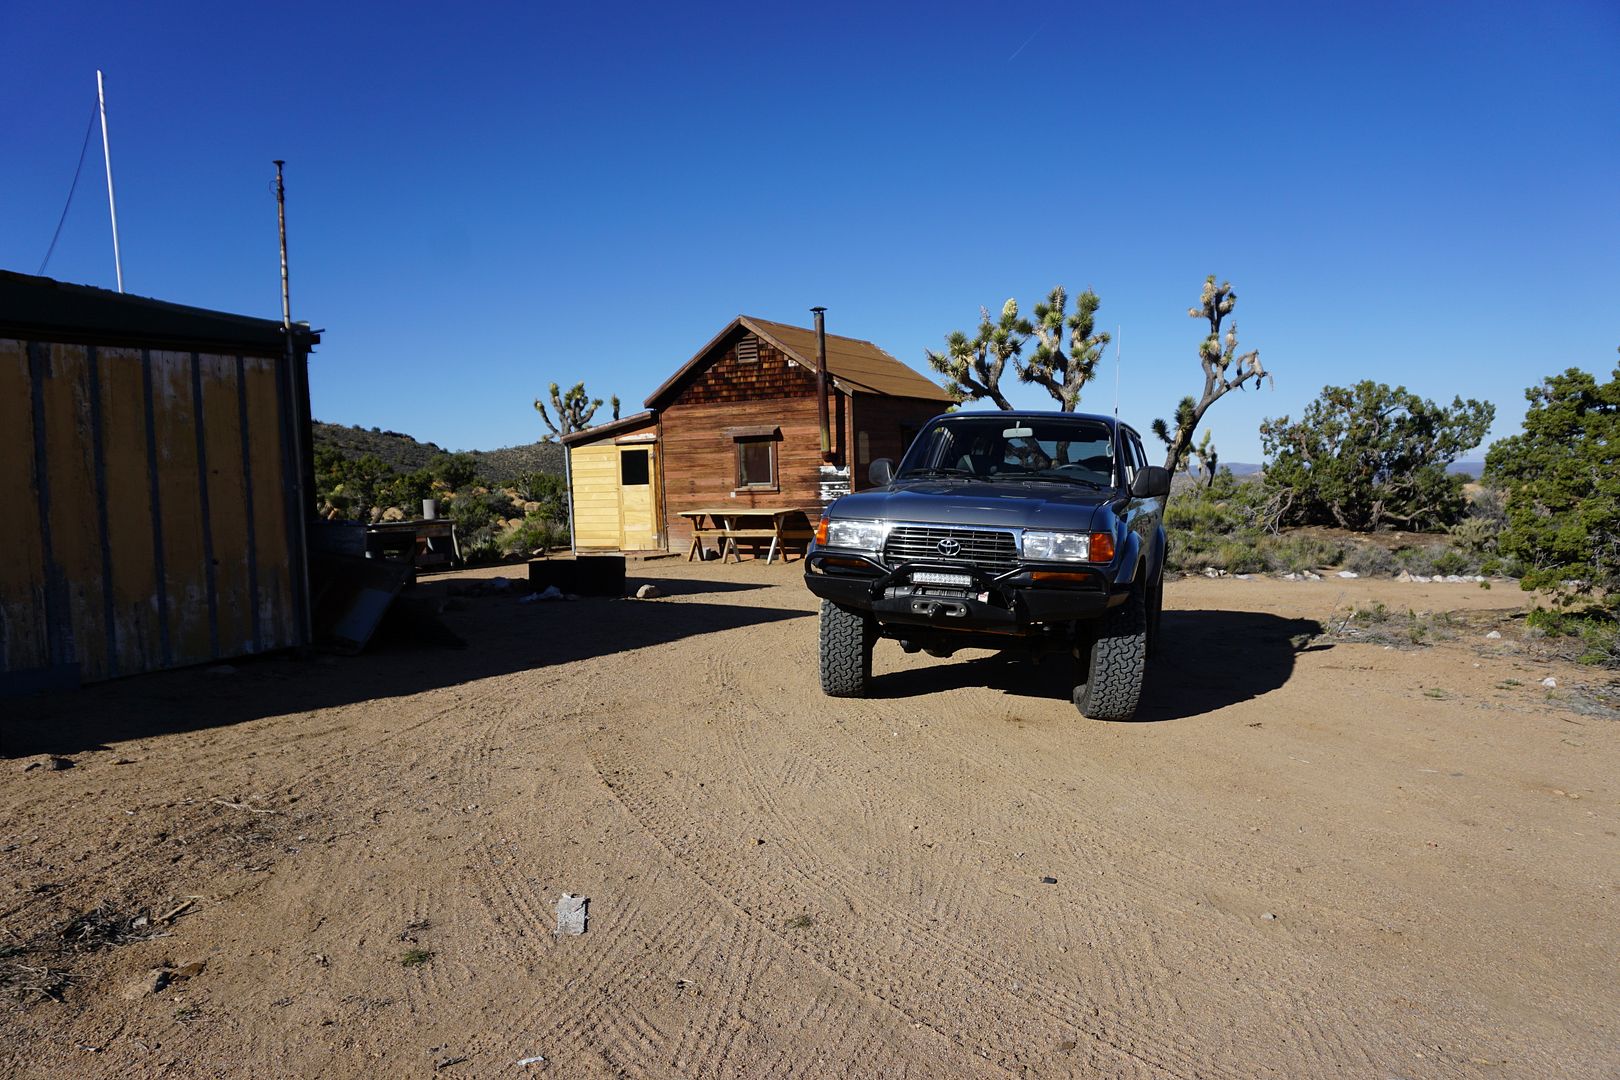
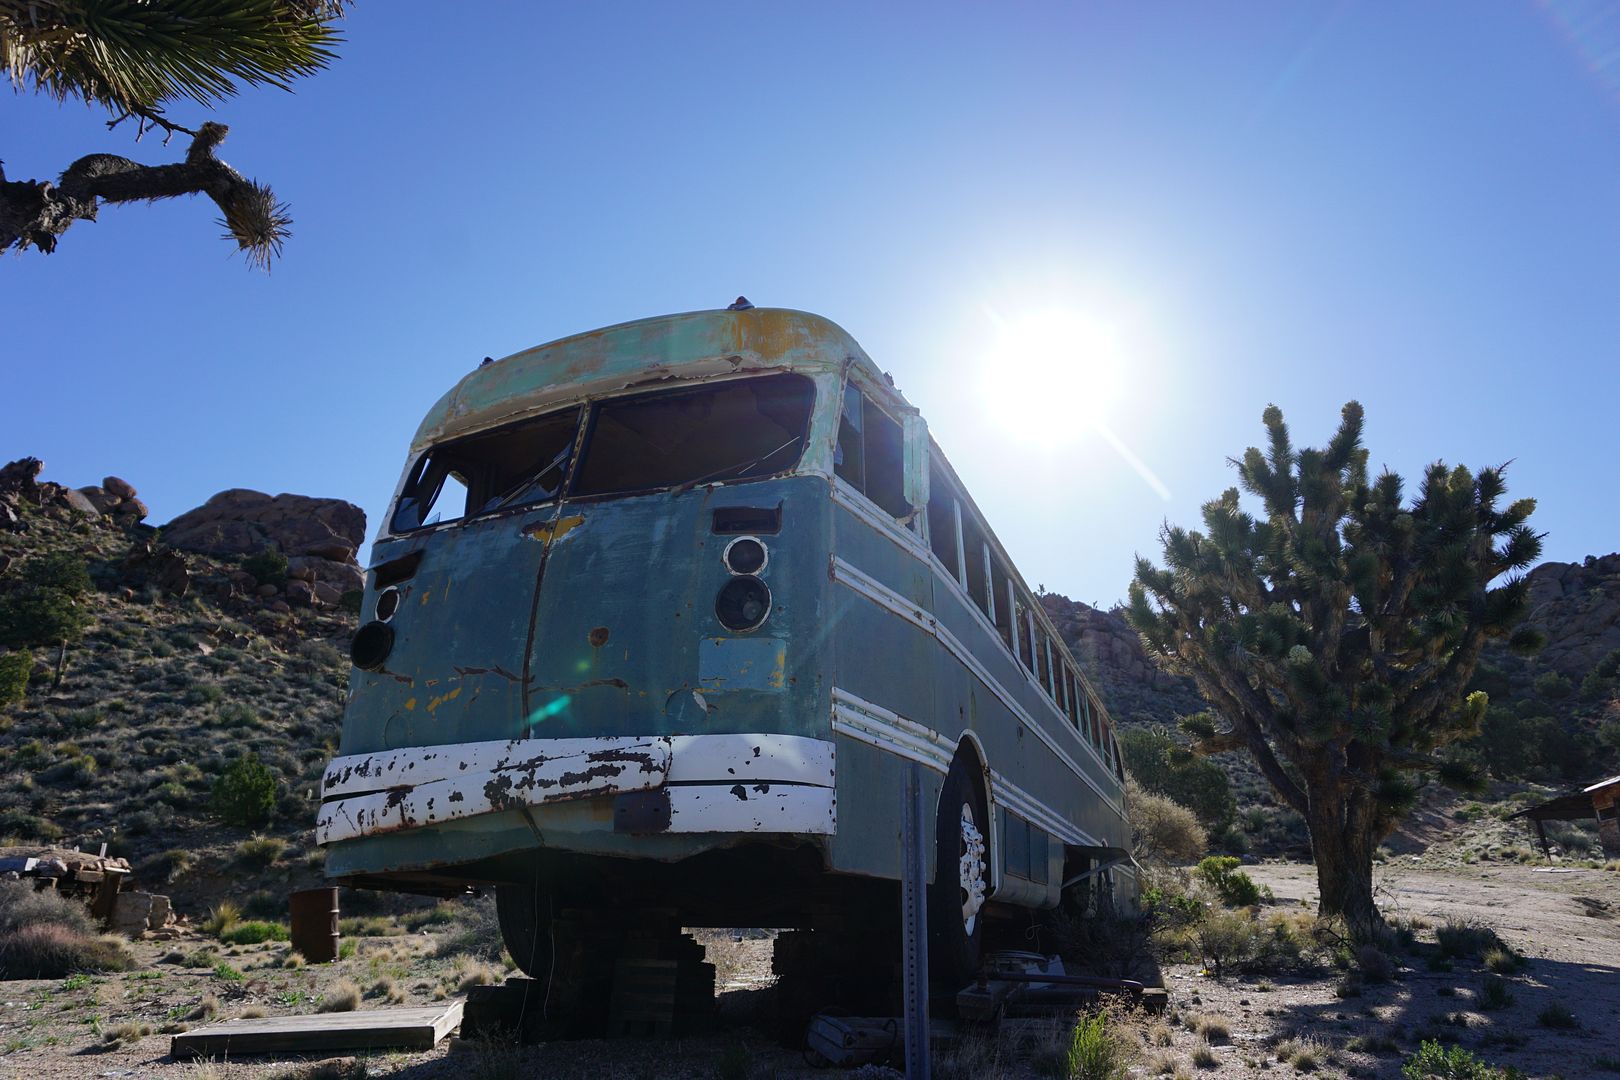
@SOAZtim: thanks for the great read and collection of photos from Death Valley and beyond. I am always impressed that people take the time to put such detsiled trip reports like yours together. The stoke is strong in your blog, and it allowed me to escape to the desert for a few minutes. Hopefully Goose is not too upset about the catclaw massage he incurred outside of Yucca. I hope to share some desert two track with you at some point in the future. Cheers!
Thank you!Great Pictures !!!!!!!!!
@SOAZtim: thanks for the great read and collection of photos from Death Valley and beyond. I am always impressed that people take the time to put such detsiled trip reports like yours together. The stoke is strong in your blog, and it allowed me to escape to the desert for a few minutes. Hopefully Goose is not too upset about the catclaw massage he incurred outside of Yucca. I hope to share some desert two track with you at some point in the future. Cheers!
Thanks! The write ups help take the sting away of long days in the office when I go back and read them. 2 track, or single track, motor or pedal I'm always game. Cheers!

Couldn't pass them up


This weekend I tackled the oil pump cover seal/o-ring and front crank seal. After reading up on the numerous threads and tutorials on this repair, I was a little fearful but it was really a piece of cake. Little did I know that the dang fan shroud would put up such a fight on removal. I find that a lot of fear mongering threads are almost trying to talk you out of doing this job and others. This repair isn't that difficult, but I guess it all depends on one's skill level. I am not an auto mechanic by trade. I have to admit though, I have the luxury of the use of a lift, so I don't have to lay on my back while doing this job, so that is already an advantage.
I'll attach some pics and tips that might help anyone that hasn't done this job before. I get so much good info from this forum, it seems a crime to not pay it forward a little with some kind of help, advice or encouragement.
First, the oil soaked nastiness. I always had drips in the garage. I finally had some time and cleaned the bottom of the engine up to do my investigation. After, I fired it up, I noticed the oil literally flowed from the base of the cover when the engine was running/under pressure.
 When I did the highly feared 7 screw removal, I used Dewalt #3 phillips bits and made sure to clean out the old screws thoroughly prior to removal. I used a 3/8" drive ratchet and a 1/4" socket with the bit inserted. One by one they broke loose with a little snap. Only one slipped on me and I noticed my bit had some grease on it so I wiped it off and it worked like a charm. Cleanliness is key here.
Some folks have struggled with the crank seal removal. I used this hook tool with a shop towel wrapped around it to protect the crankshaft surface and it worked great.

My cover seal was very dry and brittle. The crank seal didn't look bad but if you're in there, you might as well replace it.
I coated the groove for the o-ring with this silicone. It is safe to use on o-rings and I have used it for years. It's also useful in holding the o-ring in place. It has many uses when doing maintenance. I used to work on high pressure cryogenic pumps and equipment and I used a similar product on mating surfaces and seals. It always helped with lubrication and also in preserving seals in hostile environments.

Another old trick was with the crank seal...I put it in the freezer for about an hour prior to installation to "shrink" it a little. It went in with about three gentle taps using the 2" PVC coupling. An old trick from my Air Force aircraft mechanic days. Works great on bearing races as well.

All cleaned up and ready to go. As you can see I boogered one of the screws reinstalling. Just had a bad angle on it but it's tight.
I replaced the seal on the crank sensor while I was down there (using the double o-ring method) and I did the distributor o-ring. I also replaced my trans cooler hoses since I was "in the area".
So I attempted this whole repair with the cooling system intact. In doing that I really struggled trying to get the fan shroud out. It was also a struggle getting it back in. So much so that during the fight I broke the dang bypass hose nipple on the top radiator tank . So after having a slight meltdown and calling myself a few names I called CBT and low and behold they had a radiator in stock! I wasn't planning on a new radiator just yet but oh well, one less thing to worry about. Thank goodness for that club discount! That nipple is a terrible design flaw IMHO. I'm thinking about making a guard for that thing. It's in a very vulnerable spot. So anyway, run to CBT, drain, R&R, refill, pressure test etc.
Here's the broken nipple.

Things I learned-
Pump gasket is easy. Just make sure you have the right tools. Breaker bar bump method for crank bolt removal works. I used a 1/2" breaker bar and 30mm impact socket and it held up great. Some folks use 3/4" breaker bars but my snap-on didn't flinch-just make sure your battery is strong enough to turn the motor. Mine was not. Another new part I wasn't planning on. The radiator bolts in the radiator support are a little challenging but I didn't have to remove my headlights. I just removed the grille, the top two screws in the headlight brackets to get a little wiggle room for the socket and extension and was able to get to them. I also used a telescoping magnet to reinstall those nuts as my giant hands can't quite fit in there.
All in all, a very productive Saturday. Next weekend....OME suspension goodies")
I'll attach some pics and tips that might help anyone that hasn't done this job before. I get so much good info from this forum, it seems a crime to not pay it forward a little with some kind of help, advice or encouragement.
First, the oil soaked nastiness. I always had drips in the garage. I finally had some time and cleaned the bottom of the engine up to do my investigation. After, I fired it up, I noticed the oil literally flowed from the base of the cover when the engine was running/under pressure.
Some folks have struggled with the crank seal removal. I used this hook tool with a shop towel wrapped around it to protect the crankshaft surface and it worked great.
My cover seal was very dry and brittle. The crank seal didn't look bad but if you're in there, you might as well replace it.
I coated the groove for the o-ring with this silicone. It is safe to use on o-rings and I have used it for years. It's also useful in holding the o-ring in place. It has many uses when doing maintenance. I used to work on high pressure cryogenic pumps and equipment and I used a similar product on mating surfaces and seals. It always helped with lubrication and also in preserving seals in hostile environments.
Another old trick was with the crank seal...I put it in the freezer for about an hour prior to installation to "shrink" it a little. It went in with about three gentle taps using the 2" PVC coupling. An old trick from my Air Force aircraft mechanic days. Works great on bearing races as well.
All cleaned up and ready to go. As you can see I boogered one of the screws reinstalling. Just had a bad angle on it but it's tight.
I replaced the seal on the crank sensor while I was down there (using the double o-ring method) and I did the distributor o-ring. I also replaced my trans cooler hoses since I was "in the area".
So I attempted this whole repair with the cooling system intact. In doing that I really struggled trying to get the fan shroud out. It was also a struggle getting it back in. So much so that during the fight I broke the dang bypass hose nipple on the top radiator tank
. So after having a slight meltdown and calling myself a few names I called CBT and low and behold they had a radiator in stock! I wasn't planning on a new radiator just yet but oh well, one less thing to worry about. Thank goodness for that club discount! That nipple is a terrible design flaw IMHO. I'm thinking about making a guard for that thing. It's in a very vulnerable spot. So anyway, run to CBT, drain, R&R, refill, pressure test etc. Here's the broken nipple.
Things I learned-
Pump gasket is easy. Just make sure you have the right tools. Breaker bar bump method for crank bolt removal works. I used a 1/2" breaker bar and 30mm impact socket and it held up great. Some folks use 3/4" breaker bars but my snap-on didn't flinch-just make sure your battery is strong enough to turn the motor. Mine was not. Another new part I wasn't planning on. The radiator bolts in the radiator support are a little challenging but I didn't have to remove my headlights. I just removed the grille, the top two screws in the headlight brackets to get a little wiggle room for the socket and extension and was able to get to them. I also used a telescoping magnet to reinstall those nuts as my giant hands can't quite fit in there.
All in all, a very productive Saturday. Next weekend....OME suspension goodies