Here is something I just found! YEAH GOOGLE!
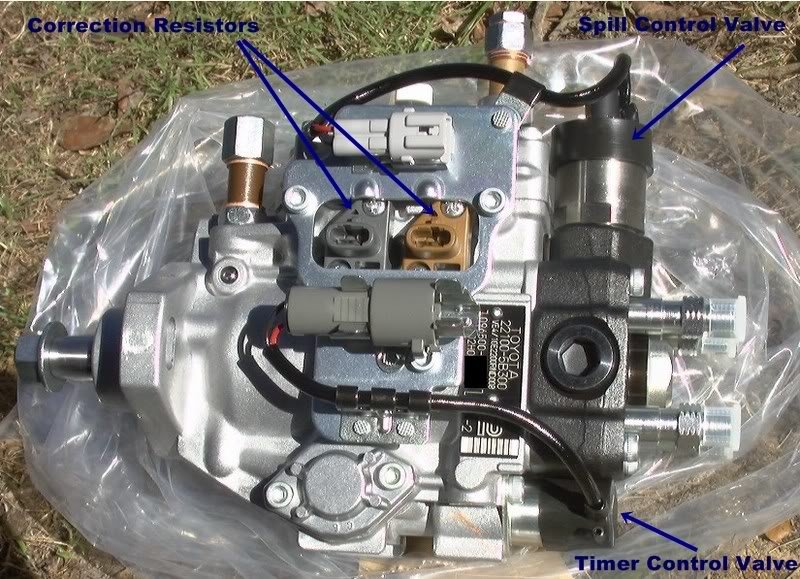
Error code 5 relates to a pair of resistors on the side of the injection pump, at least on the 2.4TD engine. These resistors are installed when the pump is calibrated and fine tune the timing and fuelling. I measured both resistors. The grey one was 0.622kΩ while the beige one was open...

galooph.com
Hilux Surf: Error 5 - Correction resistance (Pump)
POSTED: JANUARY 11, 2014
Error code 5 relates to a pair of resistors on the side of the injection pump, at least on the 2.4TD engine.
These resistors are installed when the pump is calibrated and fine tune the timing and fuelling.
I measured both resistors. The grey one was 0.622kΩ while the beige one was open circuit. The insides are potted in epoxy, so I dug out the trusty Dremel and went in.
The original epoxy.
After a bit of Dremel action.
You can see a pair of solder tabs sticking up - the original resistor, which I ground away, was soldered on here. Judging from the resistor body, it was no more than a standard 0.25W resistor.
The problem now was knowing what value the resistor was originally.
I managed to find a
scan of the manual for the Denso injector pump. I’ve also
converted it into a pdf.
From that, I was able to work out the resistance value from the part numbers. Here’s a list linking to the resistors which are available from Farnell. First, the grey one.
Now the beige one.
Solder the appropriate resistors in.
Now they need sealing from the elements. Check they read ok on a multimeter first though! After a good clean in some isopropyl alcohol, I used some
Sugru to seal them up.
Instead of Sugru, you could use some proper potting compound or even some mastic, but ONLY neutral cure mastic. If the mastic smells of vinegar, don’t use it! The acetic acid released as it cures will eat into the resistor wires.
After all that, I reset the ECU and the code 5 had been eliminated.