This leak from the oil pump cover?
Not sure - trying to orient myself to this picture. Are you looking from below and to the passenger side?
Follow along with the video below to see how to install our site as a web app on your home screen.
Note: This feature may not be available in some browsers.
This site may earn a commission from merchant affiliate
links, including eBay, Amazon, Skimlinks, and others.
This leak from the oil pump cover?

")
 job (if you thoroughly read this thread - page 6-7 have some great tips and watch the texasknowhow video)
 - all 7 came out pristine and with no problem at all - each on the first try.
... but can I get 35% off or a group buy for 45% off??You need a new dealer. The published list price on those screws is $2.01 a copy.
For this oil leak fix, can someone confirm that I need these parts:
1. Idler Pulley Part # 16603-66010
2. Oil Pump Seal Part # 15188-66020
3. Philip head bolts part # 15183-66020 quantity #7
4. Front Crank Shaft Seal part #90311-52022
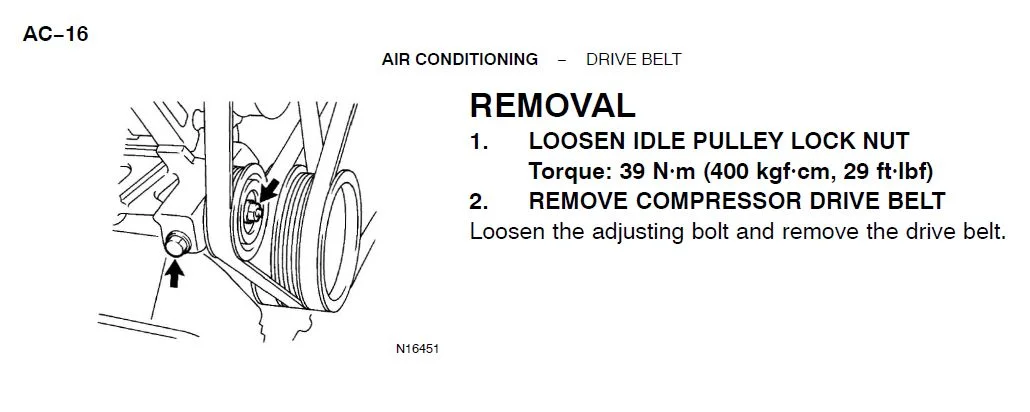
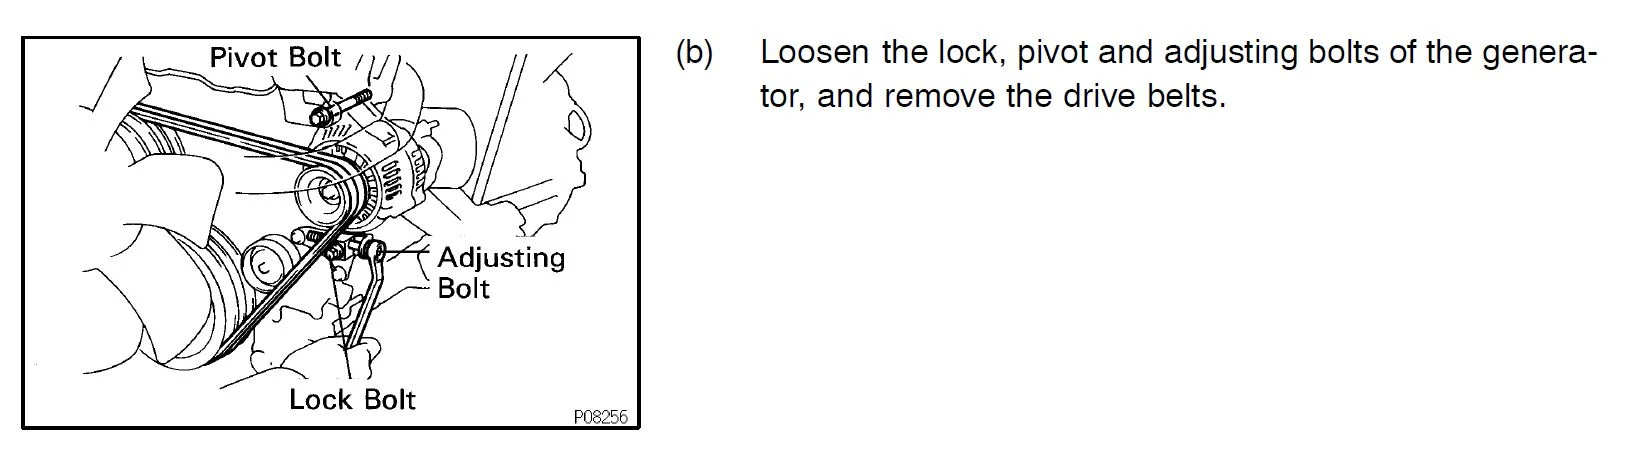
According to what I have been told, I need to change the distributor o-ring, crank shaft seal and the oil pump seal with screws. So, do I really need all that is listed above? I don't see the distributor o-ring part? Also, what do I need the idler pulley part for? I am trying to make sure I get all my parts from Toyota before trying to tackle this job. Also, should I change my belts why I am at it? I never done that before either (they have been changed but not by me), but I am sure I will be able to with the help of this board. Anyone have a tutorial on changing belts?
job - you dont even need to remove the bottom engine cover or the fan clutch....all you need is 12mm and 14 mm sockets - if you choose to do it whilst the engine is hot.