Finished
Well, I did it. Finally got some time while on vacation to fabricate new rear quarter panels for the 9/76 that I drive to work every day.
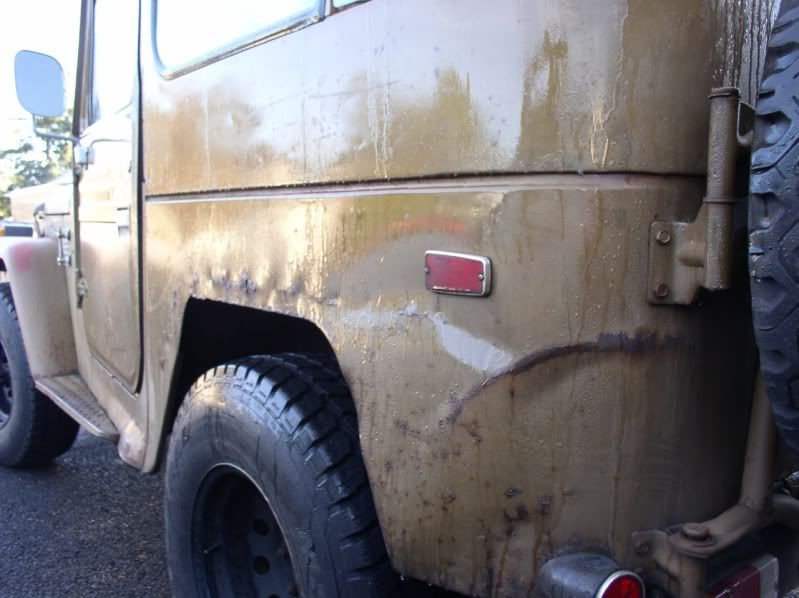
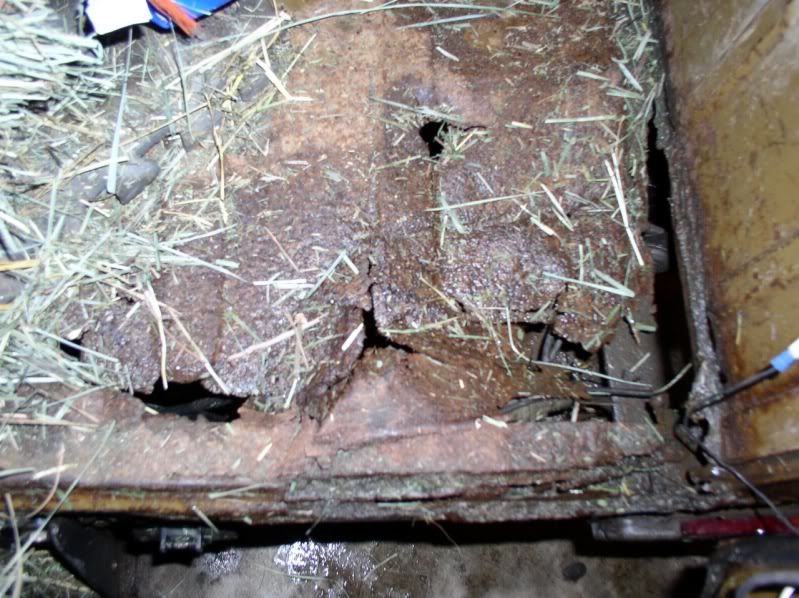
After considering the good advice of some here, I nearly bugged out and ordered them from CCOT, but couldn’t really afford them. Besides, I only had to improve on this:

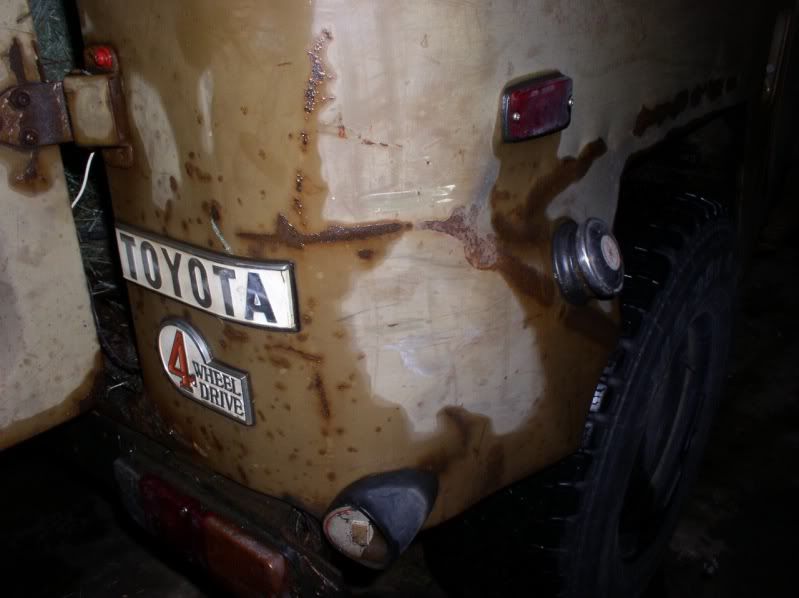
And this,

So I headed out for some 16 gauge cold rolled steel. It turned out I would have to pay $65 for the steel, and $20 for the shear work, or I could take the whole 4’x8’ sheet for $3 more, which of course was a no-brainer.

I have basically zero metal fabrication experience and a set of Harbor Freight body tools, so I had to plan carefully and did a lot of research on how other guys have approached this project. It seems like most people do a lot of the fab work while they’re installing the panel (e.g., bending the panel, using the tub itself as the form). My truck is not pretty and will continue to be a work truck so it will likely have a satin finish and perfection is not the goal, but I would not be able to live with it if I knew it was skimmed with body filler. So, I opted to cut them out, try to pre-bend them, and roll the edges before installing.
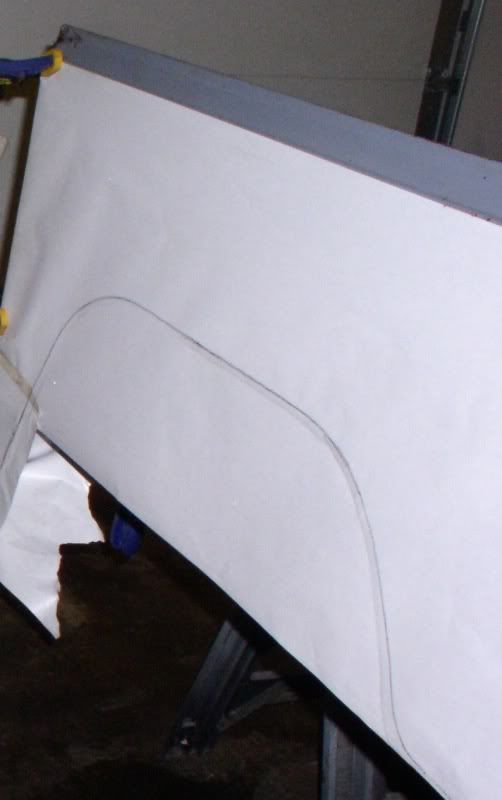
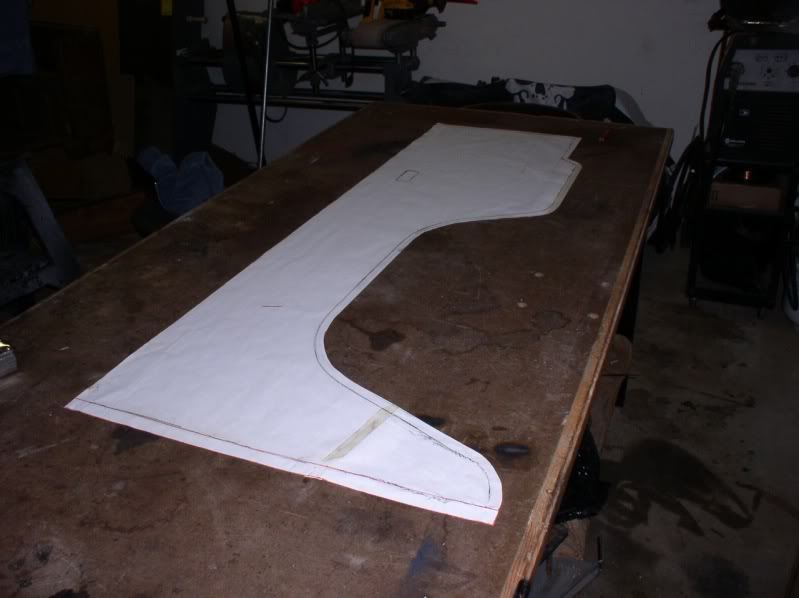
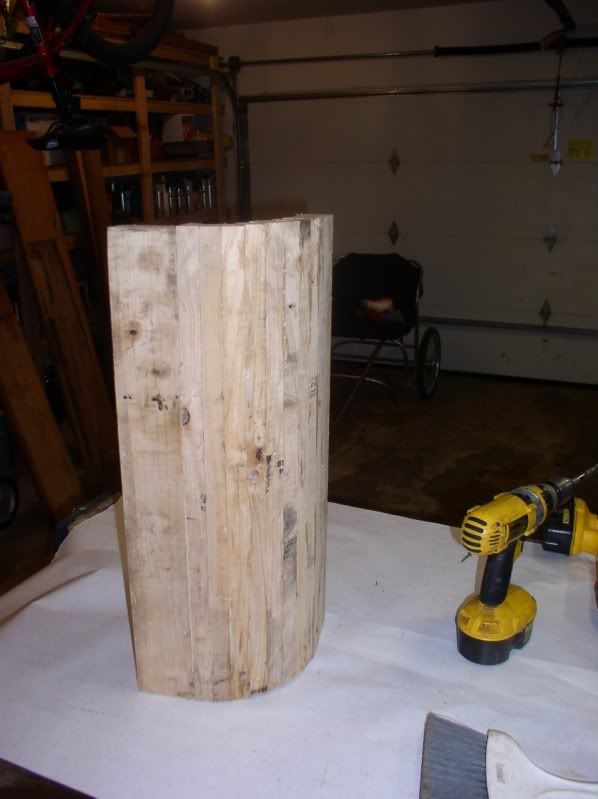
Started by tracing an otherwise worthless donor tub I’ve been saving just for this purpose. The only thing intact on it are almost perfect, uncut rolled edges.

I added a 5/8” margin to the tracing for the rolled lip, and a little more for the front lip that’s bolted on, and a little less for the back lip that spot welds to the rear corner channels.

And then transferred that to the steel:

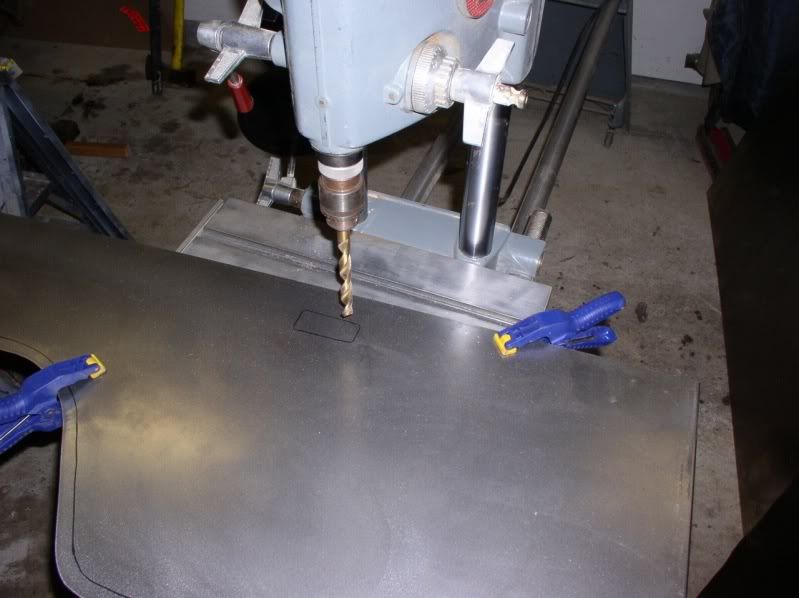
I cut everything out with a jigsaw. As an example of how tight the budget on this project was, I cut down all the dull jigsaw blades an inch or so, and reground the shanks (takes about 30 seconds, honestly) to get a second life out of them!
The marker cut-outs were easy to match. Trace, transfer, drill four 3/8” holes at the corners and connect the dots with the jigsaw.

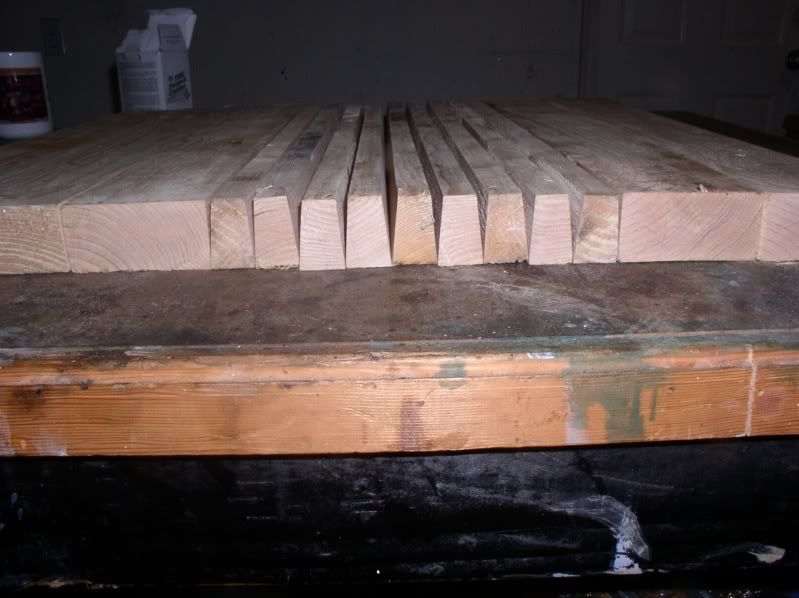
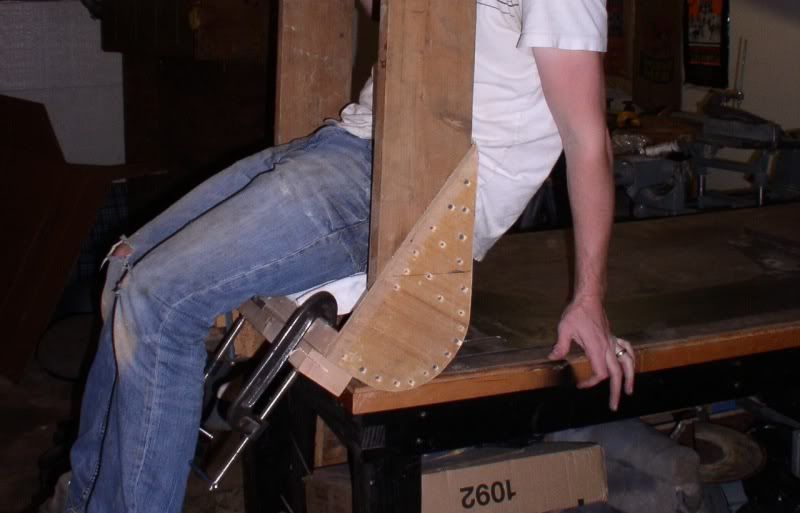
I created two simple wooden jigs for working the curved sections. They had separate functions, but the method of construction was the same. One was a wooden match to the rear corner of the truck that would be used as a form to roll the lip over, and the other was a tighter radius, and was used to pre-bend the panel to account for spring-back. They were made of construction grade lumber I had laying around and both worked great. Method of construction should be fairly obvious from the photos. They both took an hour or two to build and fair out.
There was careful figuring prior to cutting the angles on the wedges:

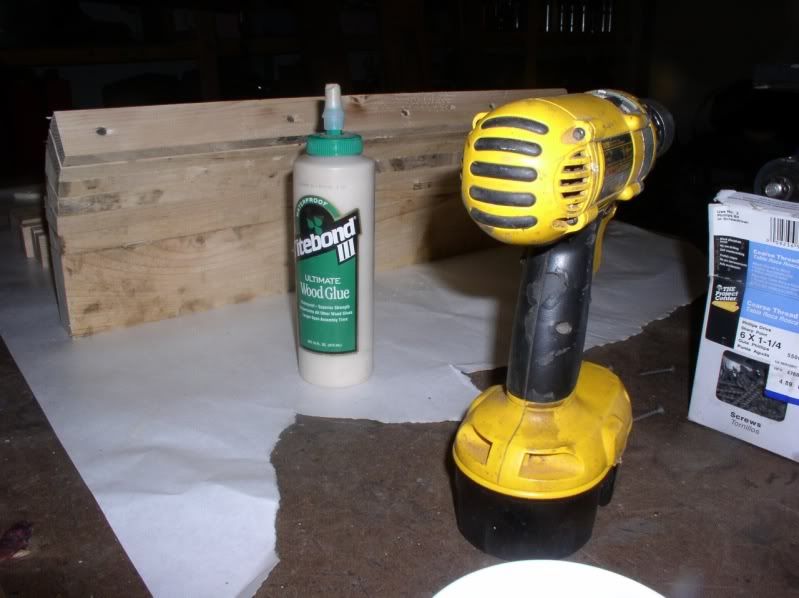
Glue and screw:

I eventually faired these curves out on a sander:

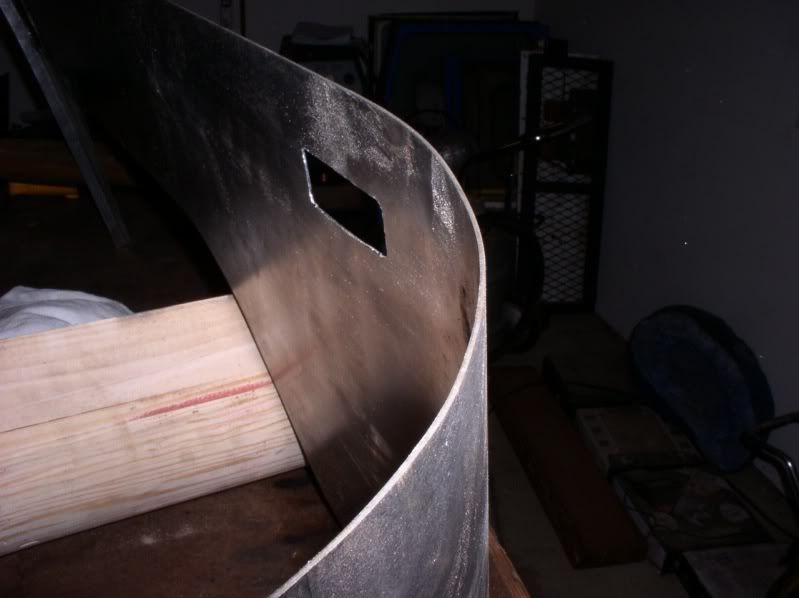
Here is the bending jig in action. It works kinda like a conduit bender and lots of careful downward pressure is required to keep from kinking the steel. I provided the careful downward pressure while my wife was kind enough to lever the bender back:

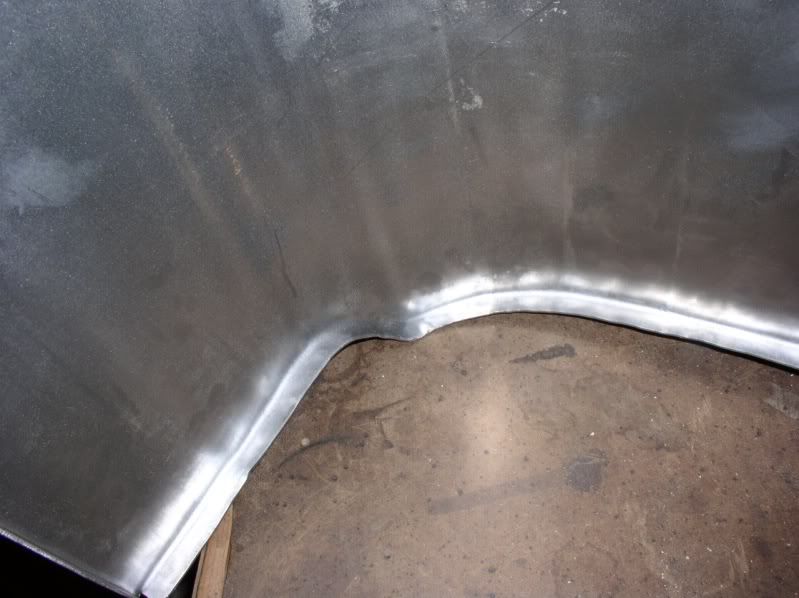
It created a very nice radius:

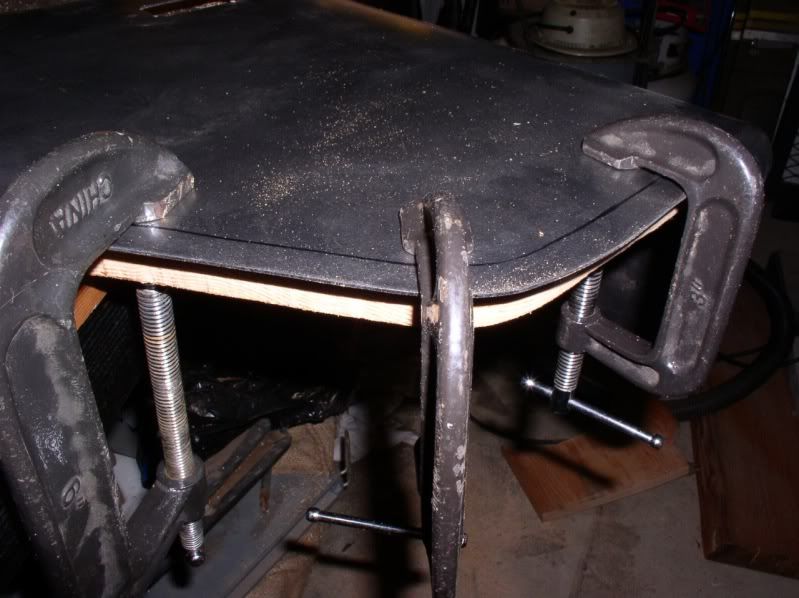
All the edges were rolled over wooden or steel forms with a Harbor Freight body hammer. It is imperative that the hammering be done right around the clamps to keep from driving the bend up into the side of the panel itself.

This whole process took about 1.5-2 hours per panel and the results were very satisfying. I didn’t have to weld, grind or cut anything. I think you could produce a perfect rolled lip in this fashion, but I only really cared that it looked good from the outside, so there are lots of hammer marks visible from the inside:

And imperfections visible from underneath. I sprayed some black gloss on this part so you could see the imperfections better, but still see how the visible part of the panel looks ok.

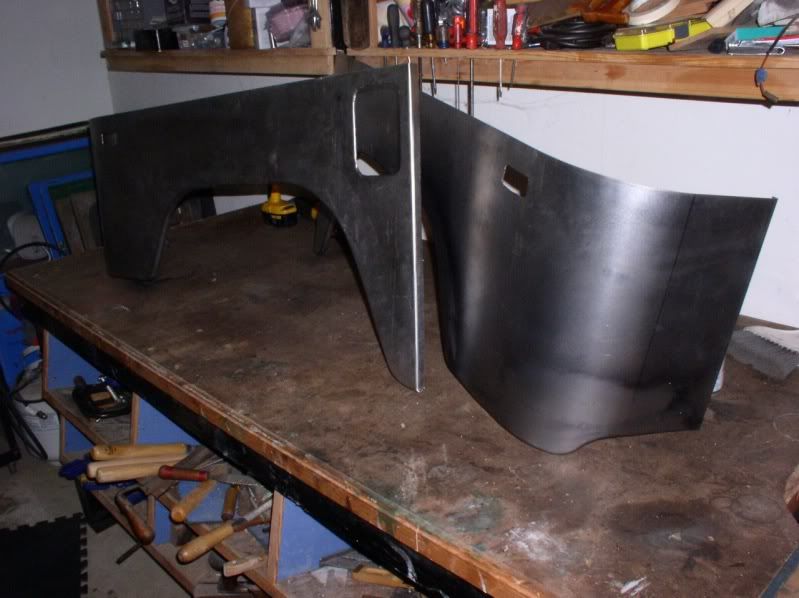
Finished panels:


I am not a perfectionist, and to be honest, I am stunned at how well these turned out. The final assessment will have to wait for final fitment and installation, but I really expected the project to be much more difficult than it was. The most difficult part was the rolled lip around where the gas tank filler neck is and I am more or less satisfied with how it turned out. In total, I think I had about two days into this project and saved about $265.
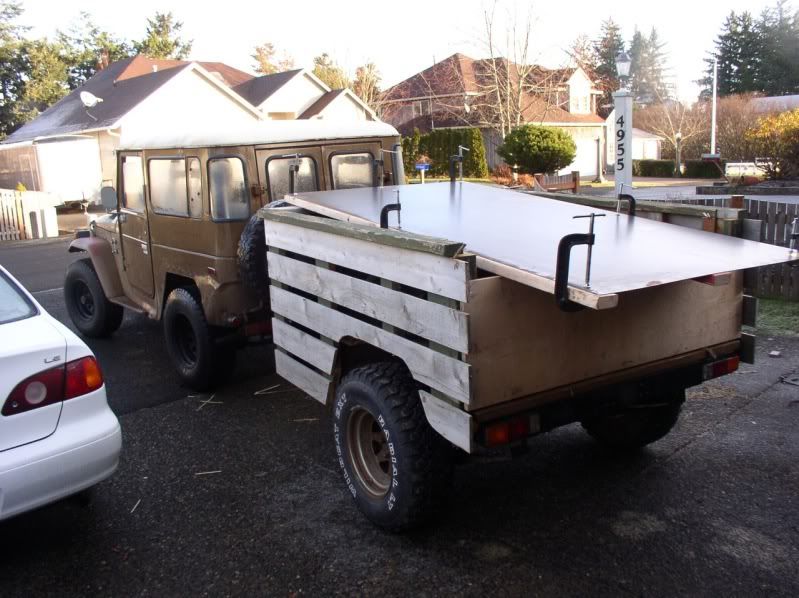
I know they wouldn’t be good enough for many of the fine restorations I see here on Mud, but they are a huge improvement over what I had and a manageable first fabrication project. Also, I have enough sheet left over to fabricate a rear floor, which I’m off to get started on. Again, the bar is set pretty low by what I’m trying to improve upon:


 and it would need to be a necessity.
")