The last thing you could possibly ever want to do I know, but here it is:
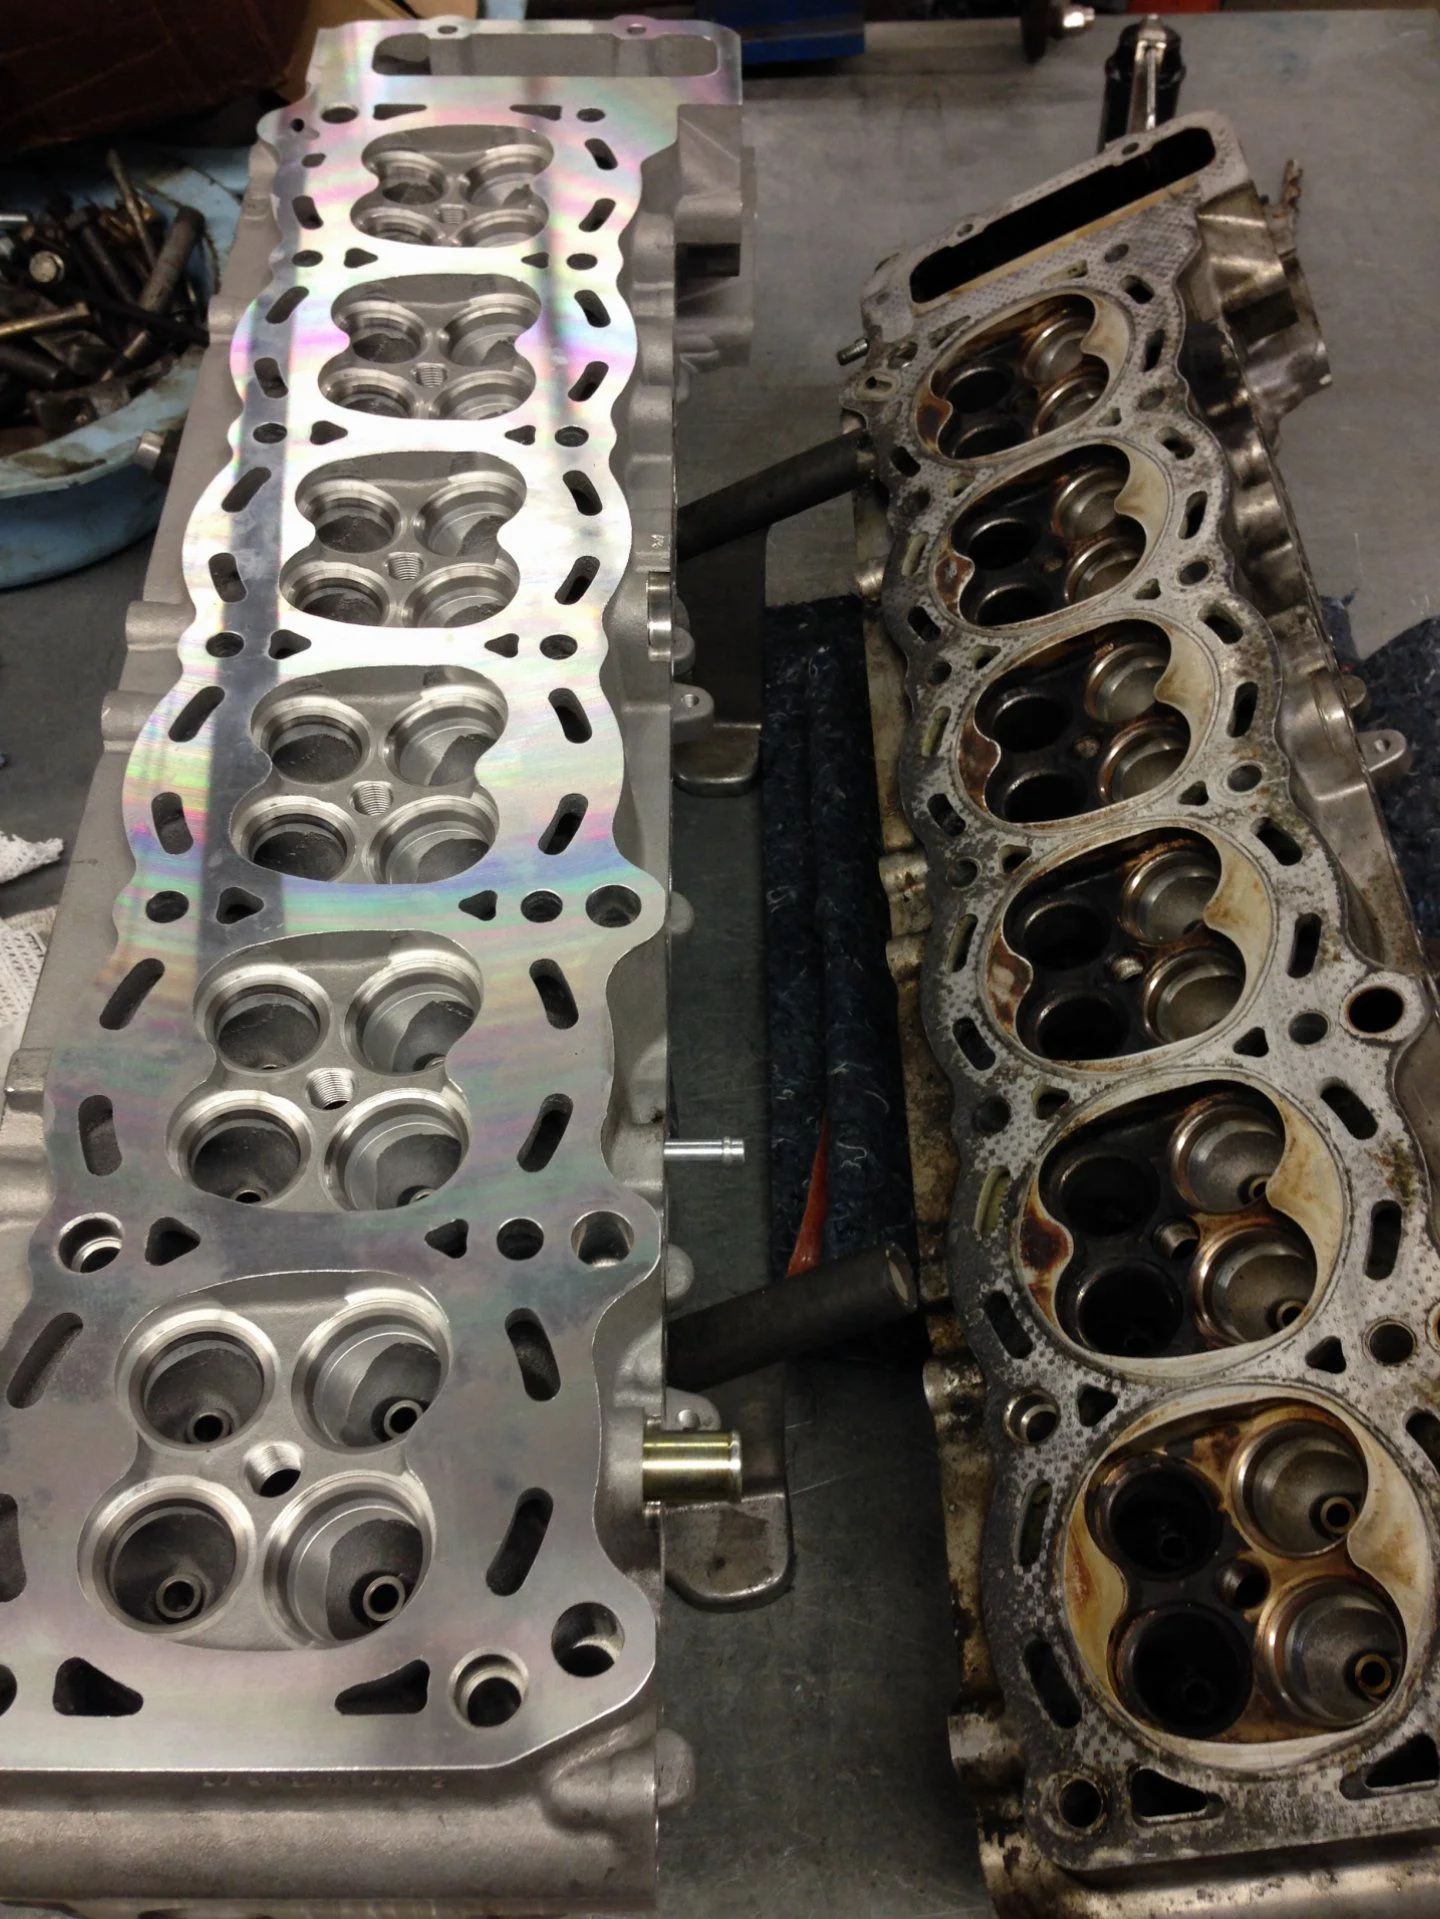
My FZJ80 is beater SUV with 360,000+ on original head, valves, etc., when the thermostat stuck closed and overheated it 2/3rds up the guage, and upon removal of the head, it was bent 40 thousandths (even the camshaft bearings). Shops wanted minimum $700 to straighten it (bolt it to a big metal plate and put it in the oven basically), and with no guarantee it would work for that much without cracking it (especially since it has been through so many heat cycles and has likely hardened/got brittle by quite a bit)
So... in comes the $400 china head.
Since it is a foreign market head, it has NO EGR- holes are drilled and tapped for bolting in the pipes for it, but it's just solid aluminum all the way through (everyone's dream I know). BUT, I live in CA where they put a sniffer in the pipe and so I figured better do it while it is out of the truck, than find out I have to take it off again later to pass smog.
The vertical portion was quite easy- mount it on it's side in a drill press with a long drill bit (and tape for when to stop, measured by sticking it in the old head), and drill straight in.
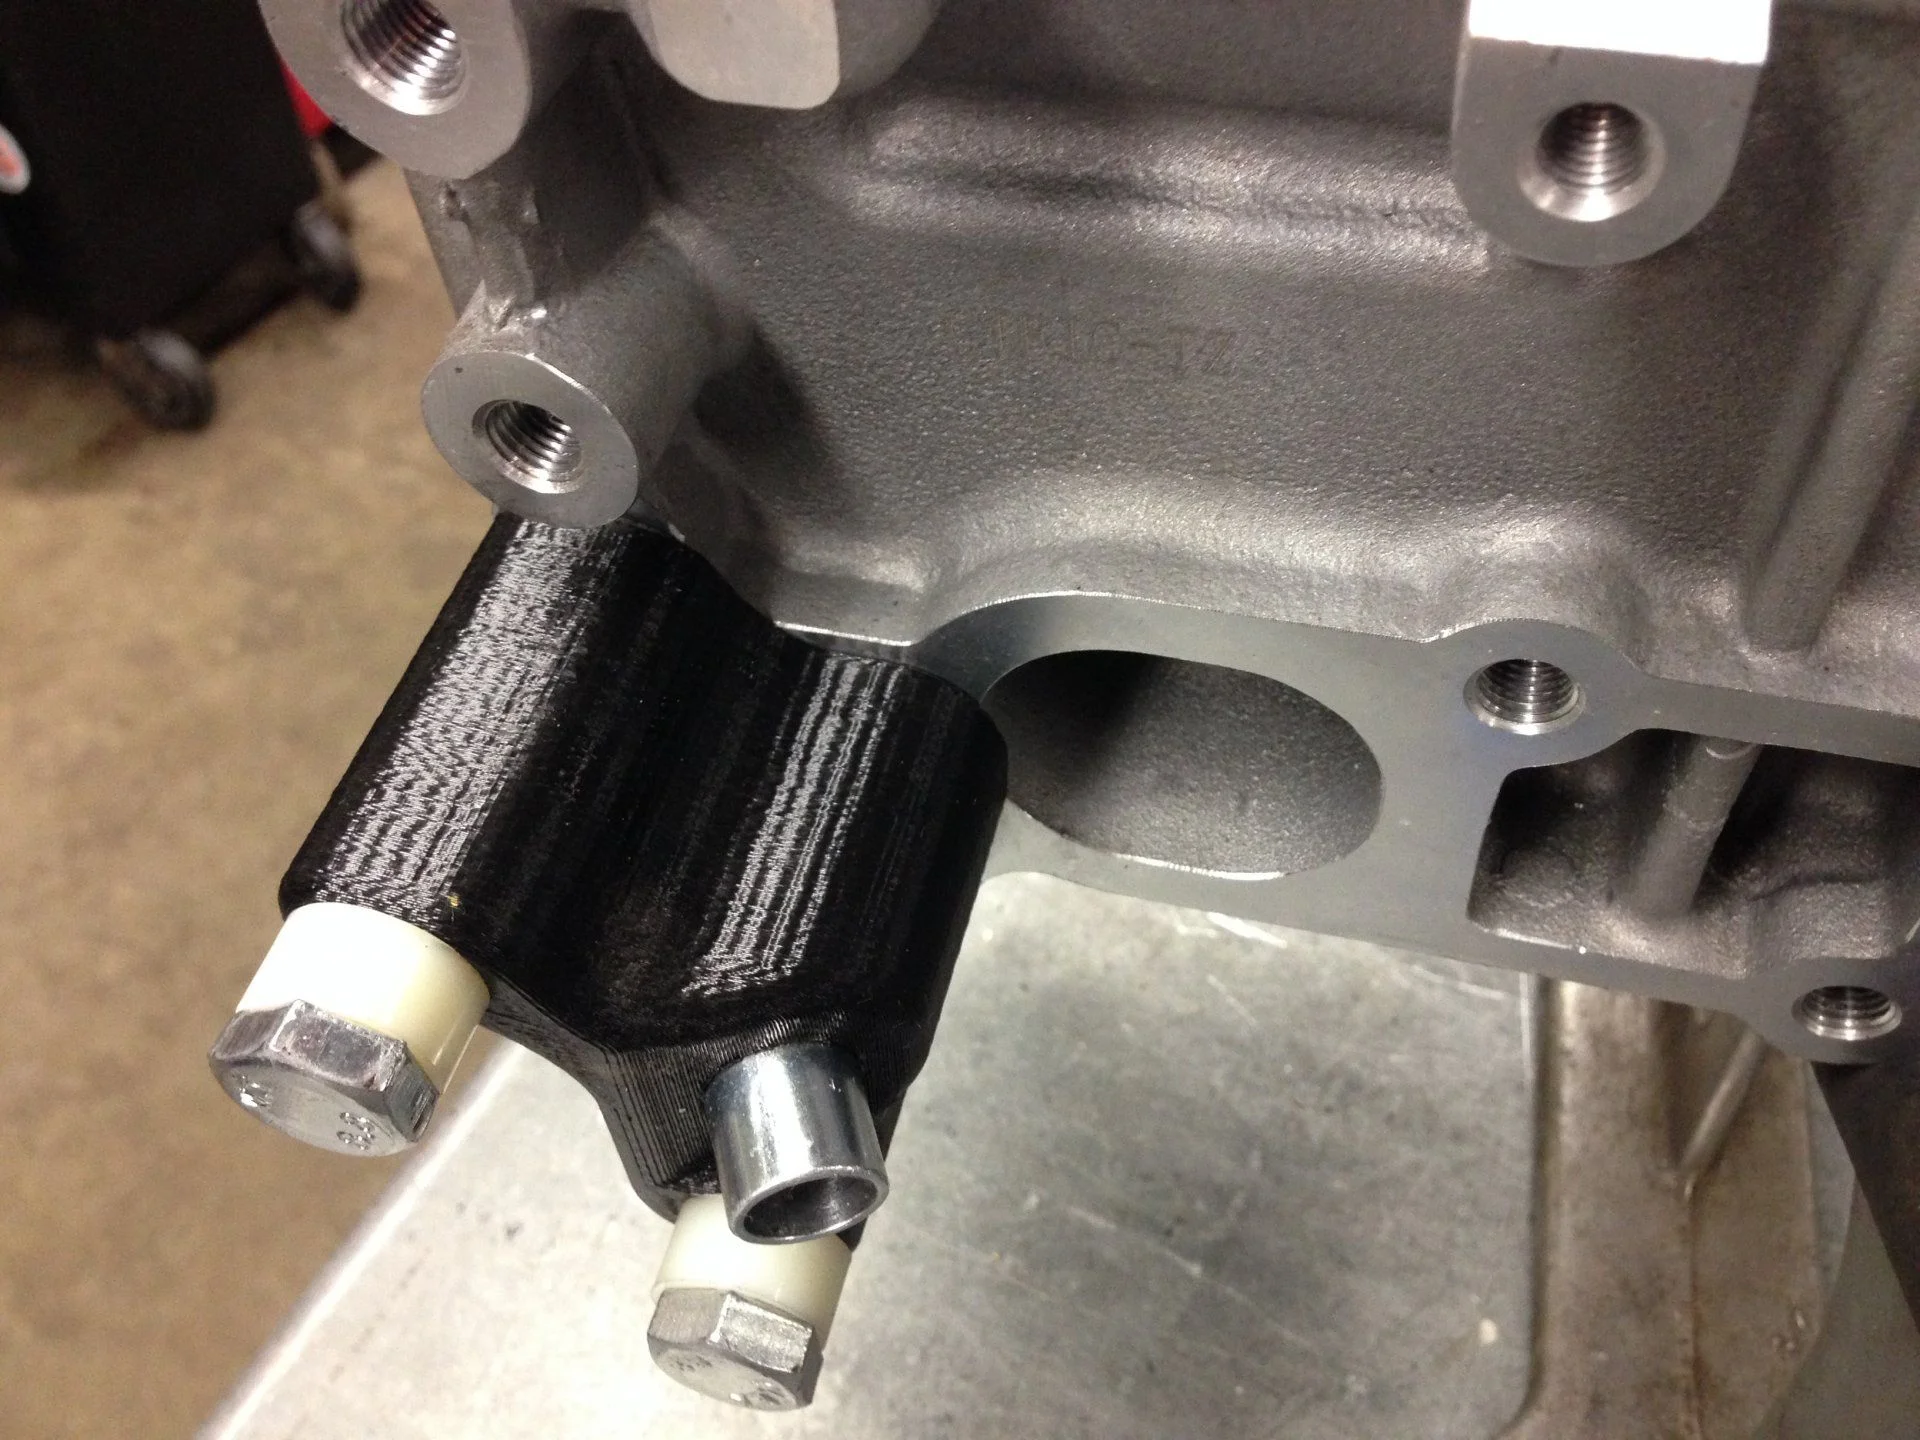
Then I had to drill the short section at an angle of 30* into the head, and while I don't have a milling machine, I do have a 3D printer, a hardware store, and a hand drill.
Onshape
1FZ-FE EGR 30* drill guide by Woofythewolf
You'll need someone with a 3D printer, 2x 2.5" M10x1.25 bolts (ACE only had 3" so I got some spacers), and a 1/2" ID x 5/8" OD x (as long as your drill bit will allow, 1.5" in my case) metal sleeve (I didn't bother with a real drill bushing because it's only getting used this once).
You may need to change the sizes of the holes depending on your slicing program and printer tolerances.
![IMG_3754[1].webp](https://forum.ih8mud.com/attachments/img_3754-1-webp.1393764/ "IMG_3754[1].webp")
My FZJ80 is beater SUV with 360,000+ on original head, valves, etc., when the thermostat stuck closed and overheated it 2/3rds up the guage, and upon removal of the head, it was bent 40 thousandths (even the camshaft bearings). Shops wanted minimum $700 to straighten it (bolt it to a big metal plate and put it in the oven basically), and with no guarantee it would work for that much without cracking it (especially since it has been through so many heat cycles and has likely hardened/got brittle by quite a bit)
So... in comes the $400 china head.
Since it is a foreign market head, it has NO EGR- holes are drilled and tapped for bolting in the pipes for it, but it's just solid aluminum all the way through (everyone's dream I know). BUT, I live in CA where they put a sniffer in the pipe and so I figured better do it while it is out of the truck, than find out I have to take it off again later to pass smog.
The vertical portion was quite easy- mount it on it's side in a drill press with a long drill bit (and tape for when to stop, measured by sticking it in the old head), and drill straight in.
Then I had to drill the short section at an angle of 30* into the head, and while I don't have a milling machine, I do have a 3D printer, a hardware store, and a hand drill.
EGR drill guide
3D printed piece with a metal sleeve to guide a 1/2" drill to create EGR hole without a milling...
Onshape
1FZ-FE EGR 30* drill guide by Woofythewolf
You'll need someone with a 3D printer, 2x 2.5" M10x1.25 bolts (ACE only had 3" so I got some spacers), and a 1/2" ID x 5/8" OD x (as long as your drill bit will allow, 1.5" in my case) metal sleeve (I didn't bother with a real drill bushing because it's only getting used this once).
You may need to change the sizes of the holes depending on your slicing program and printer tolerances.