Warn Hub (coarse spline) Cleaning and Rebuilding (1 Viewer)

This site may earn a commission from merchant affiliate
links, including eBay, Amazon, Skimlinks, and others.

Biscuit

Mars Rover Driver Emeritus
SILVER Star
Joined
Jun 5, 2005
Threads
77
Messages
903
Location
Boulder, CO
One of my "take home" projects while my FJ40 is being worked on by Mark (marksoffroad.net) has been to cleanup and rebuild a pair of Warn M193 hubs for my coarse spline birfs. These will be replacing the failed Selectros.

I bought a pair of dirty used hubs during one of my stops at the shop, and took them home to rebuild over the weekend. Total time start to finish, including trips to the hardware store and auto parts store was about 4hrs. That includes slacking between steps.

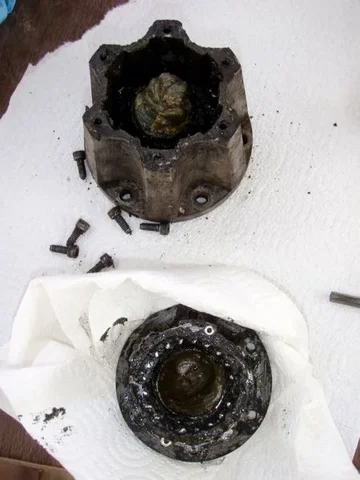
Here is what the hubs looked like when I started.

Hub 1:
Warn_M193_Rebuild-1.jpg

Hub 2:
Warn_M193_Rebuild-2.jpg
Warn_M193_Rebuild-1.jpg
Warn_M193_Rebuild-2.jpg
 
Disassembling the hubs is easy. You need a hex-key (alan wrench) to remove the 6 screws on the top of the hub. At this point you should be able to remove the hub dial and locking mechanism from the body of the hub.

This is a good point to break out the rubber gloves and paper towel as there will be a substantial amount of old grease left in the hub.

As the grease is removed you will be able to unthread the locking mechanism (it is reverse threaded). The hub's dial is held in place with a spring clip ring. A set of spring clip pliers will make removal of this much easier. There is also a spring clip on the bottom (inboard) side of the hub that holds the adapter piece in place (adapts from birf to locking mechanism). Remove that as well.

Once the spring clips are removed all the pieces should have separated. Remove the paper gasket from the hub casing and the rubber o-rings from the hub dial.

All the parts post de-greasing and before washing:
Warn_M193_Rebuild-3.jpg

To wash the parts, I used lacquer thinner in combination with a parts brush, toothbrush, scotch brite pad, and steel wool.

Here is what one hub worth of parts looked like after they were washed:
Warn_M193_Rebuild-4.jpg
Warn_M193_Rebuild-3.jpg
Warn_M193_Rebuild-4.jpg
 
Reassembly is the reverse of how it came apart.

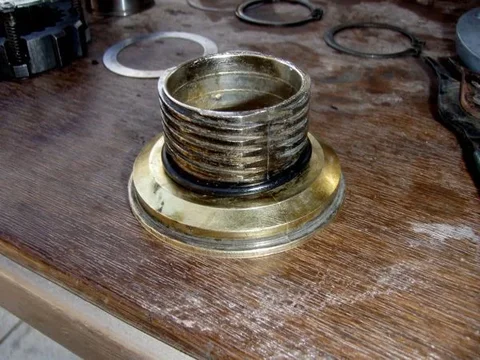
Put the o-rings on the back of the dial, put the dial through the housing ring. The thrust washer goes on first, then the spring clip. At that point you can thread the locking mechanism on (remember reverse threads).

Small o-ring on the dial:
Warn_M193_Rebuild-5.jpg

Reassembled top half (yes I know the thrust washer isn't on in this pic):
Warn_M193_Rebuild-6.jpg


Reassembling the bottom half is just as easy, insert the adapter piece the correct way (teeth inside the hub). Place the thrust washer and spring clip on the bottom of the adapter to hold it in place. I installed the top half of the hub to hold the adapter where I wanted it to make setting the spring clip easier.

Picture of the adapter, washer, and spring clip:
Warn_M193_Rebuild-7.jpg
Warn_M193_Rebuild-5.jpg
Warn_M193_Rebuild-6.jpg
Warn_M193_Rebuild-7.jpg
 
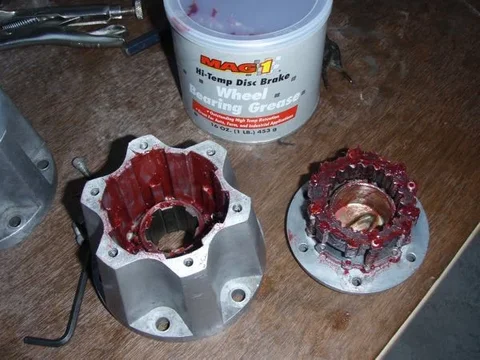
Finally I re-separated the halves of the hub and applied high speed wheel bearing grease. You don't need to pack the hub. A light-ish coating will work.

Greased up hubs:
Warn_M193_Rebuild-9.jpg


Finally put the hub halves back together with the paper gasket in between the casing parts. Tighten down the 6 screws and you are done. (I'm missing six screws).

You can test the locking of the hubs by setting the dial to lock and see if you can move the adapter.

The finished product:
Warn_M193_Rebuild-8.jpg
Warn_M193_Rebuild-9.jpg
Warn_M193_Rebuild-8.jpg
 
Good info/pics.

:beer:


Too much grease in that lockout body for me...


:meh:
 
I'll separate the two halves prior to install to see if the grease has redistributed a bit. Worst case is I remove some of the grease.
 
So other than cleaning and regreasing, what new parts are in the hubs? I've never rebuilt hubs, but it sounds like a better option than buying new.
 
No new part in these as all metal and rubber were in good shape. Warn does sell a rebuild kit which I believe includes the dial and some internals.
 
I happened across this thread... for reference sake, some Landys were helping out a local cruiser head... and they destroyed the hub body on a fine splined hub. I had a set of coarse splined hubs laying around. We were able to get the 40 back on the road by swapping the inner gears from the coarse splined to the fine splined...:D So I know they can be swapped.

So the moral is, don't scrap the coarse splined bodies, they can be useful.
 
An old thread I know but I thought I'd keep the related info together.
I'm finishing up my first knuckle rebuild and now I'm doing my first manual hub refurbish.
I disassembled four Warn M193 hubs off of a 74 and a 75 axle. They appear to be the same as Biscuit's above and all four are identical to each other except for wear & damage. I have enough parts to assemble 2 good ones. All four have a single roll pin in the cap as well as a second hole. Could there have been two pins in each? In Bicuit's pics above I don't see any pins. These pins are really frustrating for the reassembly. I mean really frustrating. Do I need these pins? Without the pins reassembly would be a snap. Has anyone reassembled these with the pins in there? Is there a magical trick? What am I missing?

M193a.jpg
 
no magic tricks here, should be just one pin, and that one pin goes through the threaded spring washer to keep it from over rotating in the housing. gently pull the roll pin out, assemble the dial part of the hub and then line up the pin drive it back in.
 
Jeeeeeeeez!! I never thought of that. I spent a few hours today trying to assemble this puzzle. Thank you so much. :beer: Excuse me while I go kick myself.
 
I too am about to tackle my first knuckle rebuild. And I have these WARN hubs so it was nice to find this thread. IH8MUD website IS the ultimate "Service Manual":clap:
 
Looking for answer to the question on how do I assemble to make it that it goes to lock and free properly?
 
Found the answer. The washer was the culprit. Had a small crease caused from snap ring that stopped the dial from totally turning to free. Flattened it out and now it’s good.
 

Users who are viewing this thread

Back
Top Bottom