What have you done to your 100 Series this week?

This site may earn a commission from merchant affiliate
links, including eBay, Amazon, Skimlinks, and others.

New inner (555 brand) and outer (genuine) steering ball joints on the right side of our ‘99 JDM.

I just did the left inner (caught during safety inspection) and used genuine for that but when a bunch of fluid came out of the boot I figured the rack isn’t going to be around long enough to justify genuine for the other side, which I found play in while doing the first side.

Not looking forward to paying for shipping for a RHD rack😬. Going to put some stop leak stuff in and keep an eye on things. View attachment 4141573
Another reason why I think if I go back to Japan for one more tour I might be looking to get a RHD 80 over 100 cause whew that was a long expensive process
 
I'm replacing my inner and outers right now too and came across a little fluid in the boots, gonna change the fluid and put some AT-205 in there too
Just a word of caution... I know a lot of people have reported success with AT-205, but within 24 hours of adding it to my power steering with the hopes of being a bandaid for my weepy rack, I came out of work to a giant puddle of PS fluid under my truck, as it apparently blew out every seal in the rack. Maybe my system was too far gone and some port on the return side just got gummed up and over-pressurized the entire system, but it went from a slowly leaking system to needing to be entirely replaced in two drives over the following day. YMMV
 
using my gantry crane, a crescent wrench to bend flanges, and hammers, I've been working on getting the pillar back into shape. started by pulling with the crane while beating warped support metal back into shape, then reworking the flange into rough shape. made a shape template from the good side out of cardboard and used that to gage the appropriate curve, and will get the door put back on soon to gage from the inside.

got the good side cleaned up to make the shape gage,
View attachment 4141487
pulled with the gantry crane and chain hoist,
View attachment 4141488
roughly reshaped the flanges, (repeat step 2 and 3 a few times),
View attachment 4141489
... and looks like we're close.
View attachment 4141490
Keep in mind that there are two layers of sheet metal that will get welded back in. I'll get them clamped in place, remount the door, and check the door clearance before I start re-welding.

That’s awesome. Good job
 
Just a word of caution... I know a lot of people have reported success with AT-205, but within 24 hours of adding it to my power steering with the hopes of being a bandaid for my weepy rack, I came out of work to a giant puddle of PS fluid under my truck, as it apparently blew out every seal in the rack. Maybe my system was too far gone and some port on the return side just got gummed up and over-pressurized the entire system, but it went from a slowly leaking system to needing to be entirely replaced in two drives over the following day. YMMV
Maybe I'll just keep adding fluid then
 

New transmission and engine mountsView attachment 4141352View attachment 4141355View attachment 4141351
Bluetooth mode engaged 😂

View attachment 4141350
Ye olde

View attachment 4141353Ye new

EDIT: NO MORE VIBRATIONS WHILE IDLING IN GEAR. OCCASIONAL THUNK GOING INTO GEAR SEEMS TO BE GONE. WOO! I have already done most of the usual suspects (diff bushings, greasing joints, drive flanges, diffs rebuilt, etc)

This was the most helpful of the vids I watched:

Were the engine mounts showing any tear at all? Did it feel better after the install? I am in the middle of an engine swap and contemplating if I should replace them now while it's out i could do the transmission later since it's easier. Thanks for the pics.
 
Just a word of caution... I know a lot of people have reported success with AT-205, but within 24 hours of adding it to my power steering with the hopes of being a bandaid for my weepy rack, I came out of work to a giant puddle of PS fluid under my truck, as it apparently blew out every seal in the rack. Maybe my system was too far gone and some port on the return side just got gummed up and over-pressurized the entire system, but it went from a slowly leaking system to needing to be entirely replaced in two drives over the following day. YMMV
How much did you add?

I have a weeping output shaft seal on my transfer case and added 50ml just for kicks. Seems to have significantly slowed it down, so I might add another 25ml to see if it makes anymore difference.


Raymond
 
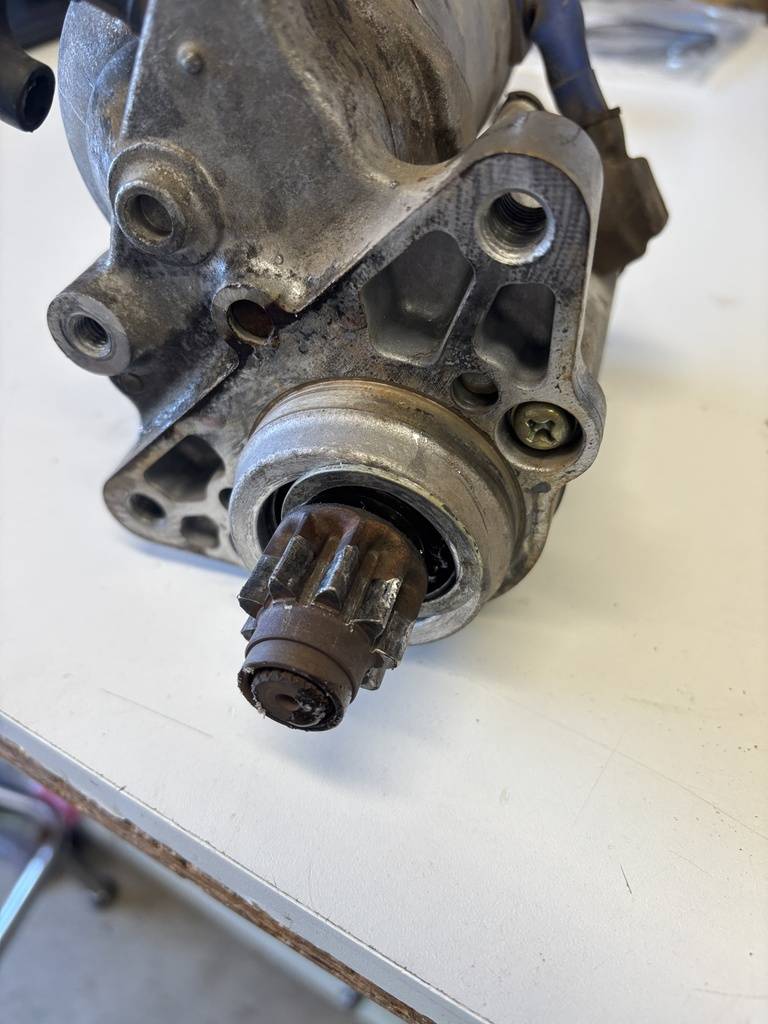
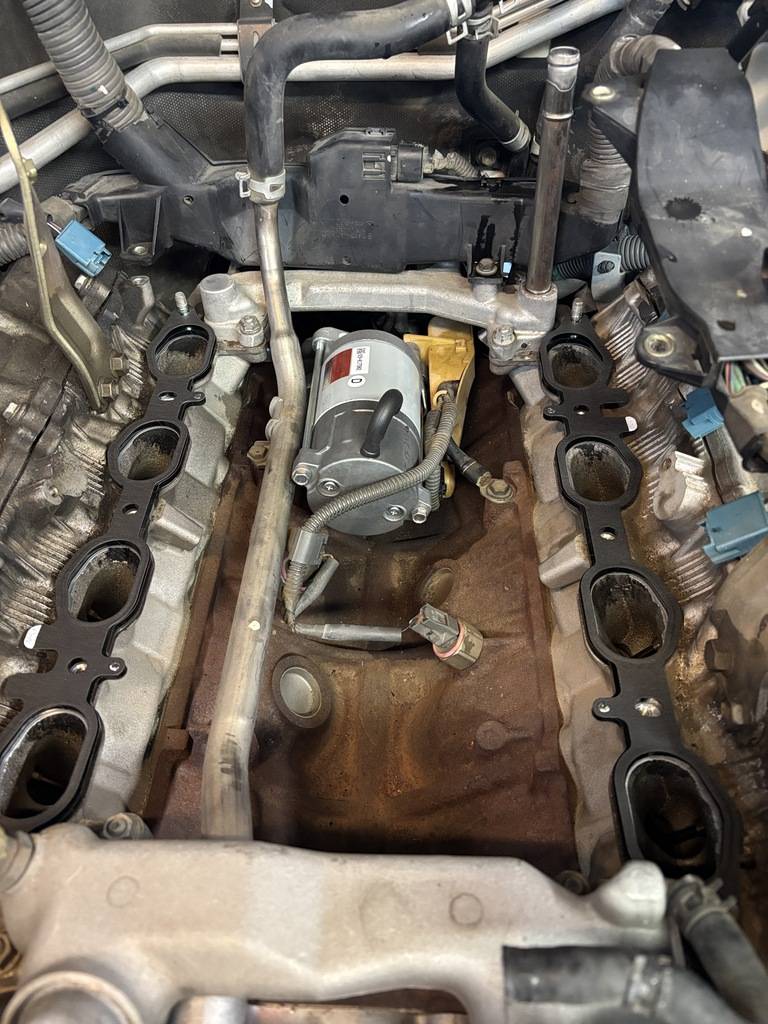
Went digging through receipts today after finishing installing a Toyota Factory rebuild starter yesterday. I rebuilt the one I took out (contacts, plunger, etc.) in December of 2008 after the dreaded "click, click, click, start" at 110, 000 miles. Now with 211,400 miles, I found a different failure.

Seems the bearing failed, and it was grinding after it started and the gear was retracting.


Probably the last time I do this job, looks like a 200 series or a Sequoia with a 5.7 are in my future for towing.
 
How much did you add?

I have a weeping output shaft seal on my transfer case and added 50ml just for kicks. Seems to have significantly slowed it down, so I might add another 25ml to see if it makes anymore difference.


Raymond
apparently too much... can't remember if I used the full bottle (8oz is like 230 ml?) or half, but either way it was too much for the system
 
Picked up another hundy!
Super crusty 05, 220k. Booster is shot, but for $800 I couldn't pass it up. Runs and drives great (minus brakes) for how crusty it is.
Just had a timing belt done, I need to put it on the lift, but if the frame isn't shot, it may make a good trail rig.
I also hate to admit it, I really enjoy driving my 200 (which I rarely do), but there's something about a 100 series that is more welcoming/wholesome.

PXL_20260519_003159859.webp
 
Removing the wood trim from the roof interior. The center console area proved to be the most headache. That 3M tape they used is no joke!

IMG_0389.webp
 
Picked up another hundy!
Super crusty 05, 220k. Booster is shot, but for $800 I couldn't pass it up. Runs and drives great (minus brakes) for how crusty it is.
Just had a timing belt done, I need to put it on the lift, but if the frame isn't shot, it may make a good trail rig.
I also hate to admit it, I really enjoy driving my 200 (which I rarely do), but there's something about a 100 series that is more welcoming/wholesome.

View attachment 4142944
Where in the world did you get that for $800?? Or are you talking about the cost of a new brake booster XD
 
How much did you add?

I have a weeping output shaft seal on my transfer case and added 50ml just for kicks. Seems to have significantly slowed it down, so I might add another 25ml to see if it makes anymore difference.


Raymond
Transfer case does not have a large fluid volume… if you add AT-205, just a few ounces will soften the seals. Also, the longer you leave it in, it will continue to soften seals…

I’d do a few ounces, and then change the fluid after a few days or a week maximum. If you leave the AT – 205 in for too long, it will turn the seals gummy, resulting in more leakage

Just what I have seen.
 
Just a word of caution... I know a lot of people have reported success with AT-205, but within 24 hours of adding it to my power steering with the hopes of being a bandaid for my weepy rack, I came out of work to a giant puddle of PS fluid under my truck, as it apparently blew out every seal in the rack. Maybe my system was too far gone and some port on the return side just got gummed up and over-pressurized the entire system, but it went from a slowly leaking system to needing to be entirely replaced in two drives over the following day. YMMV

That has been my experience as well, on two different occasions.
 
it took me 12hrs, what about you?
About the same here. The bumper was pretty straightforward but relocating the winch control box was a pain in the ass. I found that the VICE relocation kit i used just doesn't fit as nicely into the control box as the SB provided cables. I might end up putting different (lower profile) cable ends on so that the box can be closed up properly.
 
Toyota parts center online promo code GRob25Q324 for 25% off.

Create account, or login at Toyota parts center online…
Private promo code for GR owners. I do not own a GR, but the promo code worked for me.

One time use only… so I am told.
 
Last edited:
OOOOOO. Let me see what I need to order.
 
Back
Top Bottom