Metal Tech Slider Install (1 Viewer)

This site may earn a commission from merchant affiliate
links, including eBay, Amazon, Skimlinks, and others.

Joined
Feb 19, 2017
Threads
18
Messages
215
Location
Texas
Finally got around to installing the Metal Tech sliders on my Wife's '16 LC. It was a long weekend! I spent most of Saturday installing the rivet nuts and doing some test fitments. I spent an additional 5 hours or so today mounting the sliders. I did this alone, with some help from my wife in operating the jack and stabilizing the sliders.

As has been described on prior slider instal posts, it is nearly impossible to enlarge the upper holes on the frame with a drill in order to accept the 3/8 rivet nuts. I was not willing to drill the holes on a steep angle, and no, a right angled drill will not work. The space is too tight. However, I was able to enlarge some of the upper holes to accept a 5/16 x 18 rivet nut using a right angle Dremel attachment and a #932 grinder bit. I also used some other Dremel grinder bits. It is tedious work but doable. The right angled Dremel and grinder bits were also invaluable in widening some of the slider holes that were not fully aligned with the inserts or existing frame threaded holes. This can be done on or off the vehicle. Again, it's tedious, and you better buy a few extra bits.

Images below show where I was ultimately able to achieve securement points, and the hardware that I used.

Another thing that has been brought up is that difficult M8 bolt that holds the KDSS & brake line bracket to the frame. It is VERY difficult to get a bolt back in there, especially when the slider foot is inserted underneath it. I used many words that I learned in the Navy today. In the end, I had to tape a 30 mm flange bolt to a stick and use a ratcheting flex wrench and it finally took hold. I spent over an hour on that little B*@#&%$. I suggest that you buy a small metric set of these wrenches for the job actually (5 piece set $49 at Home Depot).

Next Post: The install setup and the final result...

Dremel.jpeg


Driver.jpeg


Passenger.jpeg


Hardware.jpeg


IMG_7021.JPG
 
Last edited:
I love my MT’s. I let the guys at ChiTown4X4 do the install for this very reason, they had it on the rack and said it was a challenge even then. Got the job done though...
 
Finally got around to installing the Metal Tech sliders on my Wife's '16 LC. It was a long weekend! I spent most of Saturday installing the rivet nuts and doing some test fitments. I spent an additional 5 hours or so today mounting the sliders. I did this alone, with some help from my wife in operating the jack and stabilizing the sliders.

As has been described on prior slider instal posts, it is nearly impossible to enlarge the upper holes on the frame with a drill in order to accept the 3/8 rivet nuts. I was not willing to drill the holes on a steep angle, and no, a right angled drill will not work. The space is too tight. However, I was able to enlarge some of the upper holes to accept a 5/16 x 18 rivet nut using a right angle Dremel attachment and a #932 grinder bit. I also used some other Dremel grinder bits. It is tedious work but doable. The right angled Dremel and grinder bits were also invaluable in widening some of the slider holes that were not fully aligned with the inserts or existing frame threaded holes. This can be done on or off the vehicle. Again, it's tedious, and you better buy a few extra bits.

Images below show where I was ultimately able to achieve securement points, and the hardware that I used.

Another thing that has been brought up is that difficult M8 bolt that holds the KDSS & brake line bracket to the frame. It is VERY difficult to get a bolt back in there, especially when the slider foot is inserted underneath it. I used many words that I learned in the Navy today. In the end, I had to tape a 30 mm flange bolt to a stick and use a ratcheting flex wrench and it finally took hold. I spent over an hour on that little B*@#&%$. I suggest that you buy a small metric set of these wrenches for the job actually (5 piece set $49 at Home Depot).

Next Post: The install setup and the final result...

View attachment 1958709

View attachment 1958713

View attachment 1958717

View attachment 1958718

View attachment 1958724
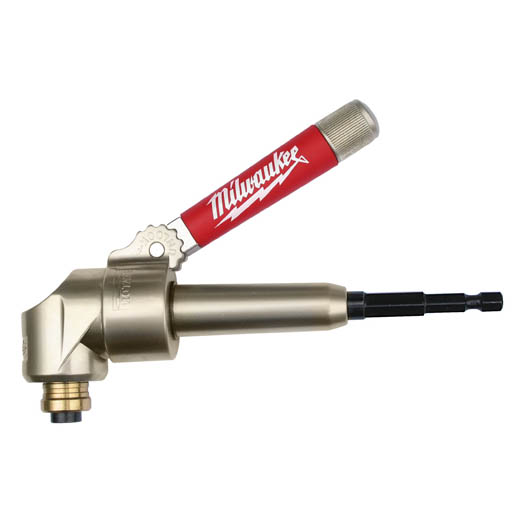
I was doing slider homework and ran across this post.. Thanks for the detail! I saw you used a right angle Dremel that I don’t have. But I do have a specialty tool that may work. And may be an alternative for others. I use it for my work in those cases where you gotta have it. Stubby 1/4” hex metal bits fit or even a hex step bit.
 
I was doing slider homework and ran across this post.. Thanks for the detail! I saw you used a right angle Dremel that I don’t have. But I do have a specialty tool that may work. And may be an alternative for others. I use it for my work in those cases where you gotta have it. Stubby 1/4” hex metal bits fit or even a hex step bit.
Thanks for that. As I recall, it may have been too tight of a space for that with its depth and the need to add the bit. It was a tedious installation. Glad it’s behind me!!
 
Thanks for detailing your experience with the install! I am considering purchasing the same sliders for my 2016 200 series. Question for you, are they wide enough for the front passenger has to use them as a step up? Thanks, Rich
 
Thanks for detailing your experience with the install! I am considering purchasing the same sliders for my 2016 200 series. Question for you, are they wide enough for the front passenger has to use them as a step up? Thanks, Rich
Hi RCB3,

The main reasons I put them on my wife's '16 LC were 1) she was complaining about the high step-up after putting on the BP-51 lift, and 2) I loathed the original running boards. Since the install, there have been zero complaints so I would take that as an answer of "yes" to your question. They were basically put on as step-ups and have served that purpose. I will add that it is not a super easy install, but it's doable. FYI, I do not have sliders on my '13 LC, b/c I saw no need. Good luck!
 
Having installed budbuilt step sliders twice, this install looks like a lot more of a pain in the neck.
 
My passengers use them for access front and back.
 
After reading the comments on this forum I elected to pay Mule Off-road to install my MT sliders. MT told them it would take an hour and a half. The job took 5.5h with 2 experienced techs, a lift, and a full professional shop of tools at their disposal. They were miserable by the end and full of complaints for MT. Their biggest frustration was the jig MT used seemed to be totally off. Half the holes lined up more or less and only needed to be enlarged, the other half were simply off by 1/2 to 3/4 of and inch. If the pros had that much trouble, I am so glad I didn’t try to do these myself! I installed WKOR sliders on my 100-series back in 2011 and although it took me 4h, it was relatively painless.

I am very happy with the final result of the MT sliders. The textured paint was an unexpected surprise- it’s grippy and looks great. The sliders are robust, should take a lot of abuse, and increase the surface area for everyone climbing into the car (only benefit the wife appreciates).

EFE3E5E7-AE4C-451D-80C8-BEC58639B95F.jpeg
 
Finally got around to installing the Metal Tech sliders on my Wife's '16 LC. It was a long weekend! I spent most of Saturday installing the rivet nuts and doing some test fitments. I spent an additional 5 hours or so today mounting the sliders. I did this alone, with some help from my wife in operating the jack and stabilizing the sliders.

As has been described on prior slider instal posts, it is nearly impossible to enlarge the upper holes on the frame with a drill in order to accept the 3/8 rivet nuts. I was not willing to drill the holes on a steep angle, and no, a right angled drill will not work. The space is too tight. However, I was able to enlarge some of the upper holes to accept a 5/16 x 18 rivet nut using a right angle Dremel attachment and a #932 grinder bit. I also used some other Dremel grinder bits. It is tedious work but doable. The right angled Dremel and grinder bits were also invaluable in widening some of the slider holes that were not fully aligned with the inserts or existing frame threaded holes. This can be done on or off the vehicle. Again, it's tedious, and you better buy a few extra bits.

Images below show where I was ultimately able to achieve securement points, and the hardware that I used.

Another thing that has been brought up is that difficult M8 bolt that holds the KDSS & brake line bracket to the frame. It is VERY difficult to get a bolt back in there, especially when the slider foot is inserted underneath it. I used many words that I learned in the Navy today. In the end, I had to tape a 30 mm flange bolt to a stick and use a ratcheting flex wrench and it finally took hold. I spent over an hour on that little B*@#&%$. I suggest that you buy a small metric set of these wrenches for the job actually (5 piece set $49 at Home Depot).

Next Post: The install setup and the final result...

View attachment 1958709

View attachment 1958713

View attachment 1958717

View attachment 1958718

View attachment 1958724
Thanks for validating my frustration…..! The KDSS bolt is a bear…Was finally able to get it loose with a 1/4 ratchet, but not attempted re-installation yet. Being only part way through install, my approach will be get both sliders up with the 8mm bolts that align now and then mark for the 3/8 Rivet Nuts. Theory being that 3/8 bolts are the primary fasteners. Then I will assess how many 8mm bolts can be installed without drilling.

If I’m being honest, this rig will not see Moab (yes been these with rental rig) or anything close unless I travel out West. Big fan of Asheville area and that would be closest if/when we invest in a mountain home. I do consider front bumper and rear bumper over-kill for my use case. Commin wisdom is after lift (2.5” King lift in my case) sliders are most important.

At this weight penalty, considered not installing them. But, money spent so they’re going on.

Snobby sounding, but got into Porsche after focus on Land Cruiser (have a FJ40 also). So that has tainted my expectations. The the fit and finish of MT leaves a lot to be desired. Tons of welding slag under powder coat and plate metal imperfections on the slider face that are visible. The worst example is the small plate that joins the tube to the main boxed slider. Looks like a sheer was used and there’s still a thin strip of metal that should have been deburred, but is untouched.

My hope is someone will say, “These are meant to be used and not admired.” AND the price point is reflective of that….would hope Slee and others are more expensive!!!

Lastly, 1.5hrs install is a joke. That goes out the window as soon as a hole doesn’t line up and/or you need to do an extra Rivnut….I think part of this is the long production run of the the LC200 and all the variations of this global vehicle. The instructions talk to fuel tank skid on drivers side. My 2009 has it on the passenger side. Think MT did the best they could to build a universal application….for the majority of the LC200 model years…

May just have to install the TRD supercharger kit I inherited from a friend that needs the nose cone shaft replacement, but otherwise was free to me😜

IMG_3665.jpeg


64270445993__40C3448A-E7FF-4927-A8BC-E891FDF2E07D.jpeg


64273686099__165A2A09-2726-4E0C-96F5-9F1EAF593FA5.jpeg


IMG_7710.jpeg


IMG_4803.jpeg
 

Users who are viewing this thread

Back
Top Bottom