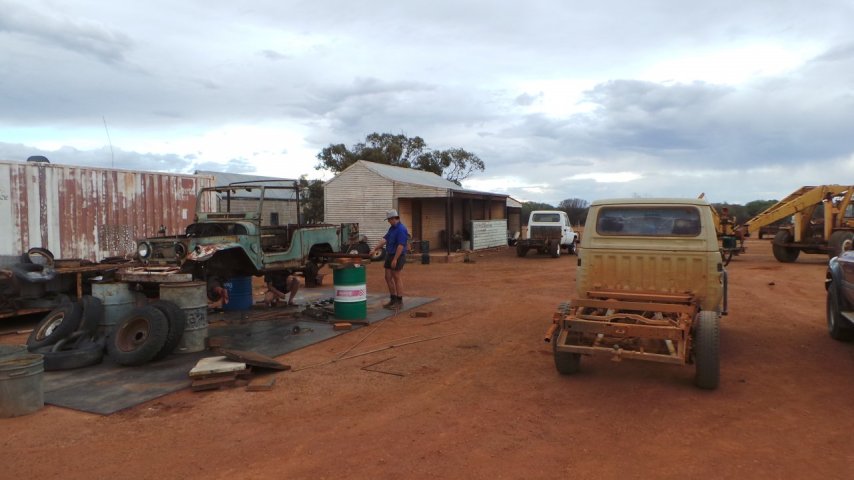
Look what I found.... 1961 FJ40 FST (5 Viewers)

This site may earn a commission from merchant affiliate
links, including eBay, Amazon, Skimlinks, and others.

ahh well still pondering this....

back to rear suspension in meantime. got my favourite jack out and 'adjusted' the hoist so can get at the rear hangers. a bit of 75 tray shuffle going on in the background.

20150208_214050.JPG 20150208_214438.JPG

had to cut the old hangers apart then took to with hammer but it is all coming back together nice enough. this was all very seriously warped. the fading light beat us in the end but is all set ready to weld up we think. the tricky bit is finding something solid to weld to! some before pics. the solid pipe that is supporting this is a good idea of 'square' compared to the hanger point.

20150208_215556.JPG 20150208_215609.JPG
 
and pair after pics ready for weld

20150208_225732.JPG 20150208_225750.JPG

this chassis is pretty stuffed. finally a pic from the front; damage i am not touching. just so you all now i am not getting all stickwelder happy on a chassis that deserves better. but we will stop the rear from tearing out for now and keep old 'rusty' from breaking in half.

20150129_153542.JPG


"PROJECT RUSTY' it is!
 
she has seen better days for sure...... but shes got some good days ahead of her yet!

honorary mudder 'bumstein' (also known as 'chantells jon' or 'the human torch') is visiting for a day or 2. he was here for very first startup night so is committed to project rusty now. putting much of the day in on rusty and making some progress!
 
good day punters. it was all about attaching the rear suspension first. had to use a bit of non oem steel. wasnt much solid to weld to. anyway all good and came up nice and square.

20150209_164727.JPG 20150209_155008.JPG

we celabrated by declaring FINANCIAL COMMITMENT!

20150209_194727.JPG

yep some 'el cheapo' aftermarket spring hangers and pins. got these from my local coastal 4wd store who dont do old. good price on the last pair of a runout line they are not going to restock
 
Man what a rust. You're our hero for saving this old truck. Really amazing can keep yourself motivated. :beer:

Here in NL it is quite essential cars have a frame number. It was hard to read so they stamped it again next to the old number. Would be hard to do that with your frame;). Is there a remnant of a stamped frame nr. anyway?

Edit just read post nr. 2. One of the last rustfree bits of this truck:).
 
looks like someone welded a high nut to the oe plug
 
yea thats exactly what it is.

while all this was going on mudder bumstein got busy with heat and crc. he undid everything! u bolts, spring hangers, everything steering, all shockys etc etc. absolutely everything with a split pin was undone. a lot of this has been heated before. very rusty. this meant lots af heat and hours with a pin punch. many split pins had to be drilled out. none of this was dismantled. just bolts were re applied with plenty anti seize and new split pins. not a very visual change but splendid work. 'future proofing' i think its called

20150209_151623.JPG

managed to get off the rotten rear bumpstops. had to carefully oxy off the excess thread first then get them out

20150209_151700.JPG
 
with the chassis and suspension 'fully restored' it was time to tackle the body. im not a body guy but this one needed a little work....

20150131_210548.JPG


20150131_212258.JPG 20150209_194907.JPG 20150209_194946.JPG
 
we have crawled around old rusty enough to know there was absolutely nothing holding the tub on. but we had a plan that met budget. we broke out the grinder. sourced a piece of 75x75 square tube in galv 2mm to act as the main mid structure

20150209_204607.JPG 20150209_202813.JPG 20150209_202830.JPG

we trimmed a bit of rust so this could be fitted from the dash side. were able to get the po broken seat bolts out by screwing then through from underneath
 
galv got a few test fits to mark and predrill seat mounts and some access to bolt it to the chassis. test fit

20150209_210607.JPG


all was going to plan and everyone was happy as the shadows lengthened

20150209_215604.JPG


we were set for day 2
 
west west west. well done old son! i see the day spent on the '61 was well worth it! i have your dash parts here - i will post this week.
 
..and i didn't realise just HOW much rust was in this. you are a fkn hero for saving it old son!
 
Excellent work as always...but I am most surprised by the sight of CLOUDS in your photos from a few days back. It couldn't have rained could it?
 
we've had over an inch since australia day. narrow thunderstorm strips but welcome.

rust?? this mat not be the rustiest landruiser in the world but it is the rustiest in west aussies experience. very very lucky for this old tojo that it was bought by a couple of nutters

20150209_194846.JPG
20150209_221924.JPG
 
day two dawned well. our umm... 'middle structural member' was a good fit. everything was coated in stockholm tar first. and there were lots of body mounts to be cut from some old conveyor belting.

20150210_122636.JPG 20150210_120742.JPG
 
we had structure! note the cut rectangle slots; these are to acess the seat mounts and chassis mount points. nice fit

20150210_124444.JPG


it was time to look at the back
 
rusty tojos are heaps easier to pull apart with the grinder! the rear crossmember was distored with rust. this was cleaned per oxy and chisel, coated in tar and straightened

20150209_221924.JPG 20150210_194544.JPG 20150210_150259.JPG

a piece of 50x50 square tube in 3mm was nominated for the job. test fit

20150210_160130.JPG
20150210_160130.JPG
 

Users who are viewing this thread

Back
Top Bottom