Builds '91 Pickup diesel conversion (2 Viewers)

This site may earn a commission from merchant affiliate
links, including eBay, Amazon, Skimlinks, and others.

wow great read!

nice to see a "give me Toyota or give me death" attitude!

by the way that custom bumper is NASTY!!!!!!

kudos:p
 
kick ass man...can we get some pictures of you doing doughnuts??
 
I'll see if I can't get some pictures of doing donuts. It won't be hard. The nice thing about the power/torque bands of the turbo diesel is that if I just let the clutch out it will crawl, and I don't have to worry at all about it spinning the tires. If I give it some fuel before the clutch comes out (and let the turbo spool up) it can break the tires free on dry pavement.

Appreciate the compliments on the bumper. I'm really liking it. As it sits now, it's 12 lbs under the SmittyBuilt tube bumper that was there, and it MUCH stronger. Also, it looks better and has recovery points. And the LED brake lights are incredibly bright. I like people to know when I stop.
led tail lights.jpg


Don't remember if I posted this picture already (I probably did), but here it is spinning the back wheels just a bit. Also, it might just be the best IFS wheeling picture ever. That's the most articulation I've seen from the IFS. It's still getting cut off in favor of SAS soon.
throwing dirt.jpg

Dan
throwing dirt.jpg
led tail lights.jpg
 
Oh man!! Look at that flex!!!!!!! :D Hehehe

Yeah. I know you're jealous.

What's really funny is that you see my wheel spinning back there. When Kate drove her '85 4-runner over the same rock, even with pretty lame tires it was absolutely no effort. All because that front axle can flex, and you see the best mine is currently able to do....

IFS="It Frikken Sucks"

Dan
 
Excellent write-up!

As for IFS flex shots, well..
fc3697b792257896af0dfdce48f06f24.gif


FWIW I thought IFS meant I Found Scratches. :lol:
 
Last edited:
No no no, IFS....It's For Soccermoms :), I just thought of that myself....make paypal donations to me :) Adding that to my Sig as we speak :)Þ
 
ROTM writeup coming in a day or so, different motor similar setup.

Finally! WAY better motor from what I gather. I really, really wish I had gotten a 1KZ-TE instead. (not that I'm not happy enough with my 2LTE though)

Dan
 
Writeup won't be quite as in depth as yours as I originally said I was only a set of hands for a majority of the project, I learned quiote a bit though and have since helped out on a second identical swap...second time round was much easier we learned alot about shortcuts to getting things in place...STAY TUNED too the sticky threads
 
I haven't updated this thread in a while. It's time for that to change. ;)

First things first: I got my amateur radio license, so I added a 2M HAM radio (actually, it's a dual band radio--FT-8800R).

I mounted the radio behind the passenger seat, the head unit I made a bracket for that locates it just in front of the shift levers, and I put an NMO mount in the roof for it.

Actually, to be precise, I added TWO NMO mounts in the roof. Since I was going to have the headliner down and the window out, I figures I might as well add another up there in case I ever wanted to add a dedicated APRS radio (someday, perhaps).

Here you can see the SSB-2 sticking out of the roof. I have not put an SWR meter on it, but it has INCREDIBLE range and clarity. I have actually connected with some other HDC guys about 35 miles away, with a mountain jutting about 5,000 feet up between us--simplex.
ham 3.jpg

And some pics of the head unit installation. I need to take the bracket back off and powder coat it now that I'm sure that I like it. It's completely out of the way (I can still even get to my manual electric fan switch easily), but I can easily see the face of it. Not too bright at night, either. The DTMF mic just hangs on a mic hanger from a truckstop (maybe a buck--much better than the metal clippy guys).
ham 1.jpg
ham 2.jpg
ham 1.jpg
ham 2.jpg
ham 3.jpg
 
So, this was what my truck looked like this morning...
arb 1.jpg

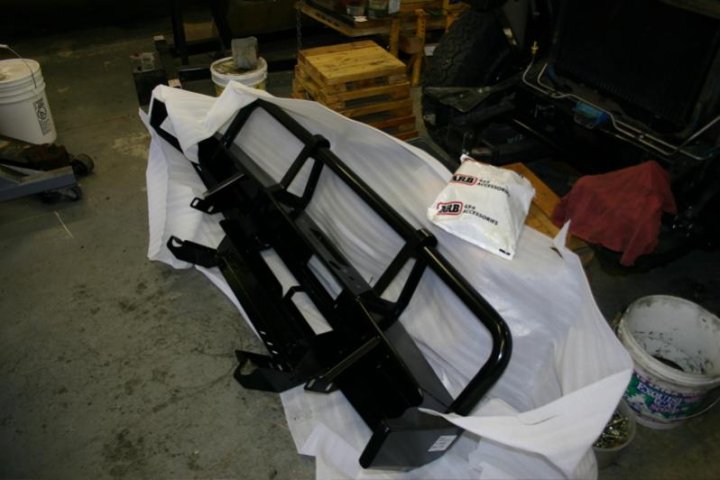
And inside the shop was this stuff...
arb 2.jpg
arb 3.jpg

Basically, I got tired of the damage multiplier on the front, plus I was getting pretty paranoid about someone smashing my front end sometime and then me being stuck waiting who knows how long I'd be waiting for parts to fix the 2LT-E (or swap it for a 1KZ-TE).

The other thing I HAD to address was that my headlights had gone to full on "suck" mode. I bought a set of roundeyes for it, and I was hoping that those would fix it, so that I wouldn't have to do a headlight harness right now.
arb 1.jpg
arb 2.jpg
arb 3.jpg
 
So, one last look of the stock bumper/damage multiplier combo from the front...
arb 6.jpg

Then I test bit the bumper on there just to get a look at it.
arb 5.jpg

And then I ripped the whole grill off. One, it made it easier to get to the headlights, and two it let me get to the wiring that I had behind the grill (for the fog lights and the block heater)
arb 4.jpg

I had to cut off a bracket on each side of the frame that a PO had (badly) welded on for the damage multiplier to let the bumper fit, and when I pulled the right headlight out, I found what I figured to be the problem with my headlights. Wire nuts. Yep. Wire nuts for some sort of ugly splice in the headlight wiring (I suspect it was an aborted attempt to wire the fog lights). So I naturally cut it out of there and did a proper soldered repair.
arb 4.jpg
arb 5.jpg
arb 6.jpg
 
Here's the tag inside the bumper... (just in case you doubted it would fit my truck ;) )
arb 9.jpg

And a pic of the new approach angle (much better).
arb 7.jpg

Amazingly, my truck is now about an inch shorter than it was with that stupid damage multiplier. Finally I can fit into a smaller parking space!
arb 8.jpg
arb 7.jpg
arb 8.jpg
arb 9.jpg
 

Users who are viewing this thread

Back
Top Bottom