Builds Marvin - '76 FJ40 (7 Viewers)

This site may earn a commission from merchant affiliate
links, including eBay, Amazon, Skimlinks, and others.

Joined
Apr 4, 2006
Threads
443
Messages
14,161
Location
NorCal
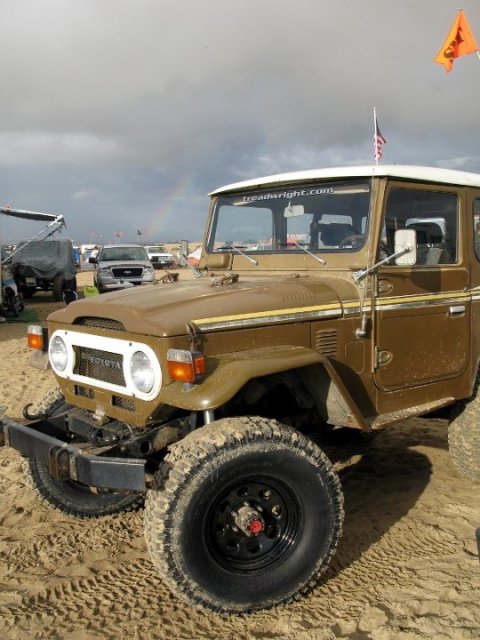
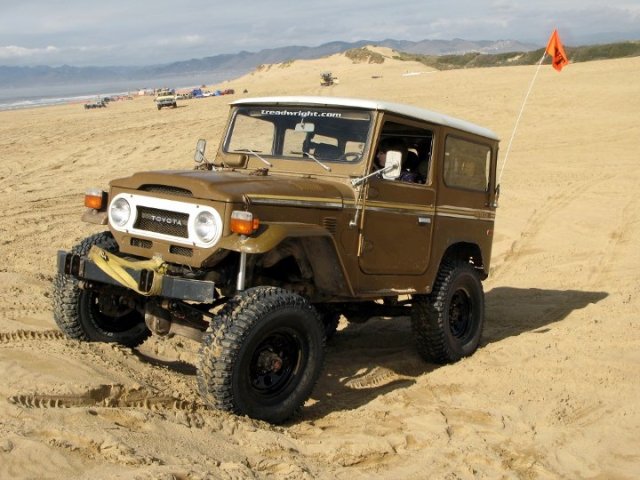
I got Marvin in August 2010 and started the axle swap after getting it to pass smog the first week of Sept. My goal was to get it on the road by Surf & Turf. Below are a couple pictures showing that I made it. :)

Stats:
- '76 FJ40, '86 2f, h41/Orion done as of 4/1/11... redone as of 1/1/12 :(
- FJ62 front axle, 30-spline Longfields and hub gears, FJ55 front springs, Proffitt's outboard shackles and spring mounts, Ruff Stuff perches and monster u-bolts
- All-pro high steer arms, FJ80 tie rods and ends, Saginaw 4-turn box, Mark's Off-Road Saginaw mount
- Ford front shock mounts, Blistein 5125 12" shocks, Napa brake lines
- FZJ80 full-floating rear end, cut down 5" or so on the passenger side, Longfield custom axle shaft and drive plate, FJ62 rear springs, Proffitt's perches, Mark's Off-Road 5.25" shackles, OEM Toyota discs and so-far unused e-brakes
- Toyota e-lockers F&R
- Cragar 16x7 soft8 rims; 4" backspacing
- http://www.treadwright.com 315-75/16 Guard Dog M/T retreads on BFG casings
- OCD Soft Top in 2013

Follow the link in my .sig to see what it looked like when I started.

Turf & Surf 2013:

attachment.php


Surf & Turf 2012:

Marvin57s.jpg Marvin93s.jpg

Random other threads about Marvin:

Cibie Oscar Driving Lights

Flares

FJ45 Run, Sourgrass Tr, Labor Day 2012:

attachment.php


In Henry Coe SP, August, 2014:

20140817_144659_richtone-hdr-edit-jpg.944124


Marvin57s.jpg
Marvin93s.jpg
 
Last edited:
Rear Axle Cut

In retrospect I should've cut so the custom short side axle length matched an fj40 or fj60 full-floater short side. Instead I made the whole axle match the front axle. The long side is about 1/2" longer than the long side of an fj60 ff.

I had Bobby Long copy the short side axle 6" shorter.

I'm not sure if I'm going to have him do the other side, or use that side as a kind of fuse. I can get a spare for $100.

I'll post up a picture or two of the sleeve we used sometime.

attachment.php


attachment.php


attachment.php
 
Last edited:
Axle Oil Fill

While we had it in the shop, I wanted to raise the oil fill hole to get more coverage of the input shaft bearing, since it's tipped up toward the transfercase about 10 degrees. It's probably higher than necessary now, but I don't have to fill it all the way up.

We cut it out with a wheel on a die grinder, turned it around and TiG-welded it back into place. I've got more pics somewhere.

attachment.php
 
Throttle Linkage

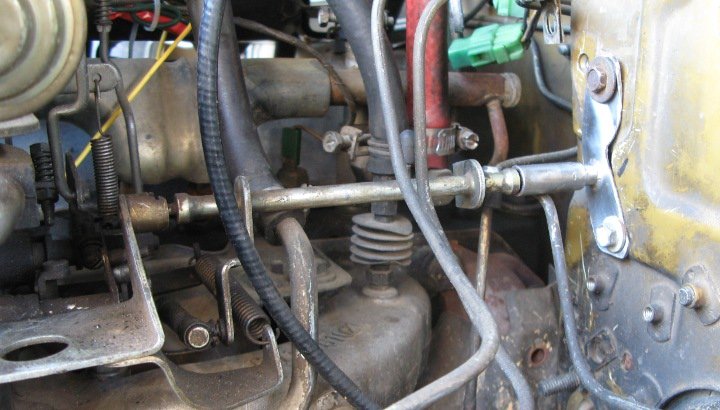
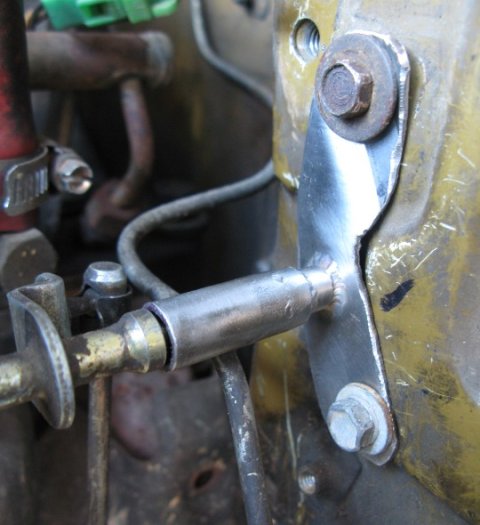
At S&T, we had some trouble with the throttle rod popping out of the firewall socket. This is a later model 2f replacement, and the throttle linkage was not the strong point. It was so ugly I didn't even take a 'before' picture. Image a rusty hunk of scrap metal held to the firewall by one bolt in the top hole. We reused the tube, but pointed it in the right direction and spaced it out to the linkage couldn't pop out. All stainless steel, btw.

I was replacing the brake booster when I was reminded that I needed to deal with the PO's mechanic's crap. :)

linkage6.jpg

bracket4.jpg
linkage6.jpg
bracket4.jpg
 
JEEBUS!!!!
About fawking time you posted some pics of that thing.
:rolleyes:
 
Outboard Springs

Marvin's back on the road now with rebuilt rear calipers, used booster from a junkyard 4runner and a new master cylinder from an fzj80.

Here are a couple pics I posted up in the 40 forum.

Looking from the front at the passenger's frame rail

attachment.php


Looking over the axle at the driver's side shackle

attachment.php


The shackle hanger is all welded up now. I've kinda been thinking about a reinforcement plate that attaches from the frame above the attachment point and to the hanger itself. The hangers are the stock ones, flipped around and relocated to the rear. The fj55 rear springs I'm using up front are very nearly flat after removing one large (added?) leaf and the one shortest leaf.

Another picture, showing how it sits:

attachment.php
 
Last edited:
Shackle Angle

The rear springs are FJ62 rears, but not flipped. I didn't like the way it looked with the wheels way in the back. We reversed and relocated the shackle hangers. The shackles are from Marks Off Road and are really long; maybe 5.5" bolt-to-bolt. It rides like buttah and flexes like a ballerina. The shocks are 12" travel Bilstein 5125s and will have about 4" down travel and 8" up travel once I move the top mounts a bit.

One thing I'm not thrilled about is that Marvin uses about five different spring bushing sizes. :rolleyes:

attachment.php
 
How come you had to add the spacer in the front. I will be using the same kit and was wondering if you ran into a clearence problem. I am hoping to reuse my front hanger it looks like the ruff stuff SR hanger. I am wondering if it will mess up my castor angle or run into spring clearence like Chicago did. I have the proffitts cnt housing.How do you like the offset shackle?
 
How come you had to add the spacer in the front. I will be using the same kit and was wondering if you ran into a clearence problem. I am hoping to reuse my front hanger it looks like the ruff stuff SR hanger. I am wondering if it will mess up my castor angle or run into spring clearence like Chicago did. I have the proffitts cnt housing.How do you like the offset shackle?

Since your C&T is already done, but you're doing the shackle reversal afterwards, you are going to have a steep spring angle and steering clearance issues. That's why I used the spacer. It's 1" solid steel, which gives about 1/2" additional steering clearance. I don't think mine will rub at full droop, but I haven't tried it yet.

You want to use as flat of springs as possible and have a steep shackle angle to keep the rear close to the frame. I prefer the steep angle as opposed to what you could do with a through-frame mount and a less-steep angle. The external mount also is much easier to move around if necessary.

If you don't already have your steering box mount done you have the opportunity to do the steering and spring mounts together, or even to go with scout steering and keep the shackles up front which would make the springs level at the expense of some clearance.

That said, I'm happy with how mine turned out.
 
Last edited:
Sorry for the dumb question but by steep spring angle you mean they will be steep from front hanger to axle? I will have all the parts sitting there axles,stock 60 springs, steering, and motor and tranny setup. So when I start to put things in place I can tack it all and make sure it will work. I am going crazy waiting for toybox to be built so I am trying to figure out future problems. Thanks for the info
 
Sorry for the dumb question but by steep spring angle you mean they will be steep from front hanger to axle?

A stock 40, with the shackles dropping down the front of the springs 3" or so makes it so that both ends of the leaf springs relatively the same height. I've never measured exactly. By doing a shackle reversal you move the front of the spring closer to the frame and the rear further away from the frame so a flat spring would then be going downhill front to back.

With the steering above the springs, and the axle rotated forward to get the pinion angle pointing at the transfer case flange, the steering then gets rotated downwards toward the springs. Both Chicago and I found this at about the same time.

Spacers above the front of the front spring hanger help, thinner and flatter springs help, tight clearance at the rear of the springs helps. Any of the opposites hurt and may cause steering clearance issues. Oh yea, smoother steering rods help. At one point I had a 4x4 Labs high-steer kit with 1-ton tie rods that wouldn't work at all. The tie rods were too thick and have big locknuts right where they would contact the springs; no bueno.
 
Last edited:
Thanks that clears it up. It's this kinda stuff a guy never thinks about till you run into the problem.
 
Thanks that clears it up. It's this kinda stuff a guy never thinks about till you run into the problem.

I didnt.:eek:
Never really hear much about the issue from others either. I can only assume its because not many people go with 60 width axles and have to outboard the springs, in which case its easy to go through the frame rear shackle configuration with 40 width axles.

Mine WILL rub, but im hoping not much. If its too bad and causing issues ill have to re think the confiuration. The 4x4 labs steer arms can be BENT UP by Luke to combat this phenomena, but its a spendy set up. That would probably be my ONLY option at this point without a TON of work. Im kinda rollin the dice betting that it'll be okay.
Hope I dont regret it.
 
We took Marvin out for an overnighter. We drove about 210 miles, a mix of freeway, country road, dirt road and about 8 miles of low-gear dirt road. We burned 16 gallons for a grand total of 13mpg. Not bad.

He cruises nice and smooth at 70mph on the freeway.
 
Marvin's new 'muscle' is almost done;)
CIMG0734.jpg
 
One thing I'm not thrilled about is that Marvin uses about five different spring bushing sizes. :rolleyes:


I went trough the same thing and decided to swap into the new shackle hanger bracket; all used 60/62 shackle hanger tubing.

easier to find replacement rather than looking for odd bushings !
 

Users who are viewing this thread

Back
Top Bottom