It's Alive! 350 Swap Complete!

This site may earn a commission from merchant affiliate
links, including eBay, Amazon, Skimlinks, and others.

Adventure Teq

SILVER Star
Joined
Feb 1, 2002
Threads
97
Messages
3,321
Location
Liberty Utah
Website
www.instagram.com
Finally got her back on the road again last night. I've been that neighbor with a deadlined vehicle with jackstands under it in the driveway for about 2 months now. Whew what a relief.

Some of you may remember some of these pics. So I'm just gonna give a little timeline of the process. Thanks for all the advice along the way.

Well, I worked a deal with 7mag here on the forum, he gave me this engine in exchange for 2 FJ40 bumpers. I couldn't pass that deal up. Thanks 7mag.

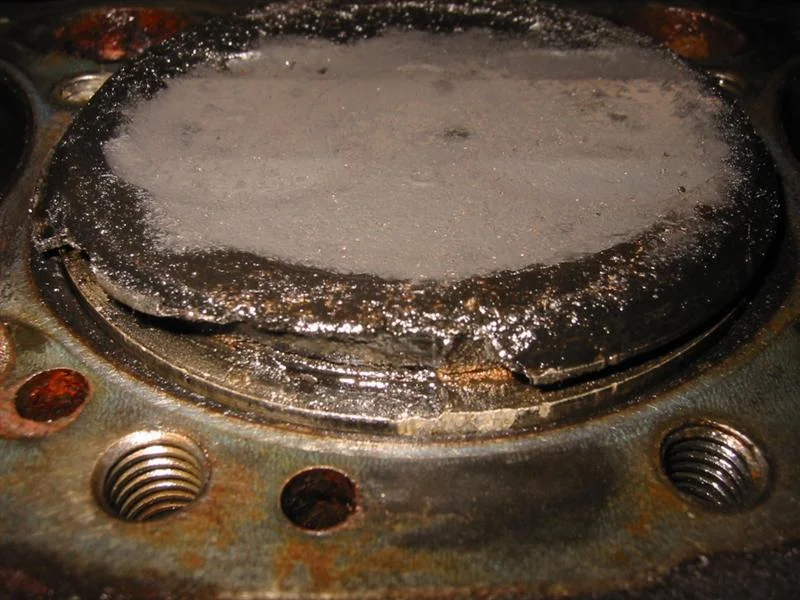
It all started when the thing started running like shiat, it was sputtering a little and there was excessive steam and smoke coming out of the oil fill on the valve cover. So I was thinking it was prolly a bad piston ring or possibly a gasket failure leaking coolant into the chamber, or maybe both. I pulled the head and sure enough there was some piston and ring damage.
1.webp
2.webp
3.webp
 
Last edited:
Rings.

4 of the pistons had busted up rings and some of them were bunched up together inside the same groove.

I wonder how long it was like this and how exactly this could have happened.

What was even more amazing was how well it actually ran like that. :eek:

And so there it is all stripped apart while I tried to figure out what I was going to do with it.
4.webp
5.webp
 
Then luckily after a couple months of deliberation I finally worked out that deal for the donor engine.

Funny thing is that this engine was sitting in a FJ40 that I had driven past for a long time. I had actually went and talked to the guy about possibly buying the truck off of him a long time ago. He wasn't interested. Then about 6 months ago or so 7mag shows up on the forum having recently purchased it. Then as fate would have it I ended up with this thing. Kewl huh...


Anyways, he said he fired it up and it ran well so I took it off his hands. When it got here I was surprised to see just how much oil had leaked from the valve covers. As you can see it was a mess.

I pulled it a part and cleaned it up and painted it. I pulled a couple pistons and main caps and all looked to be in very good tight condition. It's as if it was recently rebuilt but whoever put the gaskets on just let it get all messy. So then I used my old heads from my other block as they were in great shape. As you can see in that pic, the ring had come apart and was banging around in there til it burned away to nothing. Amazingly the valves didn't have a scratch on em and were tight and true.
6.webp
7.webp
8.webp
 
My son and I put all new gaskets and seals throughout the whole thing so it should stay dry for years to come. The Fel-Pro master gasket kit for this thing was only like $40 off Ebay. Racersoutlet is the Ebay store I use, they're fast and fair priced.

I had the pan, intake, and exhaust manifolds sandblasted, along with some other little parts like the battery tray. Then I just used that high temp paint from the parts store. It looks kind of cheesy but a heck of a lot better than before.
9.webp
10.webp
11.webp
 
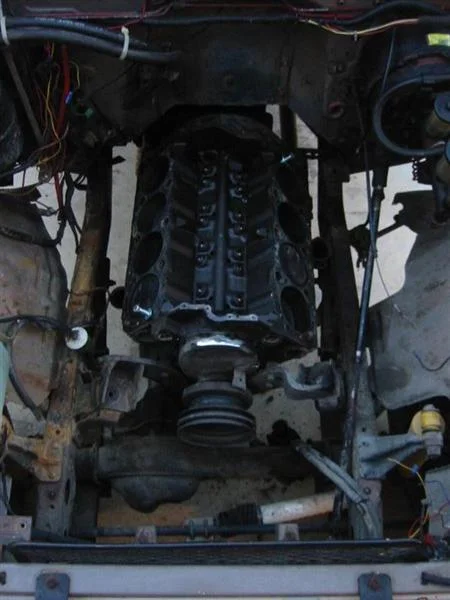
Before and after engine bay shot. I tried to wire wheel off the frame rails and used some texture paint, same stuff on the valve covers, to make it look not so bad. This was no restoration effort, just trying to clean it up a bit.

Cleaned off the fenders and firewall and repainted that battery tray. Looks way better.
12.webp
13.webp
14.webp
 
Yesterday at noon.

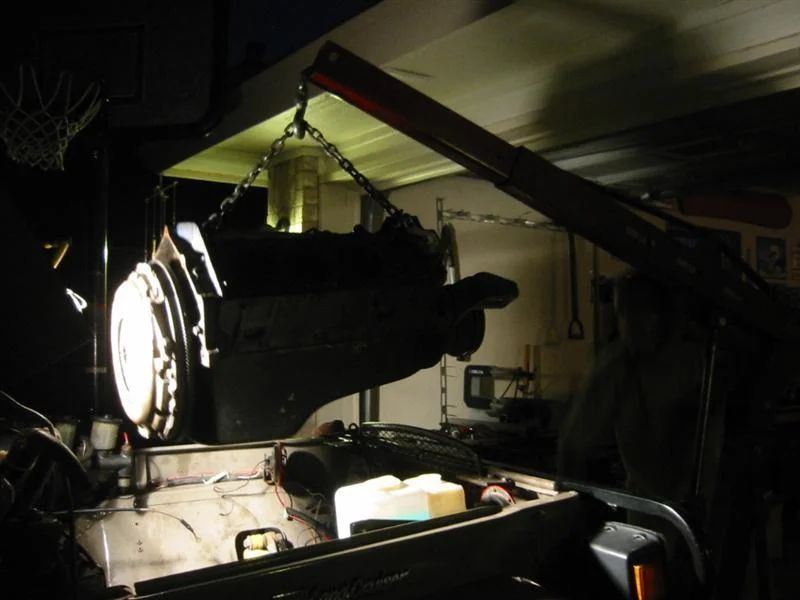
And finally I get to stick it. Funny thing is that I'm wearing the same shirt as in the pictures of it coming out. :D

All the prep work was what took forever. Once I had it on the hoist and dropped it in I was able to button up the whole thing and had it running in about 5 hours.
15.webp
16.webp
 
Finally back to normal. That cast iron intake looks aight with that aluminum paint stuff. These valve covers are a lot better than the ones that are shown in this install pic. I just wanted to save the gasket and install them once I had the valves adjusted. After I sand the tops of them to expose the shiny ribs I'll install em.

And there it is, no leaks, looking fresh. What a relief. Now I can get to installing that tire carrier. :D :bounce:

First, I had the dizzy 180 out, even though I tried not to. Got that fixed easy enough. Then adjusted the valves following some super easy steps I found online, you can't even hear em now. Then I had the second main vac port open. One for brake booster and one for EGR or whatever that valve thing is. Once I got them all straight she just purrs. Just like my old one did before the problems. That is a great sound to hear I tell ya. TG It's over.

I know, not much tech value here, maybe a little, but who else am I gonna post up pics for?

:cheers: Thanks, everyone.
17.webp
18.webp
19.webp
 
Last edited:
And it uses the same filter as a 2F:D

Looking good!


Ed
 
Hawk,

I can't believe the amount of work you did in a week. Thats awesome!! Makes me feel like a looser about rebuilding mine. Looks like the block cleaned up pretty good also. Let us know how it runs on the road.
 
dang man, that looks nice, test it out and drive on up we'll go wheelin
 
Looks like you have the same conversion set-up I have. The old Downy style saddle mount for the engine and adaptor plate for the tranny? I was going to change it out for the hotrod or AA style engine mount when I do my swap, because of issues with driveline vibration and accessory mounting. Have you had any of these issues?

edit: oh, and looking good, nice work.

Thanks,
Kirk
 
Thanks everybody.

Cam, I'll be heading up there round the end of August, might get to wheel wit ya then.

7Mag, yeah they clean up real nice when you get all those nasties off. :D Just keep pluggin away at yours. Thanks again man. :beer:

Tire roasting pics huh, let me break her in nice and easy first. :D

Fussy, havn't noticed any of the problems you mentioned. My rear DS is still out of phase from the PO and even so I notice no problems.

Got the tire carrier and tail lights installed at lunch and drove it in to work. I'm tellin ya it just hummmmmms. :D Had that big smile on my face the whole way.

Couple things I need to figure out. My thremal switch for my elec fan didn't seem to be working so I rewired it. Well now it's on all the time unless I unplug it. I might just wire it to the key switch.

Then after sitting all that time my clutch slave leaks after the install. I bled and bled and can't seem to get the air out. The leak seems to have stopped but I still can't get it right. Like $10 from SOR for a new one, should be here by the weekend. So I'm pumping the clutch all day for now, but I can live with that, hardly as dangerous as my old brake pumping nightmare with the old truck.

Just gotta get those valve covers changed out.

Thanks everyone for the kind words. Hope this thread will be useful to someone in the future.
 
1. where does your heater lines run out of? one from the water pump and one from somewhere on the intake? my water pump is plugged but i have two ports that i think there for water on my (edelbrock) intake. just wondering how yours works...

2. where did you ground your engine to?

3. what alt. are you running? what acc. linkage are you running?


got any more shots of the left and right side shots of your engine with it all complete? like the dist. and vacuum lines?
thanks man! great job by the way
10.webp
 
Last edited:
Post #5 middle pic. The black fitting next to the Tstat housing is one, and on the pump is the other. Like you said.

My passenger head is grounded directly to the batt then the batt is also grounded directly to the frame.

It's a CS-144 alternator out of an Oldsmobile V8 or something. It was the freshest looking one in the bin at the junk yard, it's been recently remanned. $40.

More pics later, don't have any right now.
 
Back
Top Bottom