duvinclunk's build it and break it quick build thread.

This site may earn a commission from merchant affiliate
links, including eBay, Amazon, Skimlinks, and others.

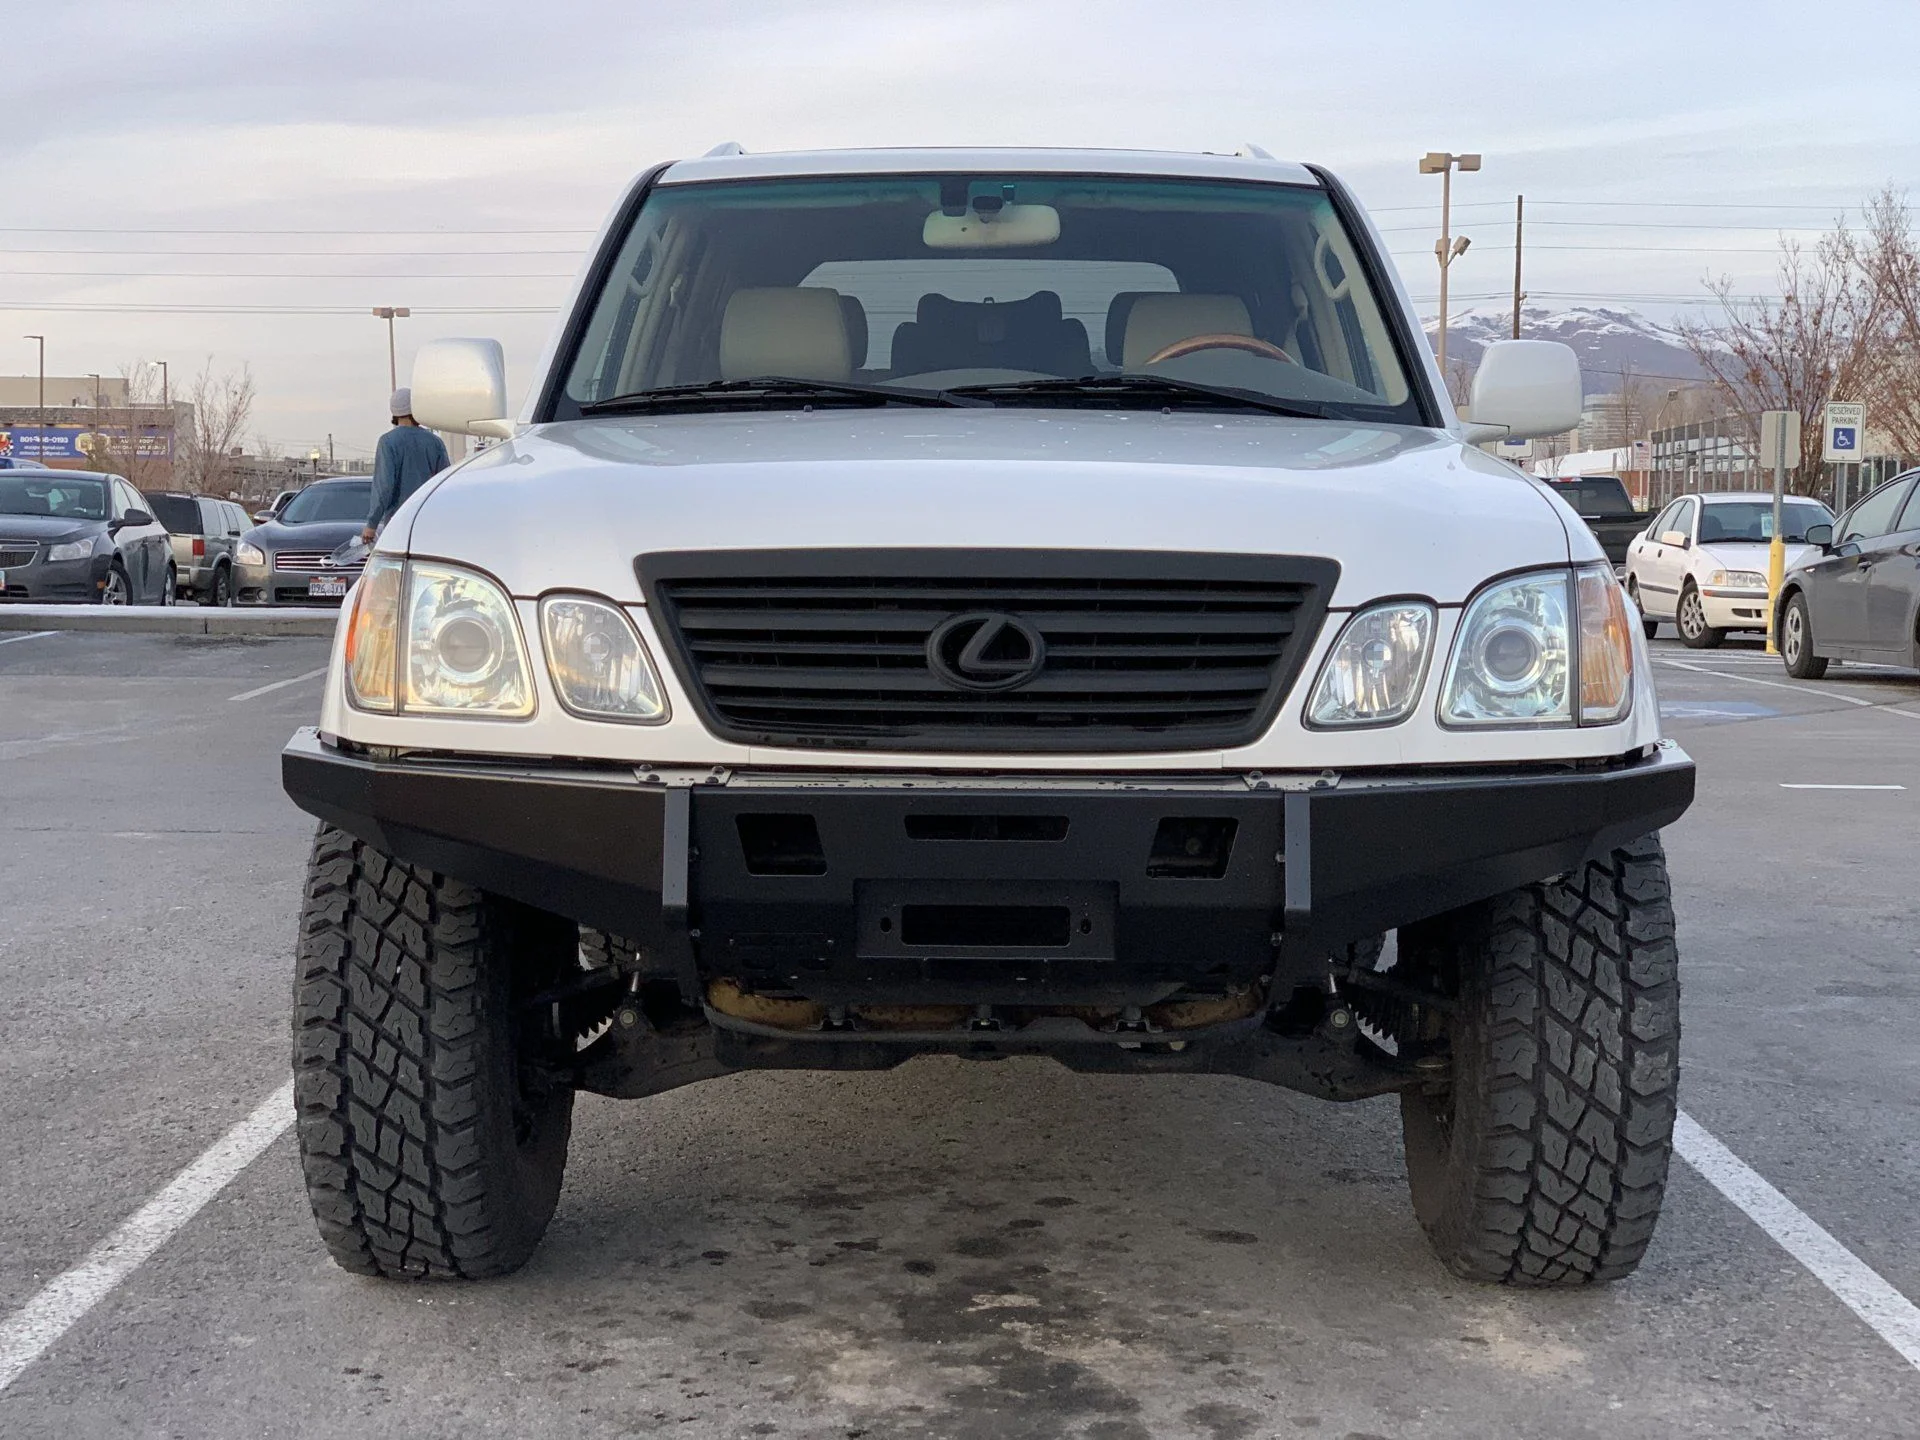
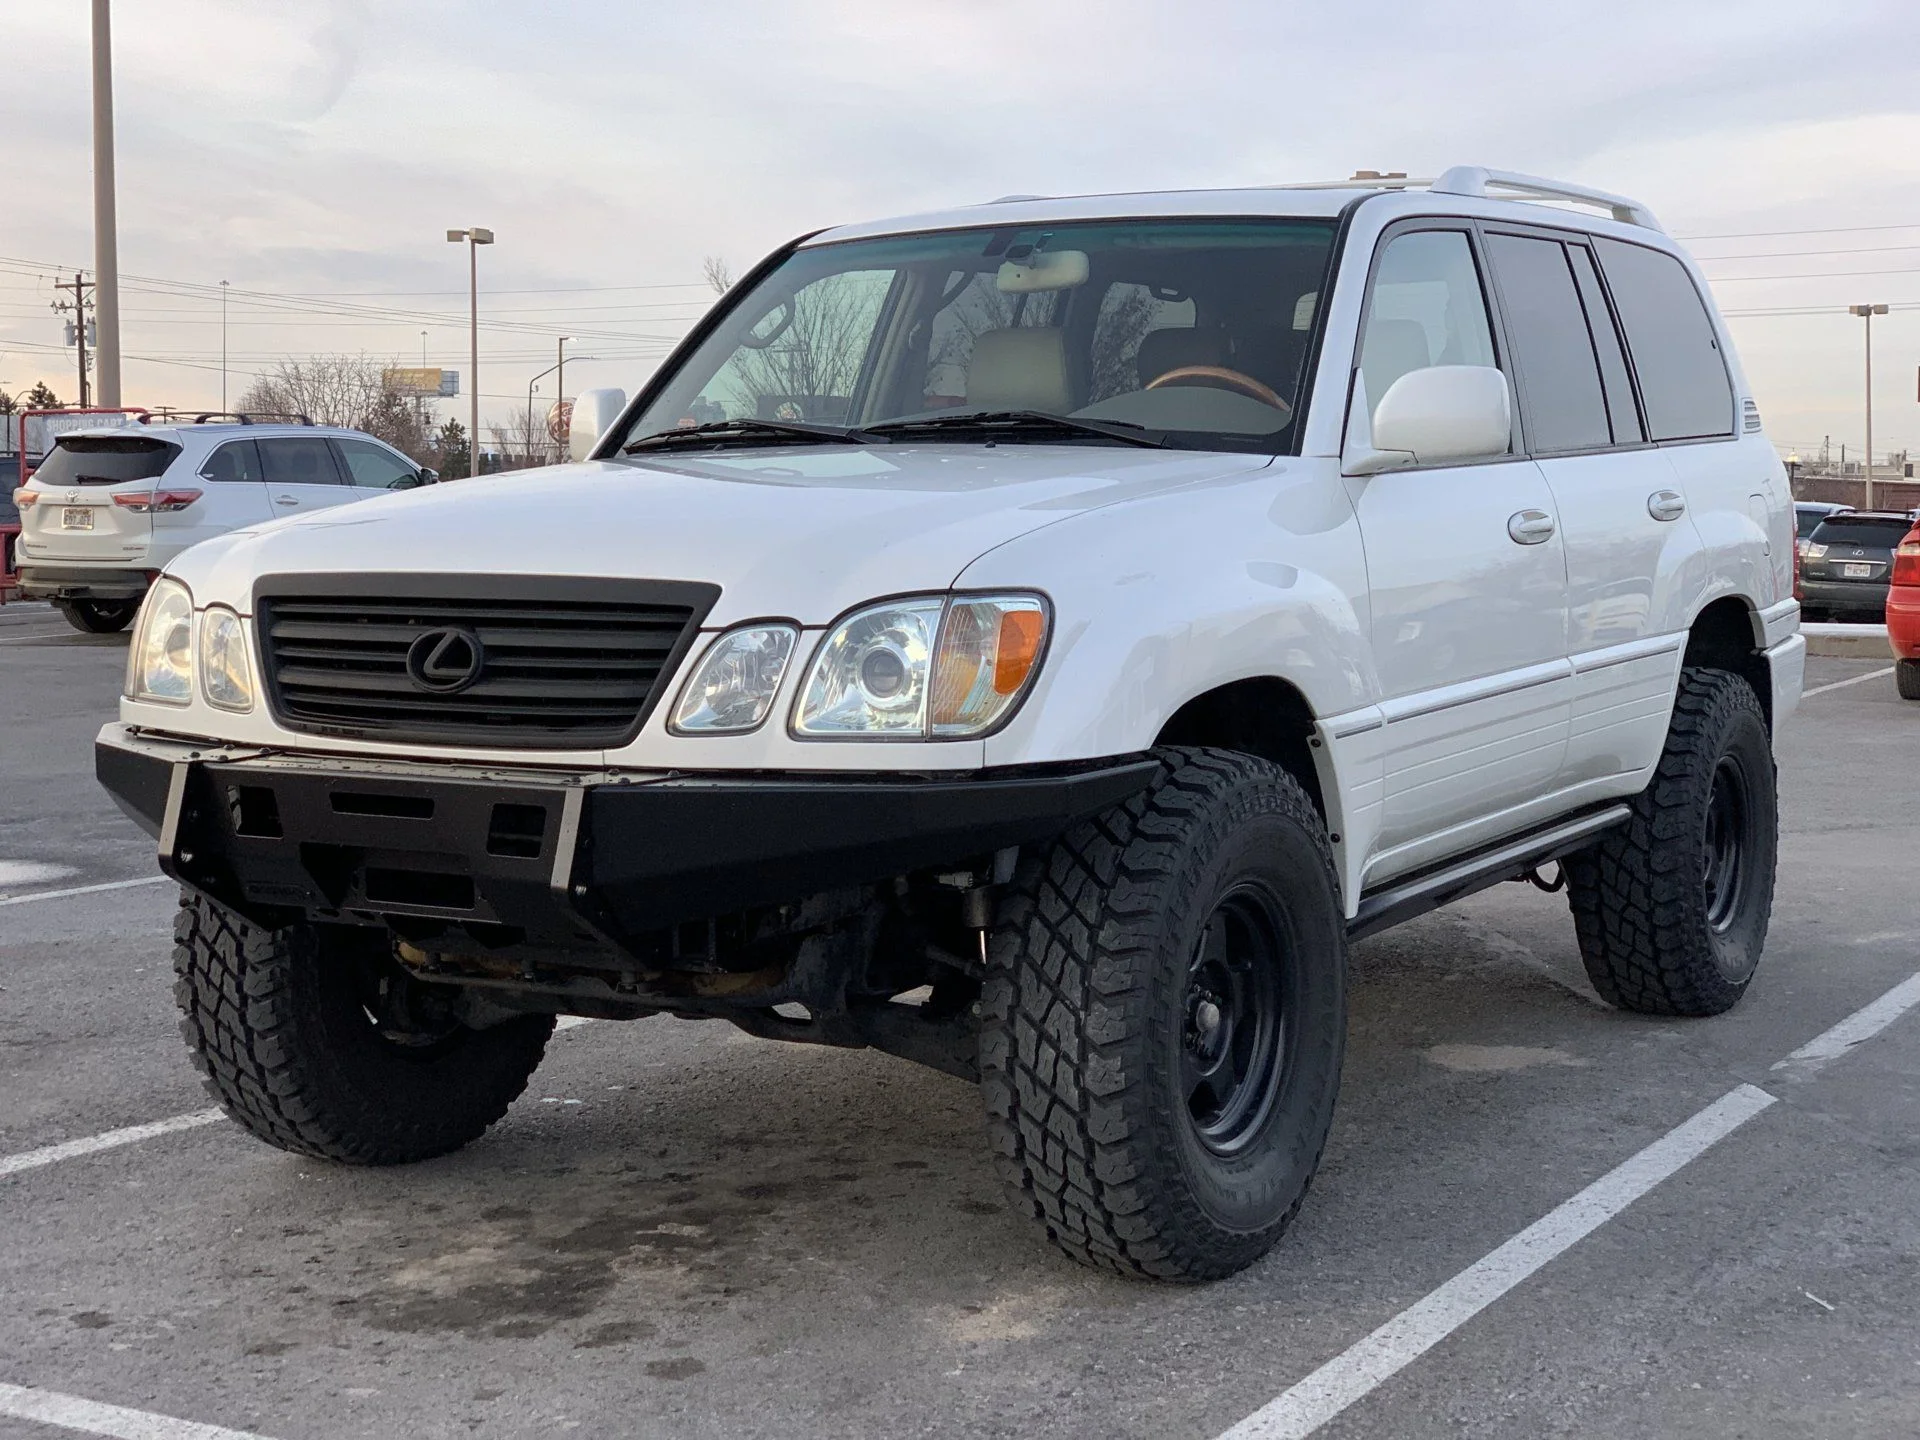
Its been a crazy week for the Cruiser. I got hit by another vehicle on my way to work before 7am at the beginning of the week. I was turning left onto a street in an industrial area and the person trying to turn onto the road I was coming from said they didn't see me and pulled out. Luckily I saw them moving out and was able to try to go even wider to avoid the accident and was only hit on one of my wheels. Zero body damage, just a scratched up new wheel. Accident was probably done at 5mph. Brought it in right away to have it inspected for any suspension/rear end damage and nothing was wrong, bent, or broken. Came out unscathed. Will be getting a new wheel under their insurance.

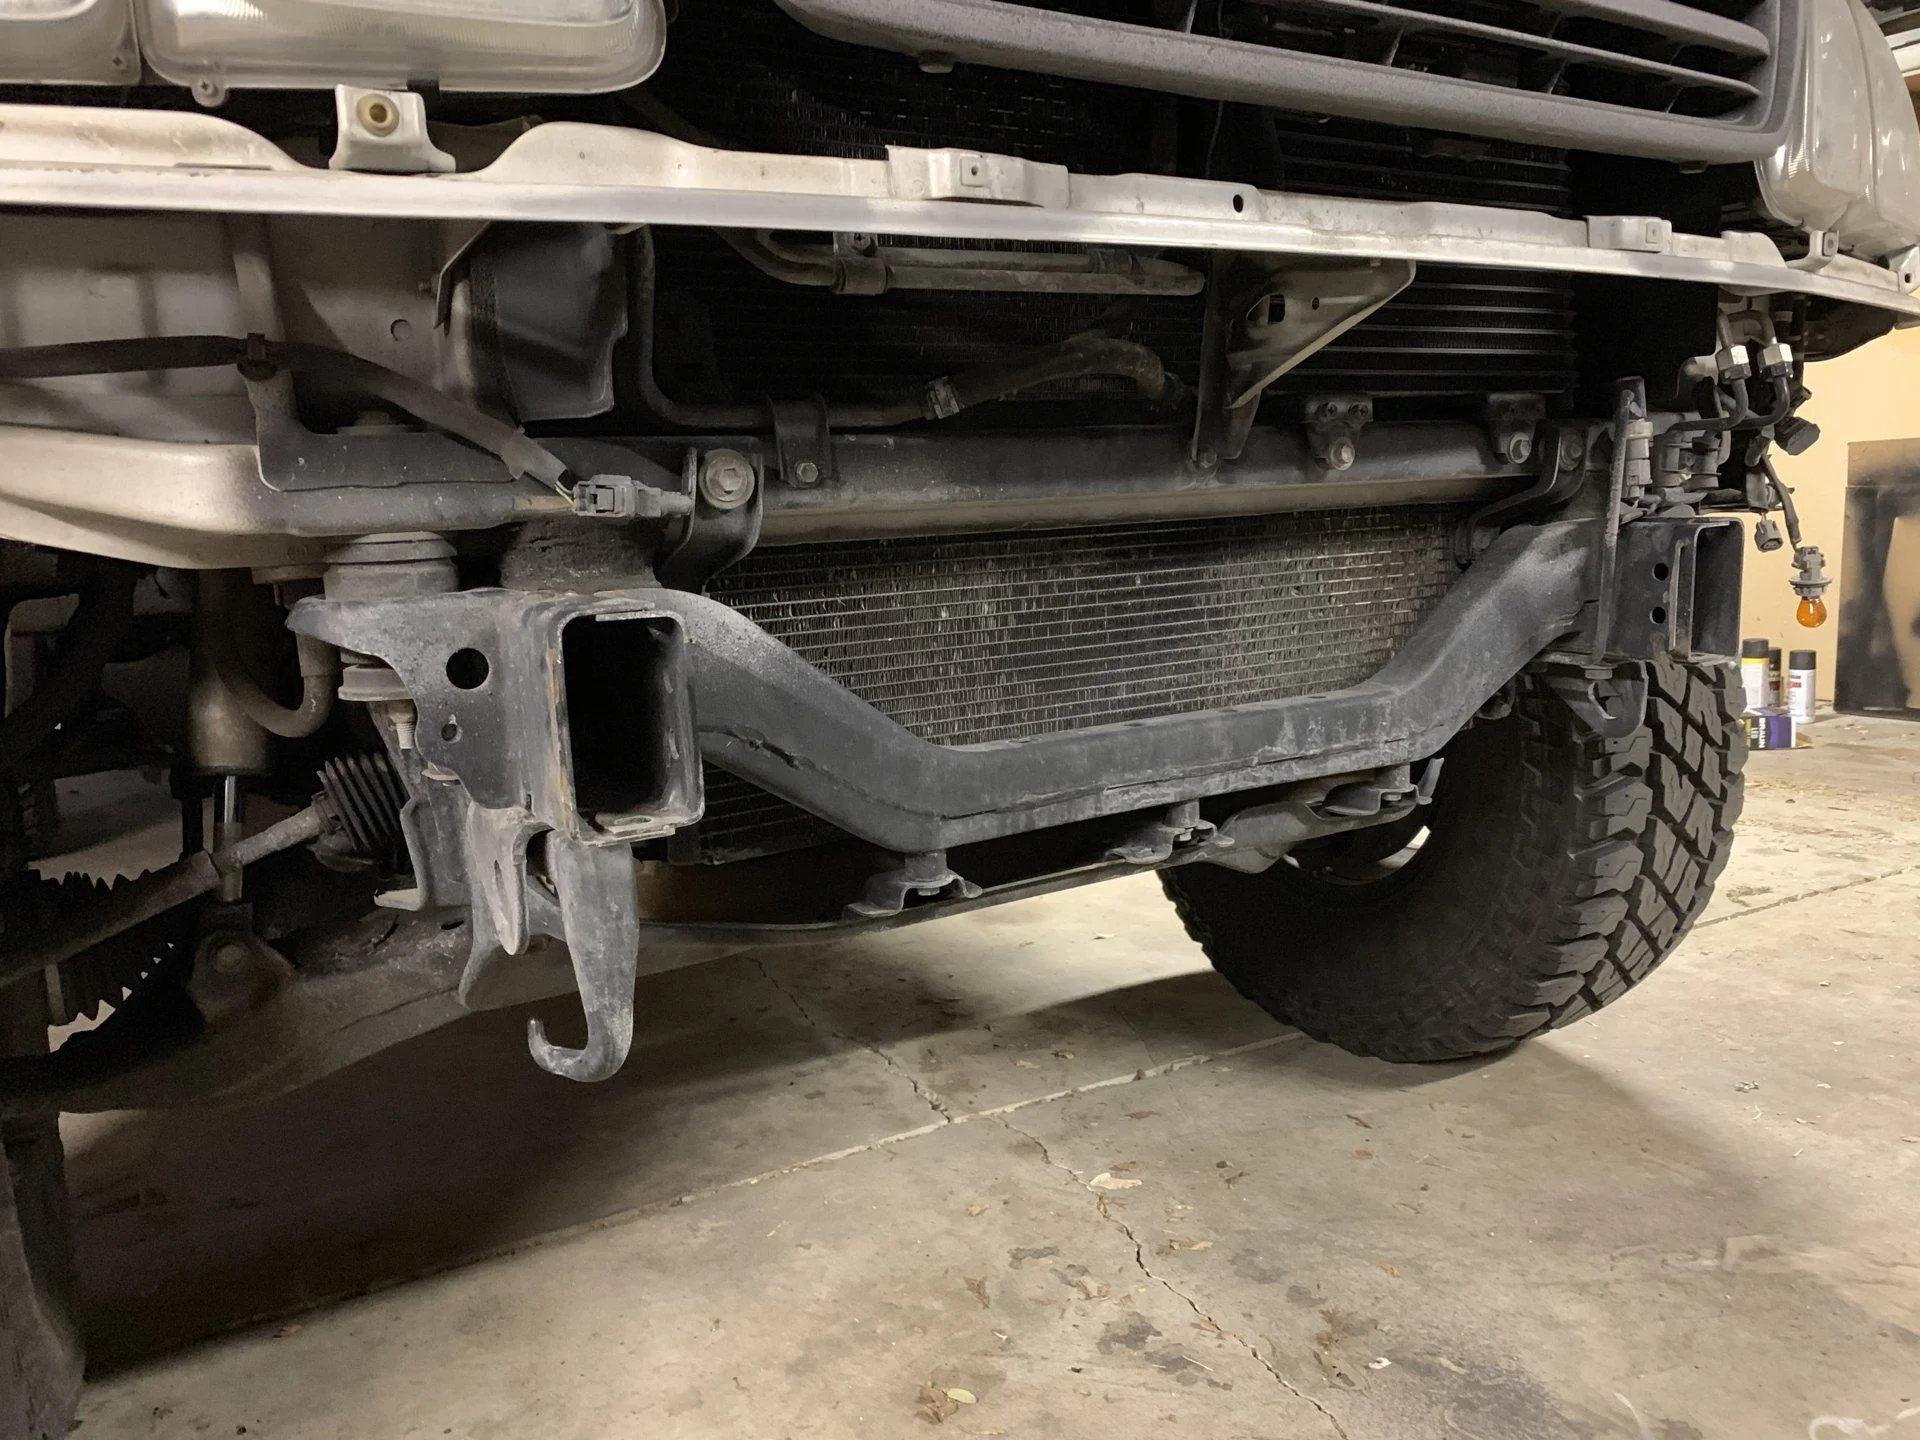
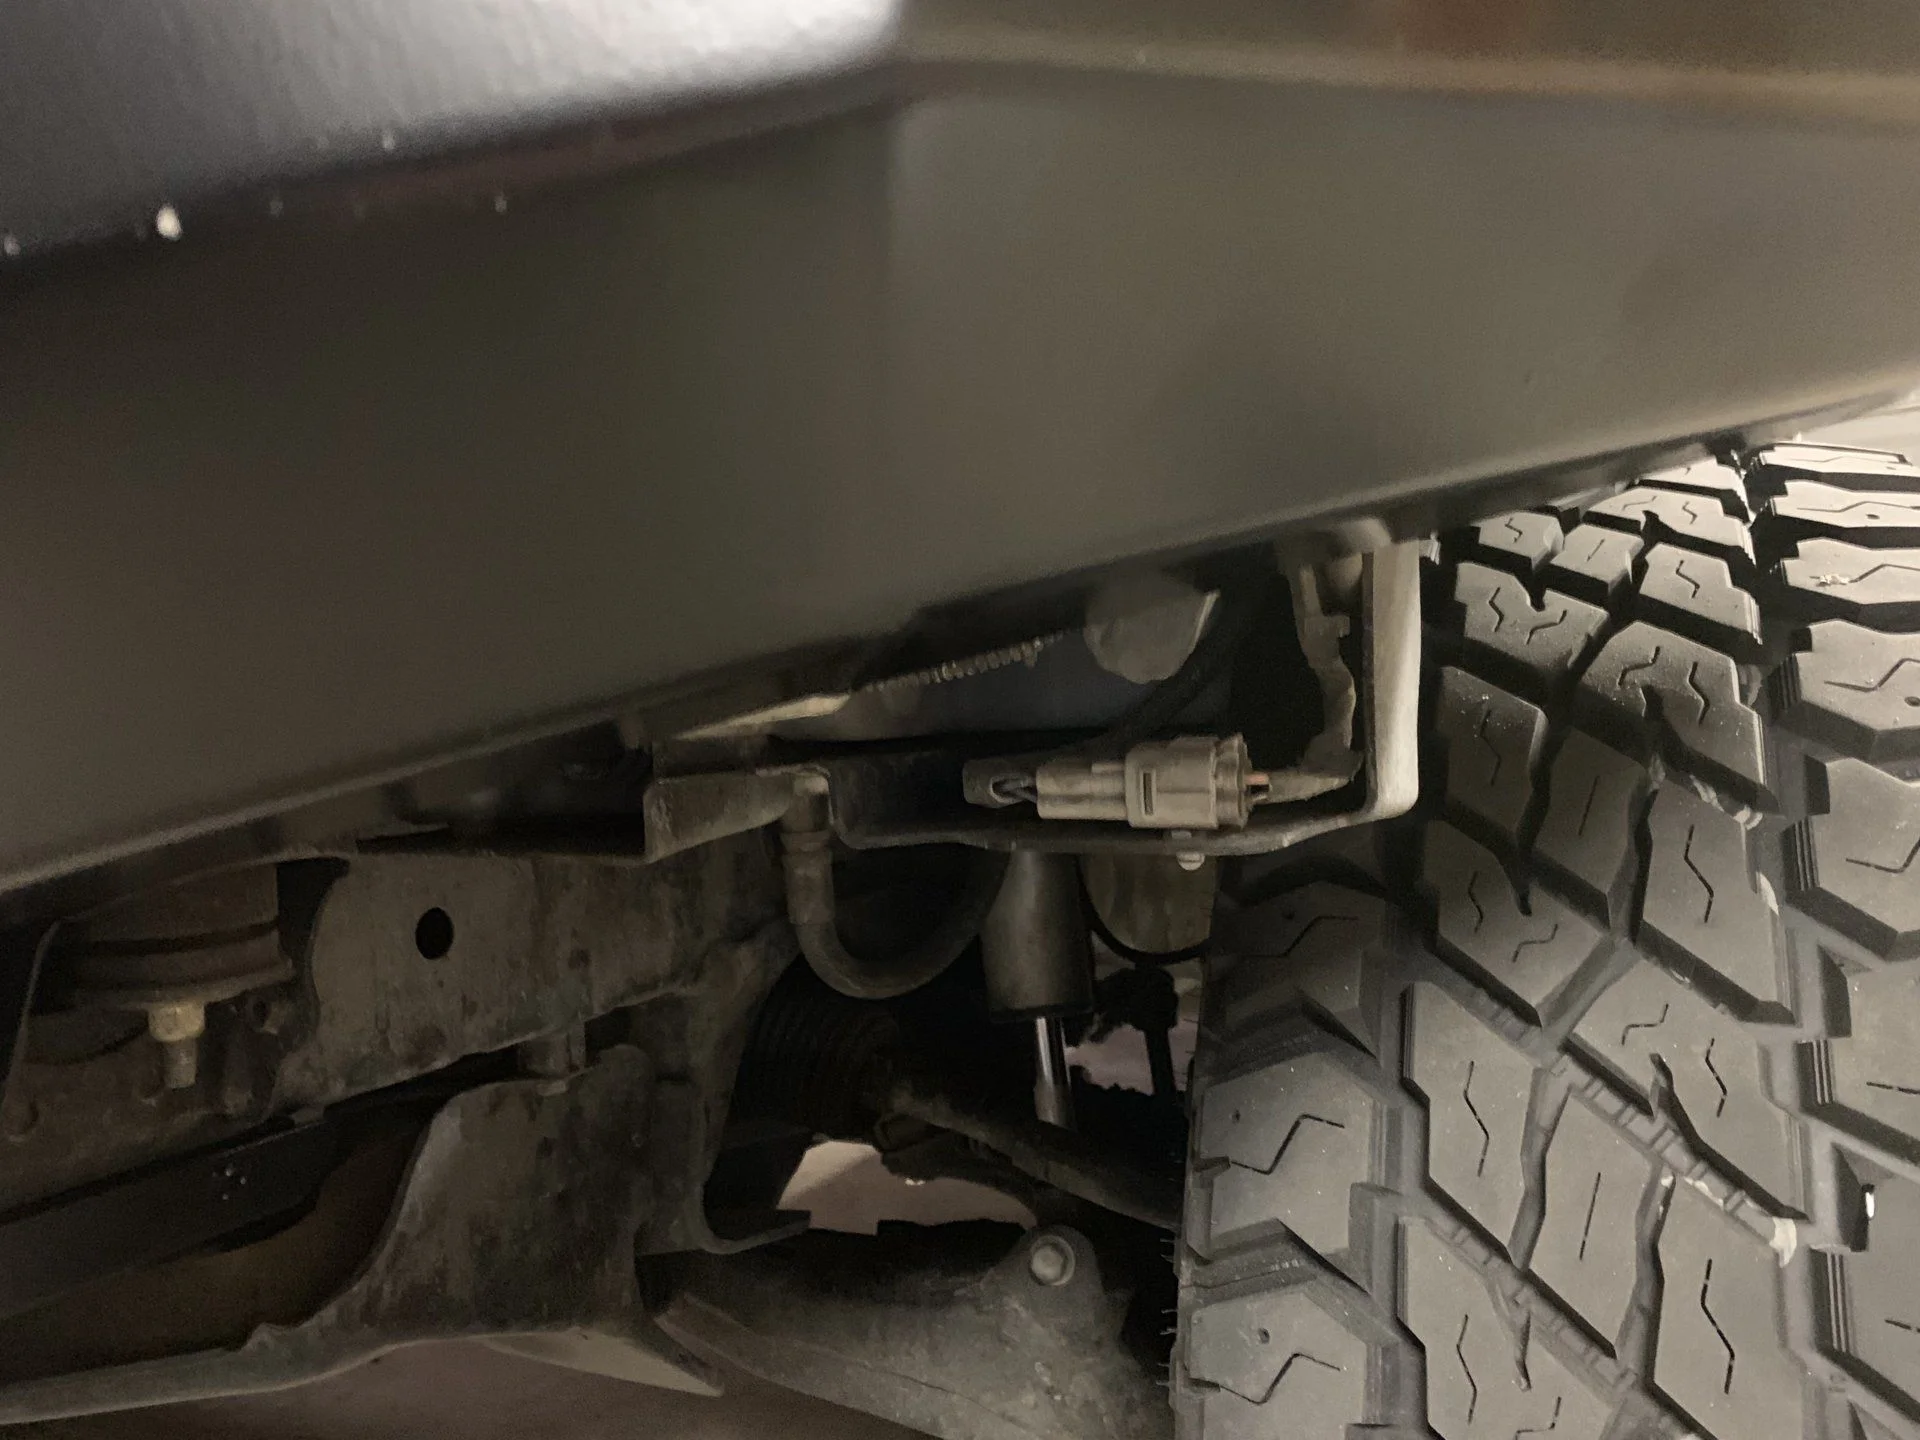
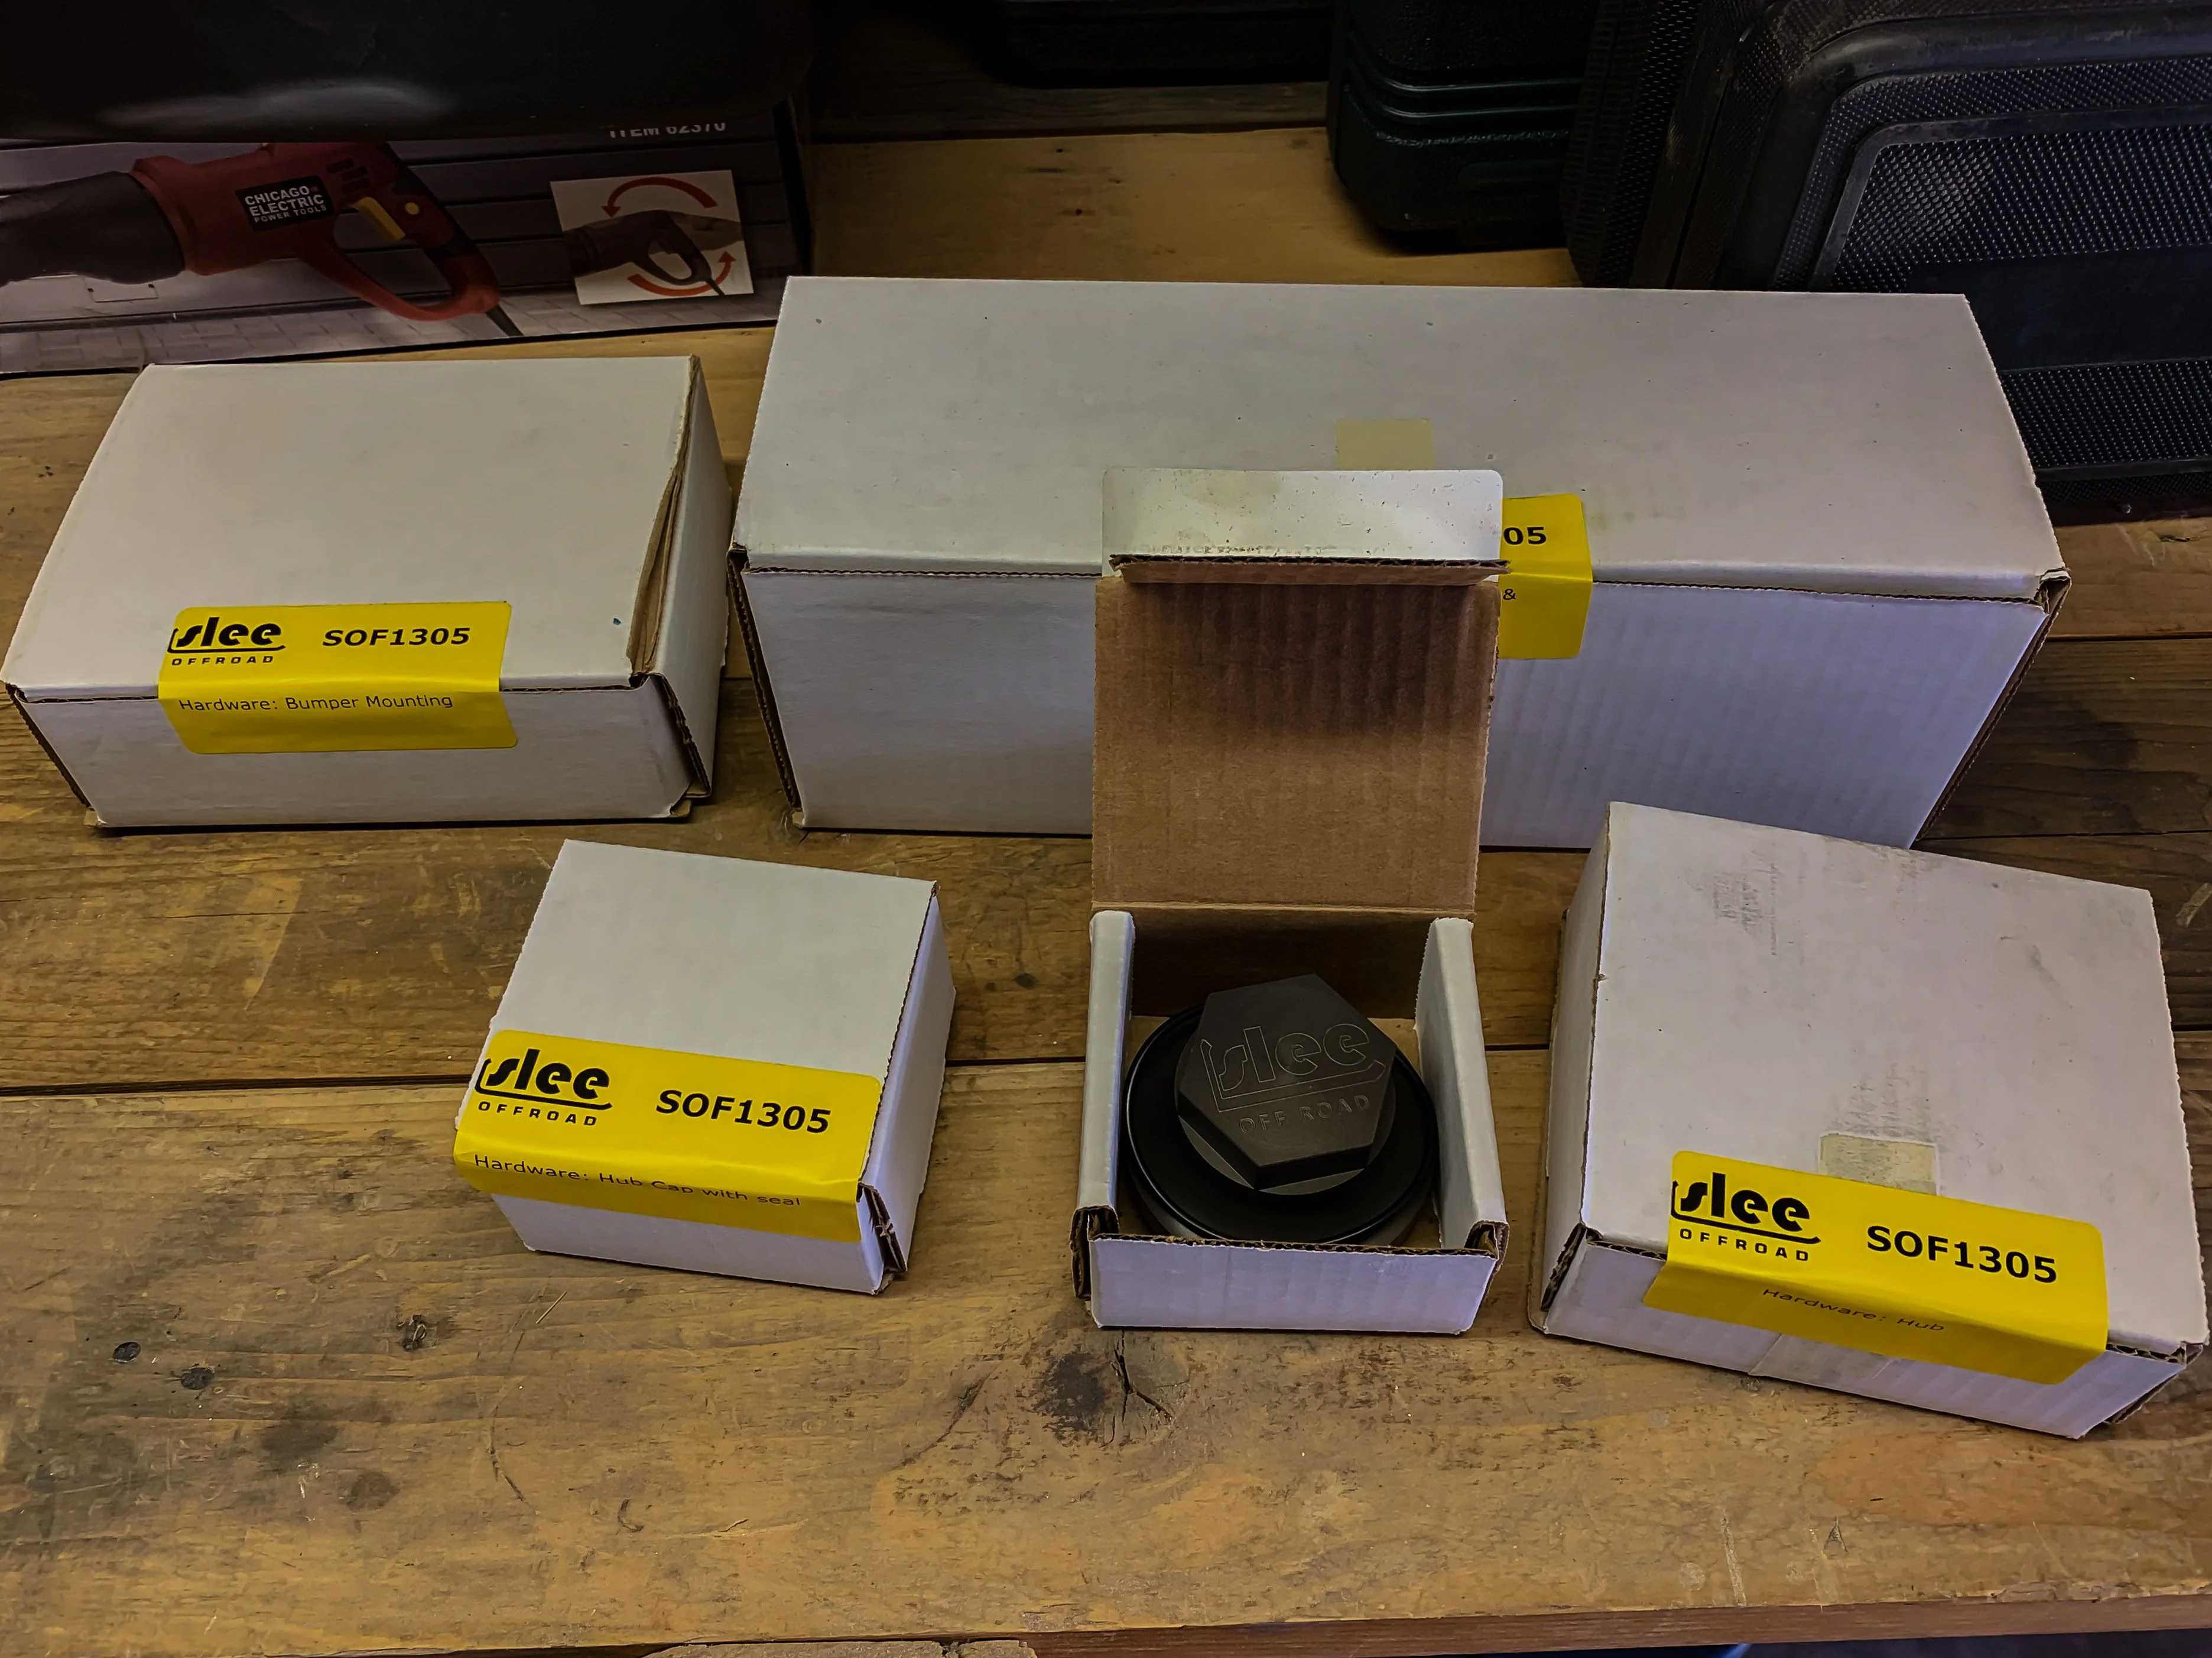
While the vehicle was in the shop I use for repairs/modifications, they informed me the front wheel bearings were going out. One was toast but the other wasn't as bad. I decided to just get them swapped out with new ones to be safe. That unexpected, expensive repair will probably push my gear and locker install back a few weeks. I also had them install my Slee steel braided brake lines while it was in there.

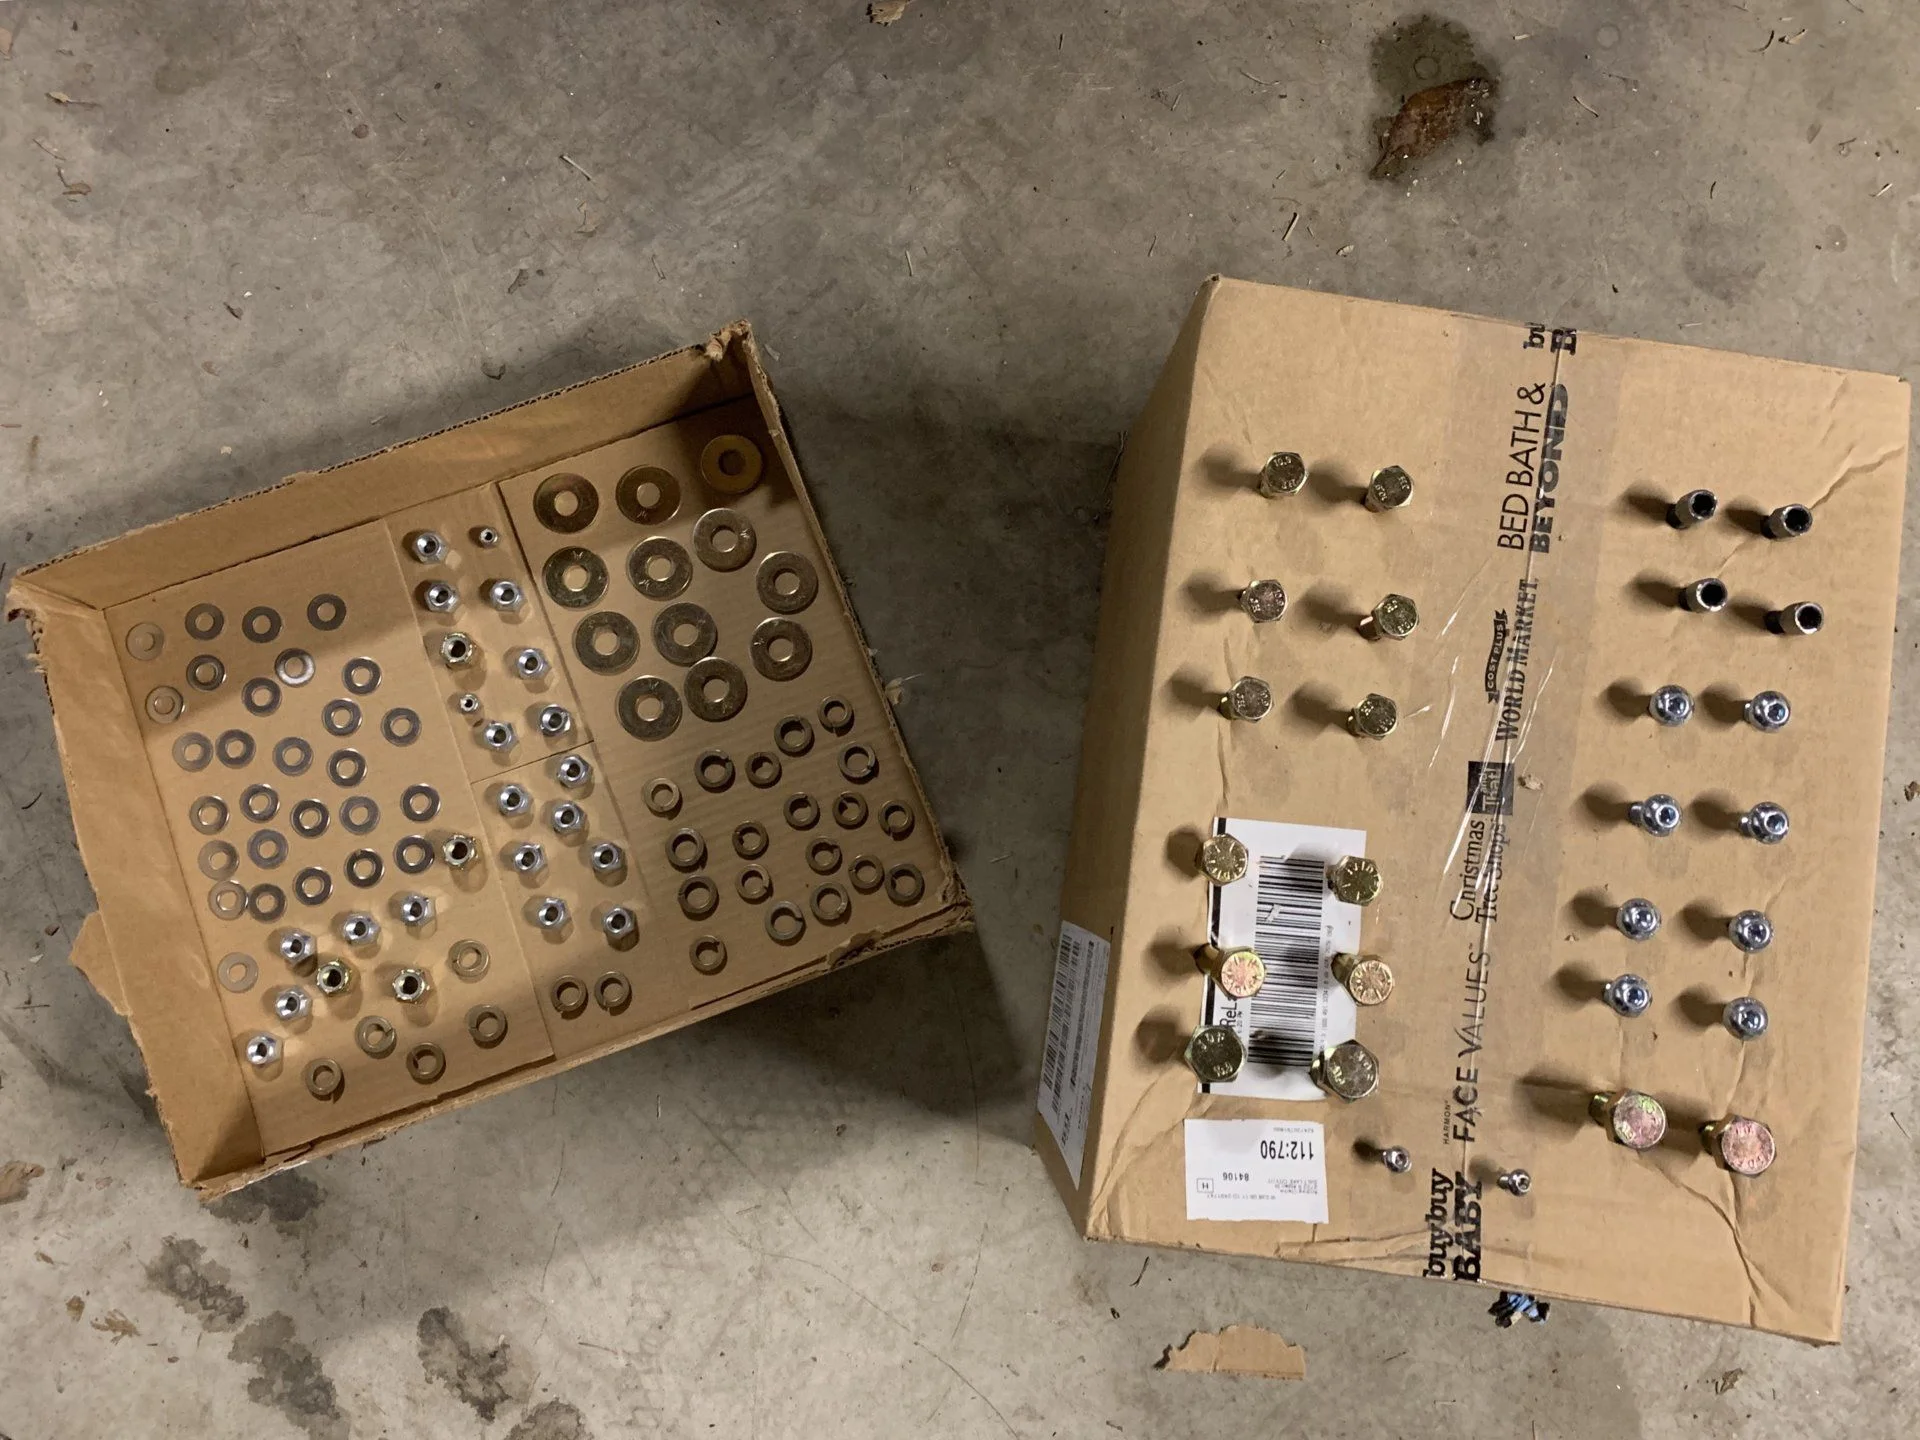
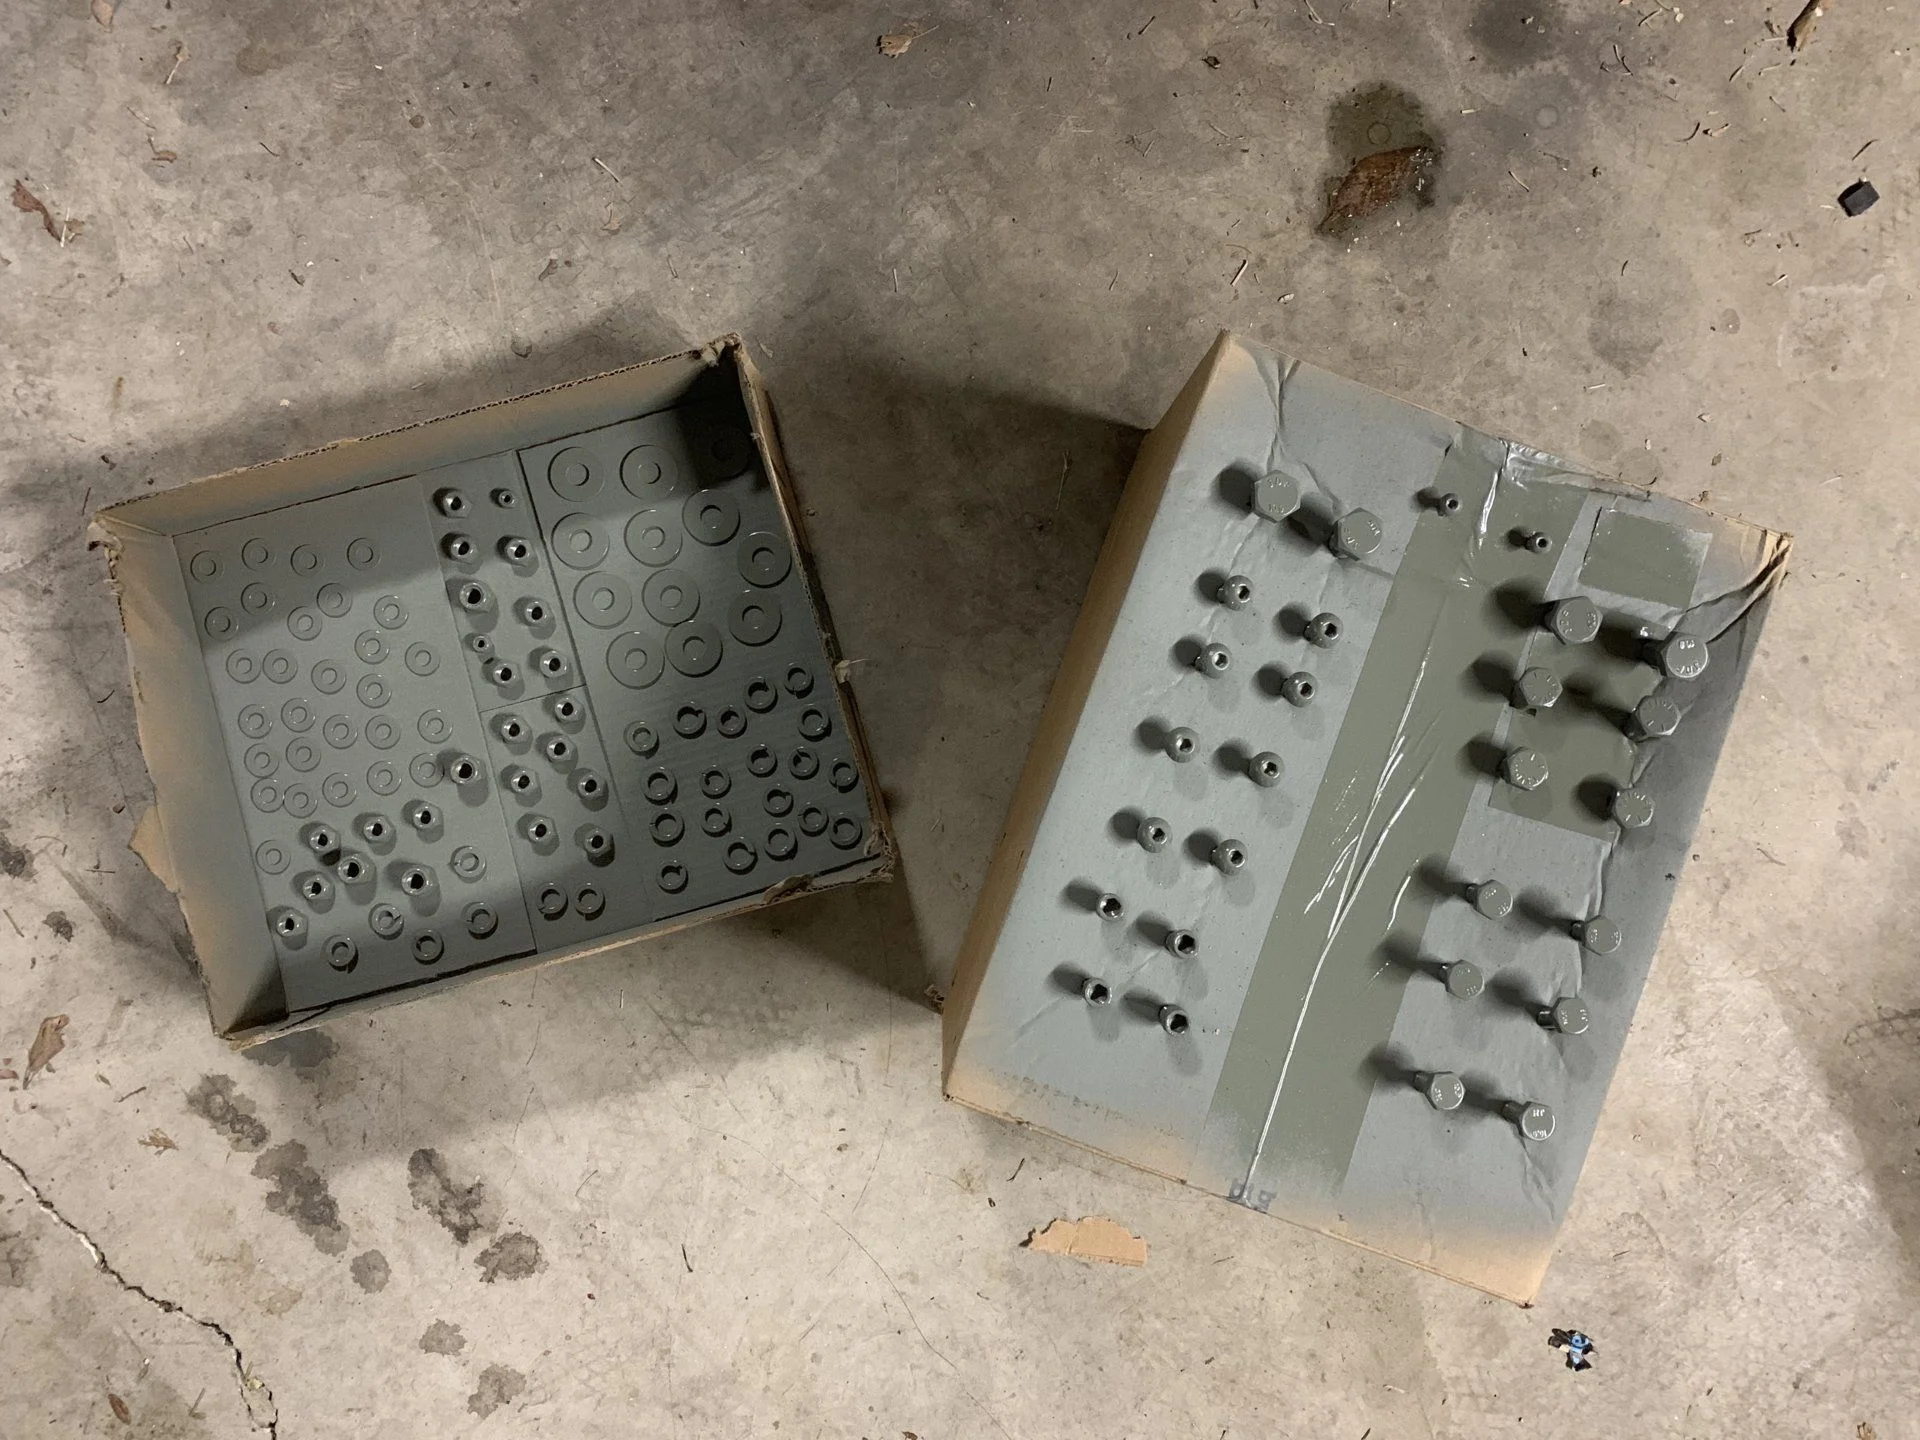
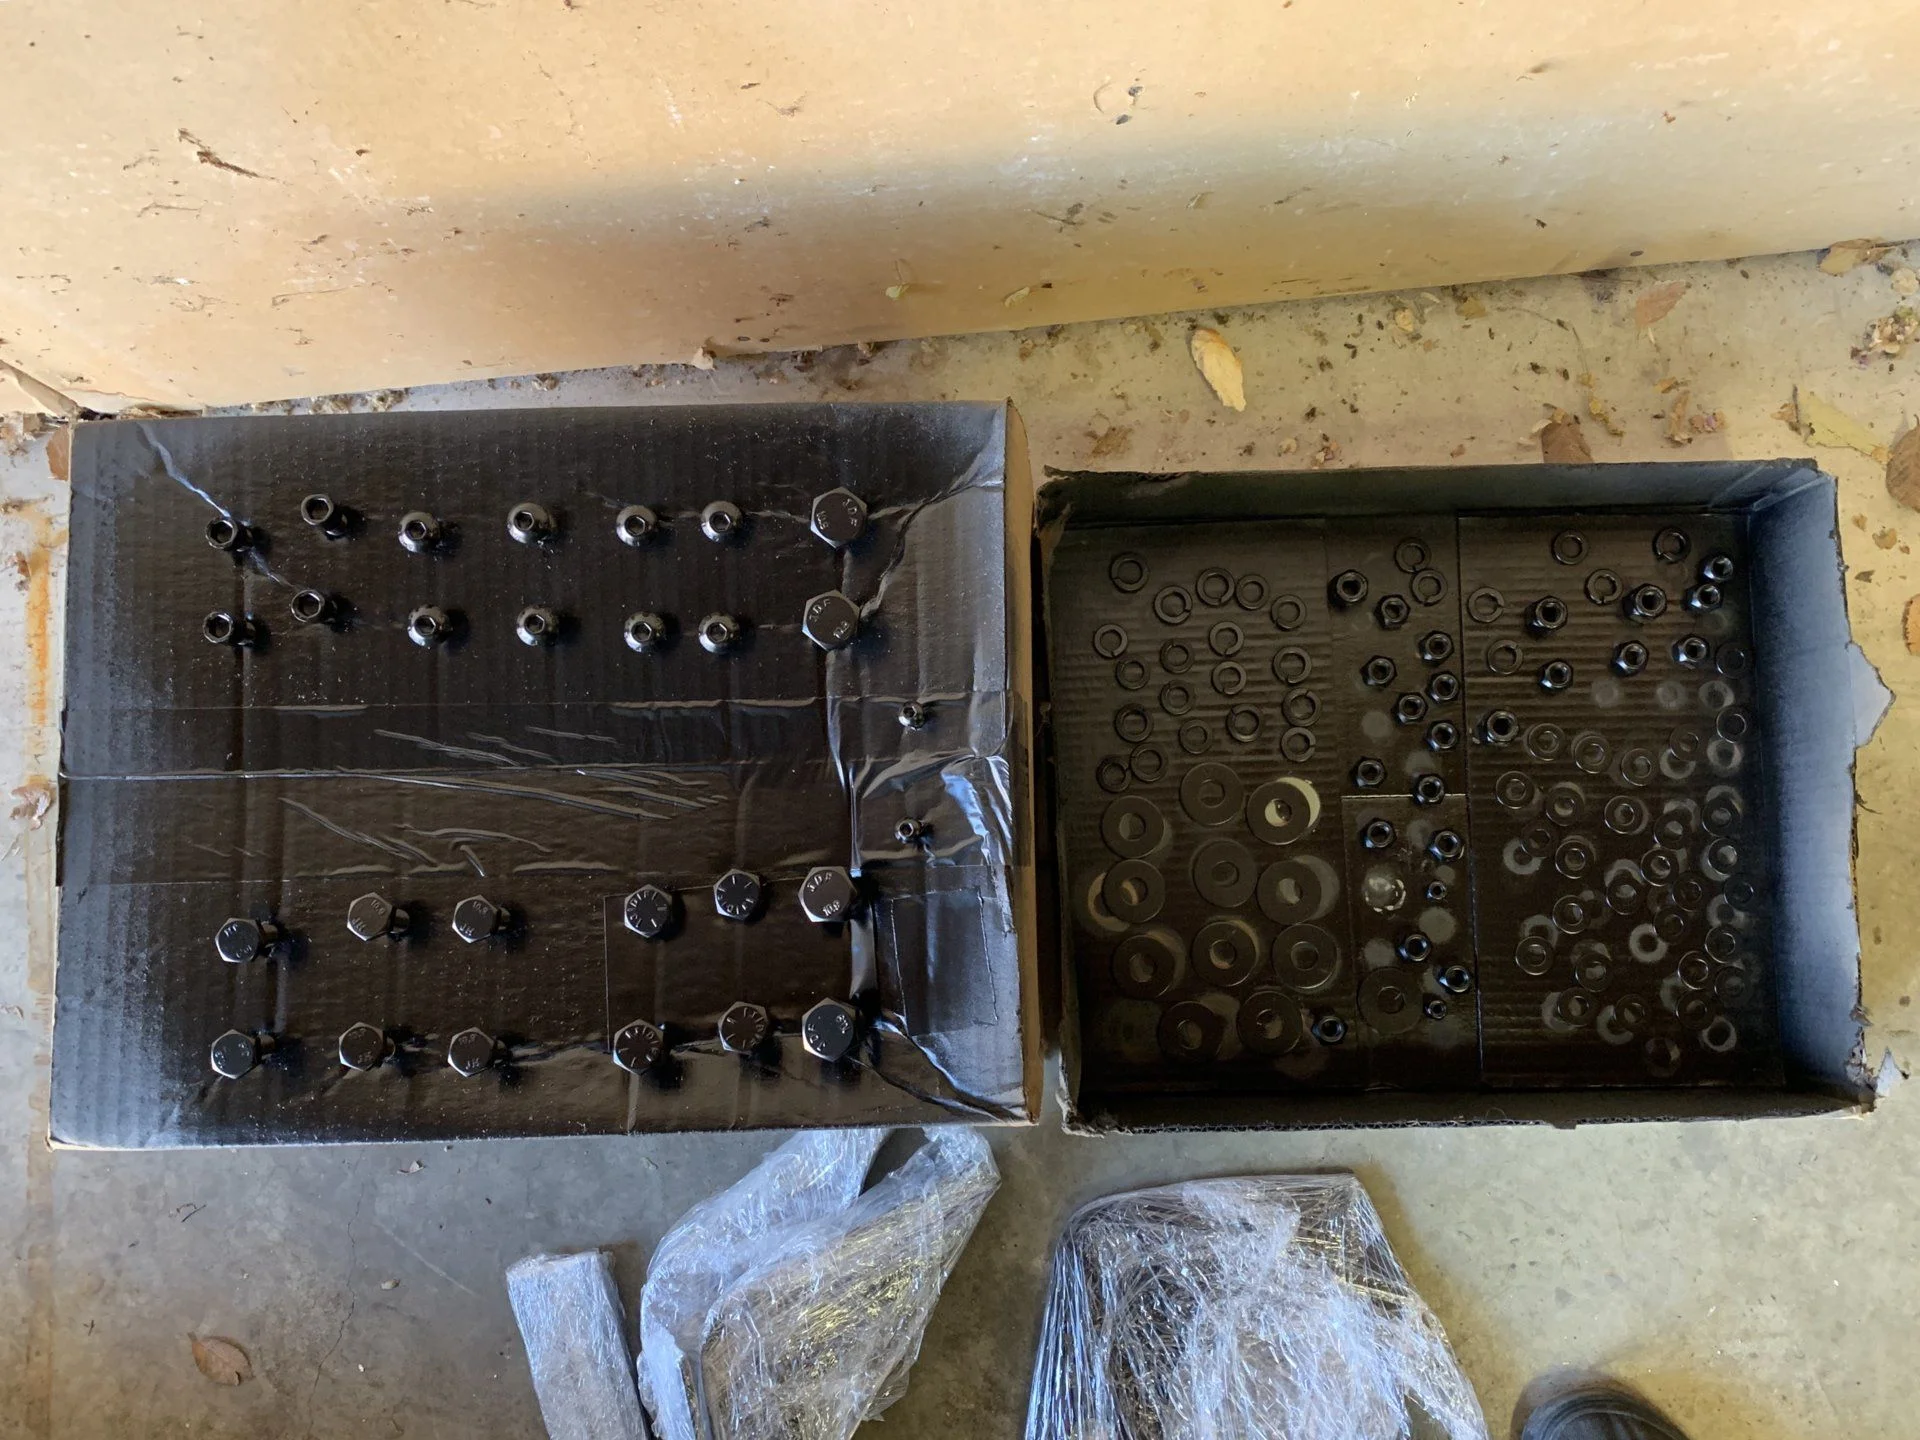
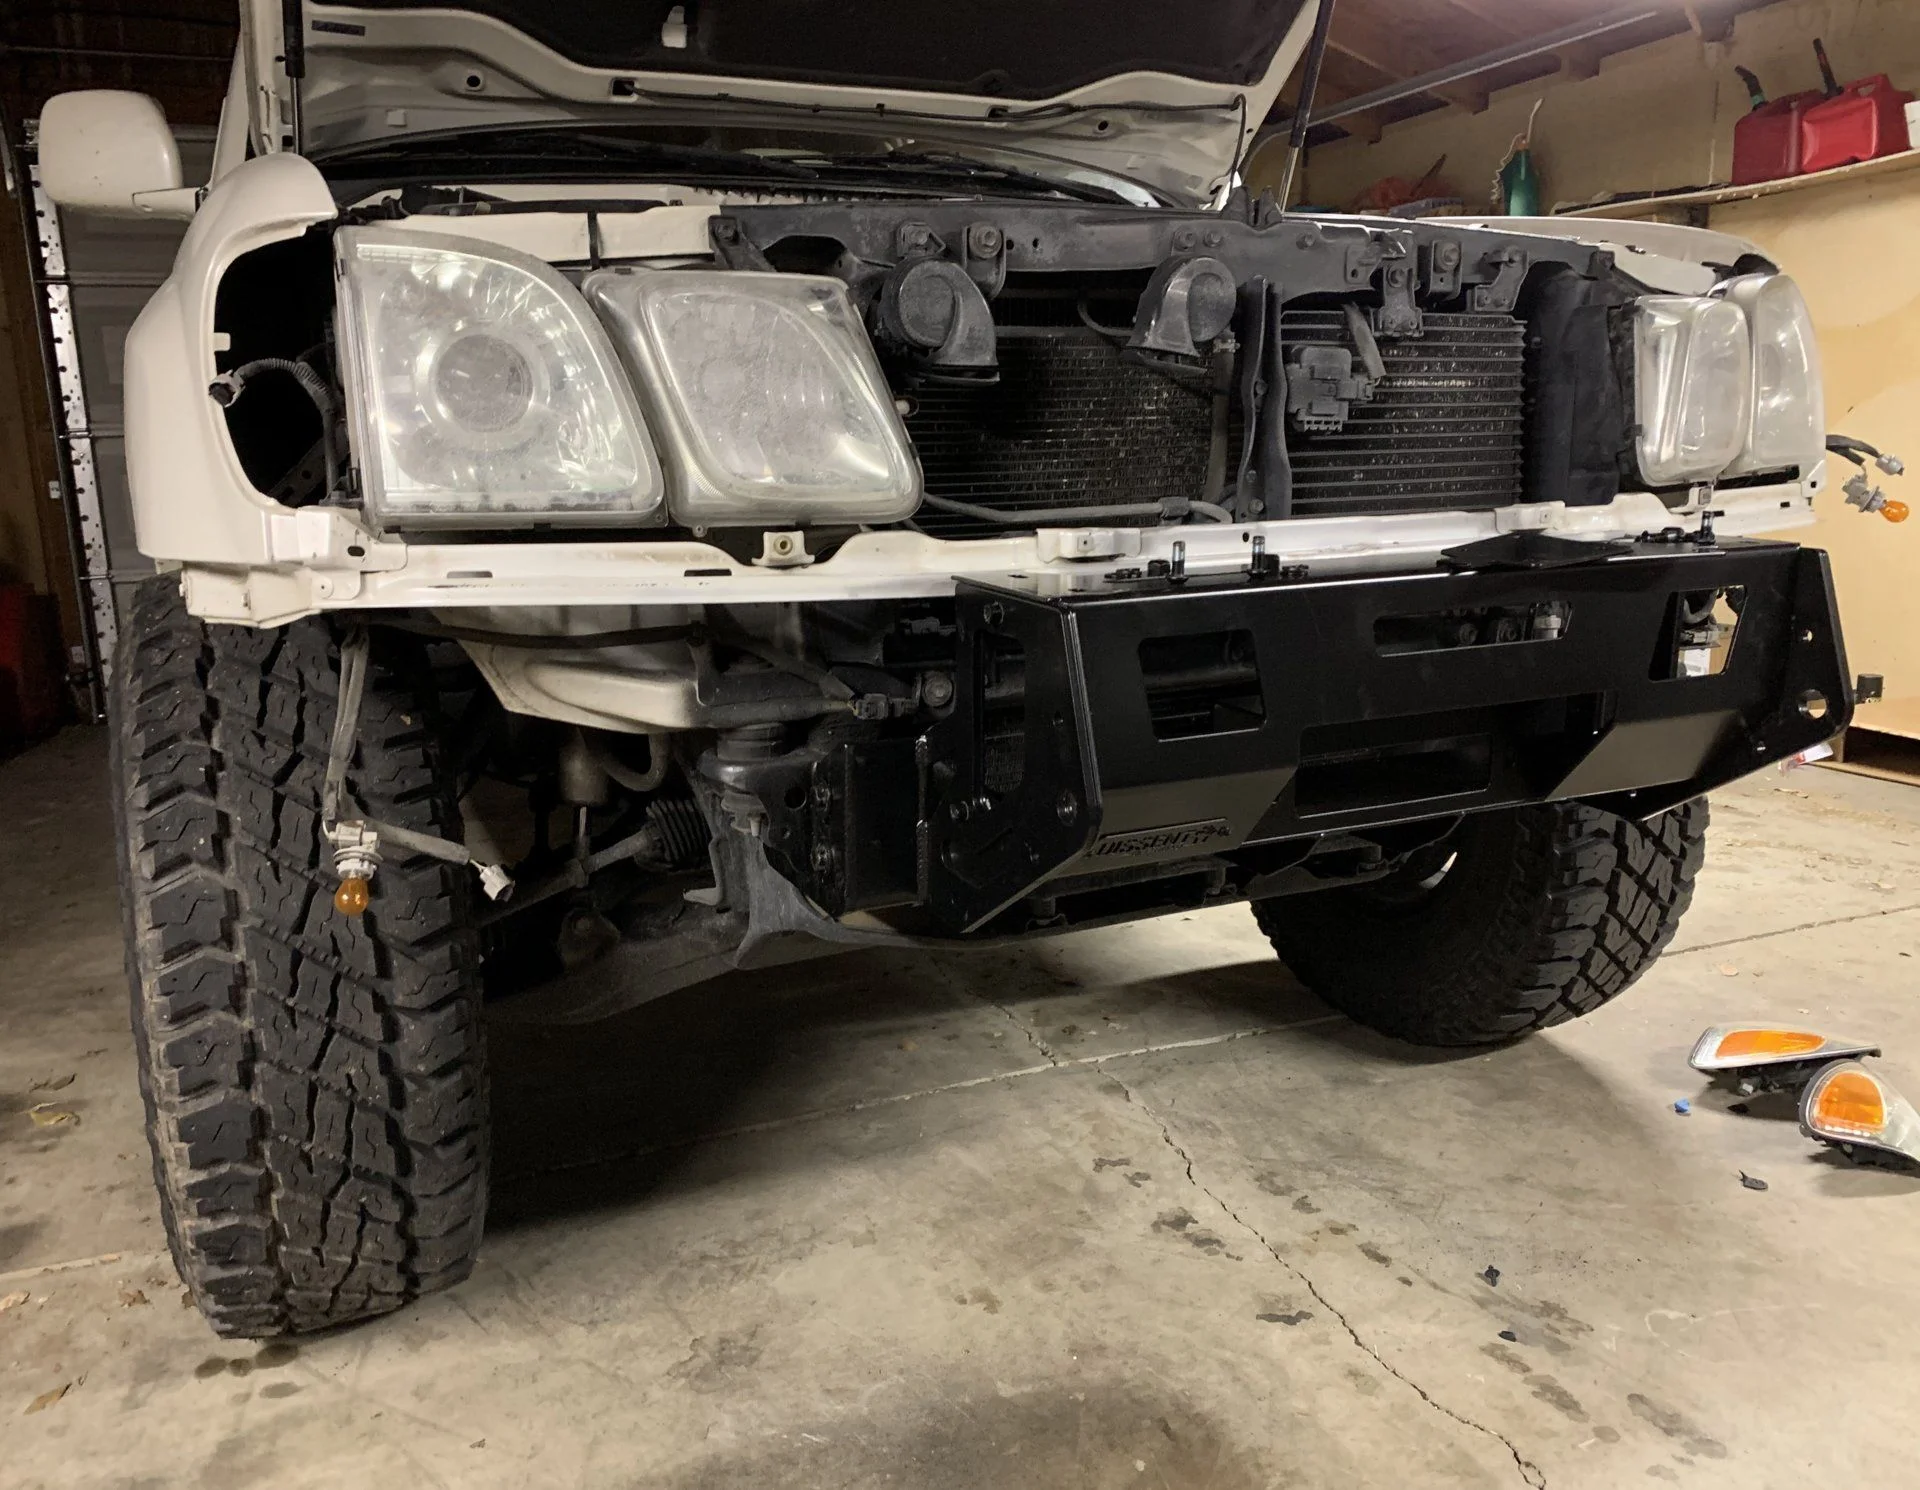
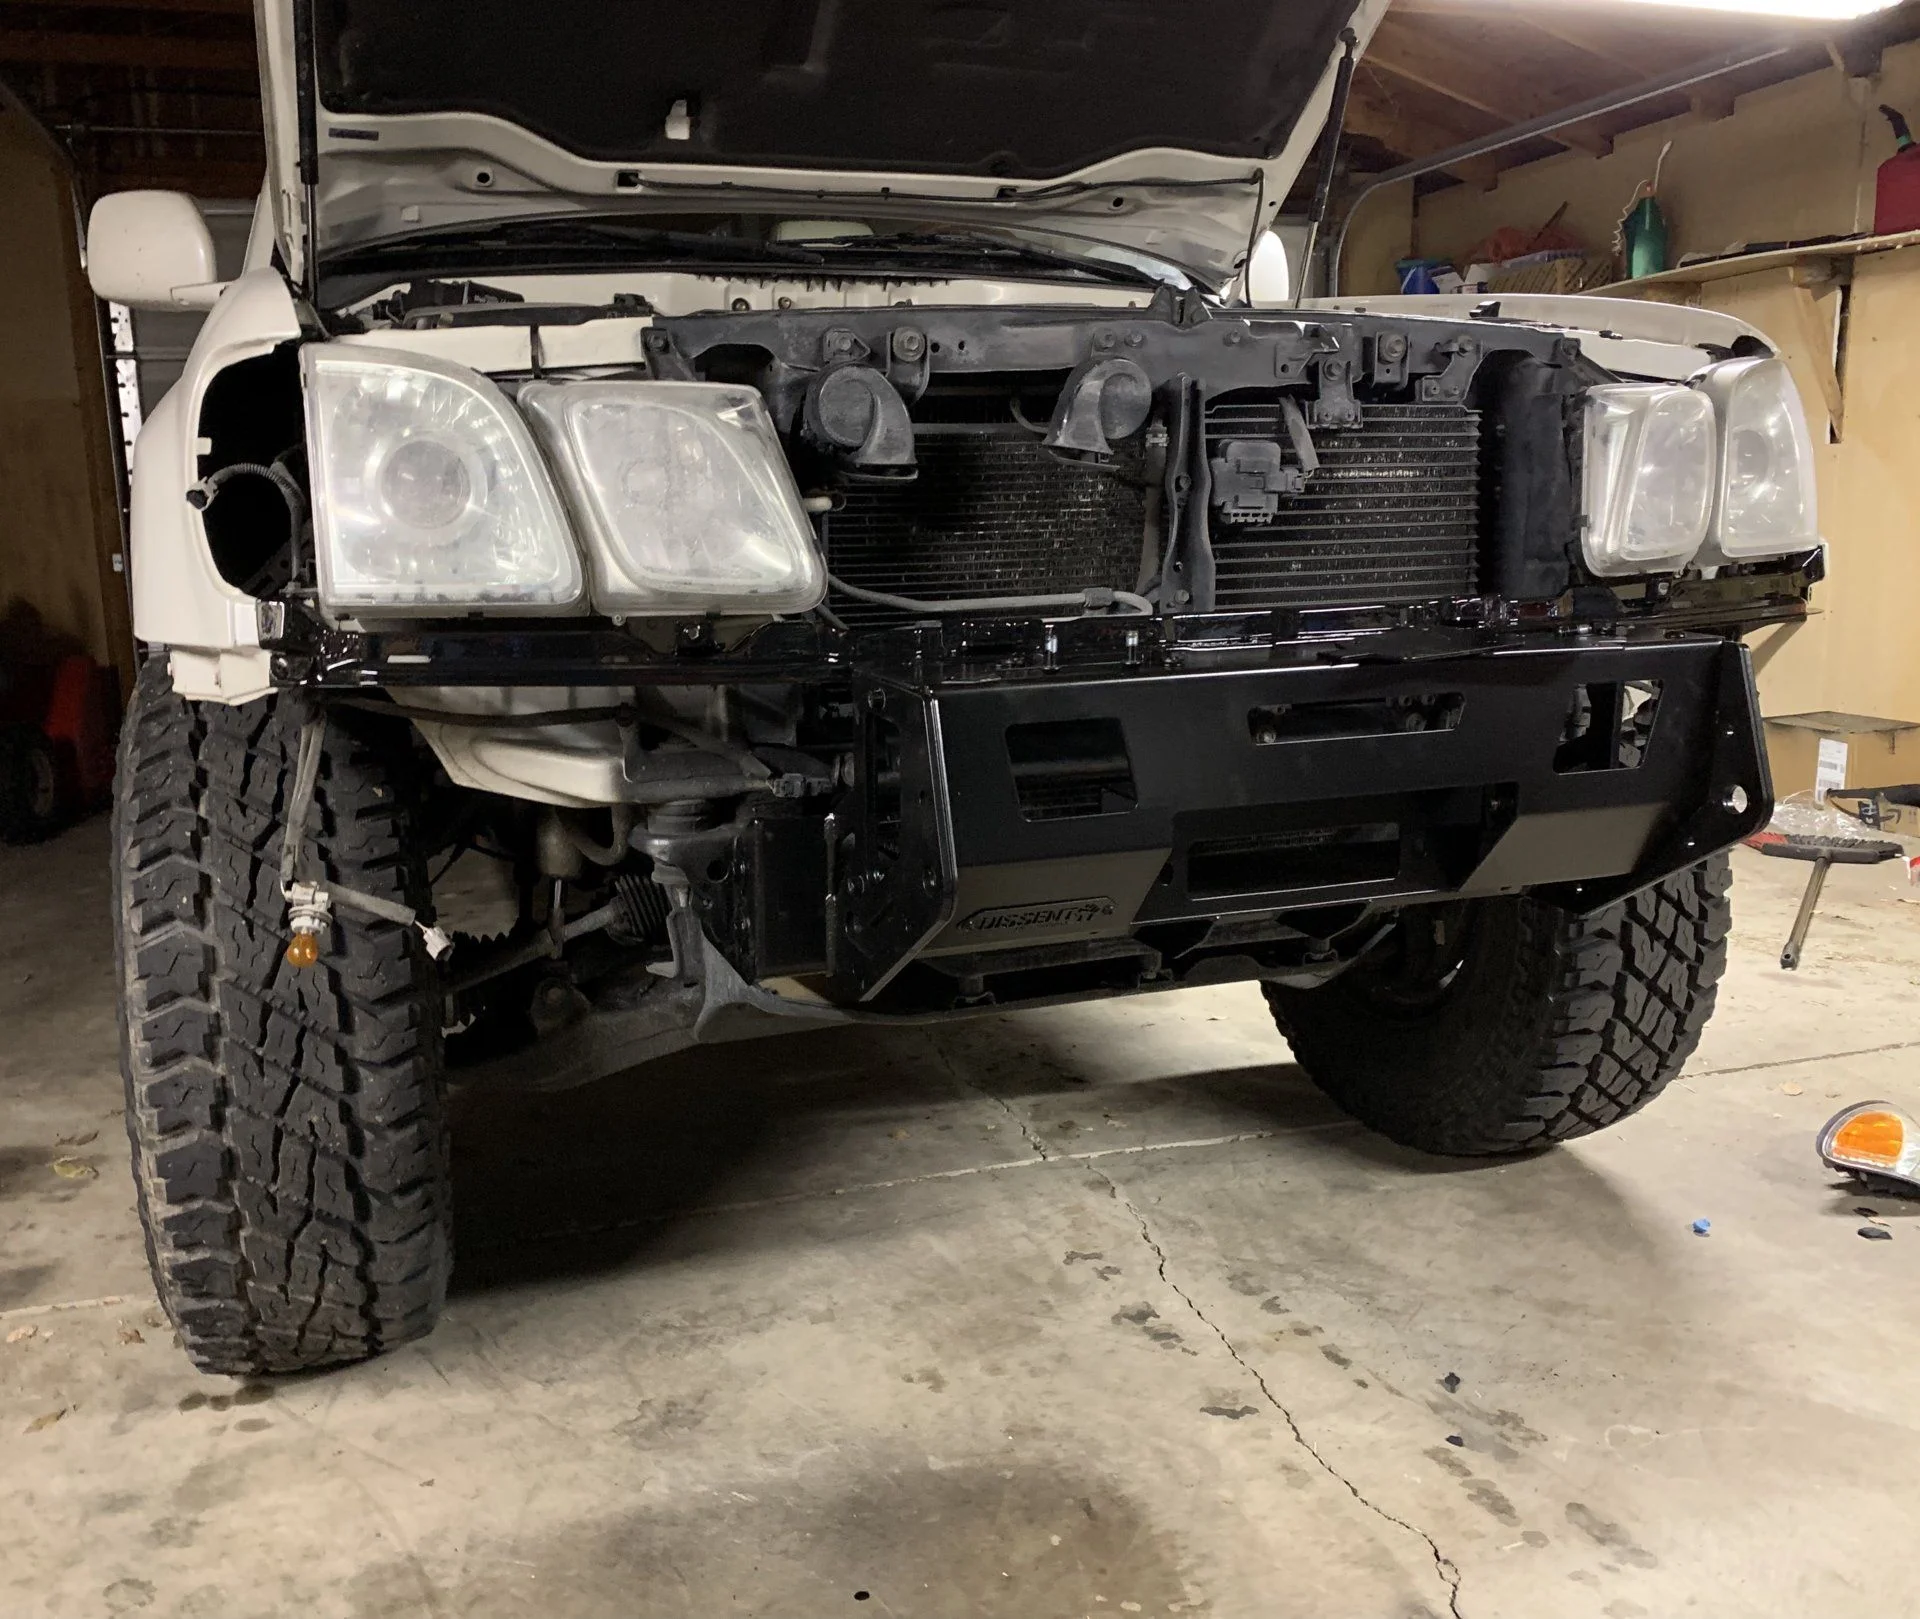
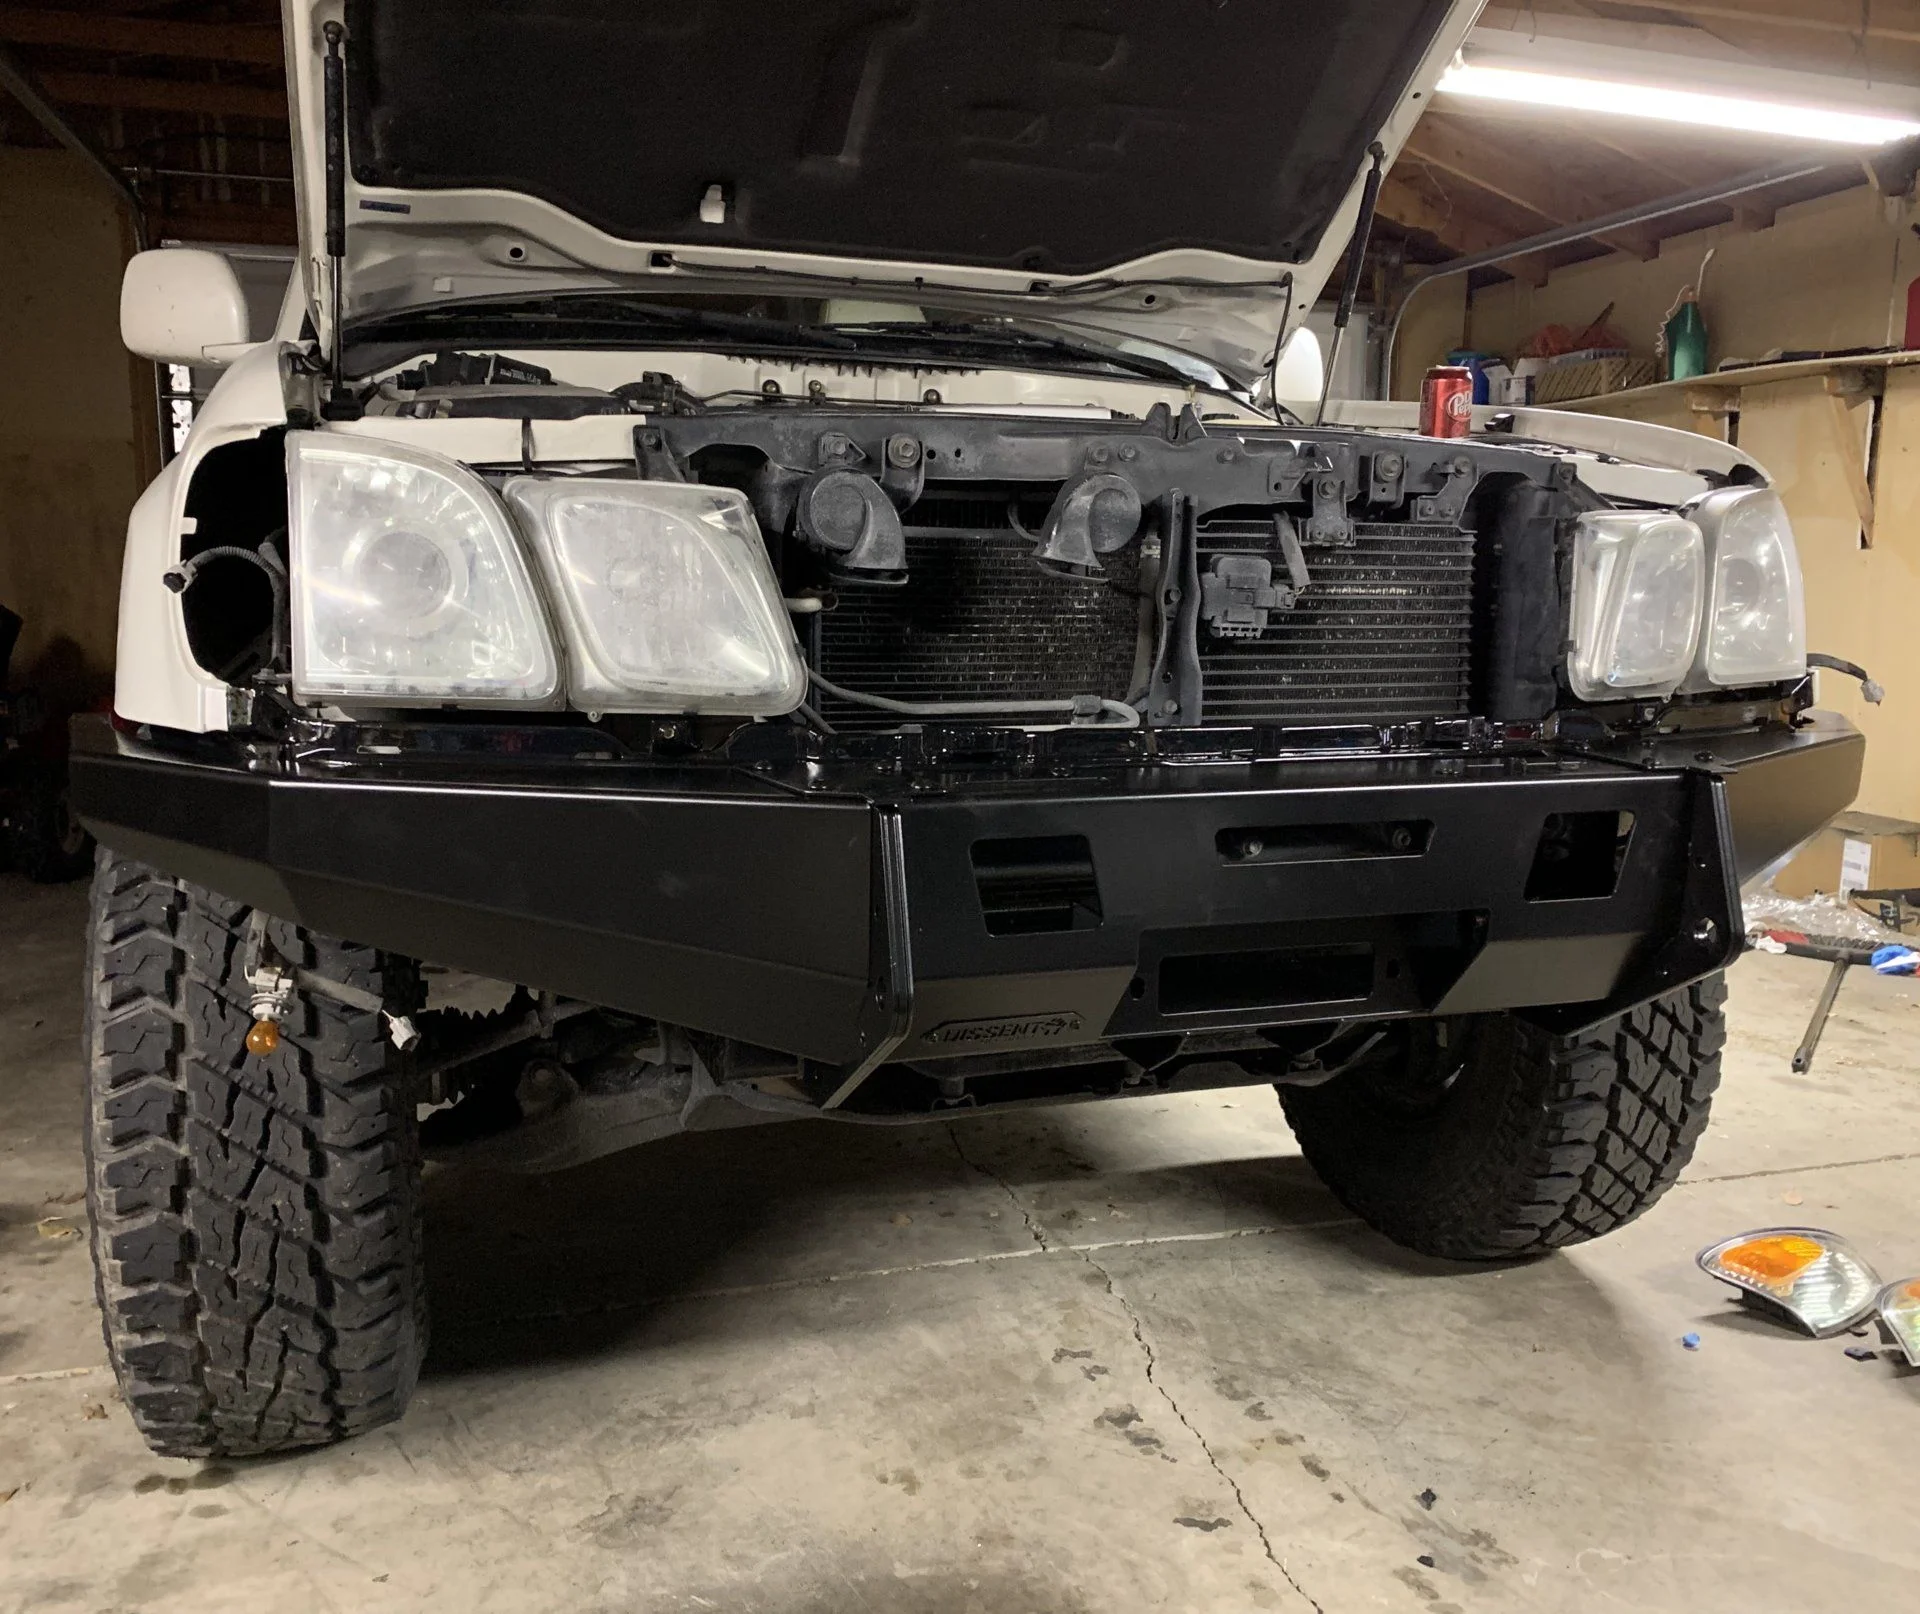
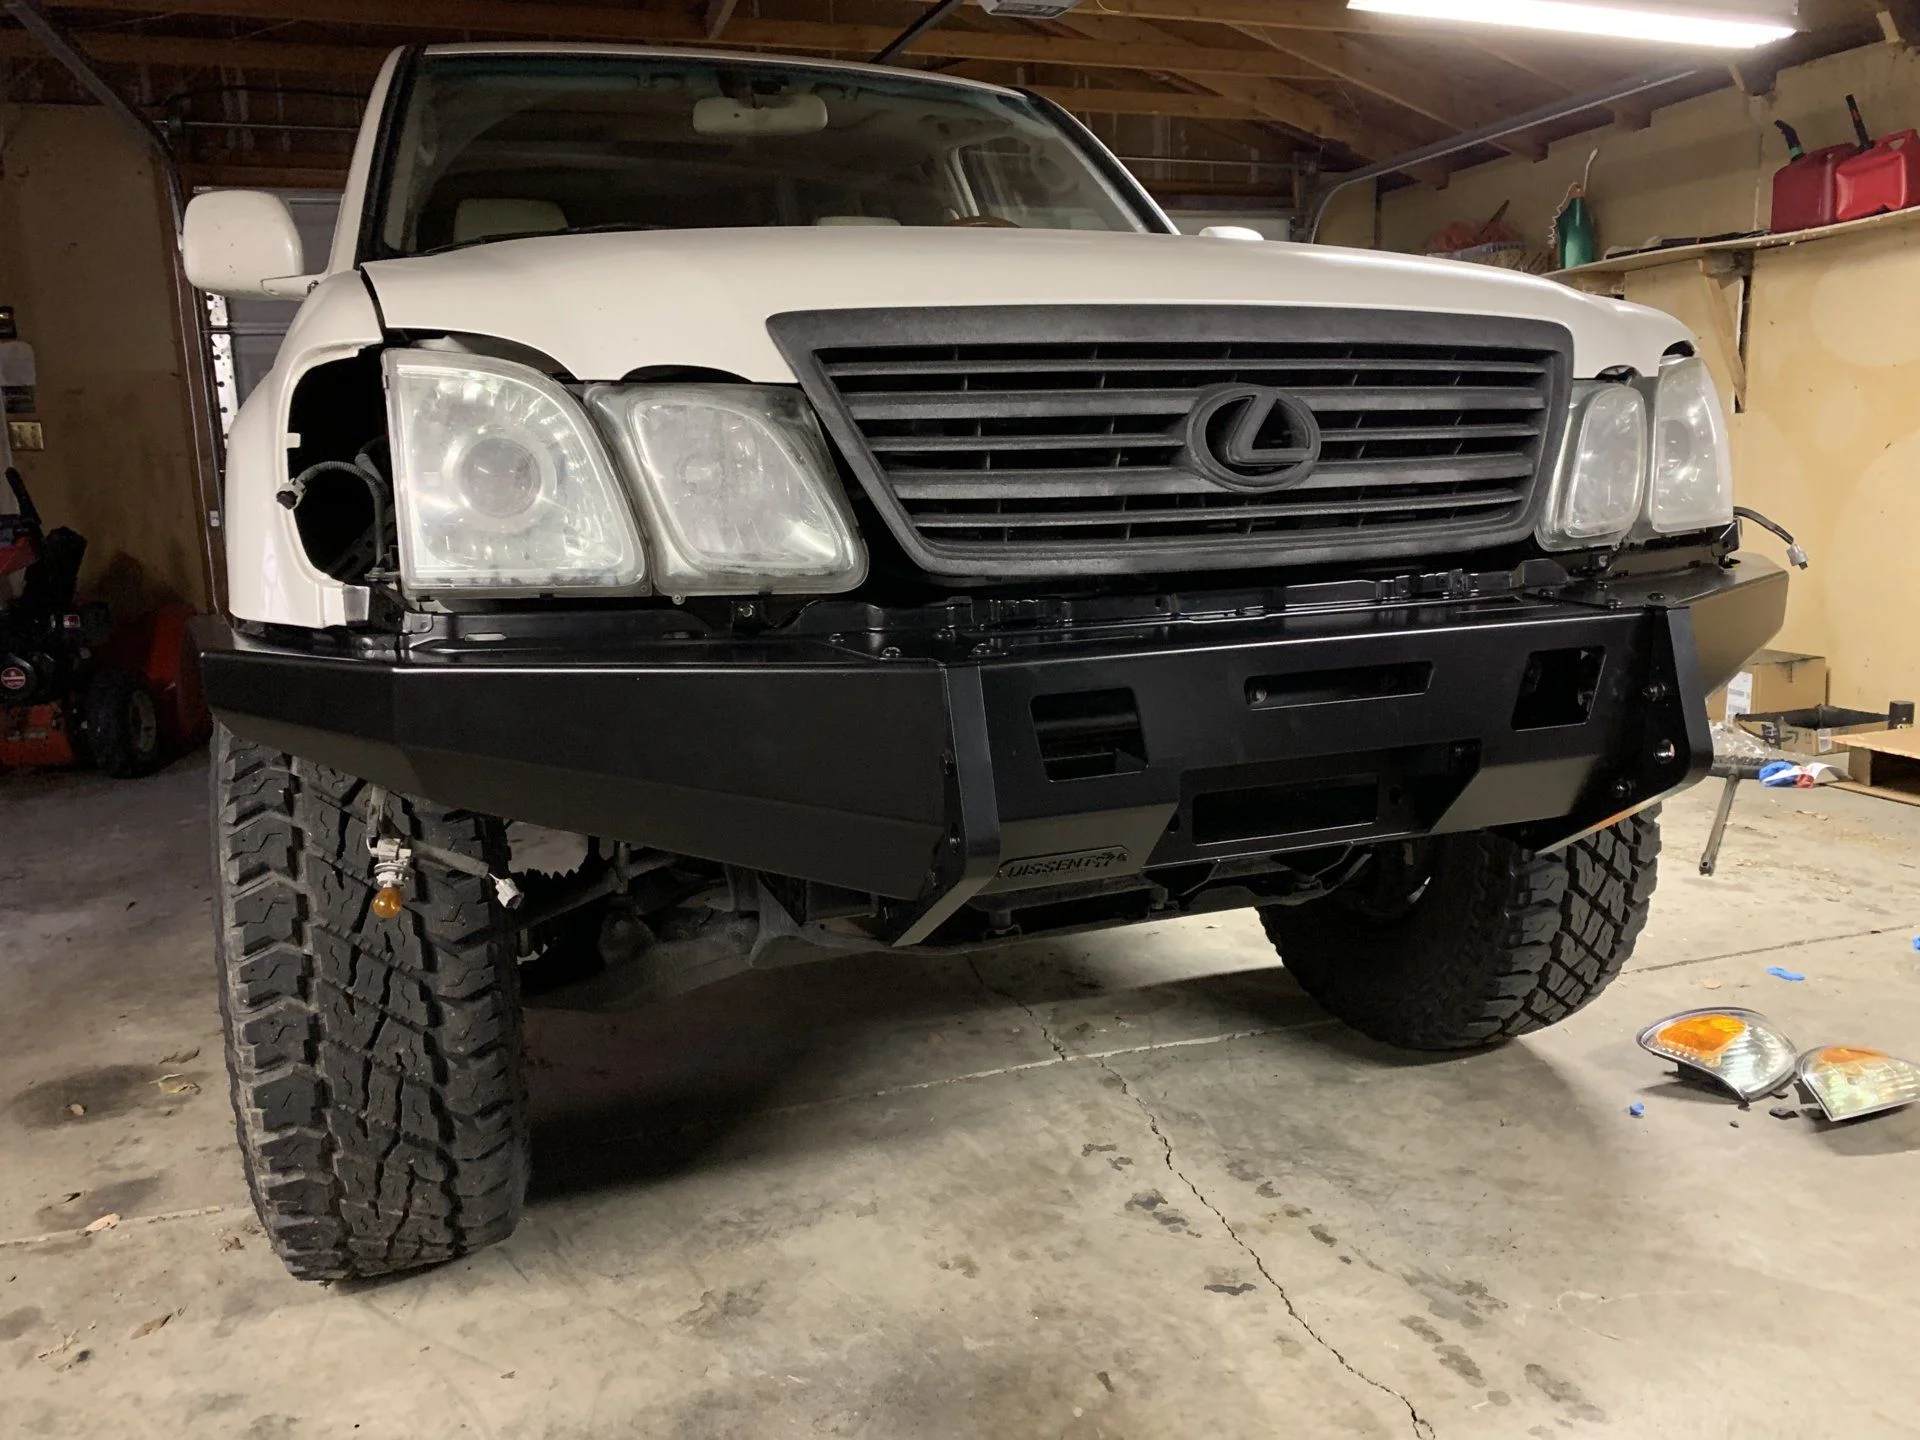
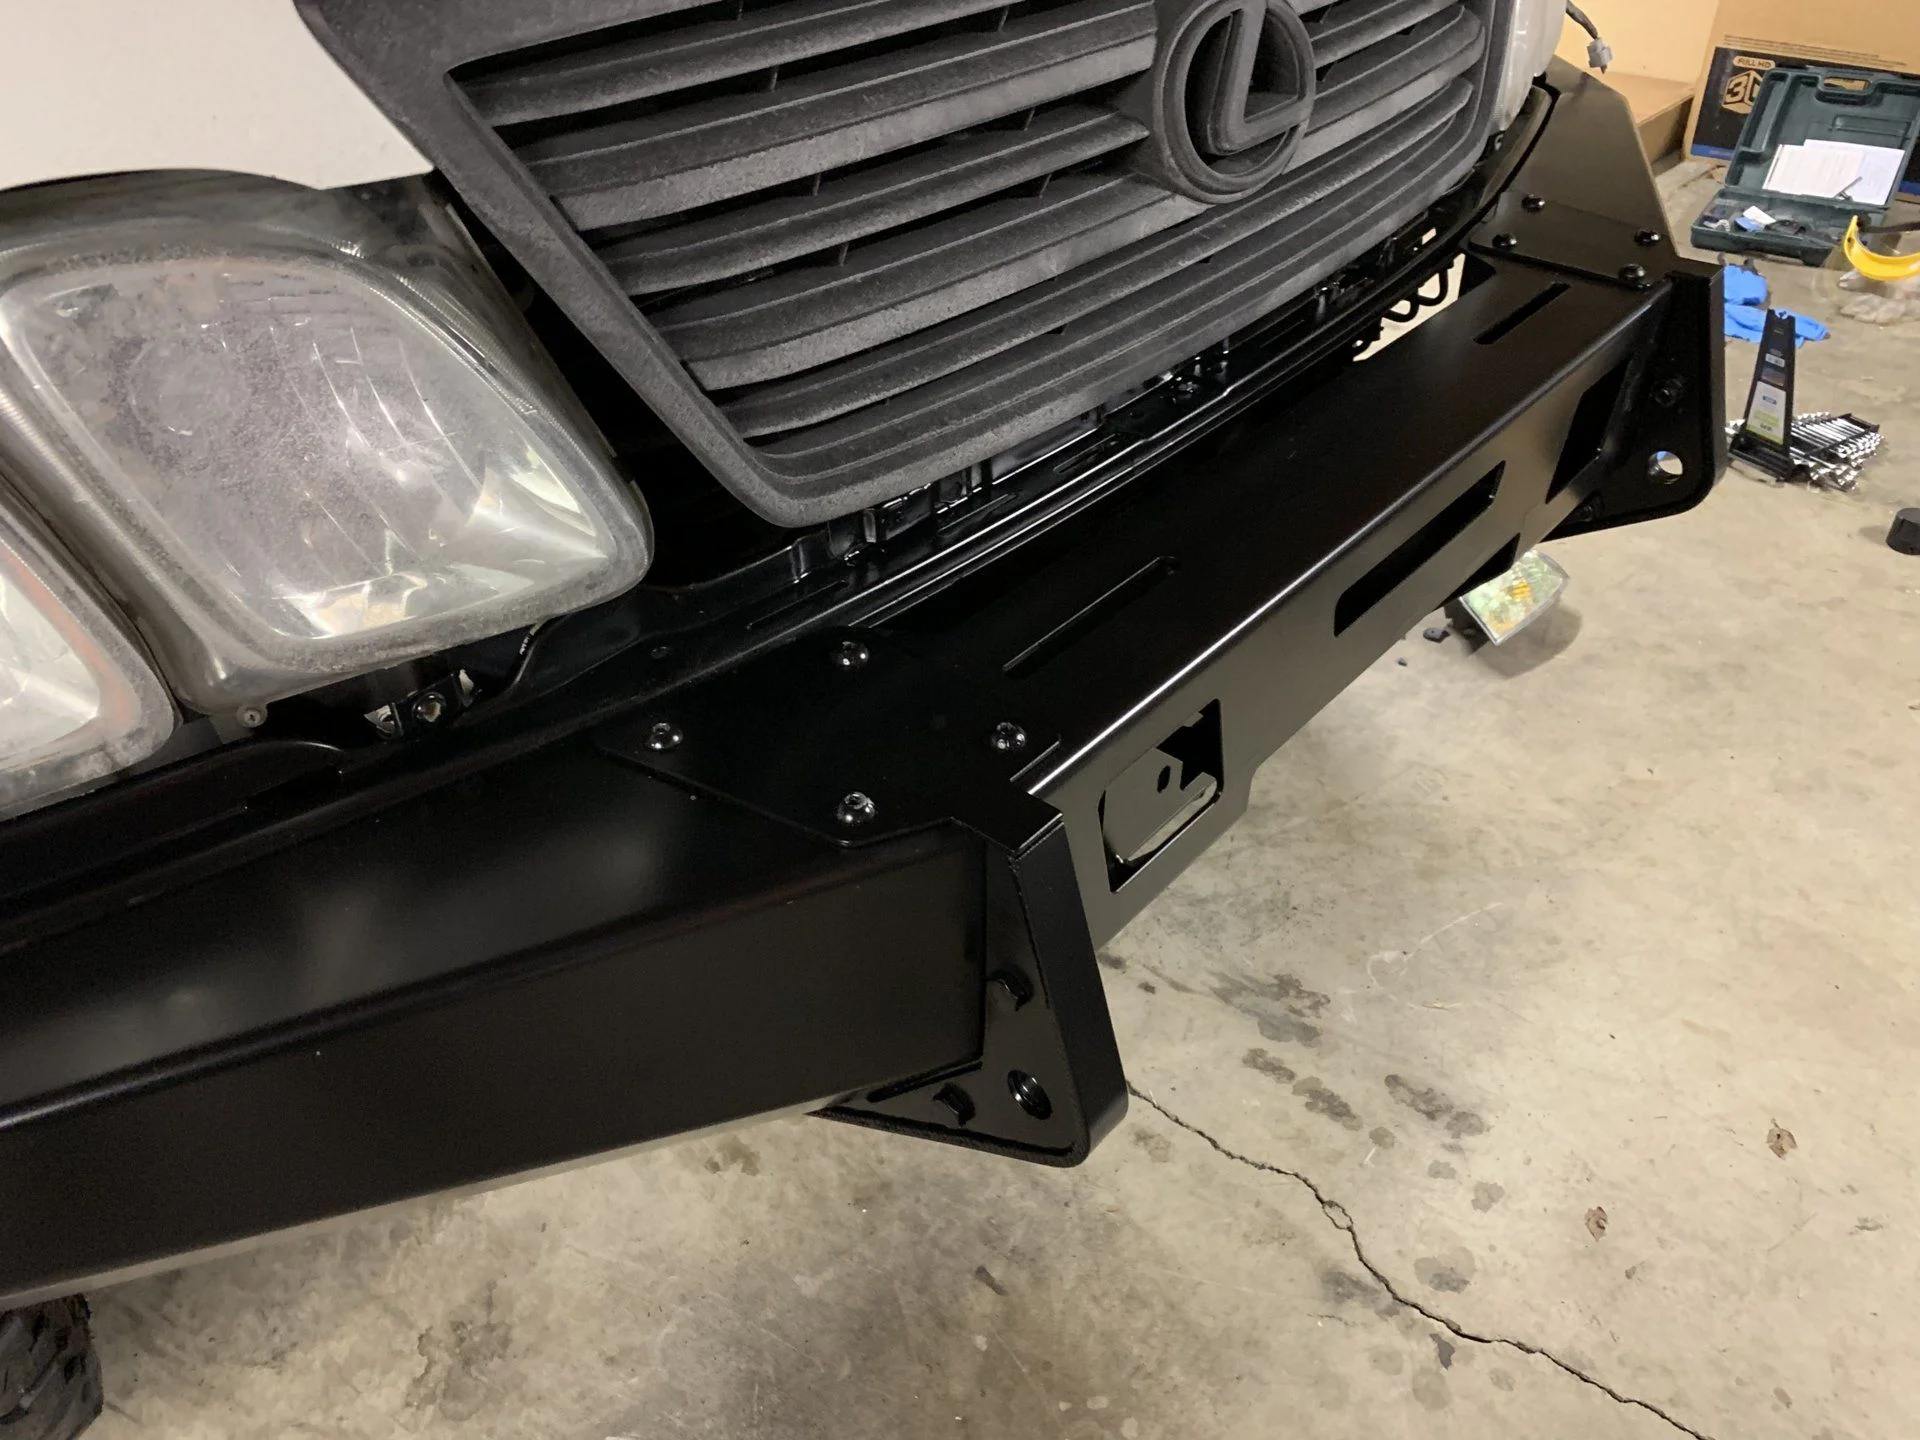
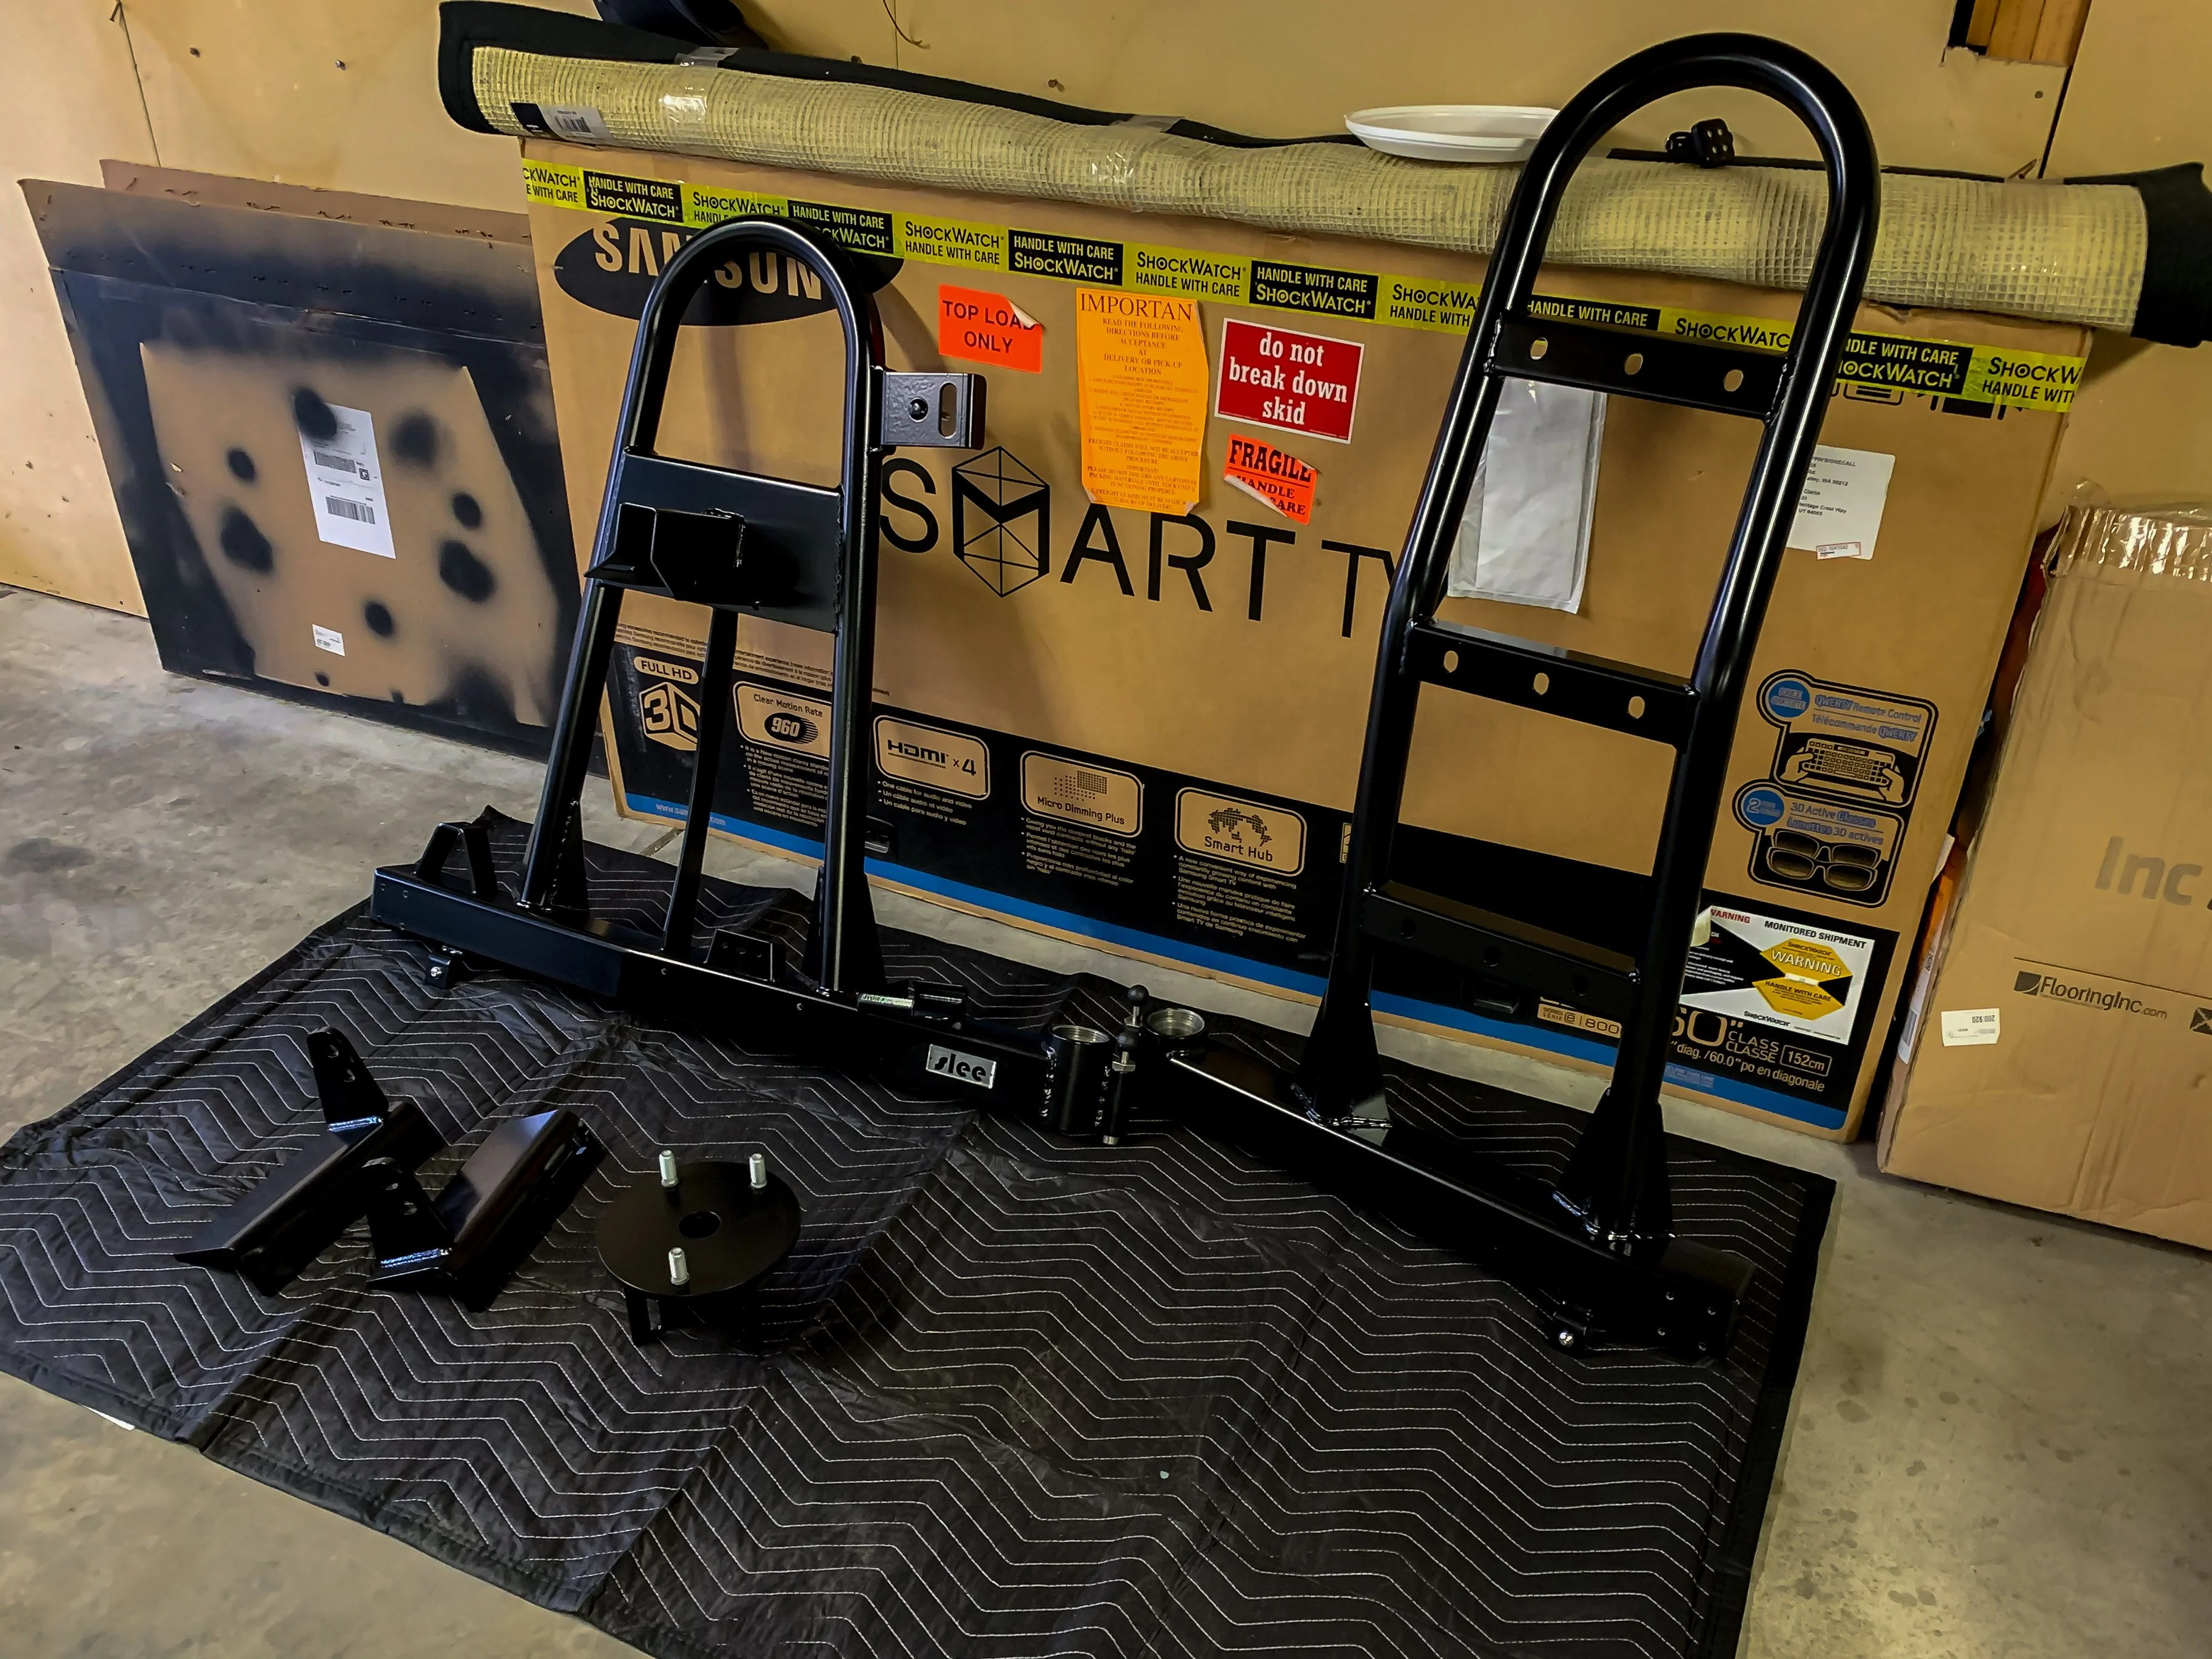
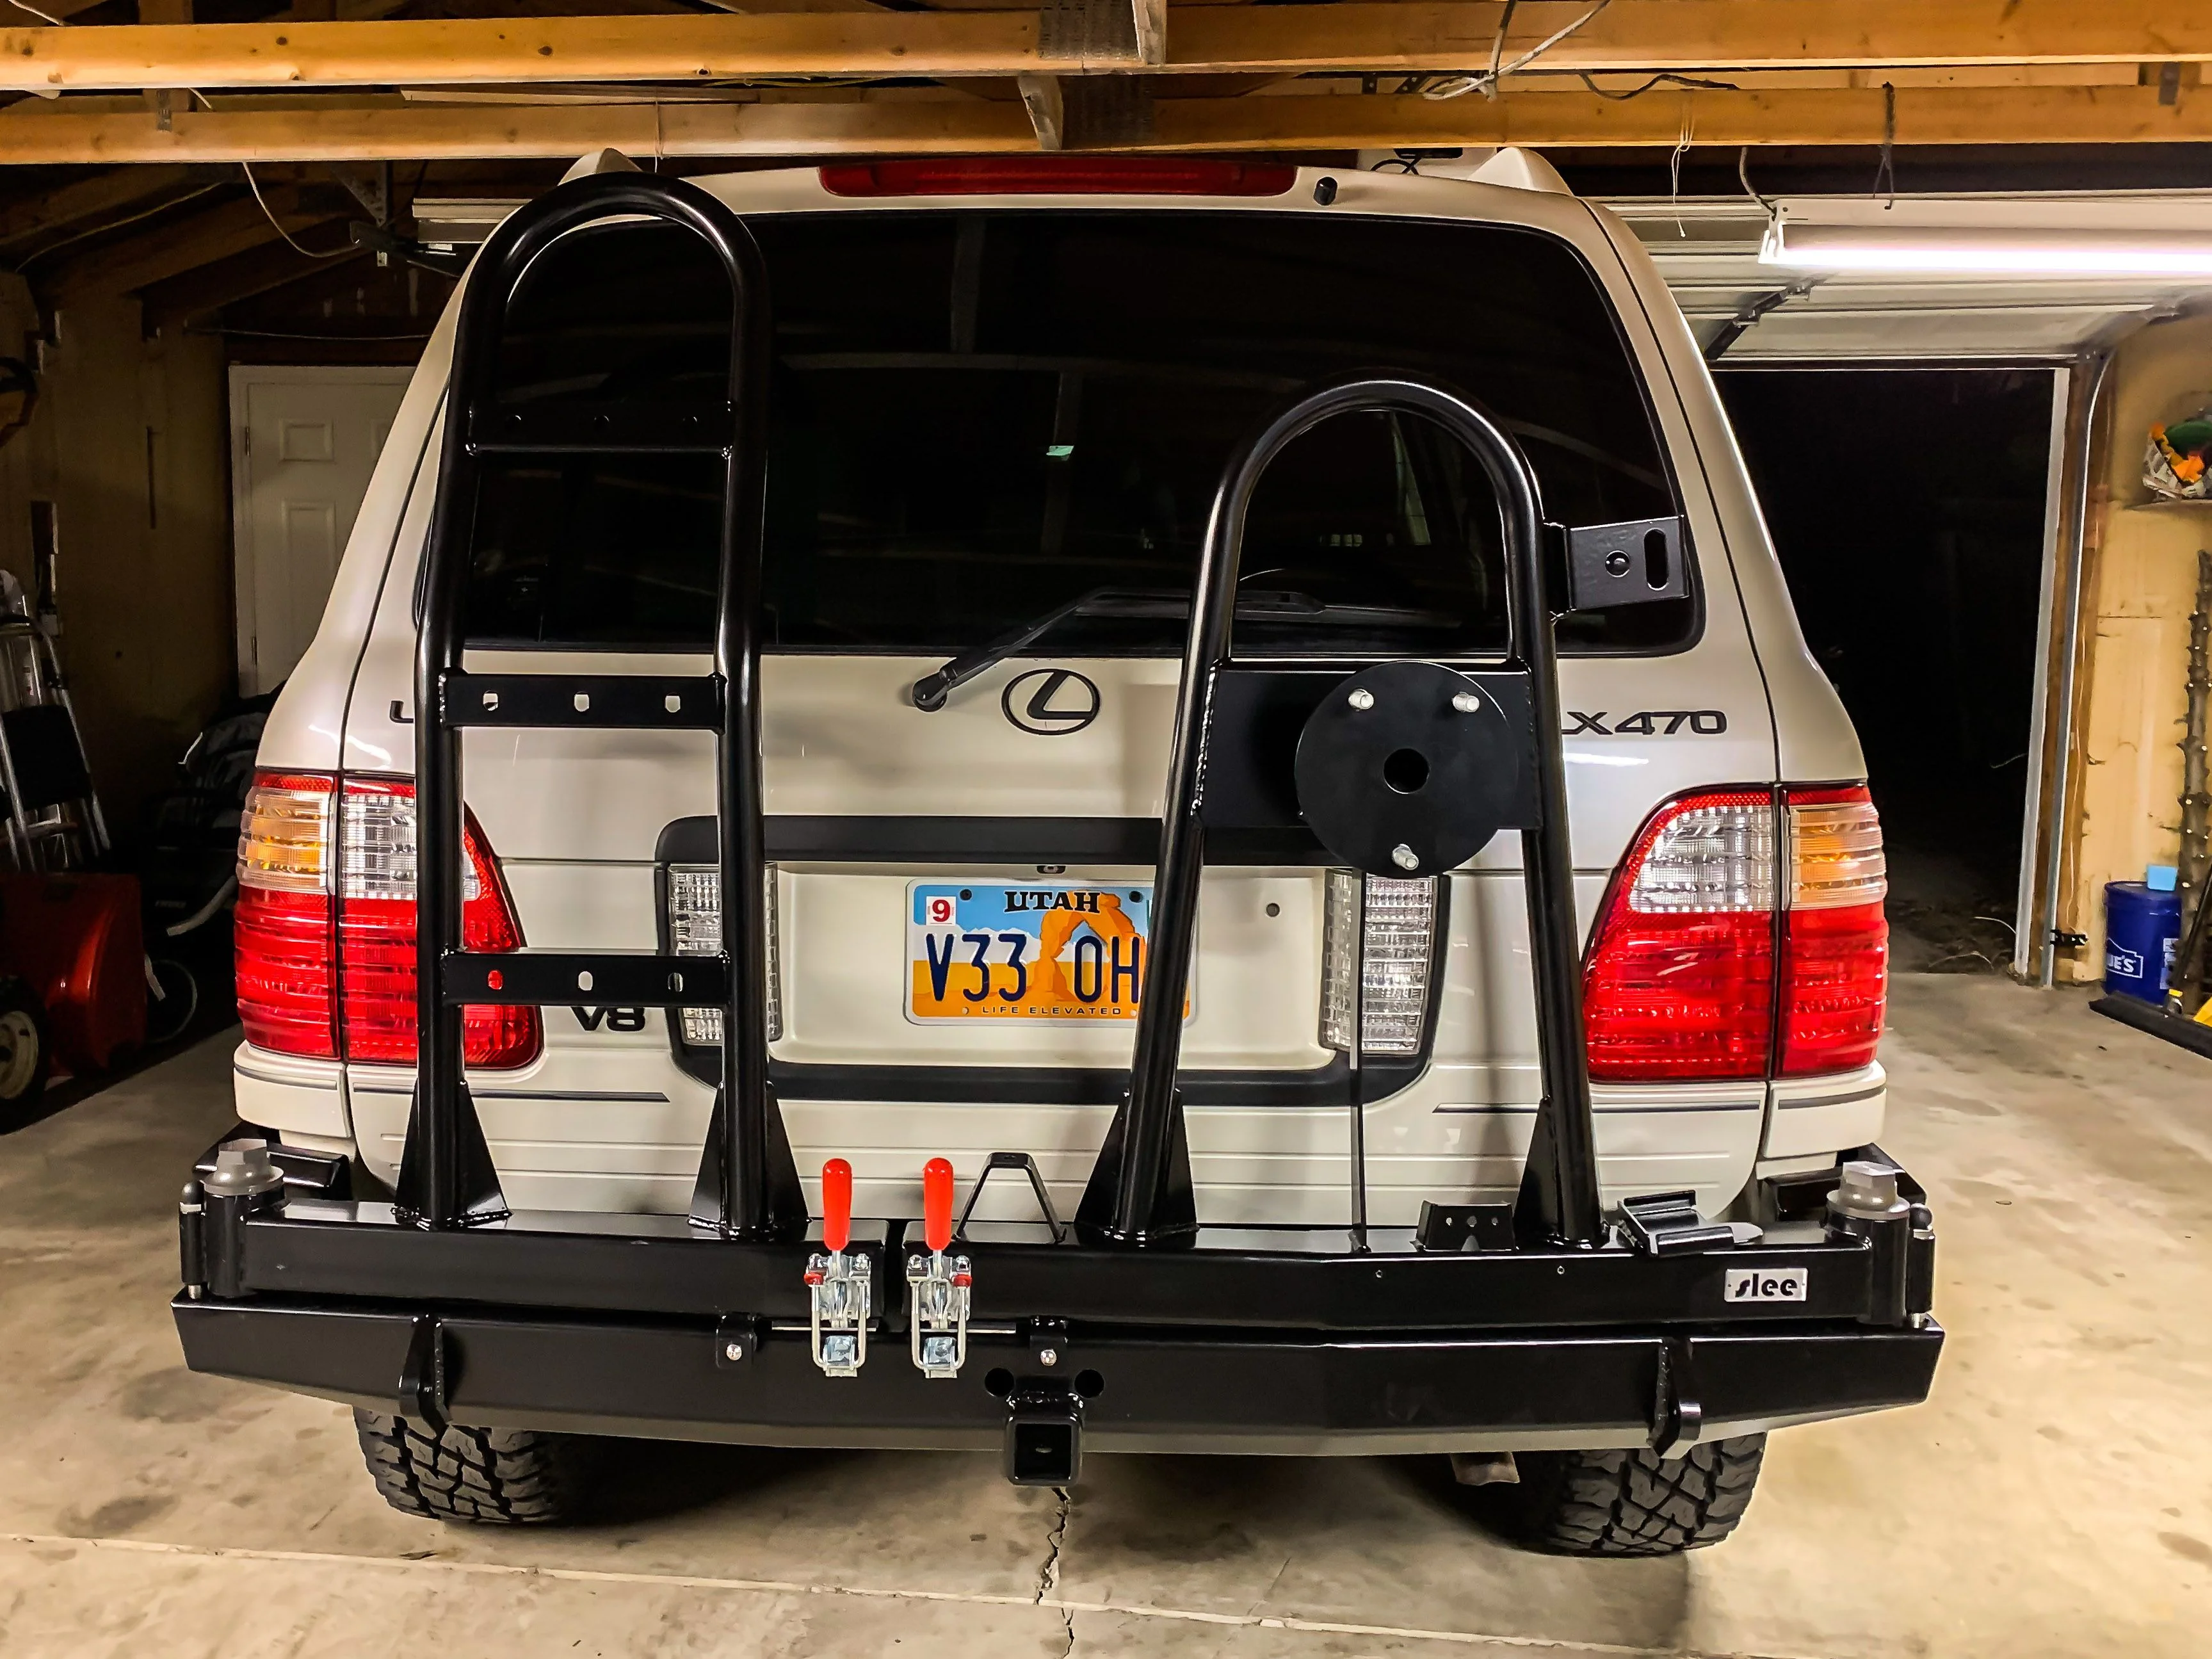
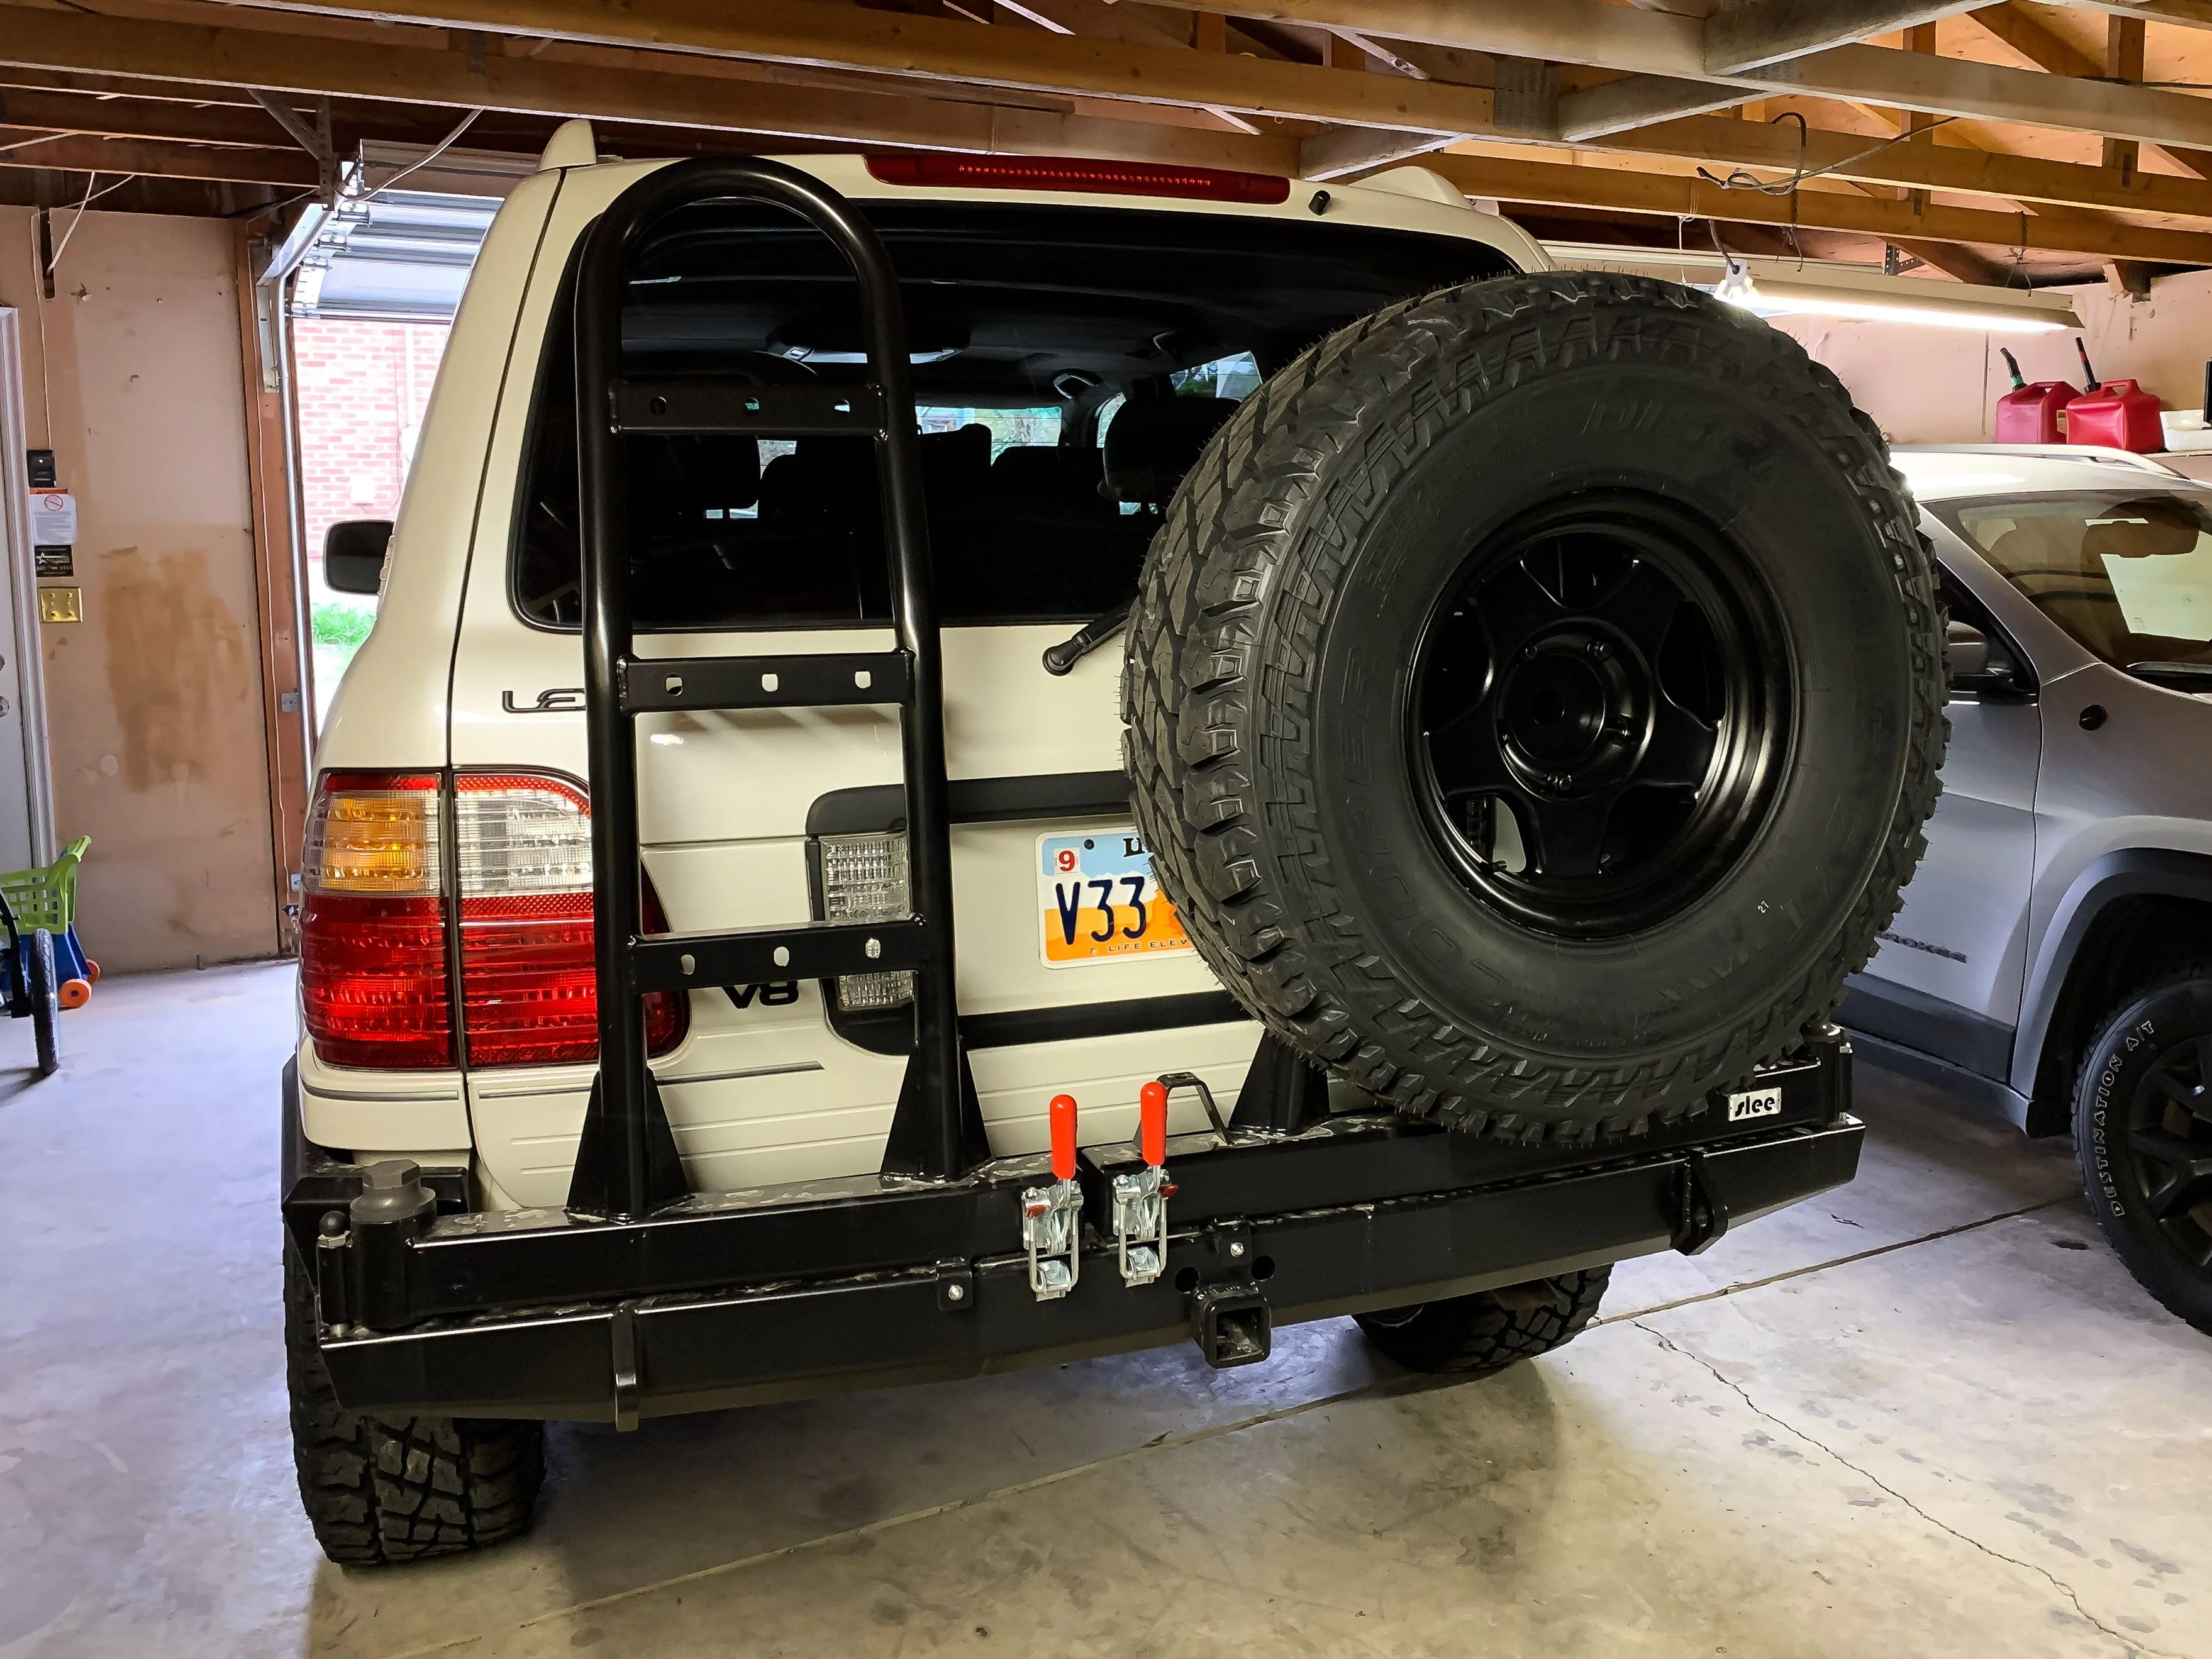
Front bumper back from powdercoated and ready to install. I have to wait until the insurance claims adjuster inspects the full vehicle for final check on Wednesday before I can install it. Getting ready and excited for that rear bumper to come in! I'll try to do my compressor install this weekend.

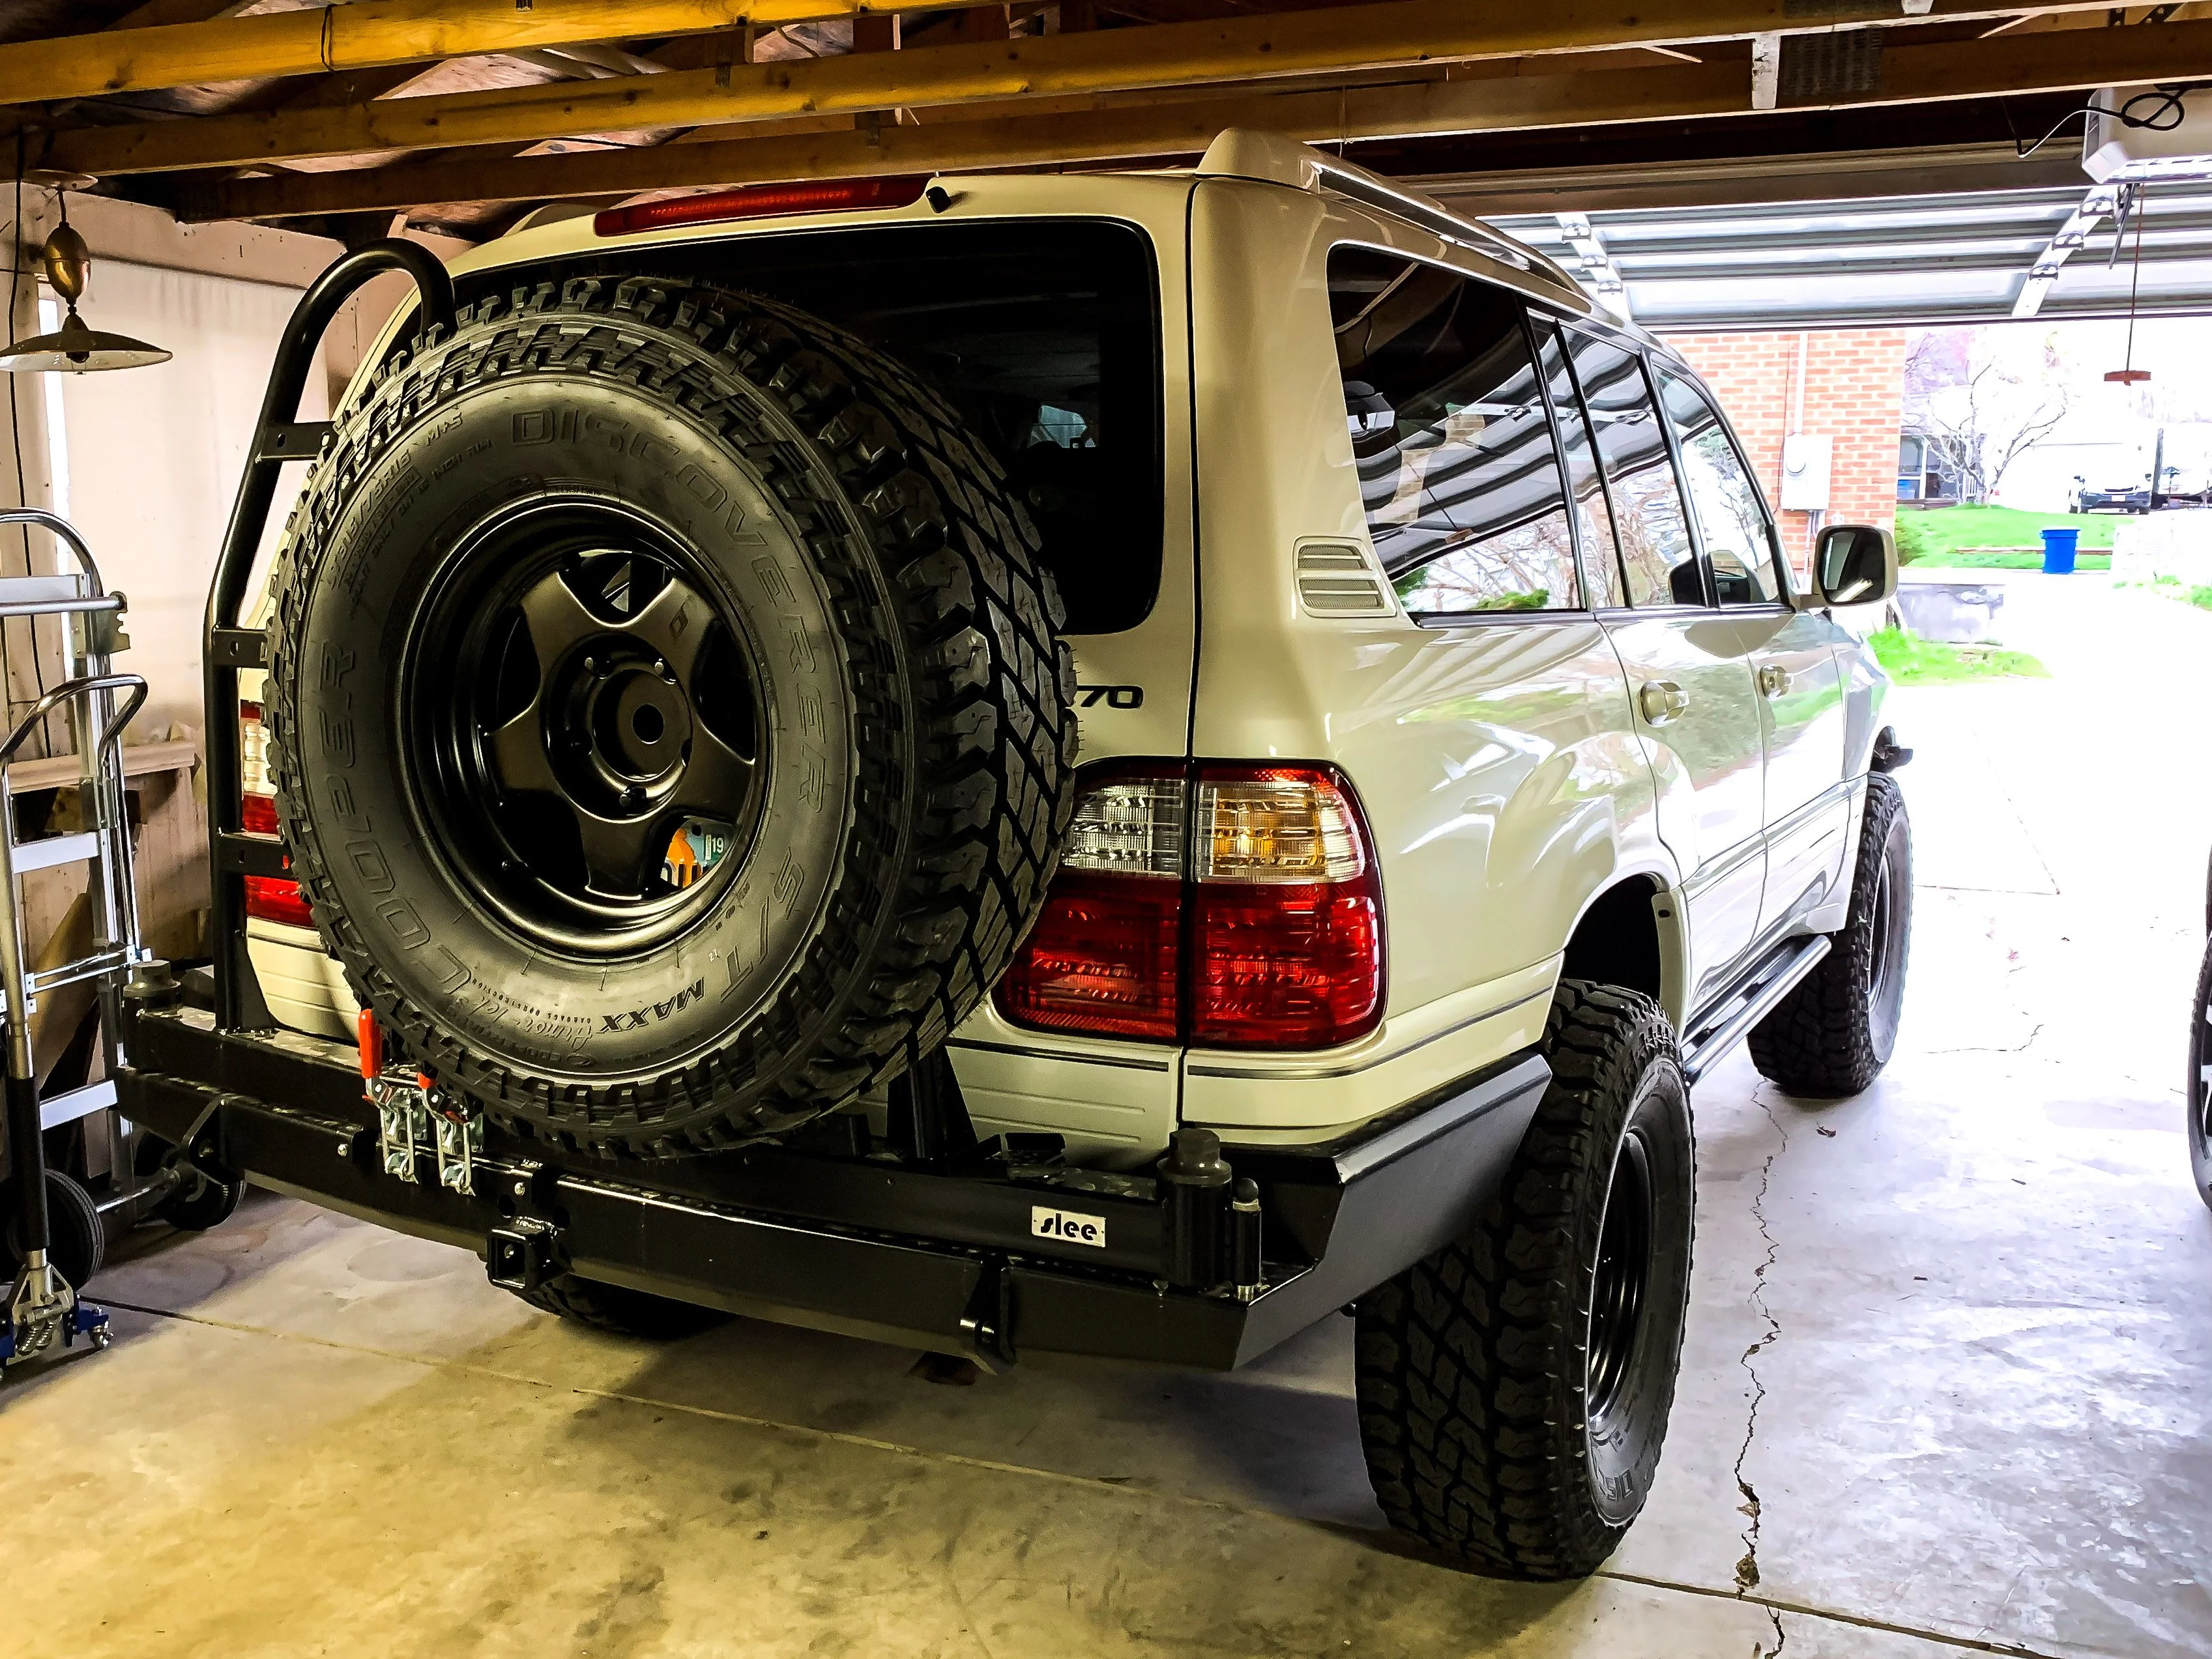
I'm the worst at getting pictures of my truck. I need to snap some more!
 
Very good thing you came out pretty well from the accident. You're getting into a position where no matter how nice or well-built your truck is, you'd get boned by insurance on the payout in the event of a total loss. Makes a good case for keeping your provider up to date on additions and upgrades that go into your truck. Took me 2x to learn it myself :doh:
 
Very good thing you came out pretty well from the accident. You're getting into a position where no matter how nice or well-built your truck is, you'd get boned by insurance on the payout in the event of a total loss. Makes a good case for keeping your provider up to date on additions and upgrades that go into your truck. Took me 2x to learn it myself :doh:
Good point. I'll have to give them a shout and update them. I do keep all receipts so hopefully that can help as well. I will say when the accident happened and before I got out my heart completely sunk. I knew there would be some lose if it was totaled and I really didn't want to try and start over again. The other person's front bumber was torn off and some front end pieces were smashed in but it was an old cheap Hyundai. So when I saw all the debris in my mirror in the road I thought the worst. But that Hyundai was no match for the Cruiser.
 
Bummer but glad to hear it came away almost unscathed.
 
Finally an update all be it a little one. Got the bumper back from powder coat and decided to brave the weather and install it in the garage. First things first I did some upgrading to the hardware that was included with the kit. Most pieces got replaced by a 10.9 grade bolt...because I'm crazy and want as much strength as possible. The bumper was powder coated black and I wanted to having matching hardware so I decided to get it painted. It was so cold that there was no way the paint would dry so after spraying it I would have to bring it in my house to dry overnight.

full

full

full


It turned out ok. I certainly should have waiting longer to install the bolts after they were painted since the paint would still be soft but I was too impatient. Ha! I had to do some touch up once installed. No biggie.

The bumper install went alright. The instructions that are available are not the best. Certainly get you through the installation but there are some elements with regards to aligning the thing that would have been nice to know beforehand. That being said after installation it is going to take some tweaking to get it sitting better. This will require removing the bumper entirely and drilling out my holes on the frame more. Ben has been great for support and walking me through things, just which it would have been spot on the first time. I'm no bumper install expert but have certainly done a small handful in my day and this one seemed to take extra time due to the modular design and the cutting off of brackets and drilling of frame.

full

full

full


Painted under trim:

full

full

full

full


Don't mind the front of the truck. Was still blasted with salt from the roads.

I went with the @ikarus method with the turn signals. Didn't feel like spending money on other side markers and then having to still modify the harness. Decided to just cut out my current side markers to get the side bulbs to fit. Turned out great...except for the small shavings in the headlight housing that @ikarus had shown. I'm not worried about it.

full

full


Didn't take a final picture, was too tired by this point. But they got plastic epoxied on. I also broke a clip on the light when taking it out as it was so cold and brittle and that got epoxied too.

full


As mentioned previously, I still need to do some adjusting. Both sides aren't even to the side fender which can be seen below:

full

full


If I could get the passenger side to match the driver side I'd be happy with it. We'll see maybe this weekend if I can get it pulled again to adjust. It will required another person to help push it in while its tightened so I'll have to see if I can get some extra hands. Anyone else deal with this?

All in all I'm happy with the way it looks. It certainly looks much better on the truck in person than it does online in my opinion. Certainly is going to give it much more clearance and approach angle which will be great. If I can get the passenger side wing adjusted then I'll be 100% satisfied with it. I can be pretty OCD sometimes and if I can't adjust it it's going to bug me every time I see it. Maybe I'll have a local fab shop cut it up and reweld it if that's the case. Ugh. Let's not consider that now...I'll just try to get it adjusted.

full

full

full


Don't mind the Lowe's parking lot shots. This was right after it was finished and I figured I'd use the little bit of sunlight left to get some pictures to show people. I still need to adjust up the torsion bars in the front to get back a little height and also need to decide on and order a winch.

For Dissent bumper owners I did have a question for you...what did you guys do with this box?

full


Can't imagine that it is in too much risk of damage from elements but it certainly will be taking a much bigger pounding by rain and road grime now that a bumper cover isn't protecting it. This is the driver's side wheel well.

I also got my Slee compressor tray installed. Just need to put the compressor in. Baby steps.
 
Looking great man! Not sure on the wiper fluid box - I've meant to look into it because my tire rubs on it a little. I imagine if it's just a washer fluid reservoir then in theory you could make a bracket and move it to the engine bay if the lines are long enough.
 
Looks awesome. Nice job spraying that bit of the sheet metal black before the bumper was on- I wish I'd done the same. Now with the plastic trim broken, I've got a hideous, dull, durface rusty line until I sand it down and paint it.

Installing my ARB was a similar experience to yours, so don't feel bad. I was pretty unimpressed with the instructions that came with it and the installation process itself. And also needed some additional love with the drill bits to get everything lined up. And that's a mass produced bumper!

You may have posted earlier, are you putting a winch in?
Man, some really detailed instructions go a long way this day and age! I do plan to get a winch, just trying to decide what one to go with. Probably not going to do anything crazy, probably a Smittybilt (flame on). I don't say I do any crazy trails and exploring, I know my limits, but I've still never used a winch to this date...knock on wood. I always want one on board just in case but never used one. I have a buddy getting rid of his truck with a brand new Super Winch in it that same thing, has never been used, that I'm trying to talk him into selling to me cheap. We'll see.

Edit: Also, on the spraying of the trim...I actually didn't spray it. For stuff like that I actually use spray paint in a can. Not a spray can, a normal paint can. For stuff that just needs to get black and I'm not worried about the finish I use the Rustoleum in a can with a paint brush. The spray paint when brushed on a little thicker will actually self level and produces a nice smooth finish for the most part. So I painted that without taping anything off and it was done as the bumper was going on.
 
No flaming for a Smittybuilt. I've got one of their 9500 pounders on mine. Just too good a deal to say no. Like you, it's there 'just in case'. Like my firearms, glad to have them, hope I never need to use them.

I'd have never thought to brush that paint on. Did you literally just spray paint into a can?
 
That was more referring to the winch police out there that for whatever reason get annoyed when people buy anything that isn't Warn or whatever. Ha! The 9.5 is what I had on the previous Tacoma build and will likely end up with that.

Yup, just normal spray paint in a can:

https://www.amazon.com/Rust-Oleum-7...548951358&sr=8-4&keywords=rustoleum+can+black

I think its made so people can load that into an actual spray gun and shoot it through a gun but I just use it with a brush and it works great. I didn't mask anything off when I panted it. I've got several brushes that I keep around in case its a tighter space I can just get in carefully and brush it away.
 
Never knew it came in a can. Can’t tell you how many times this would’ve been helpful.

Thanks for sharing.

Truck definitely looks a little meaner with the bumper installed. I like the hardware all black. Good call.
 
Been trying to get my compressor and switches mounted up but I keep running into issues or questions and with the cold its too easy to call it quits on the install. Got some time this afternoon to get some of the install done. I ended up getting the switches in.

full

full


It wasn't the smoothest to make sure you don't cut out too much material when opening up those areas. They're in there pretty tight but I'm pretty anal and want them more snug. While they won't pop out, they do have some slight wiggle if you were to grip them and try to twist them. I'll have to figure out something to do to make them a little more snug.

Tried to get the compressor in but wasn't satisfied with how it was going so I ended up calling it for the afternoon. I'm going to start a thread to see what others have done with a similar set up.

We also got hit with some unfortunate bills due this tax season. Looks like we will owe several thousands which will have to come from money saved for locker/gear and other maintenance installs. Those will now have to be pushed back which is getting frustrating. Was hoping to have them in and ready before a Moab trip in a month. I'll be running without for the trip unfortunately.
Install looks really clean - like they belong.

Your carpets (and original floor mats?) are in great shape. And they’re tan too - even more difficult to keep clean.

Go have fun in Moab. These trucks are more than capable without lockers. Plus It’ll be more rewarding to wheel it without then see the benefits of the gears & lockers next trip!

I look forward to the pics
Thanks! The floor mats and carpet are original. The previous owner was pretty anal about keeping it clean which is appreciated. I do plan to recarpet the truck with new seat covers as well to a darker color that will still work the rest of the tan. While I don't mind the tan as much as I thought I would, I want to change it up. But that likely won't be until probably late summer or fall.
 
I ended up selling the Dissent rear bumper to a local 100 series forum member. I purchased the Slee rear bumper the very next day and couldn't be happier with the decision to make the switch. Seeing the Dissent no cut installed looks really good and still think it is a great looking bumper but the Slee better suits me. The tried and true clamping mech and lock pins are just easier for me. I also was going to make sure I had a ladder and with the Dissent I would have had to have one made...also the Dissent was 34 pieces that needed to be powder coated individually and when I took it to the coater I use it was basically $500 to coat all the pieces. So in the end, even with the preorder pricing of the Dissent, the Slee was cheaper for me. Plus looking at the installation had my head completely spinning. Mad respect to those that figure it all out!

Anyways, @ikarus came by to help me with the install and it went pretty smoothly. Was helpful to have a second set of hands there to lift the thing. I was very impressed with how each box with the Slee bumper was labeled and the instructions were very clear so there was no real hiccups with the installation. Only hiccup would be the two mounting holes above the hitch didn't line up with my existing holes for the OE bumper. @ikarus's did but mine didn't; we did a quick search and found some people with certain model years also had the issue. It's bolted in so many other places that we didn't sweat it.

full

full

full

full

full

full

full

full


The license plate has since been moved to the correct position. I wired the license plate light up to the taillight and the first try wired it wrong so it would turn on when I had the lights on but then turn off when I pressed the brakes. Ha! Doh! I fixed it the next day so its working perfect now. Still two things to do. First is to relocate my reverse camera with the Slee camera bracket. Second would be to fix the tire holder. Due to the offset of the wheels it won't allow me to push the wheel in far enough to contact the wheel support brackets. This causes it to be spaced off just a little and then when driving and getting into a section where the road is a little bumpy the tire wobbles in the back and shakes the truck. Going to have to cut off the end of the tire carrier bracket so it slides in further. I'll get that done shortly.

All in all I'm very happy with the switch. Slee legacy bumper is my favorite!

I'm now also trying to figure out my rear spring set up. Kevin @ 4XOverland claims I have the heavy springs for the Slinky kit but my rear appears to my eye to be lower than @ikarus's truck with the same spring and rear bumper. When I load up for camping my rear end goes lower than the front and would like to remedy that. Having some trouble getting some answers and clarification on the springs and proper position of the Slinky rear shocks reservoirs but will try to get that resolved as well.
 
Dang! Bumper So Fresh I’m gonna have to delete my browser history!!!

Yep - the black bumper on the white LX just completed the package!

For me, the Slee Legacy is simple, clean and most importantly, Classic.


FWIW:

I called Slee about the 2 bolt holes that didn’t line up on mine just above the hitch - answer is that 98-02 line up and 03-07 do not. No you don’t need bolts at those locations

Also the Slee hitch receiver and the factory cross member cut out do not line up on mine but my hitch still fits fine so not a big deal for me.

As for my SCS F5s the offset does prevent the tire from touching the swingout carrier so I’m very interested in seeing how you remedy this. (Mine is about a 1/4” away so I’m surprised that the 315s don’t make contact - your tires are wayyyy wider than mine).
 
I’m kinda thinking you may have the medium slinky springs.

Here is a pic of mine with mediums, the 3rd row installed, and Slee rear.

0A8FC6EA-F22A-4BE5-AE57-BF404B21E195.webp


If I recall correctly the front is set at 21.5” and rear 23”... HOWEVER when my kids are back there it drops 3/4” to 1” giving it a great stance.

The springs are progressive and it doesn’t take much to compress that first inch (thats why the ride is so sweet unloaded) but more added weight compresses to the stiffer coils and handles really well when I’m rolling with the whole family.
 

Users who are viewing this thread

Back
Top Bottom