
Nice, keep going..
Navigation
Install the app
How to install the app on iOS
Follow along with the video below to see how to install our site as a web app on your home screen.
Note: This feature may not be available in some browsers.
More options
Style variation
You are using an out of date browser. It may not display this or other websites correctly.
You should upgrade or use an alternative browser.
You should upgrade or use an alternative browser.
Build 1989 GCC Spec FJ62 G Trim
- Thread starter boozewz
- Start date
Member Builds and Stories
This site may earn a commission from merchant affiliate
links, including eBay, Amazon, Skimlinks, and others.
- Thread starter
- #22
So far no rust anywhere.
Until I saw this just under the right side of the rear passenger bench


And from under

After cleaning all the crud out, we got to checking out the rear flooring

Rusted through


And this was on the front passenger side floor pan

Until I saw this just under the right side of the rear passenger bench


And from under

After cleaning all the crud out, we got to checking out the rear flooring

Rusted through


And this was on the front passenger side floor pan

- Thread starter
- #23
So a bit of a set back, but thought of it, I am in it with the engine swap, lets get this rust fixed. Went down to the body shop to see what would be the best way to handle this. The consensus was, it would be easier and quicker to get a patch for the rear floor from the junkyard than to work on fixing those rust spots.
With that, I spent a couple of weeks running down to the junkyards once every few days on the way home from work until I finally came up with this:

While I was at it, I tried to source a set of BMW front seats. Came up empty handed each time.
But then a set of 80 series seats came in. I was planning to ditch the passenger bench seat. I have it on my 80, and I have since then longed to have a center arm rest. The timing and price was good. I didn't end up taking the 80 arm rest as it was beaten up with missing handles. I have a Smittybuild center arm rest on order anyways.


Last edited:
This is getting interesting...
- Thread starter
- #25
Onto the body shop, the measuring and cutting started

The leap of faith!


Now patched in


They also worked on cleaning up and plating the rusted rear right passenger floor

Then a full exterior body walk around and "thorough" inspection was in order

The front had been in a small fender bender and that had to be worked on

This one looked like nearly 1" of body filler


So now we're in it deep!

- Thread starter
- #26
Meanwhile my original dash was cracked in two places. I popped down to the local dealer to see if they had any in stock, and they said yes they had two. But only in gray. They also had a steering wheel in gray. The last one in KSA. We got in touch with a well known reseller in Qassim, the central part of KSA where Cruisers are much more well represented and they also had dash and steering wheels in stock. Brand new. But only in gray. I did not fancy using the brown dash caps from cruiser corps. The heat here can be an issue for the glue that is required to keep the cap stuck onto the original dash. Hmmm.....I gave it a thought, and figured since I will be re-upholstering the 80 seats and door panels anyway, changing the interior to gray will not seem to be half as bad as it sounds, work wise. Grab them new unobtainable parts while you can!


Steering wheel does not come with the horn cover. I'll be on the lookout for these at the junkyard or classifieds. The cover is NLA at Toyota.

Back to the body shop, work is progressing very nicely, but at a slow ramadan pace. (Thread is still in June and catching up fast to present day)
Got rid of the GCC spec hood ornament, and sealed the hole. Never liked these. Just like I never liked mud flaps.

Cleaning up the fender

Rear rockers cleaned up

Forgot to share this earlier, but when I removed the DS front mud flap, it was rusted through


Cleaned up.

By now I am out of town, and the body shop is keeping me up to date on WhatsApp with photos.


The DS door was mangled from a wreck, so I picked up a beige 60 door from the junkyard

Primer done


Last edited:
- Thread starter
- #27
Gray 153 on!


- Joined
- Jun 21, 2011
- Threads
- 238
- Messages
- 22,256
- Location
- Redding, California
- Website
- trail-tailor.com
Great work here! Way to save a cruiser! Been there many times my friend.
I may have a spare horn button. I bought every Middle East spec steering wheel and associated part a few months back. I'll let you know and add it to your apron seal order if I do!
J
I may have a spare horn button. I bought every Middle East spec steering wheel and associated part a few months back. I'll let you know and add it to your apron seal order if I do!
J
- Joined
- Jun 21, 2011
- Threads
- 238
- Messages
- 22,256
- Location
- Redding, California
- Website
- trail-tailor.com
H,
Looks like you have a standard US spec 62 wheel not a ME spec wheel (brown in top left pic).
Here is the button I have if you're interested.
J

Looks like you have a standard US spec 62 wheel not a ME spec wheel (brown in top left pic).
Here is the button I have if you're interested.
J


Wow!!!!
- Thread starter
- #32
H,
Looks like you have a standard US spec 62 wheel not a ME spec wheel (brown in top left pic).
Here is the button I have if you're interested.
J
View attachment 1301003
Thanks @reevesci but I just picked up a used steering wheel with a cover from the classifieds last week. It came as one piece deal. I know @Thebedouin60 is also changing his interior to gray so may also be on the lookout for one of those.

In addition to that, more goodies arrived:
Carpet from @reevesci and some Dynamat and Dynaliner sound and heat deadner

ARB lockers from @cruiseroutfit and a set of front and rear flush mounted Rigid Industries duallys

Jasons' carpet kit is seriously good stuff


Also picked up his nice SS B Pillars. These will be painted matching gray

And lastly a Smittybuilt center console

- Thread starter
- #33
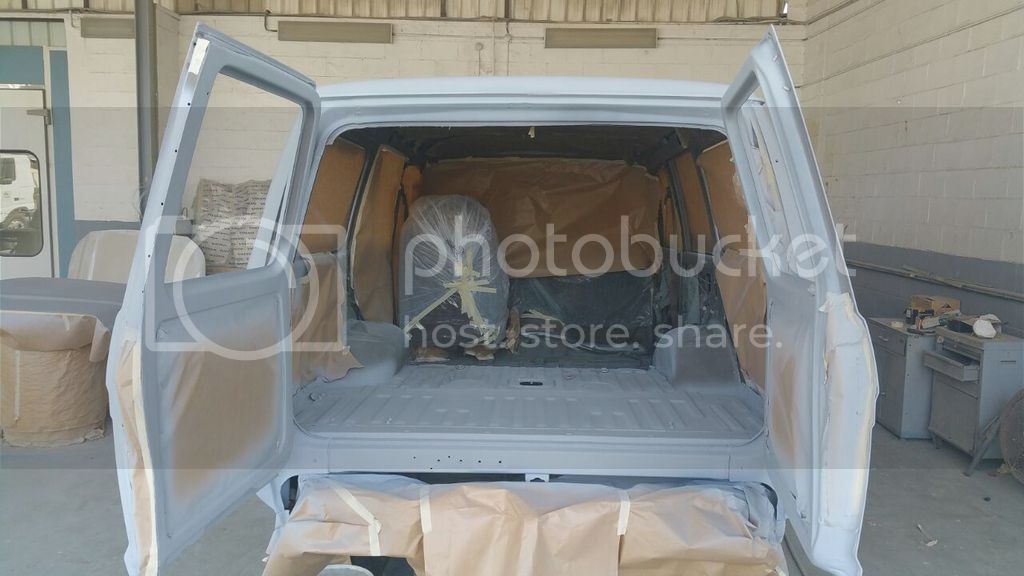
Next up was bringing in a headliner/interior guy to work on installing a new headliner.
1/2" Dynaliner


We also had the lower dash and grab handle removed and painted gray.

Back in

Dynamat is in

Still unfinished while we run it up the DS and PS footwells

Barn doors given the 1/2" Dynaliner ontop of the Dynamat. We had extra Dynaliner so will use it on the inner parts for added measure


When ordering the Dynaliner, I accidently ordered the 1/4", so since we have that, we will lay this down ontop of the Dynamat under the DS and PS side.

- Thread starter
- #34
And finally, to bring us up to speed, we started working on fabbing up a winch plate to mount the winch using the stock bumper. Idea first seen on the famous @Waggoner5 62 on 80 frame build, and again on @reevesci Poppy 60 thread.
First mock up

Placing the Warn M8000

Then we cut out the back of the plate to get it in further closer to the crossmember. This was to work around the front shackle hanger


Much better. (Right side frame rail will be straightened)
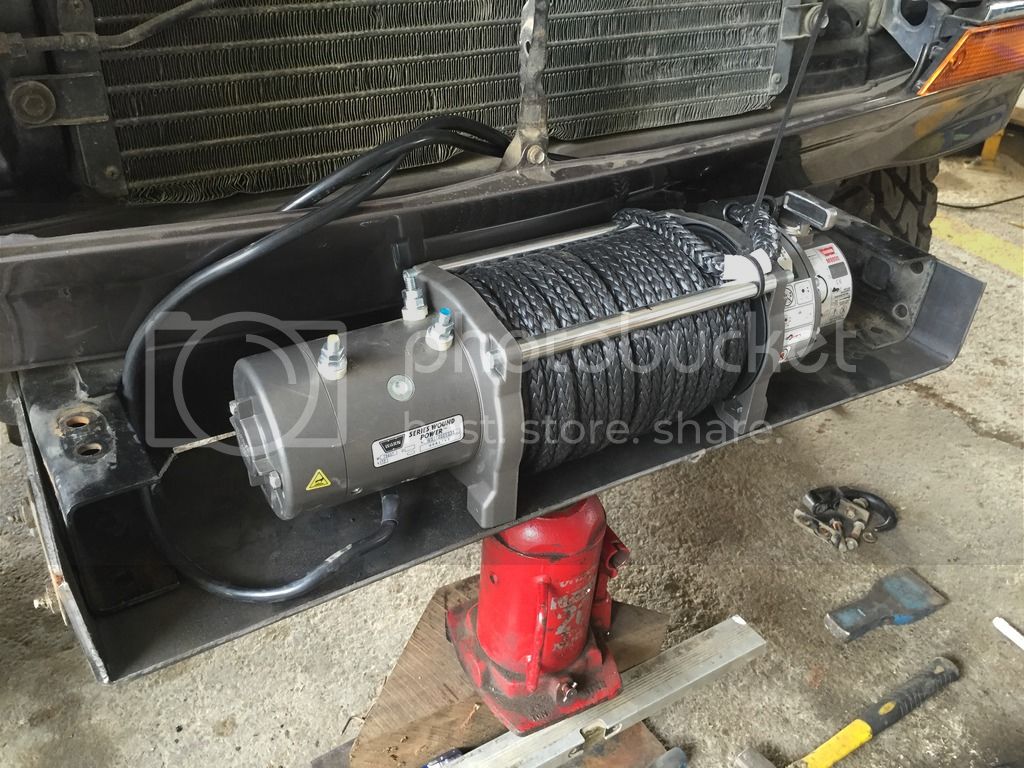


Still working on the opening. We have a new bumper on order, that we may cancel as this one will be cleaned up and straightened out.

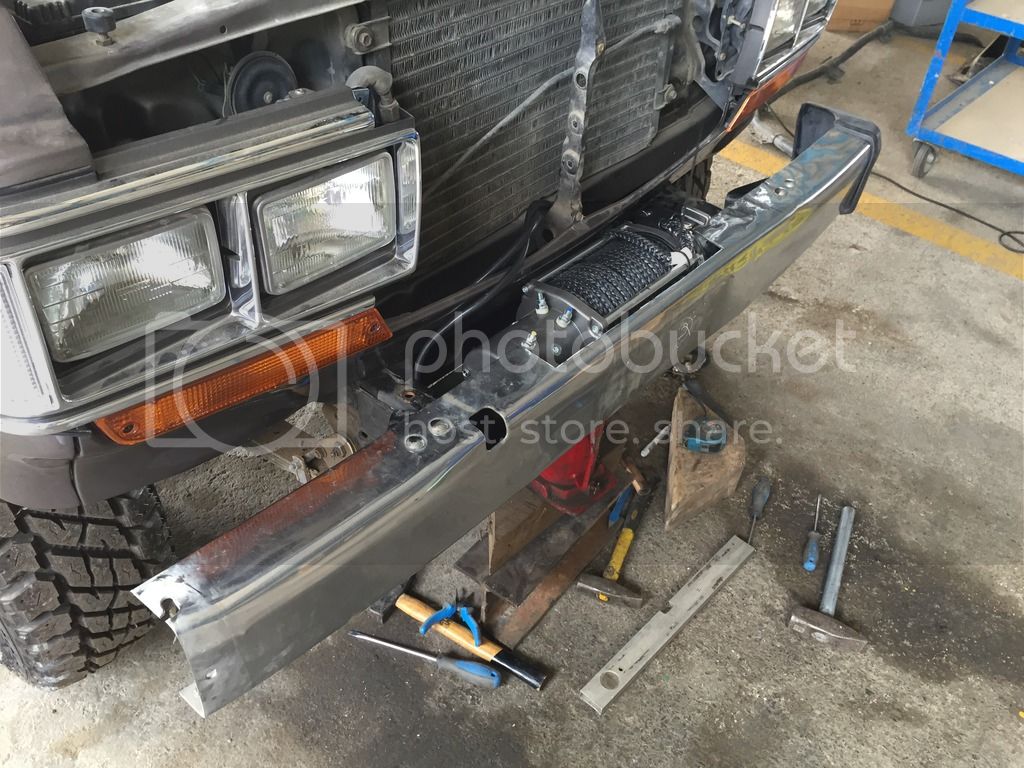
Next up, mounting the front Rigid Duallys flush into the bumper on each side of the fairlead, and finding a place to mount the winch control box. Its bigger than we thought, so one idea is putting it inside the bumper channel, with the hand control plug facing rearwards.
Also, I am not entirely happy with the winch connectors being exposed like that at the top of the bumper. Anyone have ideas what to do with them?
First mock up

Placing the Warn M8000

Then we cut out the back of the plate to get it in further closer to the crossmember. This was to work around the front shackle hanger


Much better. (Right side frame rail will be straightened)


Still working on the opening. We have a new bumper on order, that we may cancel as this one will be cleaned up and straightened out.

Next up, mounting the front Rigid Duallys flush into the bumper on each side of the fairlead, and finding a place to mount the winch control box. Its bigger than we thought, so one idea is putting it inside the bumper channel, with the hand control plug facing rearwards.
Also, I am not entirely happy with the winch connectors being exposed like that at the top of the bumper. Anyone have ideas what to do with them?
Clock the connections to the bottom. I did this and to moisture from collection in the rubber boots, punch small in them. I also spray Corrosion X on the terminals.
Mine has been this way for years with no issues.
Nice build!
Mine has been this way for years with no issues.
Nice build!
- Thread starter
- #36
Clock the connections to the bottom. I did this and to moisture from collection in the rubber boots, punch small in them. I also spray Corrosion X on the terminals.
Mine has been this way for years with no issues.
Nice build!
Awesome! I just looked it up, and seems as straightforward as removing the bolts and clocking it 90deg to the direction of the rear (or 180 to the bottom). Good point re punching holes in the rubber boots!
Thank you sir.
- Joined
- Jul 22, 2012
- Threads
- 639
- Messages
- 17,563
- Location
- Winter Park, Florida
- Website
- www.cruisermatts.com
Really nice stuff. Is that headliner OEM or ?
- Thread starter
- #39
Great looking build man!
Cheers!
Really nice stuff. Is that headliner OEM or ?
Headliner is not OEM. Didn't even check if OEM is available as this stuff is super clean and good quality. They did the 80 headliner for me as well.