Hi everyone, I've been enjoying your forum for quite some time, I don't post often but have found great help in finding FJ40 parts on here.
My name is Jake, I've been working on Land Cruisers for about 15 years now- always have and always will enjoy them. It seems recently they are mostly what I work on.
I did this conversion for a friend/customer about 1 year ago, he is still driving/wheeling it fairly often.
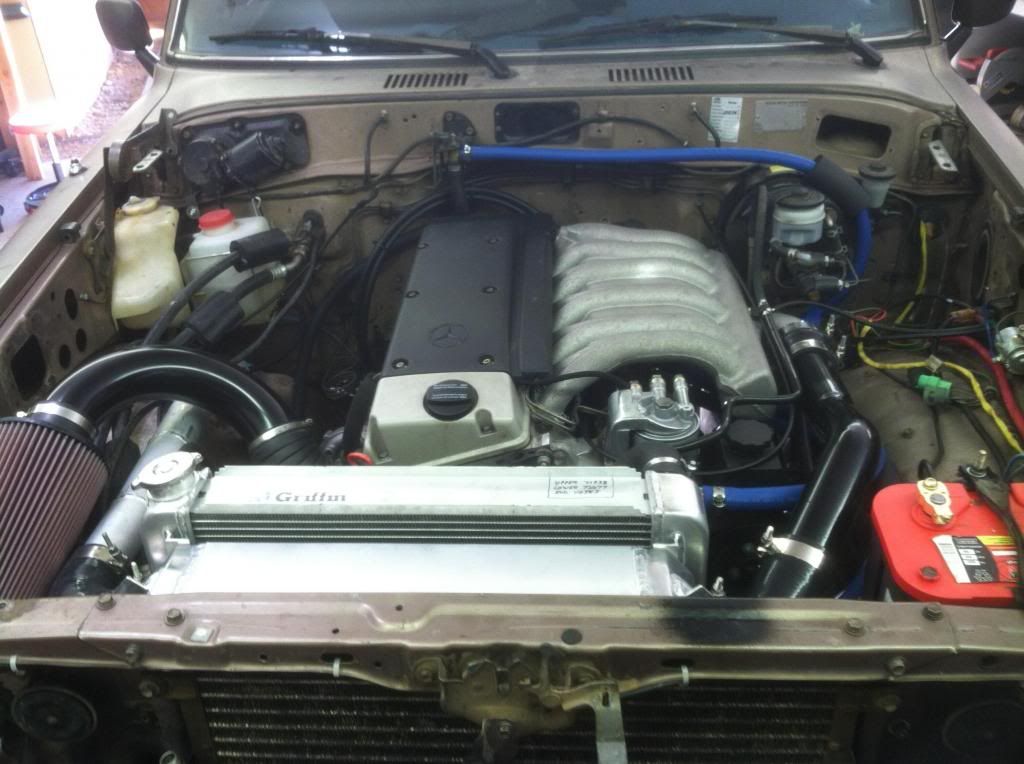
Finished product: Keep in mind throughout this that the owner runs a Euopean car shop, european auto tech, and he finished up a lot of the details. I was to get it running and driving and take care of the heavy work, welding, fabricating etc. Also the truck is used for hard wheeling so I don't have many pictures of it, he didn't care so much about form but certainly did function. Sorry for some of the pics, most are taken with a phone camera.
http://i231.photobucket.com/albums/ee163/jakebeggy/mercruiser.jpg
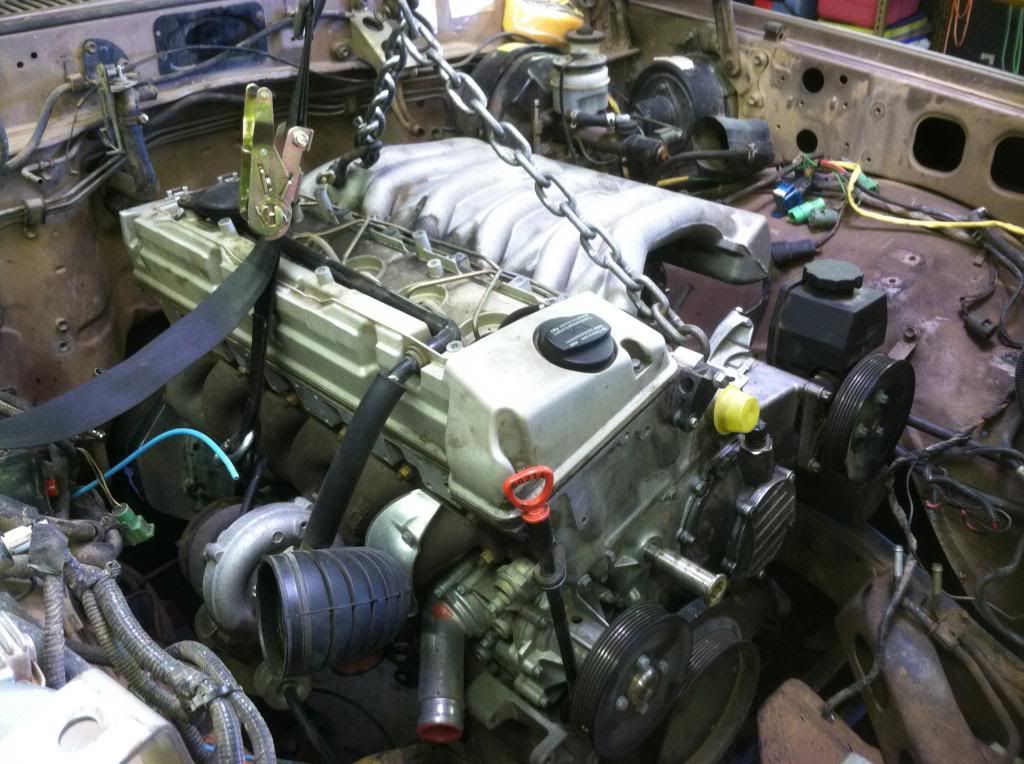
The engine was in his daily driver, a 2002 E300D I believe. It's an OM606 with the electronic injection pump, we ditched that pump for an OM603 mechanical one. It was rear ended and totaled one day, so through an insurance buyback we now have the 606.
http://i231.photobucket.com/albums/ee163/jakebeggy/4runner/mercruiser/IMG_1232.jpg
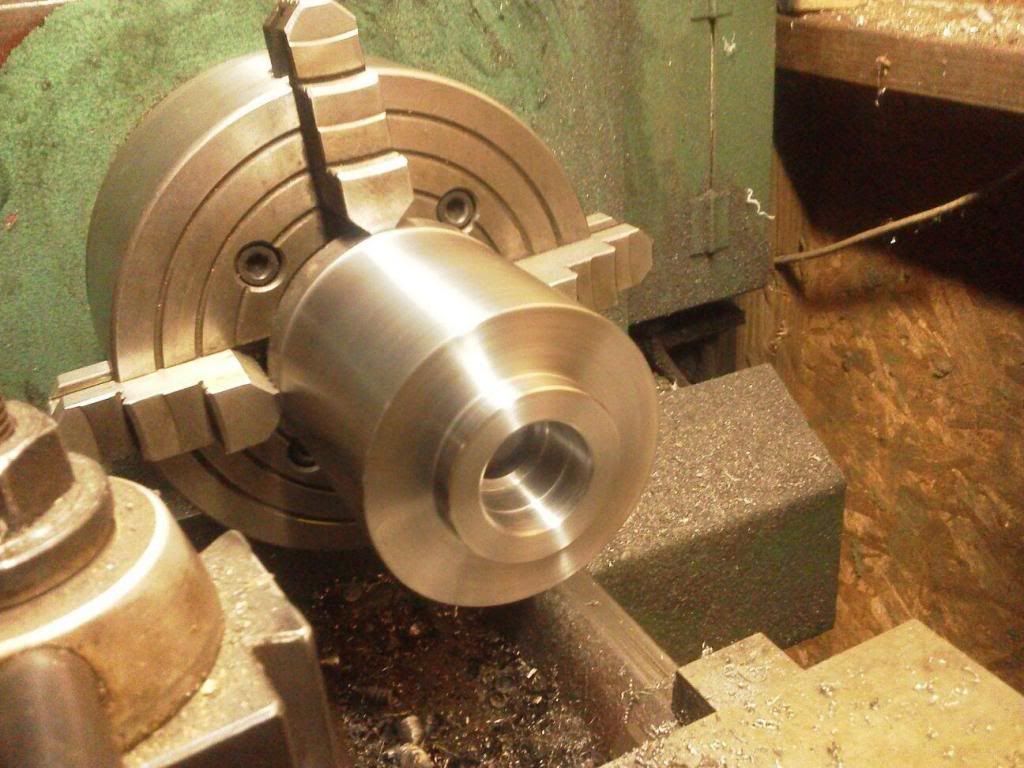
I'll get straight to the bad stuff. 4x4 labs made the adapter plate- the guy is clearly talented and has some great tools. He helped out at first then basically was really tough to get in touch with. It took a looong time to get the adapter plate, and spacer. His setup runs (in this order) 1: engine 2: stock flexplate 3: thick flywheel spacer 4: stock 2F flywheel all bolted together with long bolts that had to come from romania or something. It's an ok setup, and all seems well except this part:
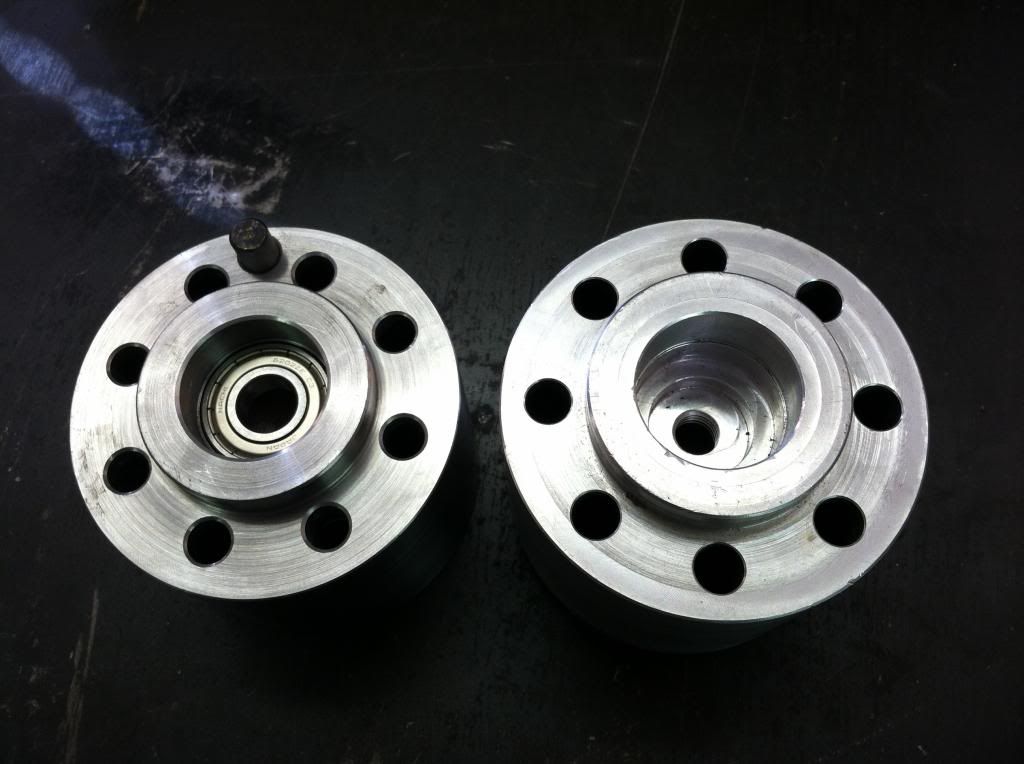
The spacer that 4x4 labs sent is on the right, the one I paid a friend to recreat is on the left.
http://i231.photobucket.com/albums/ee163/jakebeggy/4runner/mercruiser/IMG_1210.jpg
The 4x4 labs guys CNC'd the spacer, it's machined out of aluminum. One would think CNC is great- except with this type of part the tolerances should be less than .0005; I was told by my machinist friend. There were variations of about .002 all over the spacer, and it was a dissimilar metal (aluminum loves to expand and contract under heating cycles) in a ultra critical part. So my machinist friend made a copy of the aluminum one out of steel with .0002 tolerance. (the one on the left in the above pic) I know his shop isn't pretty but he does good work and I couldn't see any variations in thickness after mic'ing it.
http://i231.photobucket.com/albums/...iser/34f8e790-3b7b-43fd-91d9-f1aad8030936.jpg
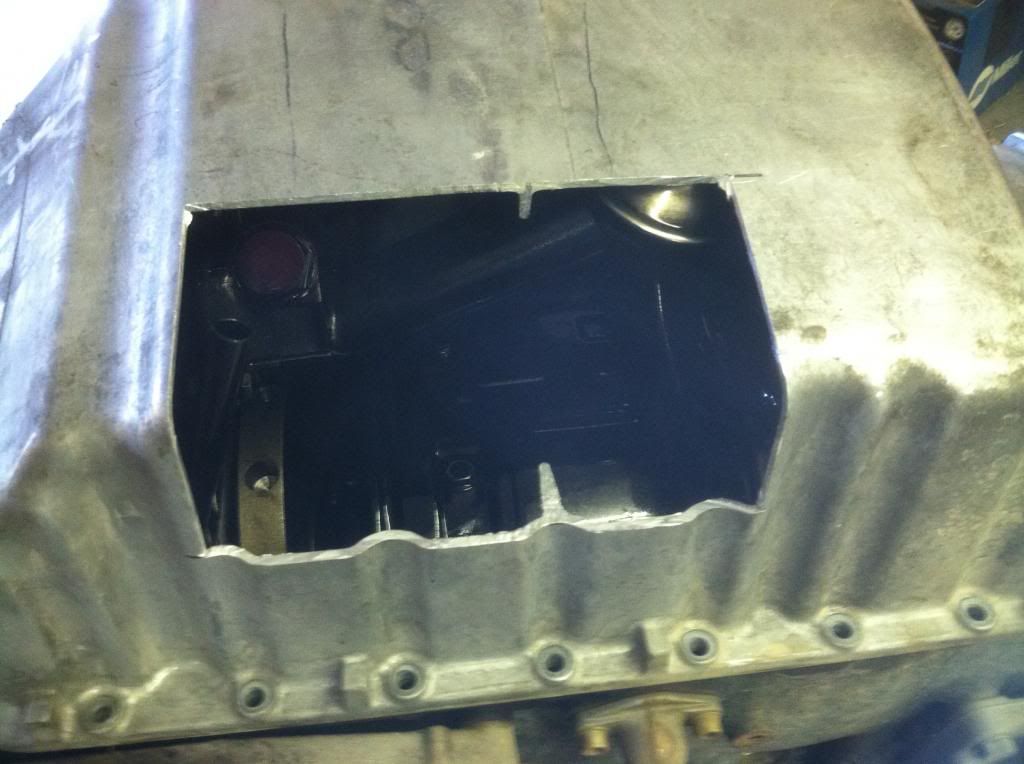
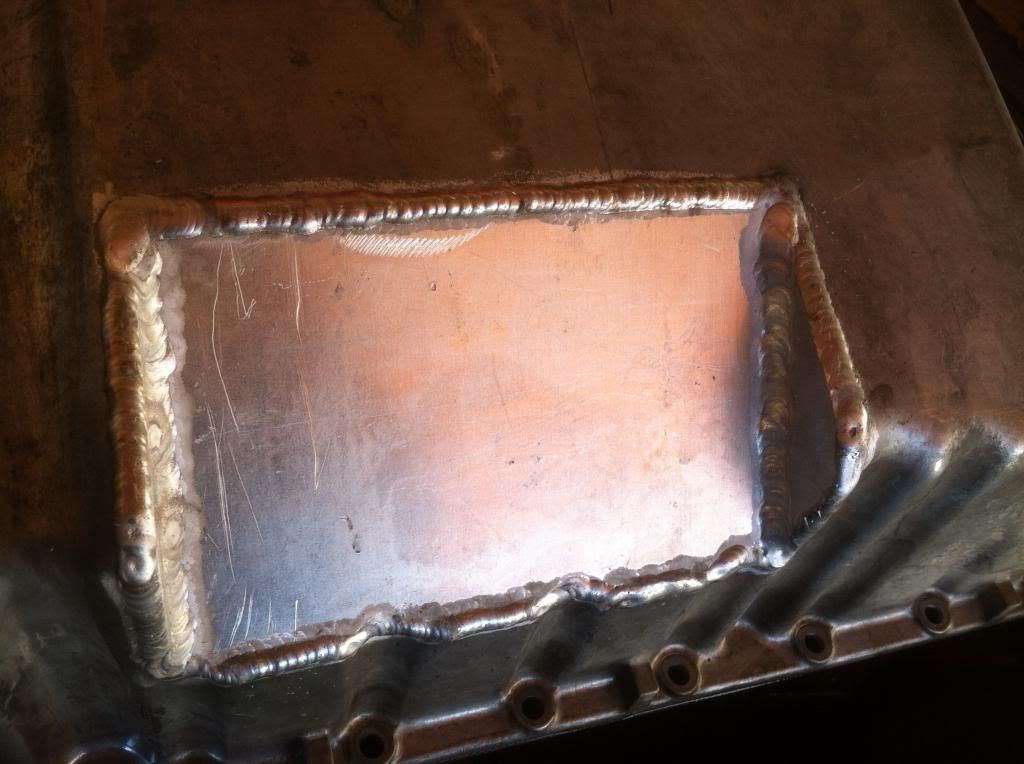
Another major issue with the OM606 is that the sump of the oil pan ends up directly above the front axle. "Just make a new oil pan", well that was my thought at first, but Mercedes used a cast aluminum pan, and about 1/3 of the pan is the lower half of the engine mounting. Also, it has a chain driven oil pump that hangs way down into the sump. I would think with enough $ one could run a jackshaft and relocate the pump to the back of the pan, and allow for a rear sump pan. The strength and accuracy of the rear mounting setup still has me scratching my head. I notched the pan and gained some additional clearance out of it.
http://i231.photobucket.com/albums/ee163/jakebeggy/4runner/mercruiser/IMG_1276.jpg
http://i231.photobucket.com/albums/ee163/jakebeggy/4runner/mercruiser/IMG_1278.jpg
The engine mounts were actually fairly easy, we opted to use the liquid filled factory Merc mounts, which only had one 8mm x 1.25 bolt to mount, which should be under tension or compression but it's a far cry from the 2F 10 or 12mm bolt/stud... They haven't proven to be a problem after a year.
http://i231.photobucket.com/albums/ee163/jakebeggy/4runner/mercruiser/IMG_1263.jpg
To make sure the oil pan wouldn't hit the axle, I used these thicker poly bump stops, it looks like it would ride terrible but actually worked out really well. He hit something really hard and blew one of these out and the pan survives:
http://i231.photobucket.com/albums/ee163/jakebeggy/4runner/mercruiser/IMG_1358.jpg
I don't have a lot of pics of the injection pump swap, but it was fairly straight forward. The only bad thing was someone dropped the pump or shipping damage- the rack had become detached from the emitter control cylinders. I didn't find this out until I tried to start it and bleeding was impossible. All the cylinders but 1 were disconnected and fuel was shut off. Anyways, figured it out eventually.
http://i231.photobucket.com/albums/ee163/jakebeggy/4runner/mercruiser/001.jpg
Clearance is tight to the stock intake, the 603 has more of a log style than the 606, and the 606 pump doesn't have the ALDA on it:
http://i231.photobucket.com/albums/ee163/jakebeggy/4runner/mercruiser/052.jpg
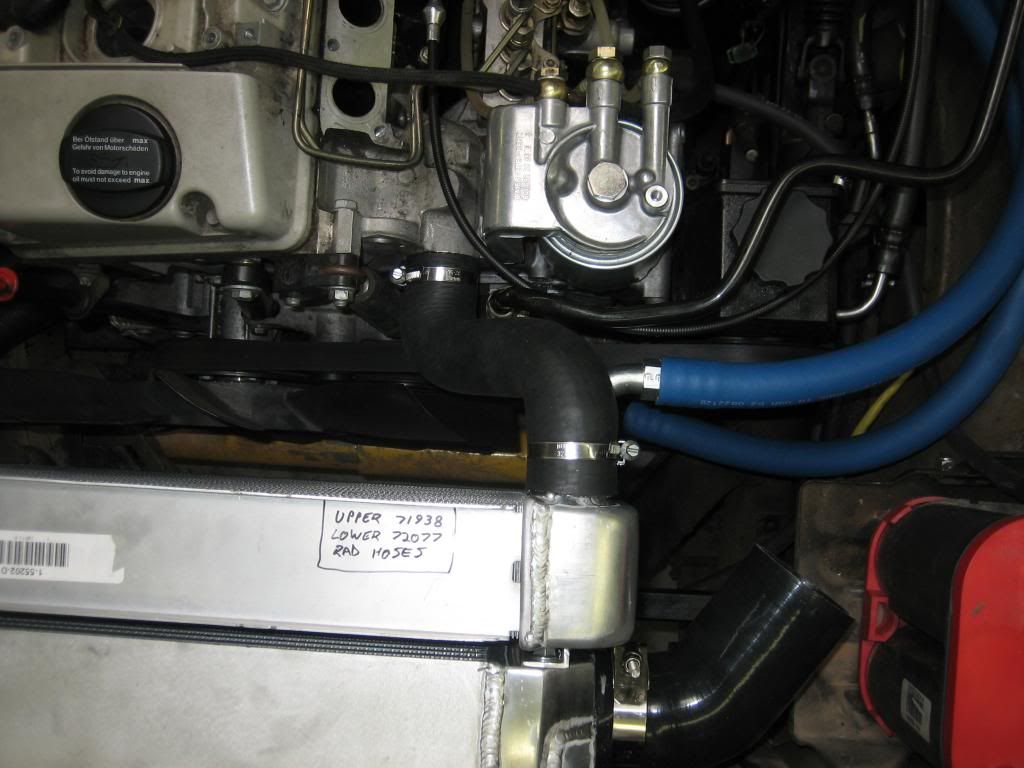
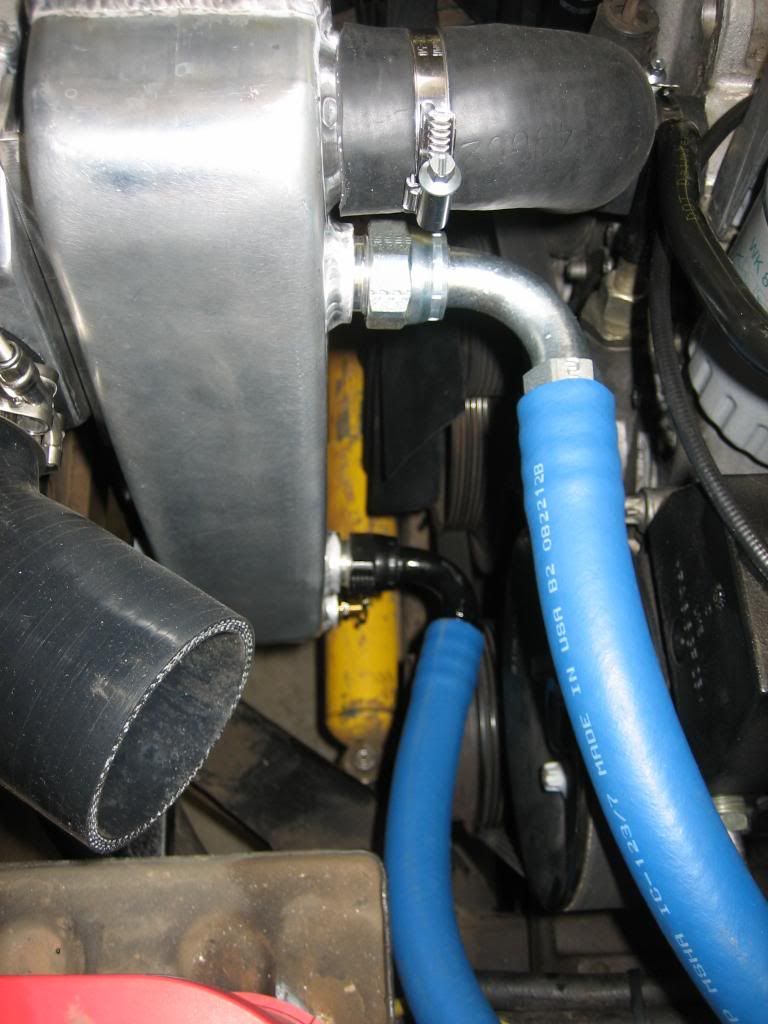
Installed pump, you can also see the massive oil cooler lines (2 blue ones) that Mercedes runs, I used a radiator with a built in engine oil cooler to hook it up to. The hoses were mockup hoses and could be crimped in the future...
http://i231.photobucket.com/albums/ee163/jakebeggy/4runner/mercruiser/044.jpg
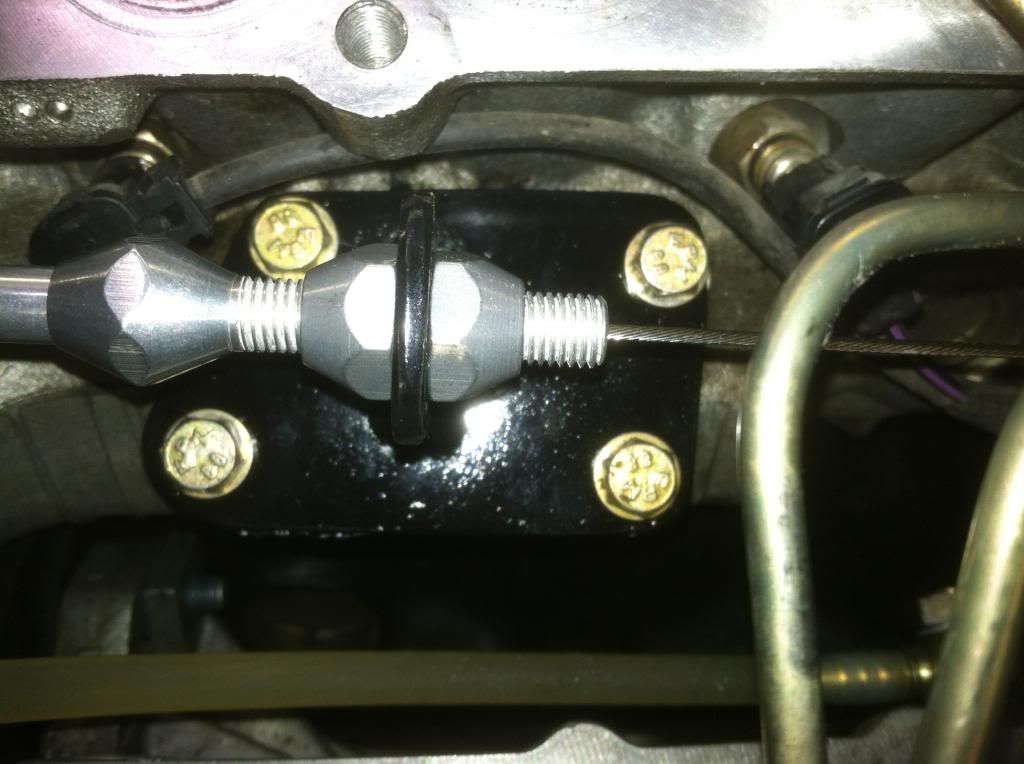
The turbo was fairly forgiving, except that the wastegate on it runs with vacuum instead of pressure. Mercedes runs the wastegate to vacuum and an the ecu changes vacuum to the wastegate to control boost. I had suggested changing the actuator for a boost actuated one, and informed the owner of this issue. We ran it with a boost gague and a no boost control- it seems with the smaller 603 pump max boost is not an issue. I'm not sure if he finished/changed anything with that setup.
The turbo was easily clocked or rotated.
http://i231.photobucket.com/albums/ee163/jakebeggy/4runner/mercruiser/049.jpg
http://i231.photobucket.com/albums/ee163/jakebeggy/4runner/mercruiser/062.jpg
http://i231.photobucket.com/albums/ee163/jakebeggy/4runner/mercruiser/IMG_1380.jpg
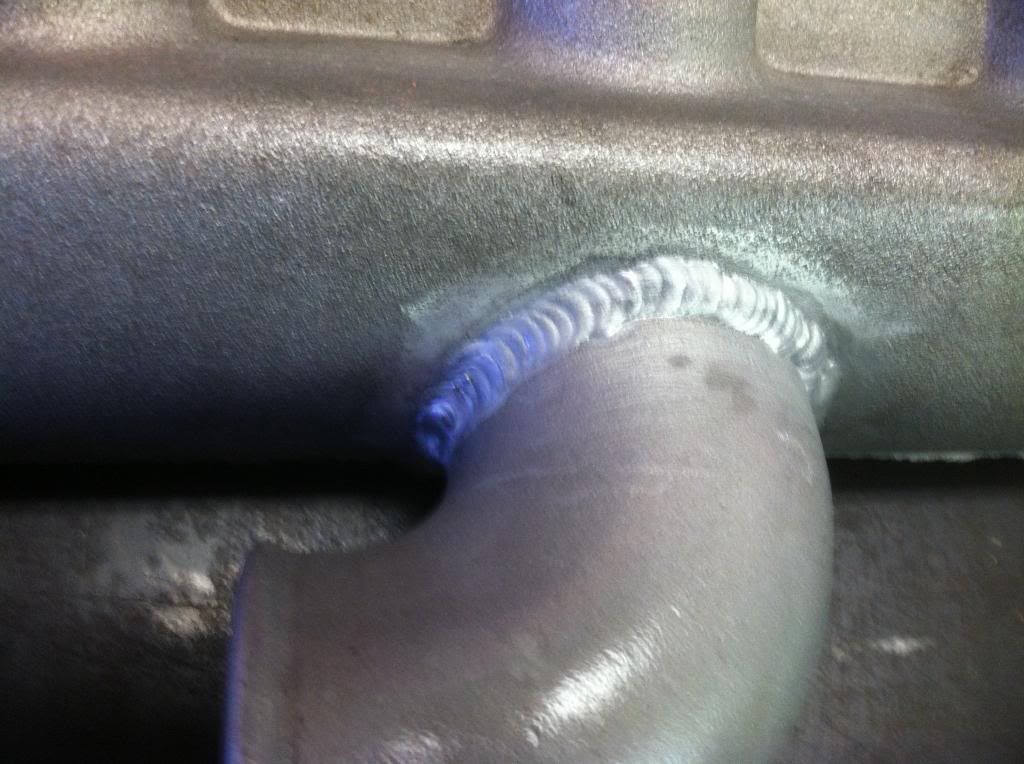
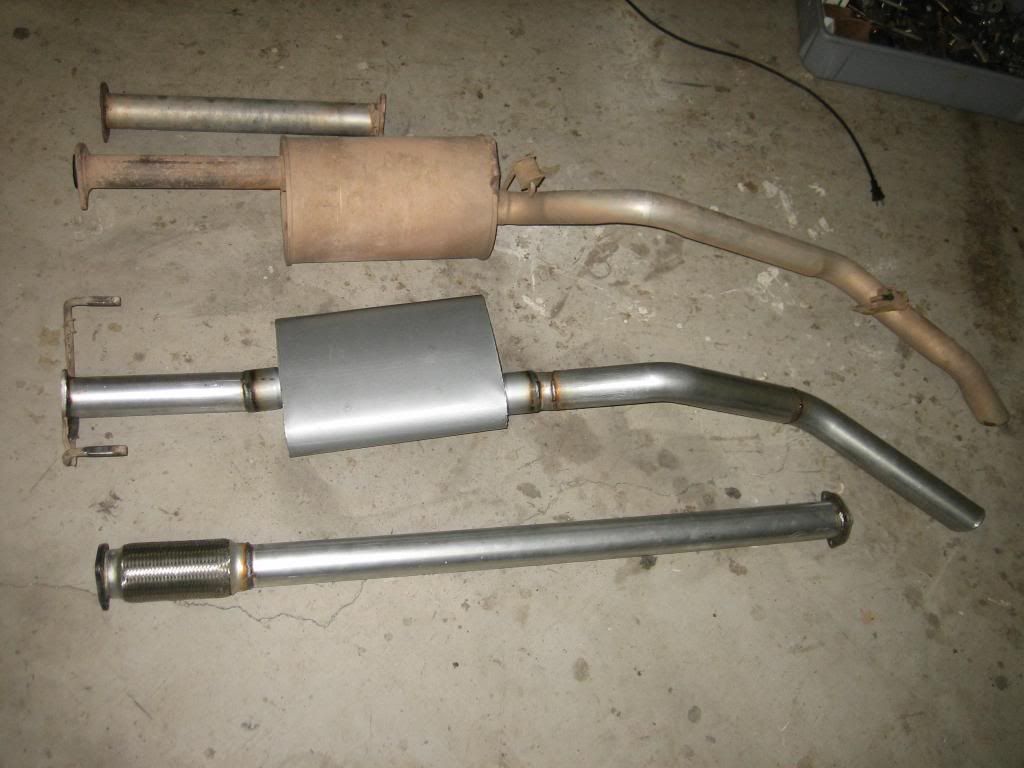
Exhaust had to switch sides due to transfer case and driveshaft:
http://i231.photobucket.com/albums/ee163/jakebeggy/4runner/mercruiser/IMG_1382.jpg
Finished exhaust next to modified stock one, I ran the flex coupler due to the soft Merc engine mounts. The engine does move around a lot more than a 2F engine. He's running an H55 5 speed in there and it's an 87 FJ60 so it has the late model trans mount. I must say somewhere, the 606 weighs MUCH less than the 2f, I would guess 250 lbs less, maybe more.
http://i231.photobucket.com/albums/ee163/jakebeggy/4runner/mercruiser/059.jpg
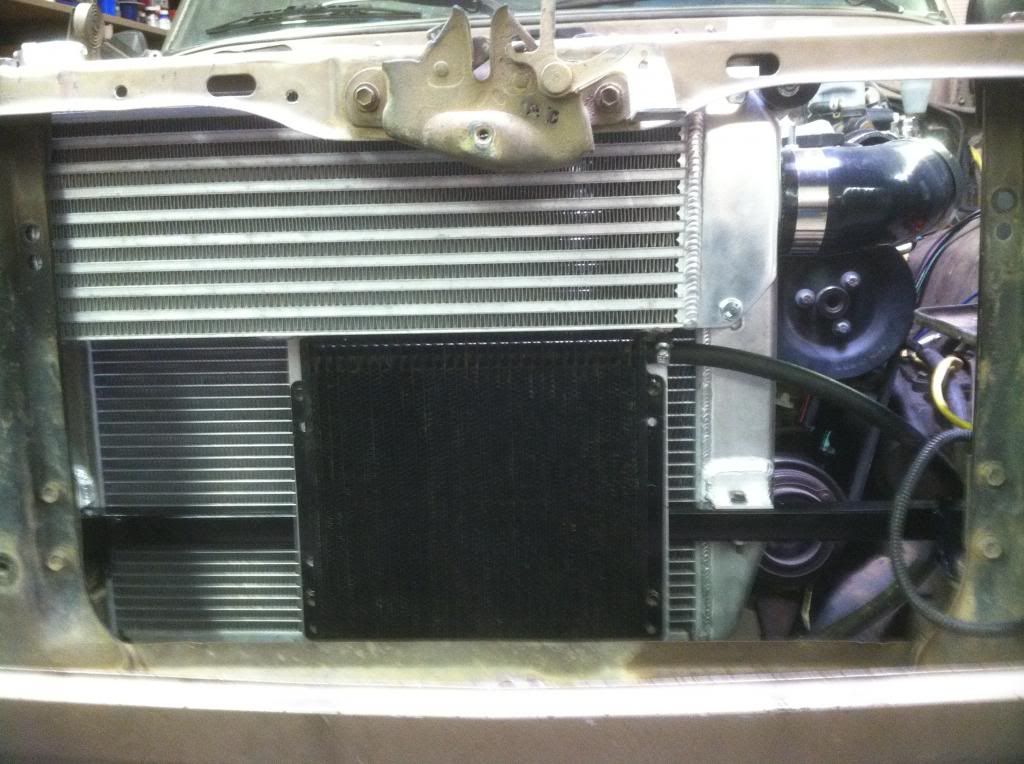
The stock 60 radiator was not going to work with the mechanical fan (notice lower outlet in center of fan), also the reason the radiator is mounted off to the side is because that's how Mercedes set their fan mounting. I know the pics are kind of scrambled here, sorry I pulled them off of 2 separate phones...
http://s231.photobucket.com/user/jakebeggy/media/4runner/mercruiser/IMG_1327.jpg.html
My name is Jake, I've been working on Land Cruisers for about 15 years now- always have and always will enjoy them. It seems recently they are mostly what I work on.
I did this conversion for a friend/customer about 1 year ago, he is still driving/wheeling it fairly often.
Finished product: Keep in mind throughout this that the owner runs a Euopean car shop, european auto tech, and he finished up a lot of the details. I was to get it running and driving and take care of the heavy work, welding, fabricating etc. Also the truck is used for hard wheeling so I don't have many pictures of it, he didn't care so much about form but certainly did function. Sorry for some of the pics, most are taken with a phone camera.
http://i231.photobucket.com/albums/ee163/jakebeggy/mercruiser.jpg
The engine was in his daily driver, a 2002 E300D I believe. It's an OM606 with the electronic injection pump, we ditched that pump for an OM603 mechanical one. It was rear ended and totaled one day, so through an insurance buyback we now have the 606.
http://i231.photobucket.com/albums/ee163/jakebeggy/4runner/mercruiser/IMG_1232.jpg
I'll get straight to the bad stuff. 4x4 labs made the adapter plate- the guy is clearly talented and has some great tools. He helped out at first then basically was really tough to get in touch with. It took a looong time to get the adapter plate, and spacer. His setup runs (in this order) 1: engine 2: stock flexplate 3: thick flywheel spacer 4: stock 2F flywheel all bolted together with long bolts that had to come from romania or something. It's an ok setup, and all seems well except this part:
The spacer that 4x4 labs sent is on the right, the one I paid a friend to recreat is on the left.
http://i231.photobucket.com/albums/ee163/jakebeggy/4runner/mercruiser/IMG_1210.jpg
The 4x4 labs guys CNC'd the spacer, it's machined out of aluminum. One would think CNC is great- except with this type of part the tolerances should be less than .0005; I was told by my machinist friend. There were variations of about .002 all over the spacer, and it was a dissimilar metal (aluminum loves to expand and contract under heating cycles) in a ultra critical part. So my machinist friend made a copy of the aluminum one out of steel with .0002 tolerance. (the one on the left in the above pic) I know his shop isn't pretty but he does good work and I couldn't see any variations in thickness after mic'ing it.
http://i231.photobucket.com/albums/...iser/34f8e790-3b7b-43fd-91d9-f1aad8030936.jpg
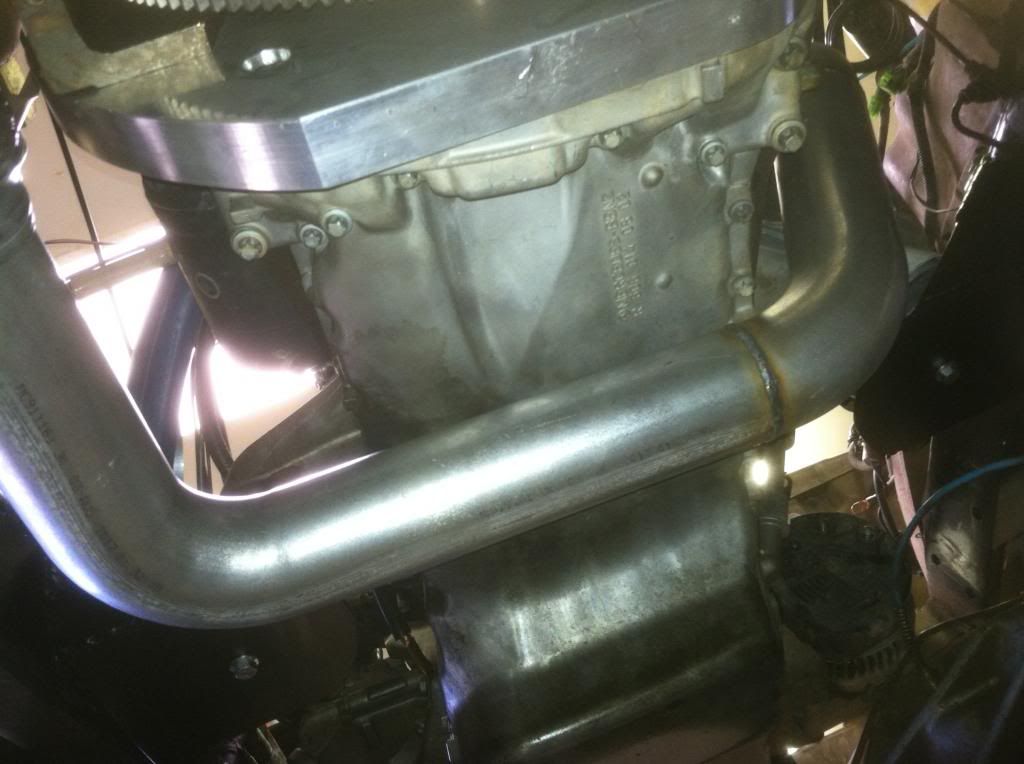
Another major issue with the OM606 is that the sump of the oil pan ends up directly above the front axle. "Just make a new oil pan", well that was my thought at first, but Mercedes used a cast aluminum pan, and about 1/3 of the pan is the lower half of the engine mounting. Also, it has a chain driven oil pump that hangs way down into the sump. I would think with enough $ one could run a jackshaft and relocate the pump to the back of the pan, and allow for a rear sump pan. The strength and accuracy of the rear mounting setup still has me scratching my head. I notched the pan and gained some additional clearance out of it.
http://i231.photobucket.com/albums/ee163/jakebeggy/4runner/mercruiser/IMG_1276.jpg
http://i231.photobucket.com/albums/ee163/jakebeggy/4runner/mercruiser/IMG_1278.jpg
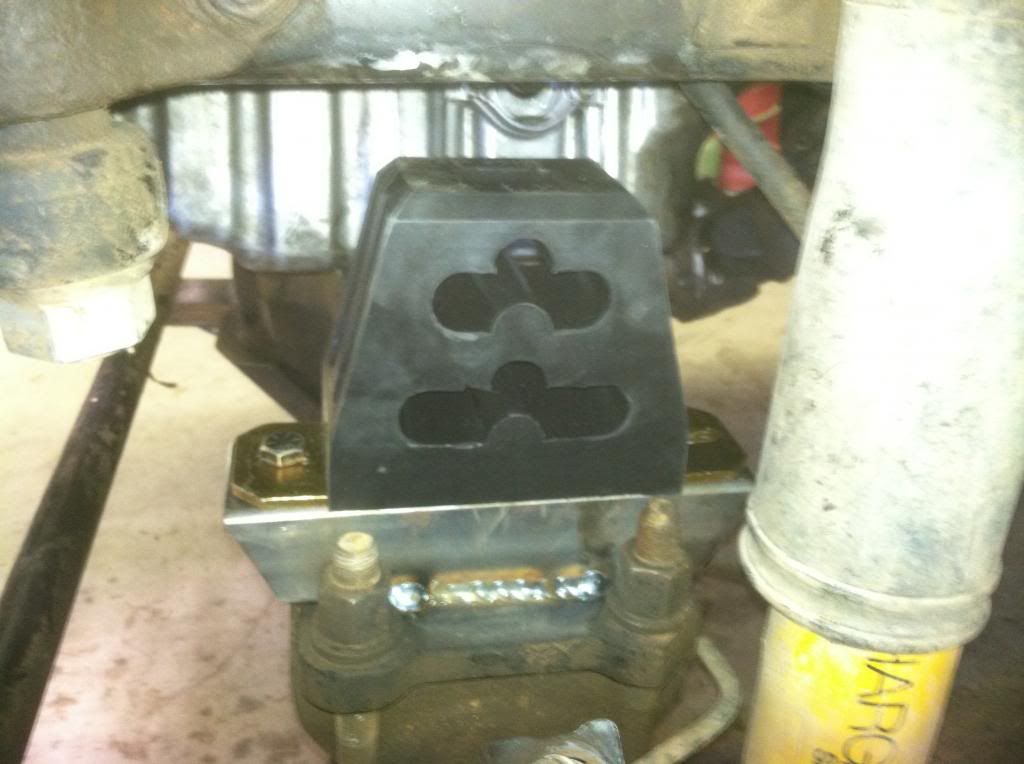
The engine mounts were actually fairly easy, we opted to use the liquid filled factory Merc mounts, which only had one 8mm x 1.25 bolt to mount, which should be under tension or compression but it's a far cry from the 2F 10 or 12mm bolt/stud... They haven't proven to be a problem after a year.
http://i231.photobucket.com/albums/ee163/jakebeggy/4runner/mercruiser/IMG_1263.jpg
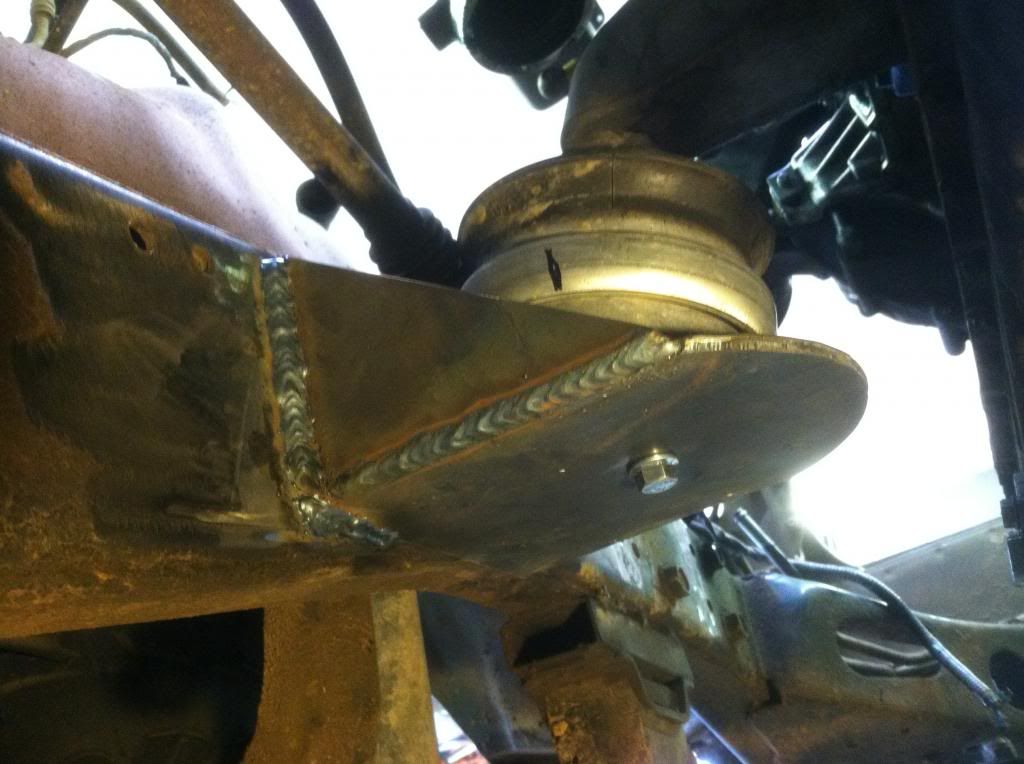
To make sure the oil pan wouldn't hit the axle, I used these thicker poly bump stops, it looks like it would ride terrible but actually worked out really well. He hit something really hard and blew one of these out and the pan survives:
http://i231.photobucket.com/albums/ee163/jakebeggy/4runner/mercruiser/IMG_1358.jpg
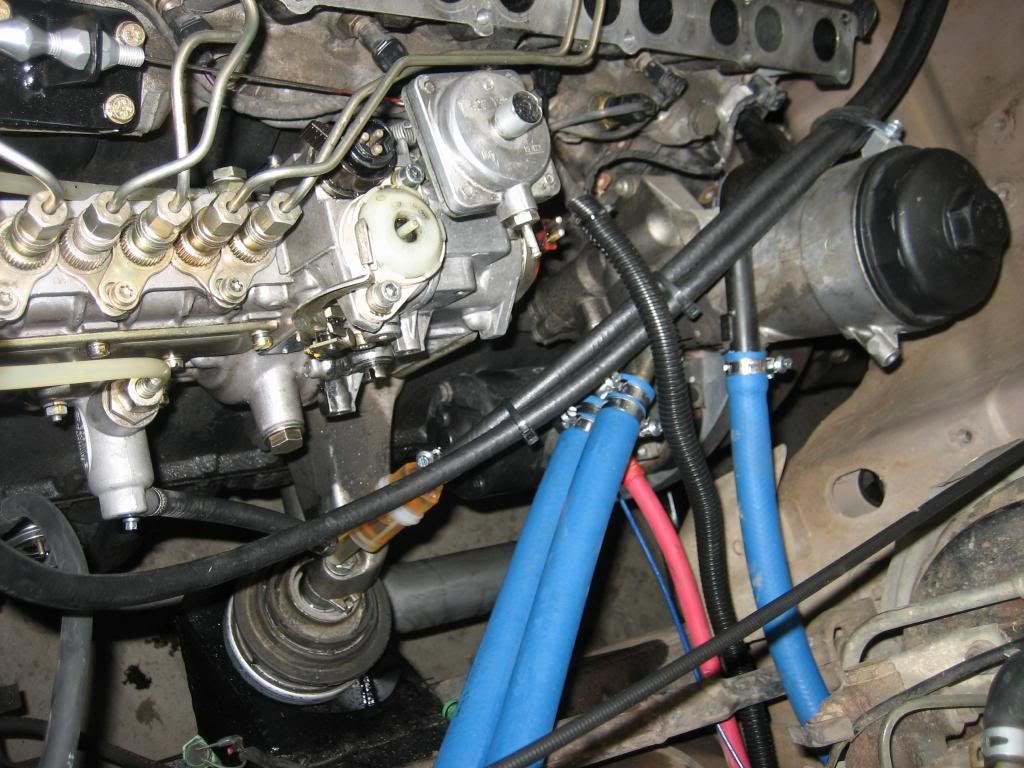
I don't have a lot of pics of the injection pump swap, but it was fairly straight forward. The only bad thing was someone dropped the pump or shipping damage- the rack had become detached from the emitter control cylinders. I didn't find this out until I tried to start it and bleeding was impossible. All the cylinders but 1 were disconnected and fuel was shut off. Anyways, figured it out eventually.
http://i231.photobucket.com/albums/ee163/jakebeggy/4runner/mercruiser/001.jpg
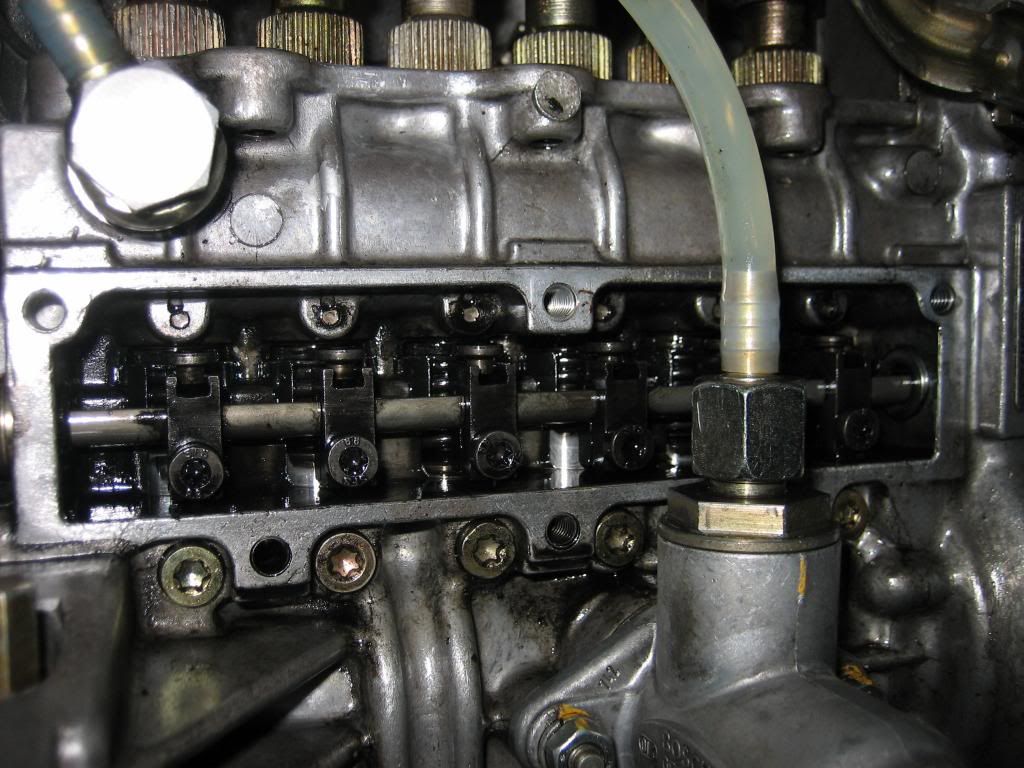
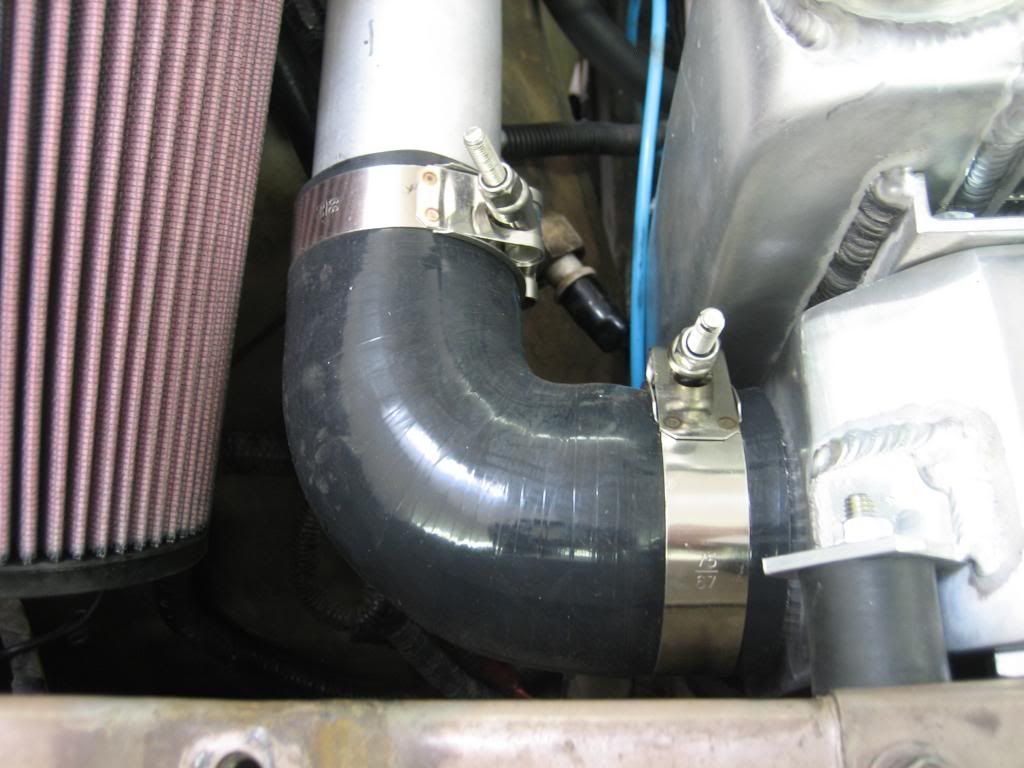
Clearance is tight to the stock intake, the 603 has more of a log style than the 606, and the 606 pump doesn't have the ALDA on it:
http://i231.photobucket.com/albums/ee163/jakebeggy/4runner/mercruiser/052.jpg
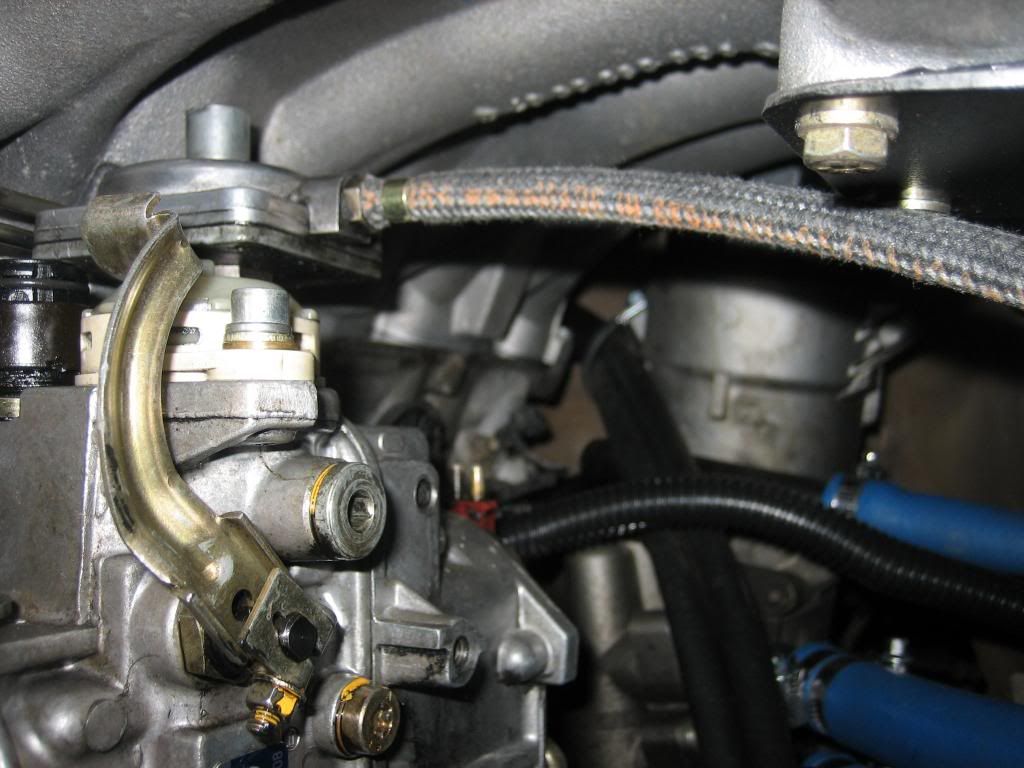
Installed pump, you can also see the massive oil cooler lines (2 blue ones) that Mercedes runs, I used a radiator with a built in engine oil cooler to hook it up to. The hoses were mockup hoses and could be crimped in the future...
http://i231.photobucket.com/albums/ee163/jakebeggy/4runner/mercruiser/044.jpg
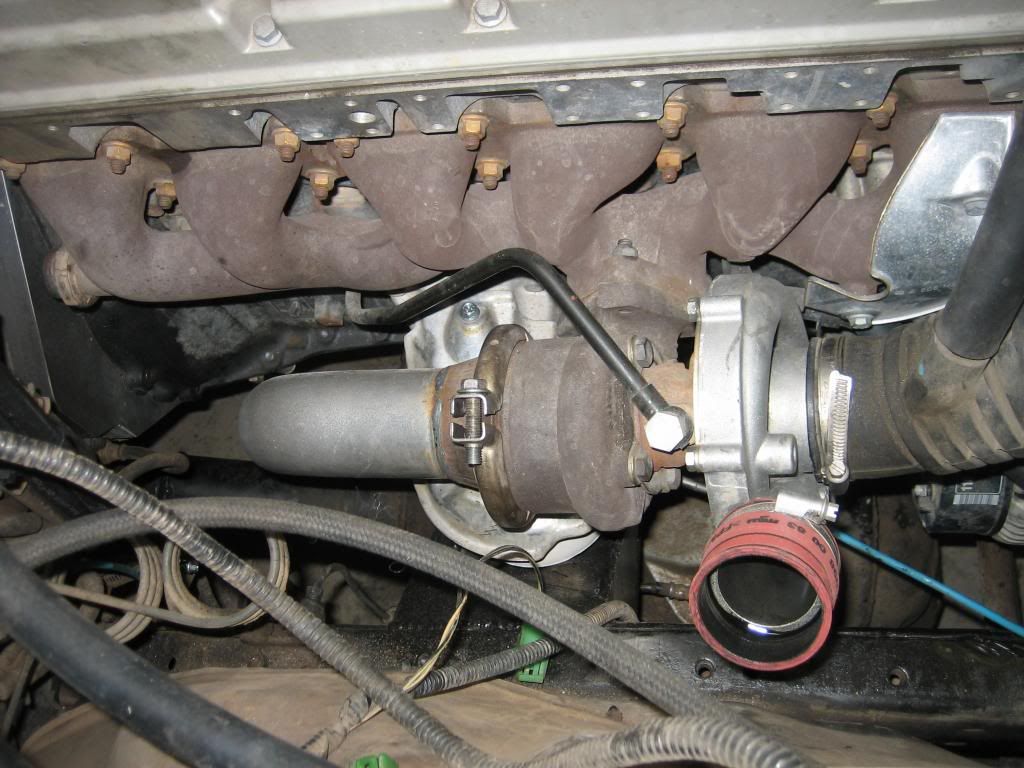
The turbo was fairly forgiving, except that the wastegate on it runs with vacuum instead of pressure. Mercedes runs the wastegate to vacuum and an the ecu changes vacuum to the wastegate to control boost. I had suggested changing the actuator for a boost actuated one, and informed the owner of this issue. We ran it with a boost gague and a no boost control- it seems with the smaller 603 pump max boost is not an issue. I'm not sure if he finished/changed anything with that setup.
The turbo was easily clocked or rotated.
http://i231.photobucket.com/albums/ee163/jakebeggy/4runner/mercruiser/049.jpg
http://i231.photobucket.com/albums/ee163/jakebeggy/4runner/mercruiser/062.jpg
http://i231.photobucket.com/albums/ee163/jakebeggy/4runner/mercruiser/IMG_1380.jpg
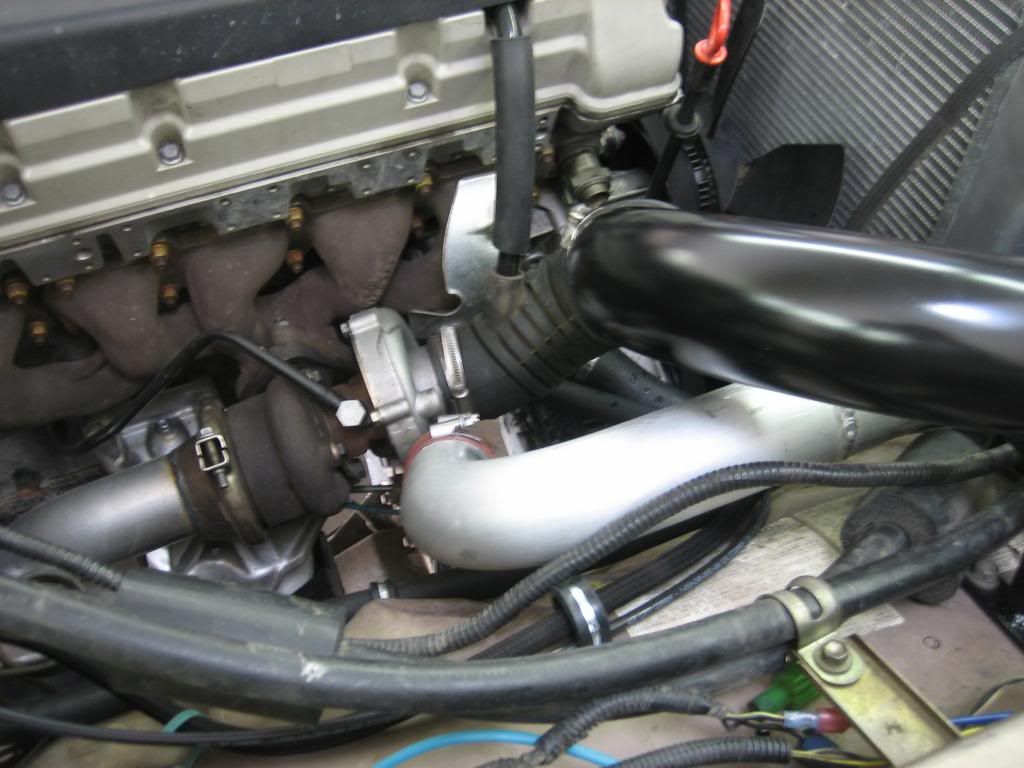
Exhaust had to switch sides due to transfer case and driveshaft:
http://i231.photobucket.com/albums/ee163/jakebeggy/4runner/mercruiser/IMG_1382.jpg
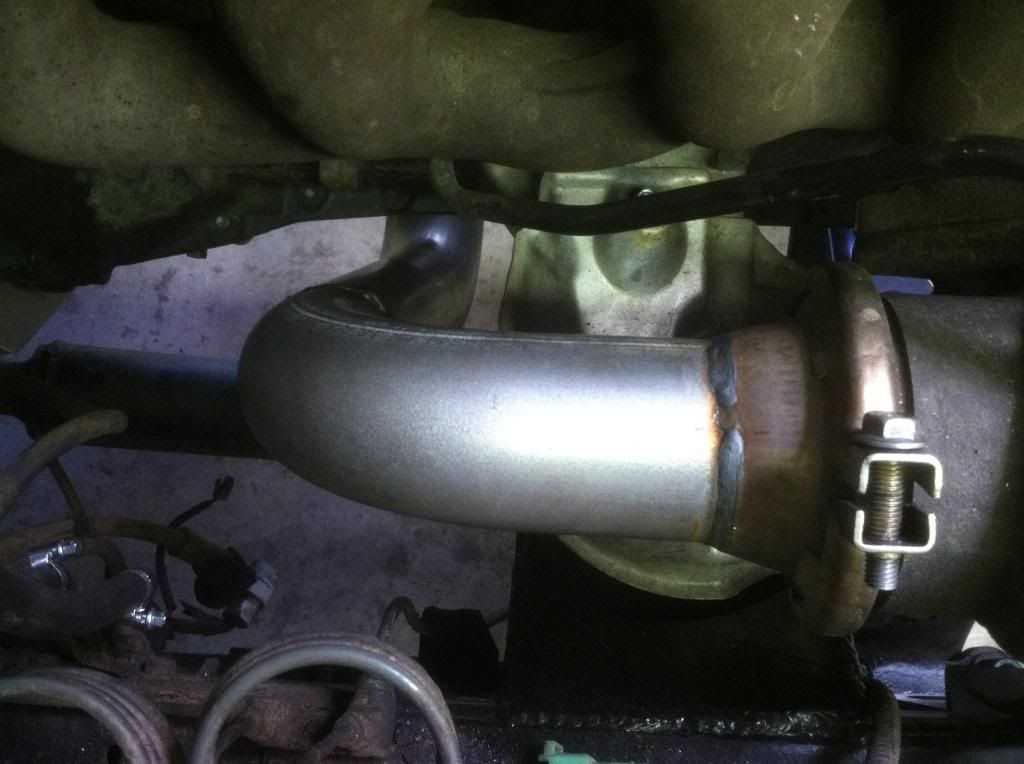
Finished exhaust next to modified stock one, I ran the flex coupler due to the soft Merc engine mounts. The engine does move around a lot more than a 2F engine. He's running an H55 5 speed in there and it's an 87 FJ60 so it has the late model trans mount. I must say somewhere, the 606 weighs MUCH less than the 2f, I would guess 250 lbs less, maybe more.
http://i231.photobucket.com/albums/ee163/jakebeggy/4runner/mercruiser/059.jpg
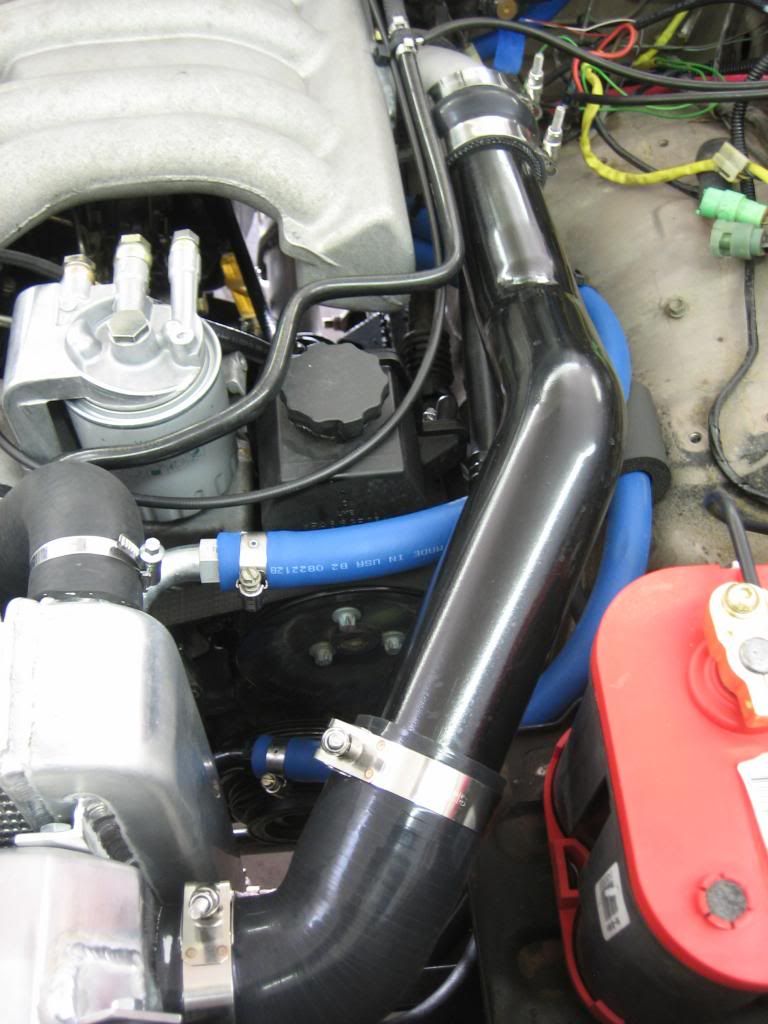
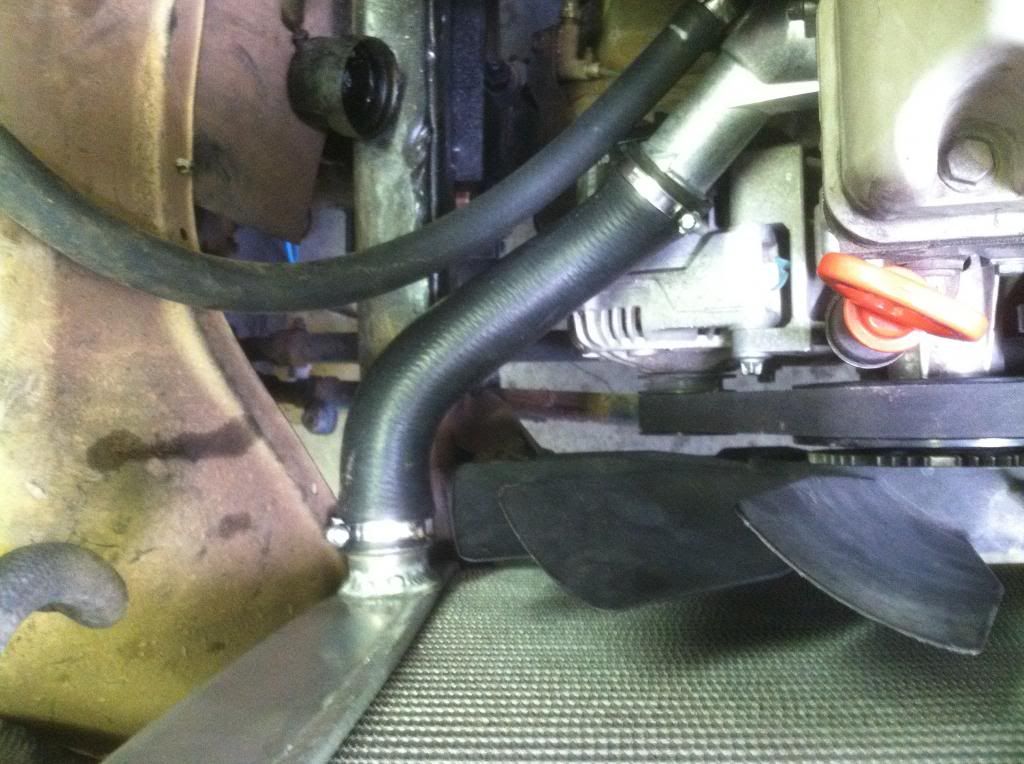
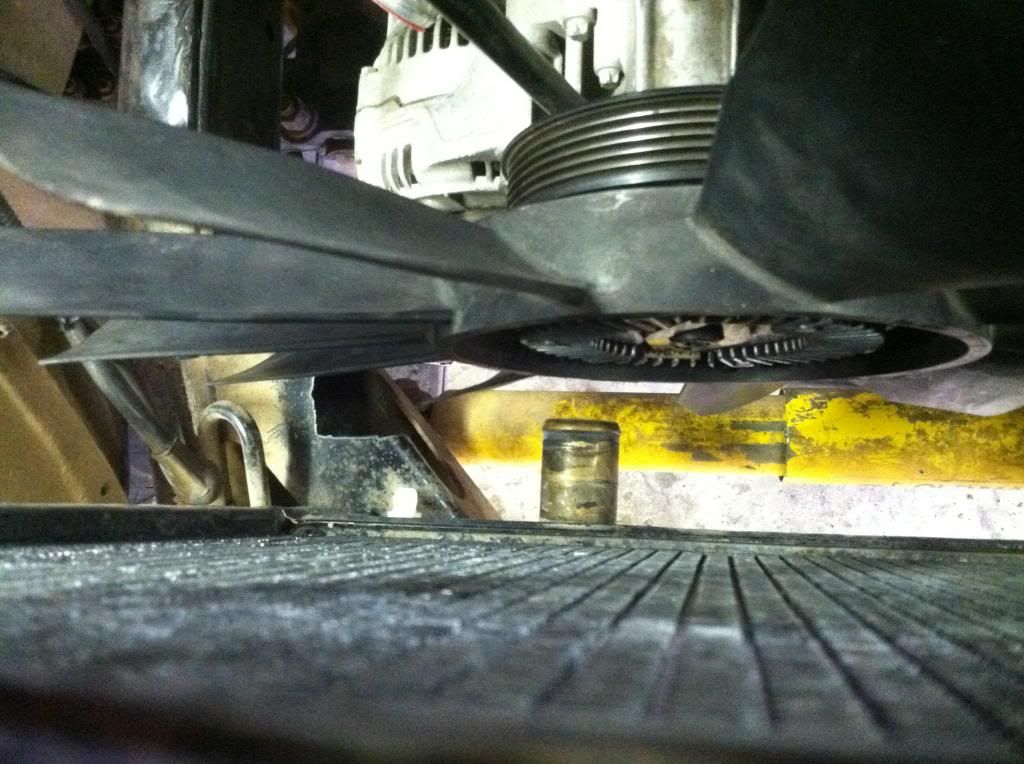
The stock 60 radiator was not going to work with the mechanical fan (notice lower outlet in center of fan), also the reason the radiator is mounted off to the side is because that's how Mercedes set their fan mounting. I know the pics are kind of scrambled here, sorry I pulled them off of 2 separate phones...
http://s231.photobucket.com/user/jakebeggy/media/4runner/mercruiser/IMG_1327.jpg.html
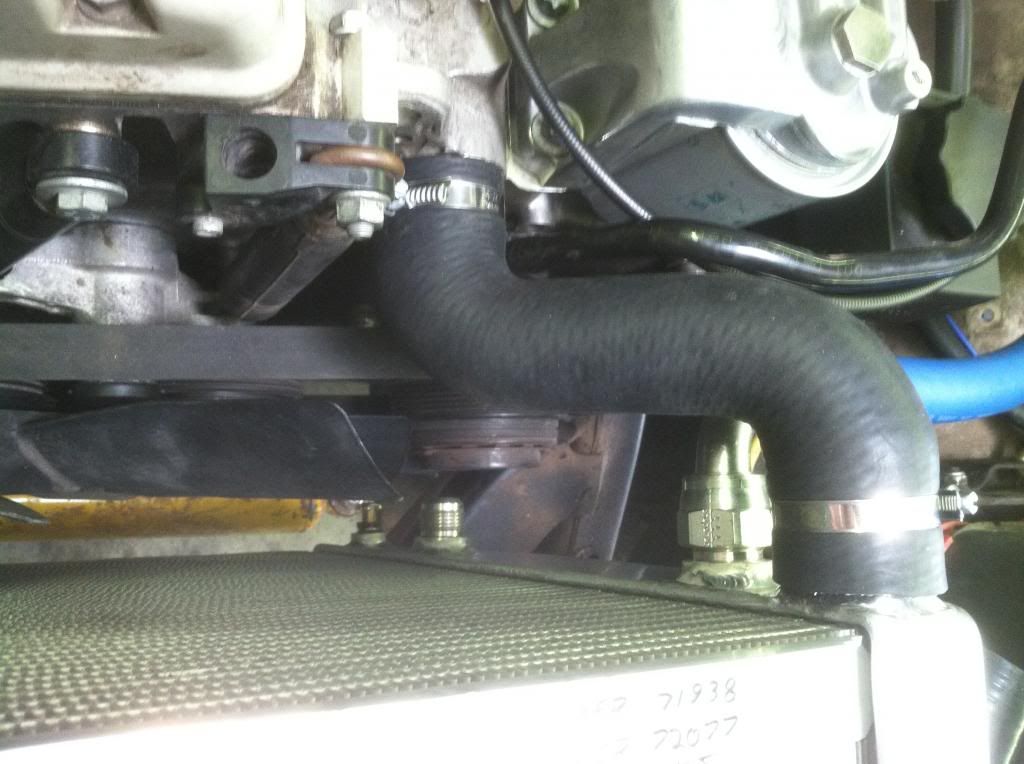
 Note the oil cooler using 1/2" hose, the Germans love big oil coolers, and always make good stuff