1987 HJ-61 - New Truck (1 Viewer)

This site may earn a commission from merchant affiliate
links, including eBay, Amazon, Skimlinks, and others.

Joined
Oct 24, 2007
Threads
92
Messages
787
Location
switzerland
Website
picasaweb.google.com
Couple of photos from my newest family addition, wife approval on this one! This thread will document the state I purchased it in, and the repairs and mods I do.

Bought it as the car I'll keep for the rest of my life. I'm the 3rd owner, it was used as a travel vehicle from the 2 POs and always stored inside. It has primarily highway miles, no leaks, no body rust (seams need to be brushed & sealed), 270K kms, well maintained, pretty much stock with OEM suspension and a trick stainless steel bash bar, but internal frame rust I'll be dealing with over the winter (pulverize, extract, apply stop rust chemicals).

Needs
- c-channels sometime soon (winter project)

Getting
- new brake discs, pads, lines, inner axel seals, all gaskets & bearings up front (OEM)
- new bump stop on the rear
- rear exhaust (got it new aftermarket online from EBay in Germany, for roughly $300 shipped instead of $900 OEM. Going 3" stainless in the future...)
- inspection this week
- ready hopefully in time for camping this weekend

Wants
- intercooler
- air conditioning
- new tires and wheels (has 15" rims w/30" tires), want 16" X 6" with 33" tires
- hooks for ISO baby seat fixation

More pictures when I get it back from the garage - outsourcing the initial work as the wife and 3 kids (5, 2, & .5 years) demand my time.
 
Last edited:
test is above, pictures here
image-2037639650.jpg
image-1071775701.jpg
image-3426998880.jpg
image-10593541.jpg
 
Last edited:
Beautiful - congrats on the rig!
 
Those wheels sort of look stock, so why are there spacers on the front axles?
 
Wow, that is a nice looking truck and a turbo diesel to boot eh! Looking forward to seeing the pics as you move forward on it.
 
Whoa!! :cool:
 
Now that's purdy. Congratulations. I approve also.

My one question. Is that bullbat only bolted to the bottom bumper horn. That doesn't look strong from this point.

Looks great.

Thanks Cody Sent from my iPhone using IH8MUD
 
I think the wheel spacers are there because those look like 4runner calipers ?
 
Brush guard is mounted with points below & abo e bumper (you csn see the bolts for the top bracket in the pix).

It's removable via 2 bolts up top, hinges on bottom, as it is not legal to have one of these in Switzerland. Why, I do not know.

Looking at other pictures I believe those calipwrs are stock, and the spacers were for wider tires& rims with different backspacing. Any harm in running them with the stock wheels?
 
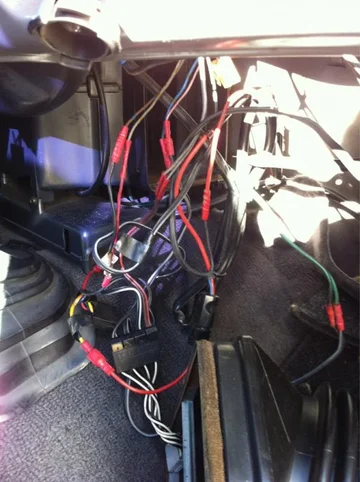
Working on installing the AC, but first I have to clean up the work of 2 POs who were cable rats!
image-488327947.jpg
image-2215562768.jpg
24/12 volt transformer must be moved from under glove box so AC cooler unit will fit, and various old splices will be redone.

The diesel-powered block heater 12volt will have to be slightly shifted for the AC lines to cooler box.

All the 24 volt leads from the battery will be moved to the power distribution box (which is fused, and included on these trucks for accessories why do POs never figure this out?).

The 12 volt lead from the battey will be rewired to come off the transformer (!#%!!! PO).

12 volt cigarette lighter will be moved to center console.

OEM (rear indicator?) fog light switch will be wired to activate the front fog lights.

Very happy to find the AC unit harness plugs where I need them!

Etc..

image-1668153451.jpg
image-488327947.jpg
image-2215562768.jpg
image-1668153451.jpg
 
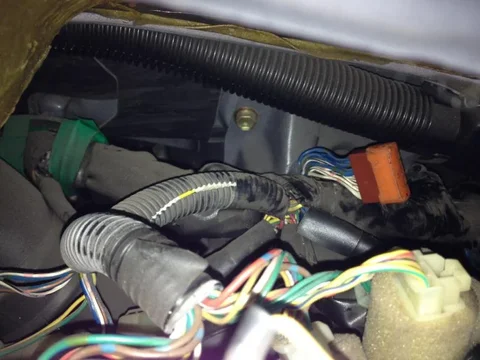
AC switch harness plug is not easy to locate! Does snyone have an idea from where it originates on the harness? I've looked behind the guage cluster and found nothing!

image-2834397838.jpg

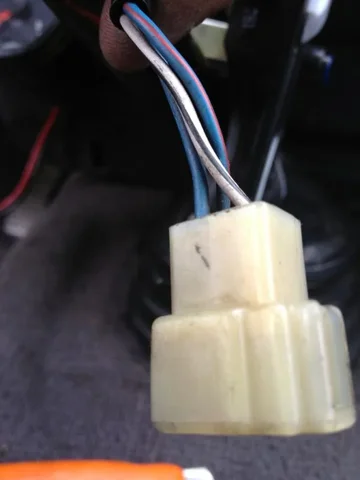
The switch is a triple plug, fits the cigarette lighter plug perfectly.

image-619061450.jpg

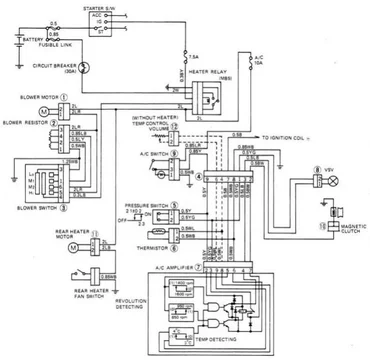
The wiring diagram that seems to match the best is this one, although the switch has a blue where the should be a yellow.

Where is that harness plug hiding???

image-2834397838.jpg


image-619061450.jpg
 
Found it! It originates from the harness over the glove box, along with the fan control lead. It was hidden, tucked in behind the ductwork.

View attachment 741496

Plugged it into the switch, and hear a relay switch on the cooler box when I power it on so I am happy. Learned how to remove the dashcap in the process, and now have good access to the spaghetti stereo job which is next on my list.

After the interior is back together, I'll be going under the hood for the compressor, dryer, radiator, and hoses. I'm lacking the parts for the idle-up, but have a hand-throttle I can use to keep the bottom end RPMs up.
 
My truck at the in-laws for the first vacation trip of the year.

image-2095322685.jpg

Found the OEM transformer in the left front fender - will be checking for 12v at the stereo next time I open up the dash. The PO had installed a second transformer for the pre-heater, and tapped 12v off one battery direct for the stereo. Gotta love POs.

image-671193680.jpg

image-2095322685.jpg


image-671193680.jpg
 
Very nice, very clean. I love the retro graphics as well!
 

Users who are viewing this thread

Back
Top Bottom