



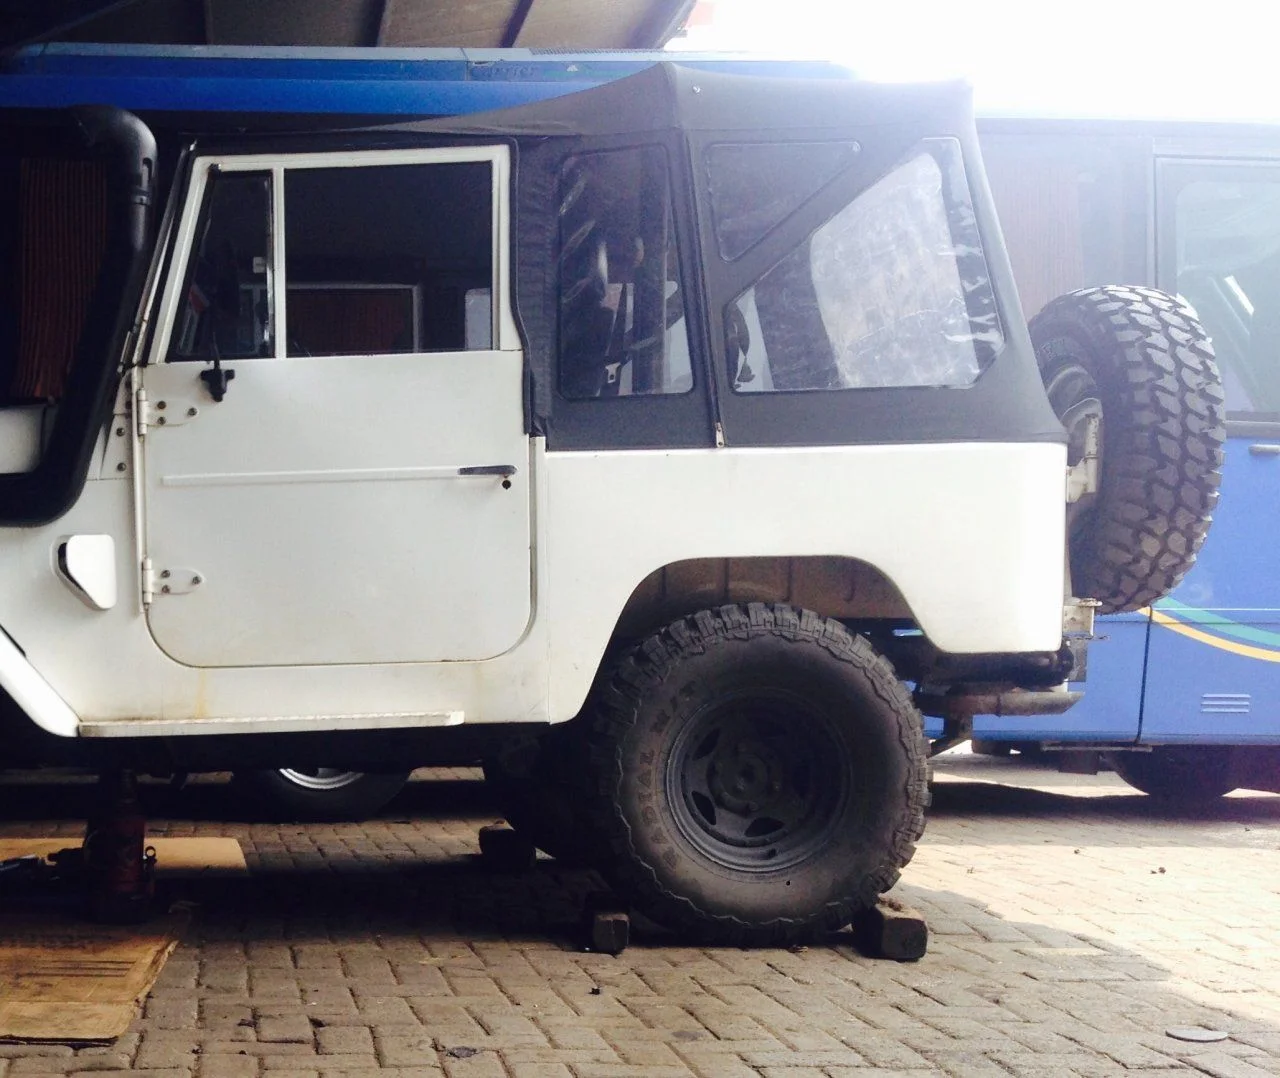
After doing extensive research here and reading many post I can't seem to find any thought or photos on a rear stock spring flip other than those who installed OME 4" or equivalent. I would like to flip my rear springs to move the axle towards the rear for a more balanced look.
My current springs are military wrap on both ends. I did AAL (full length) to gain more heigh on both axles. I gained a little over 1". I recently posted a question for feed back on if I should AAL or extend shackles to gain more height. Decided on the AAL and am very pleased. It does ride a bit more rough (it is a 40 year old LC tho) and call me crazy but my LC runs much better. I can climb hills in 3rd were before it was 2nd gear only. The cruiser also handles corners WAY better. Suppose my old leafs were worn out. Planning a new leaf pack next year but this Will do.
Also plan on adding extended shackles in the rear to gain another 1" to balance out the stance. Currently running 32x10.50 wheels and clear fine. Just want that rear axle moved back to fill out the wheel well.
The photo was taken before the front AAL were added. Any concerns regarding the driveshaft? Other concerns I should consider? Anyone with photos please post so I can get an idea on what it may look like before I full the springs again. I know some say move the hangers but rather not cut and weld. Not lazy but would like a more simple alternative
View attachment 1251801
My current springs are military wrap on both ends. I did AAL (full length) to gain more heigh on both axles. I gained a little over 1". I recently posted a question for feed back on if I should AAL or extend shackles to gain more height. Decided on the AAL and am very pleased. It does ride a bit more rough (it is a 40 year old LC tho) and call me crazy but my LC runs much better. I can climb hills in 3rd were before it was 2nd gear only. The cruiser also handles corners WAY better. Suppose my old leafs were worn out. Planning a new leaf pack next year but this Will do.
Also plan on adding extended shackles in the rear to gain another 1" to balance out the stance. Currently running 32x10.50 wheels and clear fine. Just want that rear axle moved back to fill out the wheel well.
The photo was taken before the front AAL were added. Any concerns regarding the driveshaft? Other concerns I should consider? Anyone with photos please post so I can get an idea on what it may look like before I full the springs again. I know some say move the hangers but rather not cut and weld. Not lazy but would like a more simple alternative
View attachment 1251801


