
-
North American Clubhouses - East RegionCA.ON- SOTEC CA.ON- Upper Canada Land Cruisers CA.QC- Club TORQ CA.QC- Quebec Cruisers AL- DixieLand Cruisers AL- Hot South Cruisers FL- Florida Land Cruiser Association FL- Northwest Florida Toyota 4WD FL- Tampa Bay Land Cruiser Association GA- Pavement Pounders GA- Georgia Cruisers GA/FL/AL- Red Hills Land Cruiser Club GA- YOTA IL- Windy City Land Cruisers IN- Hoosier Cruisers IN- Indiana Land Cruisers KY- Kentucky Landcruiser MA/NH- Yankee Toys MI- Lake Michigan Land Cruisers MS- CottonLand Cruisers NC- Olde North State Cruisers NJ- Garden State Land Cruisers NY/CT/MA- FJNortheasters NY- Gotham City Land Cruisers OH- The Buckeye Birfield Syndicate PA- Keystone Cruisers PA- Steel City Land Cruiser Club SC: Land Cruisers: Charleston SC- Palmetto State Land Cruiser Association SC- Upstate Cruisers SC- Swamp Fox Land Cruisers SC- Low Country Land Cruisers TN- Appalachia Cruisers TN- Bluff City Cruisers TN- STLCA VA- Bay to Blue Ridge Cruisers VA- COVA CRUISERS VA/DC/MD- Capital Land Cruiser Club VA/NC- Mid-Atlantic TLCA VA- Star City Land Cruisers VT/NH/MA/ME Acadian Overlanders WI- Land Cruiser Legends WV- Mountaineer Cruisers
-
North American Clubhouses - Central RegionCA.AB- Oil Country Cruisers CA.AB- Rocky Mountain Land Cruiser Association CA.AB- Toyota Ghost Wheelers AR- Razorback Land Cruisers AR/MO- Ozark Mountain Cruisers CO- BookCliff Cruisers CO- Colorado Land Cruisers CO- Derailed Cruisers CO- Rising Sun 4WD Club CO/WY- Horsetooth 4 Wheelers Cruiser Club IA- Tall Corn Cruisers KS/MO- Tornado Alley Cruisers LA- Bayou State Land Cruisers LA- Louisiana Land Krewesers MO- Gateway Cruisers MT- 406 Cruisers MT- Big Sky Cruisers NE- Flat Land Cruisers NM- High Desert Cruisers OK- Green Country Cruisers SD- Dakota Territory Cruisers TX- Alamo City Land Cruisers TX- Bayou City Land Cruisers TX- Lone Star Land Cruisers TX- Lone Star Land Cruisers - Austin Chapter TX- The White Trash of the Elwood Chapter TX- Toyota Trail Riders
-
North American Clubhouses - West RegionCA.BC- Coastal Cruisers CA.BC- Okanagan-Similkameen Land Cruisers CA.BC- Peace Canyon Toyota Swamp Donkeys CA.BC- Calgary Chapter: Swamp Donkeys
CA.BC- Vancouver Island Cruisers AZ- Copper State Cruisers CA- Beach-n-Toys CA- Central Coast Land Cruisers CA- Central Valley Crawlers CA- Gold Country Cruisers CA- Inland Empire Cruisers CA- L.A. County Trailcrew CA- Mountain Transit Authority CA- Pacific Mountain Cruisers CA- San Diego Cruisers CA - Santa Cruz Land Cruisers CA- SoCal 80's CA- Southern California Land Cruisers CA- Toyotally Awesome Cruisers HI- Hawaiian Island Land Cruisers ID- Treasure Valley Land Cruisers NV- Battle Born Cruisers of Northern Nevada NV- Southern Nevada Land Cruisers OR/CA- Jefferson State Cruisers OR- Cascade Cruisers OR- Central Oregon Cruisers OR- Portland Metro Cruisers UT- Red Rock Cruiser Club UT- Wasatch Cruisers WA- Central Washington Cruisers WA- North Sound Cruisers WA- South Sound Cruisers WA- Spokane Land Cruisers
Navigation
Install the app
How to install the app on iOS
Follow along with the video below to see how to install our site as a web app on your home screen.
Note: This feature may not be available in some browsers.
More options
Style variation
You are using an out of date browser. It may not display this or other websites correctly.
You should upgrade or use an alternative browser.
You should upgrade or use an alternative browser.
1997 fzj80
- Thread starter sdnative
- Start date
This site may earn a commission from merchant affiliate
links, including eBay, Amazon, Skimlinks, and others.
Wow...lots of progress. Rig looks freakin great! 
- Thread starter
- #63
Eric, the rig is looking great! Glad to see you are already putting those sliders and armor to use. Great pics, thanks for sharing.
Thanks. Those sliders saved my bacon a few times that day.
Wow...lots of progress. Rig looks freakin great!
Thanks!
- Joined
- Sep 26, 2011
- Threads
- 7
- Messages
- 57
Old thread but would like to say nice build.


I like the 12v auxiliary plugs. Was it some kind of kit you bought or did you just buy the pieces and rig it up yourself?
- Thread starter
- #68
Your build is turning out really nice!!
Keep up the good work
Where did you get the cup holder and how much $
Thanks!
The cup holder can be purchased here:
LAND ROVER PARTS - GENUINE CUP HOLDER KIT - BEIGE DISCOVERY
Usually people buy the set of two and sell one. That is how I got mine.
There is a little nipple on the bottom that I had to grind off to get it to sit flush. It's not perfectly level, but seems to work fine. Maybe I'll add a small bit of rubber spacer to level it out.
I like the 12v auxiliary plugs. Was it some kind of kit you bought or did you just buy the pieces and rig it up yourself?
The plugs are from West Marine. They come single, double or triple and include a surface mount plate (which I did not use) that works great as a template for scribing the circles to cut the holes. Just be aware of what is behind the console because you will need a couple of inches deep of space.
WEST MARINE 12V Flush-Mount Receptacles & Plugs at West Marine
I don't have the model of fuse holder handy, but it is just a positive bus setup. I connected the negative from the outlets to chassis under the console.
Last edited:
- Thread starter
- #69
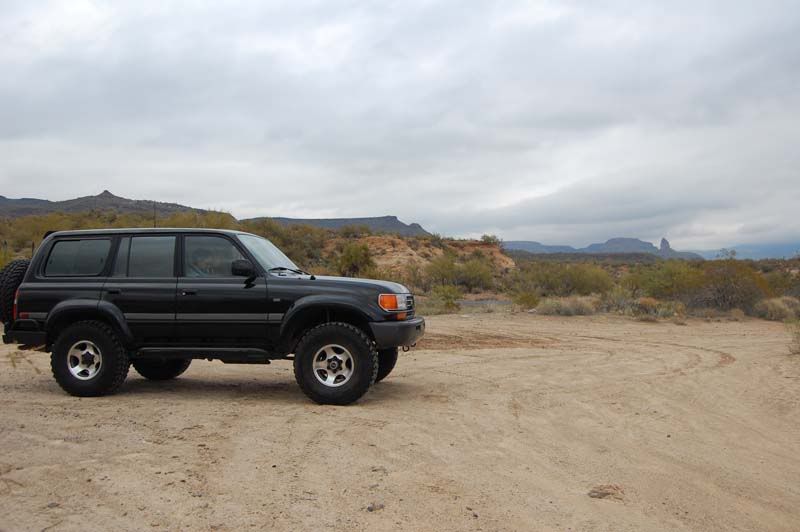
Just took a road trip in the cruiser. Roughly 1500 miles and 5 days. Went to Phoenix, Flagstaff, Grand Canyon, Hoover Dam and Las Vegas. The truck performed flawlessly.
http://i117.photobucket.com/albums/o67/cheme02/1997_FZJ80/DSC_5680.jpg
http://i117.photobucket.com/albums/o67/cheme02/1997_FZJ80/DSC_5905.jpg
http://i117.photobucket.com/albums/o67/cheme02/1997_FZJ80/IMG_0856.jpg
http://i117.photobucket.com/albums/o67/cheme02/1997_FZJ80/DSC_5680.jpg
http://i117.photobucket.com/albums/o67/cheme02/1997_FZJ80/DSC_5905.jpg

http://i117.photobucket.com/albums/o67/cheme02/1997_FZJ80/IMG_0856.jpg

Last edited:
 What's left to be done?
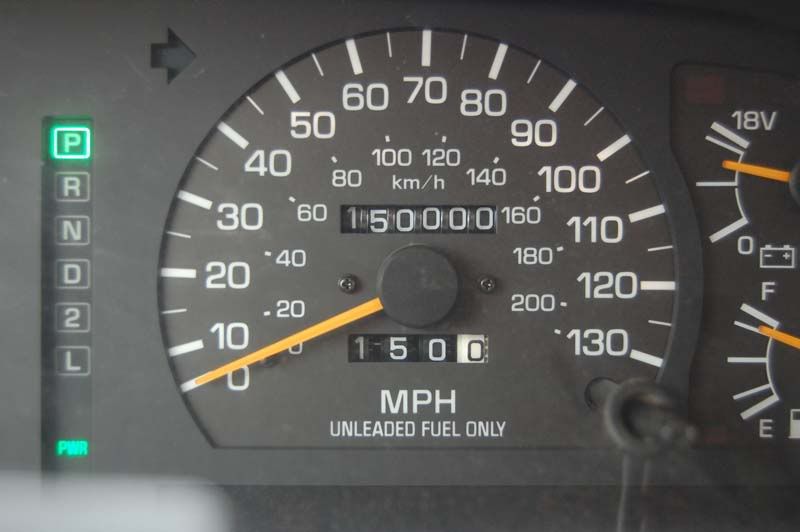
Your truck looks freakin' rad!!!!!! 150k miles!!!!! And 150 miles on trip odometer to match??? Nice!!!! Thanks for the cup holder link. Anyone out there interested in a cup holder purchase??? Buy two and sell the other one?????
Thanks for the links Sdnative
I would be willing to take the 2nd cup holder. Let me know how you want to work it. I buy or you buy and we can split the total cost
Let me know
Frank
Your truck looks freakin' rad!!!!!! 150k miles!!!!! And 150 miles on trip odometer to match??? Nice!!!! Thanks for the cup holder link. Anyone out there interested in a cup holder purchase??? Buy two and sell the other one?????
I would be willing to take the 2nd cup holder. Let me know how you want to work it. I buy or you buy and we can split the total cost
Let me know
Frank
- Thread starter
- #74
Picked up a 4x4 Labs Interior Carrier from Cruisercouple and installed it today. Very stout, but doesn't have the supports that use the 3rd row seat floor bracket holes like the Hannas do. Should be fine, just need to keep an eye on the stress points.


Perfect fit next to your cargo box! Were you that good or just that lucky?
Sent from my iPhone using IH8MUD App
Sent from my iPhone using IH8MUD App
- Thread starter
- #76
haha. I wish I was that good. Actually I had to move the box over a couple of inches so the carrier would fit. The downside is the box is now slightly in the area where the DS 3rd row seat would go. Previously I had the option to install one of the 3rd row seats, now I don't. I doubt I will ever need it, but it was nice to have options.Perfect fit next to your cargo box! Were you that good or just that lucky?
Sent from my iPhone using IH8MUD App


- Thread starter
- #78
It's been a year since I last updated this thread, so figured I should document what I have done lately.
About the middle of last year, I had the exhaust system replaced by Ed Hanson muffler. I had to put up with the loud leaky exhaust during our Grand Canyon trip and needed to get it replaced. I told him I wanted it quiet without loosing performance and he custom designed a system using a muffler/resonator combo similar to the factory configuration. Wow, what a difference! He exceeded my expectations, and I highly recommend his shop to anyone in the SoCal area.
http://www.edhansonsmuffler.com/index.html
I also installed a factory throttle lock cable and knob from the Akella group buy. Pretty neat, although for me probably more of a novelty mod than anything else.
- Thread starter
- #79
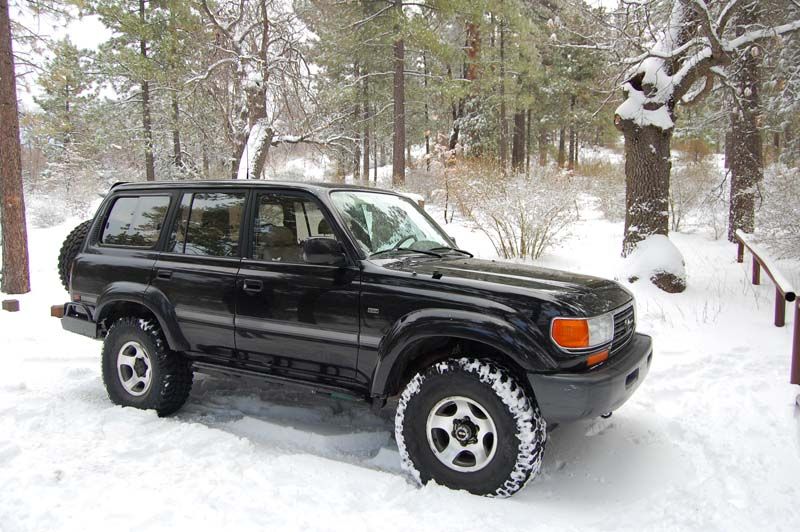
Took the family up to the Laguna Mountains back in February for a snow day. Funny, there was a CHP officer at Sunrise Hwy checking for chains. He was turning most people around but when we drove up, it went something like this:
Lowering his sunglasses, he looked at the truck, then turned to me
CHP: Do they even make these in 2WD?
Me: No sir.
CHP: Have a nice day


There were a few crazies up there, but once we got past the first few play areas, we pretty much had the mountain to ourselves.
http://i117.photobucket.com/albums/o67/cheme02/1997_FZJ80/DSC_67171.jpg
Lowering his sunglasses, he looked at the truck, then turned to me
CHP: Do they even make these in 2WD?
Me: No sir.
CHP: Have a nice day
There were a few crazies up there, but once we got past the first few play areas, we pretty much had the mountain to ourselves.
http://i117.photobucket.com/albums/o67/cheme02/1997_FZJ80/DSC_67171.jpg
- Thread starter
- #80
Spent most of the day yesterday tackling some maintenance and upgrades I have been putting off.
It was about time to flush and refill the cooling system, so I figured it was a good time to replace the radiator hoses, PHH and thermostat.
I also upgraded to a 2.2kW high output starter and 150A alternator using the photoman bracket. Also a good time to replace the belts. I wanted to do the fuel filter but ran out of time.
Factory vs. silicone PHH from 1fzfephh.com
http://i117.photobucket.com/albums/o67/cheme02/1997_FZJ80/IMG_1547.jpg
Installed. Went fairly smooth, about 15 minutes to remove and about 30 minutes to fight the new one on. I actually had a casualty while installing the new one (see below).
http://i117.photobucket.com/albums/o67/cheme02/1997_FZJ80/IMG_1548.jpg
New (rebuilt) 2.2kW starter vs. original 2.0kW starter.
http://i117.photobucket.com/albums/o67/cheme02/1997_FZJ80/IMG_1546.jpg
http://i117.photobucket.com/albums/o67/cheme02/1997_FZJ80/IMG_1549.jpg
150A sequoia alternator vs. original
http://i117.photobucket.com/albums/o67/cheme02/1997_FZJ80/IMG_1550.jpg
The hardest part about all of this was getting the new alternator belts around the new 150A alternator pulley. Word of advice to anyone making this upgrade: get an inch or so longer belts, you'll be glad you did.
Once everything was buttoned up and was running, I threw a P0330 code. Tried to reset it with the scangauge, but it came right back next time I started the truck. Not familiar with this code, I did a MUD search. Coincidentally several of the threads with P0330 also had PHH. It seems the cause of this code is the knock sensor. The #2 knock sensor happens to be right next to the PHH, and there were reports of busted connectors and cut wires. I went out and looked on my truck and sure enough I busted the connector on mine . I was able to push it back on and make a connection, but it will probably fall back off at anytime. I am going to try to pull it out and epoxy the broken connector, but if that doesn't work it's well north of $100 for a new one.
This video is of the new starter, which spins much faster than the original and sounds cool as it winds up. The video also happens to show the busted #2 knock sensor (the top PHH bolt is pointing right at it).
http://s117.photobucket.com/user/cheme02/media/1997_FZJ80/MVI_1554.mp4.html
It was about time to flush and refill the cooling system, so I figured it was a good time to replace the radiator hoses, PHH and thermostat.
I also upgraded to a 2.2kW high output starter and 150A alternator using the photoman bracket. Also a good time to replace the belts. I wanted to do the fuel filter but ran out of time.
Factory vs. silicone PHH from 1fzfephh.com
http://i117.photobucket.com/albums/o67/cheme02/1997_FZJ80/IMG_1547.jpg

Installed. Went fairly smooth, about 15 minutes to remove and about 30 minutes to fight the new one on. I actually had a casualty while installing the new one (see below).
http://i117.photobucket.com/albums/o67/cheme02/1997_FZJ80/IMG_1548.jpg

New (rebuilt) 2.2kW starter vs. original 2.0kW starter.
http://i117.photobucket.com/albums/o67/cheme02/1997_FZJ80/IMG_1546.jpg

http://i117.photobucket.com/albums/o67/cheme02/1997_FZJ80/IMG_1549.jpg

150A sequoia alternator vs. original
http://i117.photobucket.com/albums/o67/cheme02/1997_FZJ80/IMG_1550.jpg

The hardest part about all of this was getting the new alternator belts around the new 150A alternator pulley. Word of advice to anyone making this upgrade: get an inch or so longer belts, you'll be glad you did.
Once everything was buttoned up and was running, I threw a P0330 code. Tried to reset it with the scangauge, but it came right back next time I started the truck. Not familiar with this code, I did a MUD search. Coincidentally several of the threads with P0330 also had PHH. It seems the cause of this code is the knock sensor. The #2 knock sensor happens to be right next to the PHH, and there were reports of busted connectors and cut wires. I went out and looked on my truck and sure enough I busted the connector on mine
. I was able to push it back on and make a connection, but it will probably fall back off at anytime. I am going to try to pull it out and epoxy the broken connector, but if that doesn't work it's well north of $100 for a new one.This video is of the new starter, which spins much faster than the original and sounds cool as it winds up. The video also happens to show the busted #2 knock sensor (the top PHH bolt is pointing right at it).
http://s117.photobucket.com/user/cheme02/media/1997_FZJ80/MVI_1554.mp4.html
Last edited: