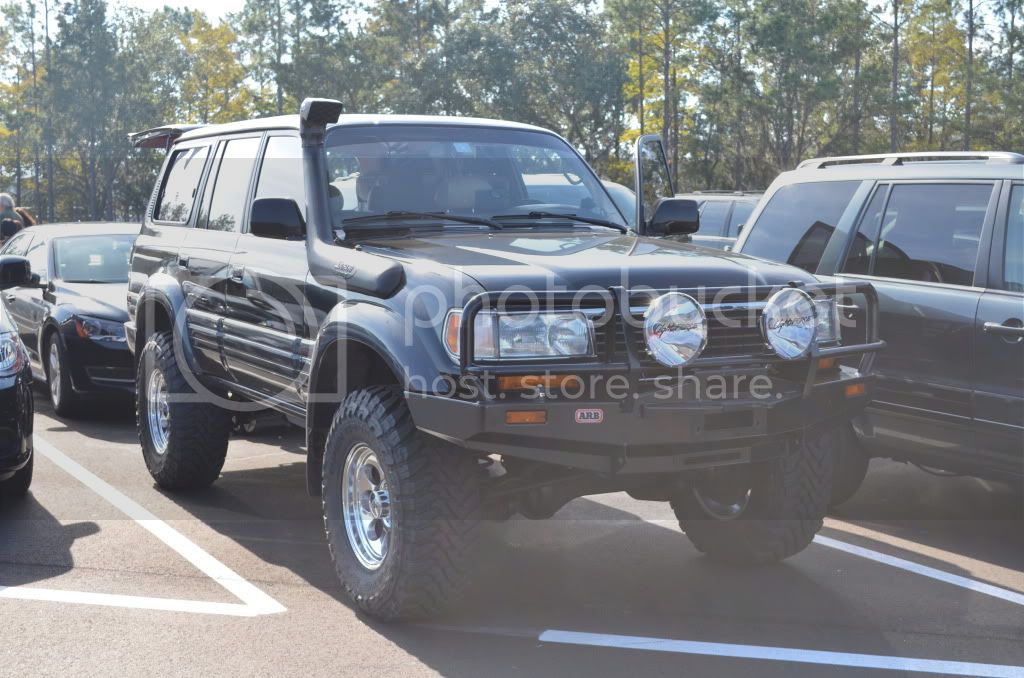
So I have been following the board for a while and it has been a huge help with my LC. thank you all and I hope to contribute my part.
My flares, roof and hood clear coat has been peeling from the years of exposure to the south FLorida sun and I finally decided it was time to do something to freshen it up. I have seen guys on here do some work on thier peeling hoods and flares, but it seems most do truck liner or flat black. I wanted to stay as close to OEM as I could without doing a total respray.
I dont have any experience painting with a spray gun and if I can get decent results i'm sure many on this board can too.
I have done some minor touchups with rattle can paint but never anything to this scale since I do not have a garage.
After a lot of research and going to my local paint supply store I decided it was something I wanted to try to do. If it didn't work out I could always take it to get professionally sprayed.
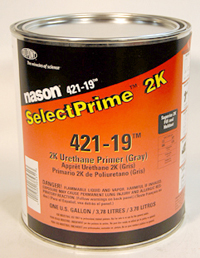
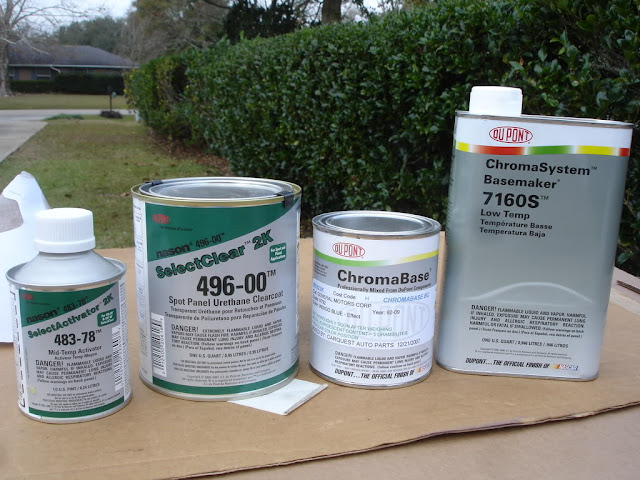
Based on my research i purchased the following paint:
1 Qt. Nason Primer and activator
1 Qt. Dupont Chromabase and Basemaker (matched by VIN)
1 Qt. Nason Clear with Activator
I also purchased the following (except the DA) at the paint store:
DA sander with 220, 320 and 400 grit paper.
1 G of Acetone (cleanup)
1 Qt of Surface prep
3 Rolls of 3M masking tape
400 grit Wet sandpaper
1000 grit sandpaper
1500 grit Wet sandpaper
1 Qt. 3M Machine Polish
3M respirator ( protect your lungs! I wore this during sanding and spraying)
I had a decent 20 gal compressor that I knew was going to be somewhat undersized in CFMs but i wanted to work with what i had and didnt want to make a huge investment in new equipment. That said, I purchased two sets of HPLV paint guns (#94572 for base/clear #47016 for primer) at my local Harbor Freight.
http://www.harborfreight.com/professional-automotive-hvlp-spray-gun-kit-94572.html
http://www.harborfreight.com/20-oz-high-volume-low-pressure-gravity-feed-spray-gun-47016.html
I read a lot of success stories using these cheap guns, and since I wasn't planning on opening up a Body shop anytime soon, I decided on HF versus higher quality units.
I also purchased an inline desiccant/filter and pressure gauge that would go at the end of my air hose right before the gun.
Total cost was roughly $450. Based on my research it was going to cost me a minimum of $1500 to $3000 depending if I removed the rack and flares.
I started by taping up the LC and getting all the compromised paint of the fairs with the DA.
I decided to start working on the roof since it was the least visible and the flares since they are the smallest pieces.
I opted to not remove the flares since I read about how the clips break. My gaskets where gone while ago and were not going to be in the way. Later I can replace the gaskets.
I worked the DA on the roof with 220 being careful to not go past the factory primer base.
I then went to work on the flares that had long being worked down to the primer by the sun.

I then gave the roof a hand of 320 with the DA sander, aired it down and wiped it down with surface prep and a tack cloth before spraying primer with a 1.8MM tip @ 45PSI gun pressure.

Next I waited for the primer to dry and worked out any imperfections with 400G wetsand on a sanding block, washed it down, wait to dry completely, surface prep tack cloth and sprayed the base coat. (always follow the appropriate flash time between coats) and sprayed three coats of clear.


At this point I'm pretty happy with the finish the color match is pretty good especially being a 17 year old non-garaged car in Florida sun. No runs and some minor orange peel in a few places that I can work out with the 1500 wet sand later.
The next day I decide to work on the hood and apply what I had learned on the flares and roof.
The clearcoat on the hood was really bad and I took it to the base/primer with the DA and 220, then 320 and primer with the same workflow I had done on the roof and flares.


I then decided to spray the hood off the car as the weather looked as it might rain. I gave it the first coat of base. I sprayed the base in very light coats until i had even coverage on the entire panel.

Once dry I gave it four coats of clear with the appropriate flash times and put the last one on wet. Once it flowed i was left with a little waviness but nothing I couldn't get out with 1500 grit wetsand and the polisher.

So I put the hood back on the LC and we have got a problem! The hood looks great but the fenders are so sun baked it looks like poo!

Time to blend! tape off the fenders at the crease, wetsand 1000 grit and attempt a blend on the top of the fenders. I also sand a respray the panel with vents and wipers between the hood and windshield and then spray the clear.


I then went over all the painted panels and wet sanded with 1500 grit and a soft sanding block any imperfection or orange peel, washed the truck and hit it with the 3M machine polish and a black foam pad.
Finsihed product.


Overall I'm really happy with how it came out. It's ready for another many years of the Florida sun!
My flares, roof and hood clear coat has been peeling from the years of exposure to the south FLorida sun and I finally decided it was time to do something to freshen it up. I have seen guys on here do some work on thier peeling hoods and flares, but it seems most do truck liner or flat black. I wanted to stay as close to OEM as I could without doing a total respray.
I dont have any experience painting with a spray gun and if I can get decent results i'm sure many on this board can too.
I have done some minor touchups with rattle can paint but never anything to this scale since I do not have a garage.
After a lot of research and going to my local paint supply store I decided it was something I wanted to try to do. If it didn't work out I could always take it to get professionally sprayed.
Based on my research i purchased the following paint:
1 Qt. Nason Primer and activator
1 Qt. Dupont Chromabase and Basemaker (matched by VIN)
1 Qt. Nason Clear with Activator
I also purchased the following (except the DA) at the paint store:
DA sander with 220, 320 and 400 grit paper.
1 G of Acetone (cleanup)
1 Qt of Surface prep
3 Rolls of 3M masking tape
400 grit Wet sandpaper
1000 grit sandpaper
1500 grit Wet sandpaper
1 Qt. 3M Machine Polish
3M respirator ( protect your lungs! I wore this during sanding and spraying)
I had a decent 20 gal compressor that I knew was going to be somewhat undersized in CFMs but i wanted to work with what i had and didnt want to make a huge investment in new equipment. That said, I purchased two sets of HPLV paint guns (#94572 for base/clear #47016 for primer) at my local Harbor Freight.
http://www.harborfreight.com/professional-automotive-hvlp-spray-gun-kit-94572.html
http://www.harborfreight.com/20-oz-high-volume-low-pressure-gravity-feed-spray-gun-47016.html
I read a lot of success stories using these cheap guns, and since I wasn't planning on opening up a Body shop anytime soon, I decided on HF versus higher quality units.
I also purchased an inline desiccant/filter and pressure gauge that would go at the end of my air hose right before the gun.
Total cost was roughly $450. Based on my research it was going to cost me a minimum of $1500 to $3000 depending if I removed the rack and flares.
I started by taping up the LC and getting all the compromised paint of the fairs with the DA.
I decided to start working on the roof since it was the least visible and the flares since they are the smallest pieces.
I opted to not remove the flares since I read about how the clips break. My gaskets where gone while ago and were not going to be in the way. Later I can replace the gaskets.
I worked the DA on the roof with 220 being careful to not go past the factory primer base.
I then went to work on the flares that had long being worked down to the primer by the sun.
I then gave the roof a hand of 320 with the DA sander, aired it down and wiped it down with surface prep and a tack cloth before spraying primer with a 1.8MM tip @ 45PSI gun pressure.
Next I waited for the primer to dry and worked out any imperfections with 400G wetsand on a sanding block, washed it down, wait to dry completely, surface prep tack cloth and sprayed the base coat. (always follow the appropriate flash time between coats) and sprayed three coats of clear.
At this point I'm pretty happy with the finish the color match is pretty good especially being a 17 year old non-garaged car in Florida sun. No runs and some minor orange peel in a few places that I can work out with the 1500 wet sand later.
The next day I decide to work on the hood and apply what I had learned on the flares and roof.
The clearcoat on the hood was really bad and I took it to the base/primer with the DA and 220, then 320 and primer with the same workflow I had done on the roof and flares.
I then decided to spray the hood off the car as the weather looked as it might rain. I gave it the first coat of base. I sprayed the base in very light coats until i had even coverage on the entire panel.
Once dry I gave it four coats of clear with the appropriate flash times and put the last one on wet. Once it flowed i was left with a little waviness but nothing I couldn't get out with 1500 grit wetsand and the polisher.
So I put the hood back on the LC and we have got a problem! The hood looks great but the fenders are so sun baked it looks like poo!
Time to blend! tape off the fenders at the crease, wetsand 1000 grit and attempt a blend on the top of the fenders. I also sand a respray the panel with vents and wipers between the hood and windshield and then spray the clear.
I then went over all the painted panels and wet sanded with 1500 grit and a soft sanding block any imperfection or orange peel, washed the truck and hit it with the 3M machine polish and a black foam pad.
Finsihed product.
Overall I'm really happy with how it came out. It's ready for another many years of the Florida sun!