Let's baseline my grandma's neglected, (20 year old to us) 1997 LX450

This site may earn a commission from merchant affiliate
links, including eBay, Amazon, Skimlinks, and others.

Well done replacing the full exhaust. I just did mine including new manifolds. I didn't notice much of a difference.

Your overall engine noise is much louder than mine.
I've checked around for noises due to alternator bearing but they don't sound the same. someone in another video also mentioned an vacuum leaking within the valve cover. it sounds like a whistle right? the pitch goes higher when I Rev it.
 
so I watched that video and it looks like the same one located right behind my driver side shocks in the picture below. one way to find out is to unscrew this 14mm bolt/plug


20220629_155807.webp
20220629_155839.webp


found it!

replaced it with this

20220629_161337.webp
20220629_162216.webp


thanks for the upgrade @NLXTACY ! at what ft lbs should each be torqued? I did 22lbs for 14mm and 14lbs for the 10mm
 
I've checked around for noises due to alternator bearing but they don't sound the same. someone in another video also mentioned an vacuum leaking within the valve cover. it sounds like a whistle right? the pitch goes higher when I Rev it.
What belts do you have on this? Toyota OEM or aftermarket? If aftermarket, do the belts have a ribbed inside? If so, the noise is from them hitting the idler pulley. Otherwise, you need to inspect the bearings in both of the idler pulleys to isolate the noise.

Second step is to remove the AC belt and listen for the noise. If gone, it's in that system of pulleys or components.

Then do the same for the alternator belts. Don't run it for more than a few minutes, as your water pump will not be turning and you have no cooling.

You definitely need to schedule the following:

Valve cover gasket
Spark Plug tube seals
PCV grommet
PCV valve
PCV hose
VC vent hose to throttle body
Front main seal
Oil pump seal
Distributor O-Ring

This short list will cure 95% of your leaks.
the front main seal and oil pump seal looks like something I'll have to get done by someone else. aside from those two and they are next in line after the coolant runs clear.

the belts are most likely aftermarket but I did buy a new set from the dealership.
 
You might be able to get a bit of a break on the labor if you already have the radiator out, fan clutch off, belts off, and everything ready to go to get the flywheel off to change the oil pump filter. They can probably change the water pump and pulleys at the same time.

Doing that oil pump gasket yourself isn't that terrible but you do need a long breaker bar, a socket you likely don't own, and a torque wrench that can go over 300 ft lbs. The torque wrench is the expensive part if you can't borrow/rent one. A JIS screw bit got the cover off got mine off in just a few minutes. I bought the Witts' end leak kit and it included it, IIRC.

A good mobile mechanic sure would be helpful if you weren't comfortable or just wanted to get it done faster. I imagine the parts would be cheaper than going the dealer route. Anything you can't get from Joey could likely be purchased from Partsouq at a good price. I had to go to Impex Japan for a few parts on the cooling system refresh to stay OEM but not break the bank.
 
Last edited:
You might be able to get a bit of a break on the labor if you already have the radiator out, fan clutch off, belts off, and everything ready to go to get the flywheel off to change the oil pump filter. They can probably change the water pump and pulleys at the same time.

Doing that oil pump gasket yourself isn't that terrible but you do need a long breaker bar, a socket you likely don't own, and a torque wrench that can go over 300 ft lbs. The torque wrench is the expensive part if you can't borrow/rent one. A JIS screw bit got the cover off got mine off in just a few minutes. I bought the Witts' end leak kit and it included it, IIRC.

A good mobile mechanic sure would be helpful if you weren't comfortable or just wanted to get it done faster. I imagine the parts would be cheaper than going the dealer route. Anything you can't get from Joey could likely be purchased from Partsouq at a good price. I had to go to Impex Japan for a few parts on the cooling system refresh to stay OEM but not break the bank.
it looks like the JIS bits from wits end are on backorder, unless he forgot to update the description. the only JIS screwdrivers I have are for small electronics.

ok I noticed on youtube that if I screw in bolts into the crank wheel thing, I can use that as leverage with a wrench so I can use a 3/4 inch breaker bar to loosen it?

if I were to do it myself, would I need a separate breaker bar and torque wrench for 300 ft lbs?


I think Joey gave me non-JIS bits as replacements so the next time it would not need JIS. You just need the removal bit to avoid stripping them on the way out.

I used a 1" breaker bar and it came loose fairly easy with a pipe over it for more leverage. There was probably an expletive or two but not the end of the world and I did not need a second person.

I do remember having a hard time because one of 1" sockets was either too fat or too deep for the area. I was inpatient and ordered something in advance instead of waiting until I knew exactly what I needed and just bought it locally. Maybe 3/4" drive will fit better with less guess work. OTRAMM has a video on this. You might be able to figure out what he used and I recall he did his solo too.

I had a 3/4" split beam torque wrench that went up to 600 ft lbs that I already owned for heavy truck / bus lug nuts. It must have been over $400. I would seriously find a rental place because you'll likely never use it again due to the length and minimum torque value. I know I have industrial rental places here in Florida all over the place that had torque wrenches for rent. Even better if you found a well equipped mobile mechanic and still wanted help. They heavy/semi truck guys would have it.

I'm sure some guys here have used torque multipliers or just got it to 300 ft lbs using a normally priced wrench, since that is where most of them tap out. You need some value above 300 ft lbs.
 
These are also alternatives that you can purchase to use with existing tools

You can also get the 14MM deep well hex impact socket to install on the flywheel bolt to use as an engine stop (just don't forget to remove it!)

304 LB-FT is the magic number.


HF 300 LB Torque Wrench

Amazon Torque Multiplier
 
welp. It looks like I have to take it back to the service dept because the gray wire on the connector is disconnected. I have the CEL for the front o2 sensor.

Screenshot_20220628-172229_OBD Auto Doctor.webp
20220701_111454.webp
20220701_111511.webp
 
For the crank bolt, I recommend the Neiko torque multiplier. $239 on Amazon. Made in Taiwan. It specifies an error range, so adjust your torque wrench assuming that the multiplier is underperforming at the limit of that range. @nukegoat has made it clear that the crank bolt can take much more than 304 ft-lbs and the important thing is that it's tightened to *at least* 304.
 
For the crank bolt, I recommend the Neiko torque multiplier. $239 on Amazon. Made in Taiwan. It specifies an error range, so adjust your torque wrench assuming that the multiplier is underperforming at the limit of that range. @nukegoat has made it clear that the crank bolt can take much more than 304 ft-lbs and the important thing is that it's tightened to *at least* 304.
great! I saw OTRAMM used to sell the tool that keeps the bolt from moving, but he no longer sells them. What are other ways to keep that from turning?
 
great! I saw OTRAMM used to sell the tool that keeps the bolt from moving, but he no longer sells them. What are other ways to keep that from turning?
You can build your own, like @Kernal:


I made one slightly fancier, by cutting a disc with a hole in the center, drilling the two holes, and welding on some box-section steel. Easy project if you already have a ton of other necessary tools...

LandCruiserCrankHolder.webp


It looks like @CPACruiser is now selling OTRAMM's design?

 
great! I saw OTRAMM used to sell the tool that keeps the bolt from moving, but he no longer sells them. What are other ways to keep that from turning?
@CPACruiser sells them and they’re badass.

 
For the crank bolt, I recommend the Neiko torque multiplier. $239 on Amazon. Made in Taiwan. It specifies an error range, so adjust your torque wrench assuming that the multiplier is underperforming at the limit of that range. @nukegoat has made it clear that the crank bolt can take much more than 304 ft-lbs and the important thing is that it's tightened to *at least* 304.
Yes just reef on it like a man and it'll be fine
 
the hood opens up by itself now. I have a bit more confidence that it won't fall and hit me on the head. One bolt was stripped when I took it out so I had to wait until Tuesday to pick a replacement at the closest Lexus dealership. I picked up a new intake filter so I'll replace it once I replace the valve cover gasket and other parts that I'll be removing to get to it.

Next up will be to remove the charcoal canister and inspect it for any clogs and then replace the vacuum lines that go out from it. I'm thinking of just removing the bolts that connect the bracket to the body because the last time I tried to remove the canister itself, the fuse box is in the way and I can't pull it out entirely. Does that sound like the better way to go?

View attachment 2974402
I'm just getting into your thread so forgive me if this has already been stated...

The charcoal cannister will most likely not be able to be replaced by OEM.
DURALAST has a great one and this guy has a good video on replacing it...BUT, it's on his 1991 and I'm not sure if the location is different on the Lexus 1997 model.

 
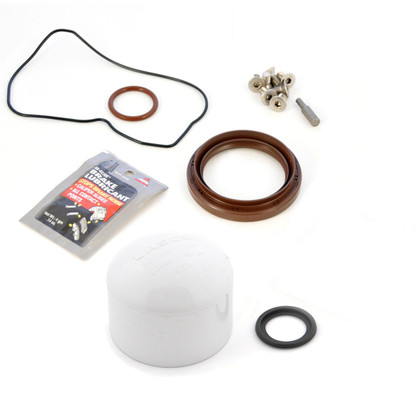
All right! Just finished buying the parts I need to work on the cooling system. They should all arrive by early next month 🤞. By then, I'll disassemble a good amount of parts from the engine bay to work on the list items I specified on the Baseline checklist: valve cover leak kit, Tuneup kit I ordered from @NLXTACY a while back, Radiator and hoses, heater hoses (reverting the rear heater delete). It's almost time to address comment #6 by @Ozark80

So far I'm down $1807.23 on parts alone. I've amassed a bunch of tools since I started with practically nothing other than a couple screwdrivers and a pair of scissors :cry:.
I'm going to do the same thing to mine...been buying parts over the last six months. I've had my '97 for six years and I'm now in a financial position (see: Way better job/career) to afford to baseline and then build.
I'll sub and watch this thread, thanks!
 
Back
Top Bottom