
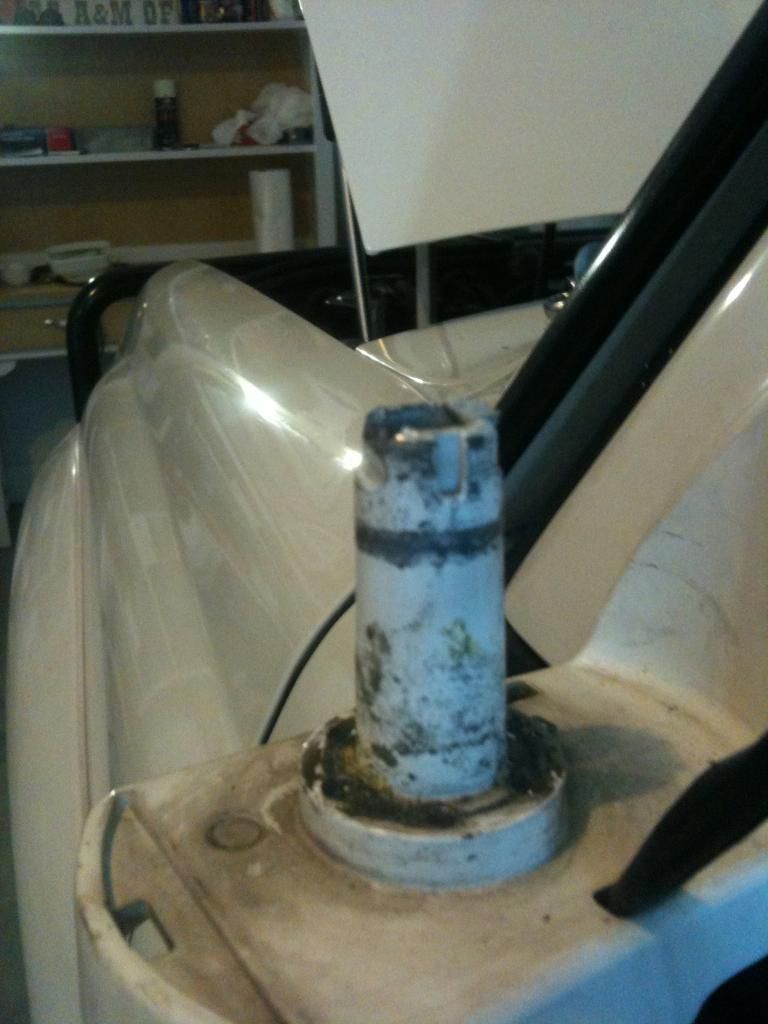
So the other day I was cruising when I noticed that my DS mirror was swinging in the wind as I accelerated/braked. I searched on 'Mud and discovered that the post that allows the mirror to swing has two little plastic tabs that hold down a large spring. The spring puts pressure on the mirror, which forces it to stay in place. When the plastic tabs on the mirror post become brittle and break, the spring decompresses and the mirror housing is free to swivel.
I found several threads with ideas on how to fix this problem without purchasing a new mirror housing (~$300), and combined all of the great ideas I found into a simple and cheap solution (~$5). Here goes:
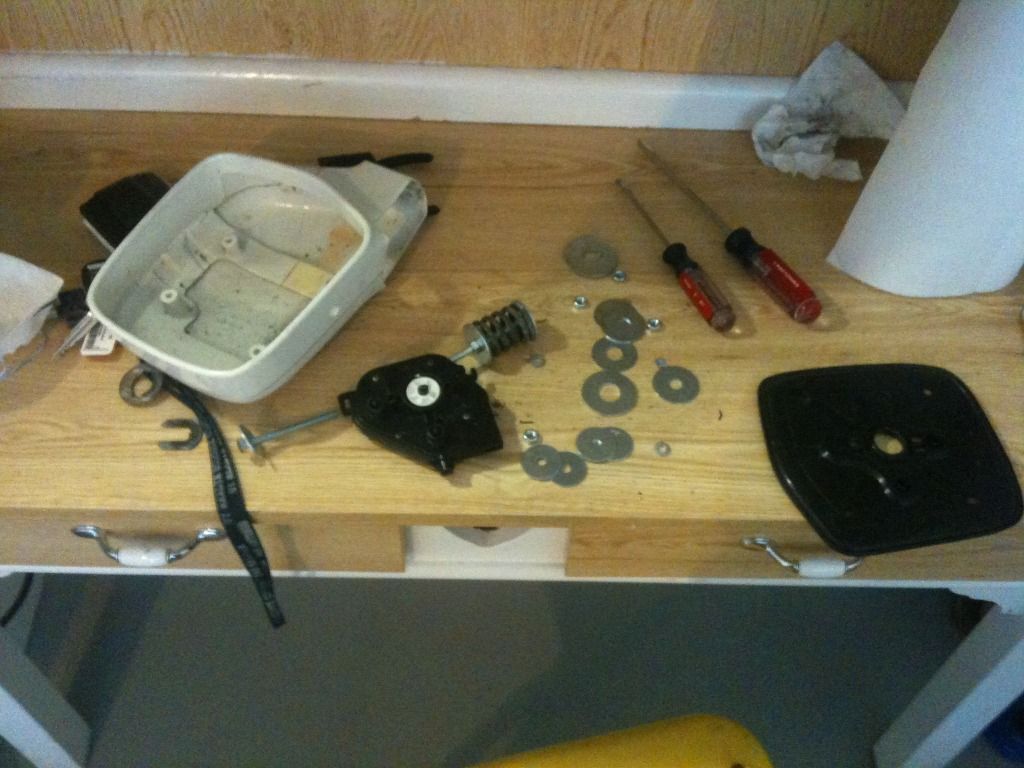
1) Remove the mirror glass, mirror motor, and finally the mirror housing. More detailed instructions for this procedure can be found here:
https://forum.ih8mud.com/80-series-tech/83177-shakey-sideview-mirror-fix.html
https://forum.ih8mud.com/80-series-tech/378291-broken-mirror-glass-replacement-idiots-lots-pics.html
(Note: you don't have to remove the post, just the mirror housing)
One thing that I never saw mentioned in other threads is be careful for the three ball bearings that reside in the bottom of the metal "mirror frame". I didn't realize they were there until they all fell out when I removed the mirror and I had to sweep the garage floor to find them.
2) Go to hardware store of choice and purchase: 1x .25x3in. bolt, 2x fender washers (must be larger than the diameter of the spring), 1x .25in locking nut, and 2x .25 nuts. I bought more than I needed and ended up using the above hardware.

3) If only one plastic tab on the post is broken (as was the case with mine), file off or cut off the other tab so that when you tighten the bolt the fender washer won't sit crooked.

4) Feed the 3 wires that were disconnected from the mirror motor through the most rear hole (closest to tailgate) of the post housing. The wires must be rerouted due the fact the bolt/fender washers will be occupying the space inside the post.

5) With the mirror frame in place, run the bolt through the post with one fender washer at the bottom and one fender washer covering the top of the spring. Add locking nut and tighten with the two nuts. Tighten the fender washer down to the post then loosen just a tad so that the apparatus won't be rubbing up against the top of the post. Note: You can still add all of the other parts of the mirror after this step (you will need to room to tighten the nuts)


6) Put everything back together as you found it and reconnect the wires. If you are facing the glass of the mirror, from left to right the colors are Black, Red, Brown. Here is a picture of the BACK of the motor plate from another thread (This is for DS; order of wires is reversed for PS):

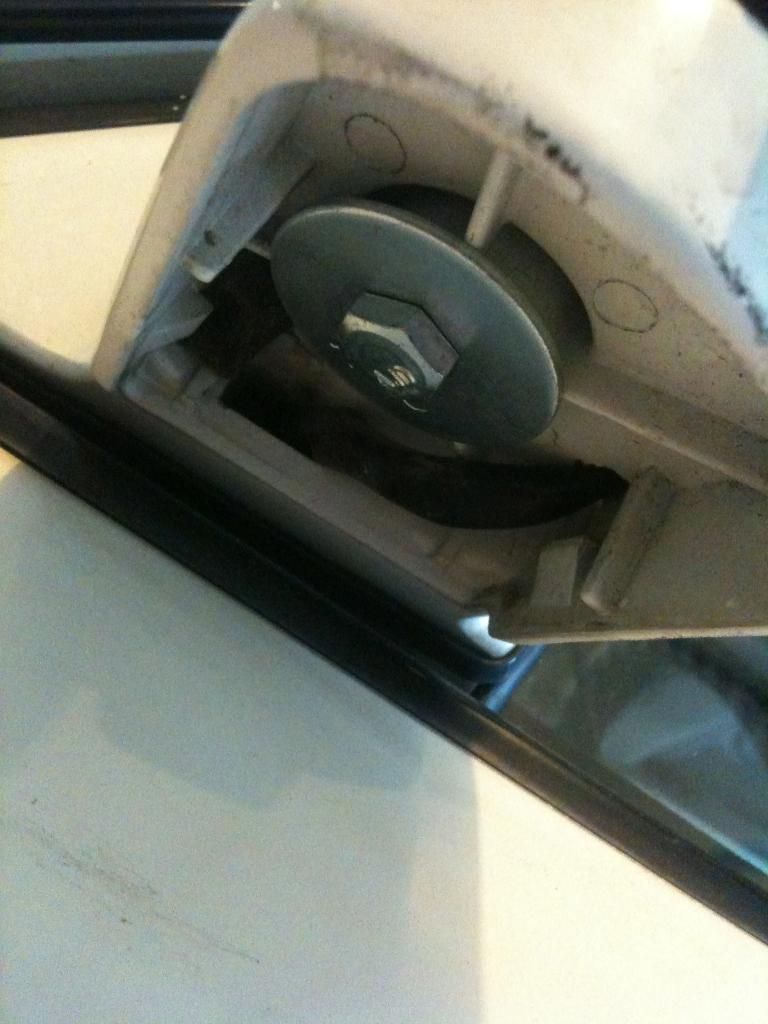
Note: Now would also be a perfect time to R&R your mirror hangers and bottom screw hole if you have a "shakey mirror problem" (most likely you will if the post broke). Refer to here: https://forum.ih8mud.com/80-series-tech/83177-shakey-sideview-mirror-fix.html
6-2)
Credits (and reference of all threads concerning this issue):
https://forum.ih8mud.com/80-series-tech/83177-shakey-sideview-mirror-fix.html
https://forum.ih8mud.com/80-series-tech/378291-broken-mirror-glass-replacement-idiots-lots-pics.html
https://forum.ih8mud.com/80-series-tech/295383-loose-mirror-problem-not-shaky-mirror.html
https://forum.ih8mud.com/80-series-tech/456180-swinging-mirror-fix-broken-mirror-post.html
https://forum.ih8mud.com/80-series-tech/395744-drivers-side-view-mirror-housing-loose.html
https://forum.ih8mud.com/80-series-tech/368071-side-view-mirror-bracket-broke-pics.html
https://forum.ih8mud.com/80-series-tech/72535-broken-mirror-mounting-tab.html
I found several threads with ideas on how to fix this problem without purchasing a new mirror housing (~$300), and combined all of the great ideas I found into a simple and cheap solution (~$5). Here goes:
1) Remove the mirror glass, mirror motor, and finally the mirror housing. More detailed instructions for this procedure can be found here:
https://forum.ih8mud.com/80-series-tech/83177-shakey-sideview-mirror-fix.html
https://forum.ih8mud.com/80-series-tech/378291-broken-mirror-glass-replacement-idiots-lots-pics.html
(Note: you don't have to remove the post, just the mirror housing)
One thing that I never saw mentioned in other threads is be careful for the three ball bearings that reside in the bottom of the metal "mirror frame". I didn't realize they were there until they all fell out when I removed the mirror and I had to sweep the garage floor to find them.
2) Go to hardware store of choice and purchase: 1x .25x3in. bolt, 2x fender washers (must be larger than the diameter of the spring), 1x .25in locking nut, and 2x .25 nuts. I bought more than I needed and ended up using the above hardware.
3) If only one plastic tab on the post is broken (as was the case with mine), file off or cut off the other tab so that when you tighten the bolt the fender washer won't sit crooked.
4) Feed the 3 wires that were disconnected from the mirror motor through the most rear hole (closest to tailgate) of the post housing. The wires must be rerouted due the fact the bolt/fender washers will be occupying the space inside the post.

5) With the mirror frame in place, run the bolt through the post with one fender washer at the bottom and one fender washer covering the top of the spring. Add locking nut and tighten with the two nuts. Tighten the fender washer down to the post then loosen just a tad so that the apparatus won't be rubbing up against the top of the post. Note: You can still add all of the other parts of the mirror after this step (you will need to room to tighten the nuts)

6) Put everything back together as you found it and reconnect the wires. If you are facing the glass of the mirror, from left to right the colors are Black, Red, Brown. Here is a picture of the BACK of the motor plate from another thread (This is for DS; order of wires is reversed for PS):

Note: Now would also be a perfect time to R&R your mirror hangers and bottom screw hole if you have a "shakey mirror problem" (most likely you will if the post broke). Refer to here: https://forum.ih8mud.com/80-series-tech/83177-shakey-sideview-mirror-fix.html
6-2)
Credits (and reference of all threads concerning this issue):
https://forum.ih8mud.com/80-series-tech/83177-shakey-sideview-mirror-fix.html
https://forum.ih8mud.com/80-series-tech/378291-broken-mirror-glass-replacement-idiots-lots-pics.html
https://forum.ih8mud.com/80-series-tech/295383-loose-mirror-problem-not-shaky-mirror.html
https://forum.ih8mud.com/80-series-tech/456180-swinging-mirror-fix-broken-mirror-post.html
https://forum.ih8mud.com/80-series-tech/395744-drivers-side-view-mirror-housing-loose.html
https://forum.ih8mud.com/80-series-tech/368071-side-view-mirror-bracket-broke-pics.html
https://forum.ih8mud.com/80-series-tech/72535-broken-mirror-mounting-tab.html
Last edited:
")