
-
North American Clubhouses - East RegionCA.ON- SOTEC CA.ON- Upper Canada Land Cruisers CA.QC- Club TORQ CA.QC- Quebec Cruisers AL- DixieLand Cruisers AL- Hot South Cruisers FL- Florida Land Cruiser Association FL- Northwest Florida Toyota 4WD FL- Tampa Bay Land Cruiser Association GA- Pavement Pounders GA- Georgia Cruisers GA/FL/AL- Red Hills Land Cruiser Club GA- YOTA IL- Windy City Land Cruisers IN- Hoosier Cruisers IN- Indiana Land Cruisers KY- Kentucky Landcruiser MA/NH- Yankee Toys MI- Lake Michigan Land Cruisers MS- CottonLand Cruisers NC- Olde North State Cruisers NJ- Garden State Land Cruisers NY/CT/MA- FJNortheasters NY- Gotham City Land Cruisers OH- The Buckeye Birfield Syndicate PA- Keystone Cruisers PA- Steel City Land Cruiser Club SC: Land Cruisers: Charleston SC- Palmetto State Land Cruiser Association SC- Upstate Cruisers SC- Swamp Fox Land Cruisers SC- Low Country Land Cruisers TN- Appalachia Cruisers TN- Bluff City Cruisers TN- STLCA VA- Bay to Blue Ridge Cruisers VA- COVA CRUISERS VA/DC/MD- Capital Land Cruiser Club VA/NC- Mid-Atlantic TLCA VA- Star City Land Cruisers VT/NH/MA/ME Acadian Overlanders WI- Land Cruiser Legends WV- Mountaineer Cruisers
-
North American Clubhouses - Central RegionCA.AB- Oil Country Cruisers CA.AB- Rocky Mountain Land Cruiser Association CA.AB- Toyota Ghost Wheelers AR- Razorback Land Cruisers AR/MO- Ozark Mountain Cruisers CO- BookCliff Cruisers CO- Colorado Land Cruisers CO- Derailed Cruisers CO- Rising Sun 4WD Club CO/WY- Horsetooth 4 Wheelers Cruiser Club IA- Tall Corn Cruisers KS/MO- Tornado Alley Cruisers LA- Bayou State Land Cruisers LA- Louisiana Land Krewesers MO- Gateway Cruisers MT- 406 Cruisers MT- Big Sky Cruisers NE- Flat Land Cruisers NM- High Desert Cruisers OK- Green Country Cruisers SD- Dakota Territory Cruisers TX- Alamo City Land Cruisers TX- Bayou City Land Cruisers TX- Lone Star Land Cruisers TX- Lone Star Land Cruisers - Austin Chapter TX- The White Trash of the Elwood Chapter TX- Toyota Trail Riders
-
North American Clubhouses - West RegionCA.BC- Coastal Cruisers CA.BC- Okanagan-Similkameen Land Cruisers CA.BC- Peace Canyon Toyota Swamp Donkeys CA.BC- Calgary Chapter: Swamp Donkeys
CA.BC- Vancouver Island Cruisers AZ- Copper State Cruisers CA- Beach-n-Toys CA- Central Coast Land Cruisers CA- Central Valley Crawlers CA- Gold Country Cruisers CA- Inland Empire Cruisers CA- L.A. County Trailcrew CA- Mountain Transit Authority CA- Pacific Mountain Cruisers CA- San Diego Cruisers CA - Santa Cruz Land Cruisers CA- SoCal 80's CA- Southern California Land Cruisers CA- Toyotally Awesome Cruisers HI- Hawaiian Island Land Cruisers ID- Treasure Valley Land Cruisers NV- Battle Born Cruisers of Northern Nevada NV- Southern Nevada Land Cruisers OR/CA- Jefferson State Cruisers OR- Cascade Cruisers OR- Central Oregon Cruisers OR- Portland Metro Cruisers UT- Red Rock Cruiser Club UT- Wasatch Cruisers WA- Central Washington Cruisers WA- North Sound Cruisers WA- South Sound Cruisers WA- Spokane Land Cruisers
Navigation
Install the app
How to install the app on iOS
Follow along with the video below to see how to install our site as a web app on your home screen.
Note: This feature may not be available in some browsers.
More options
Style variation
You are using an out of date browser. It may not display this or other websites correctly.
You should upgrade or use an alternative browser.
You should upgrade or use an alternative browser.
Finally started it
- Thread starter Fireman
- Start date
This site may earn a commission from merchant affiliate
links, including eBay, Amazon, Skimlinks, and others.
- Joined
- Jul 9, 2004
- Threads
- 386
- Messages
- 3,997
- Location
- Montgomery Co. TEXAS
- Website
- missionsonwheels.org
Got to figure out how to lose the fender flares on the rear to smooth it out so it doesn't look so goofy.
But goofy seems to work ya

Looks damn nice!
KOWBOY
President
- Joined
- Mar 21, 2005
- Threads
- 209
- Messages
- 5,878
- Location
- Diggin' mud
- Website
- www.elwoodwhitetrash.com
Lookin' very nice indeed sir. 
Who ya gonna get to drive it for ya?

Who ya gonna get to drive it for ya?
- Thread starter
- #44
Lookin' very nice indeed sir.
Who ya gonna get to drive it for ya?
Probably Heather or Bailey!
Wow! It's been what, just over a month since I last checked in, and this build is REALLY moving along! Sorry about that David, I just sorta lumped you in with all the other builders that take a year or two to burn together a project like this.
On the t-case mount, I think the quality of the fab is awesome, and the product is a prime example of the K.I.S.S. principle. But I do have a question. In my mind having a crossmember with 4 corners seems a little counter productive, as the the flex of the frame would tend to put stress on the member that it wouldn't have with only two mounting points. If ANYONE viewing this thread can enlighten me on that point, I would appreciate it.
Second, yours is the first build where I have seen someone using a faux adjustable link rod for mock up. That is really, really cool. Did you borrow those, and more importantly, would they be available to borrow again? Those look like the sheit for getting lengths and angles down on a link conversion. Of course, if you tell me EVERYBODY's got them, that'll just show how little I know about link stuff anyways!;p
Since you've now set the wheelbase, the only logical answer to your wheelwell question is to lengthen the body!;p


I was reading an article about a 4runner yesterday and I recalled your truck.
looking good dave and one step closer to be done
looking good dave and one step closer to be done
- Thread starter
- #48
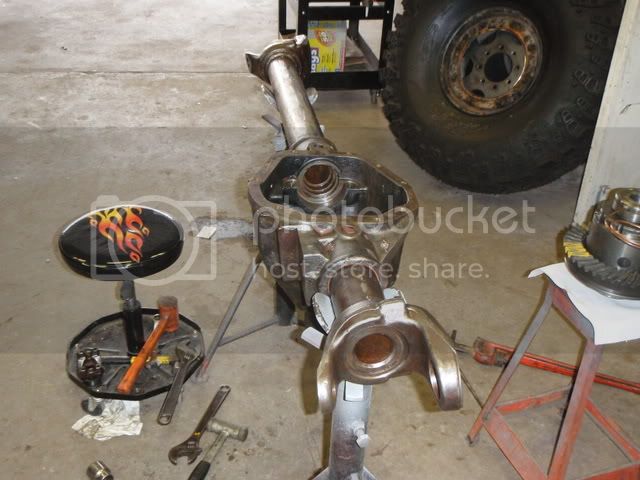
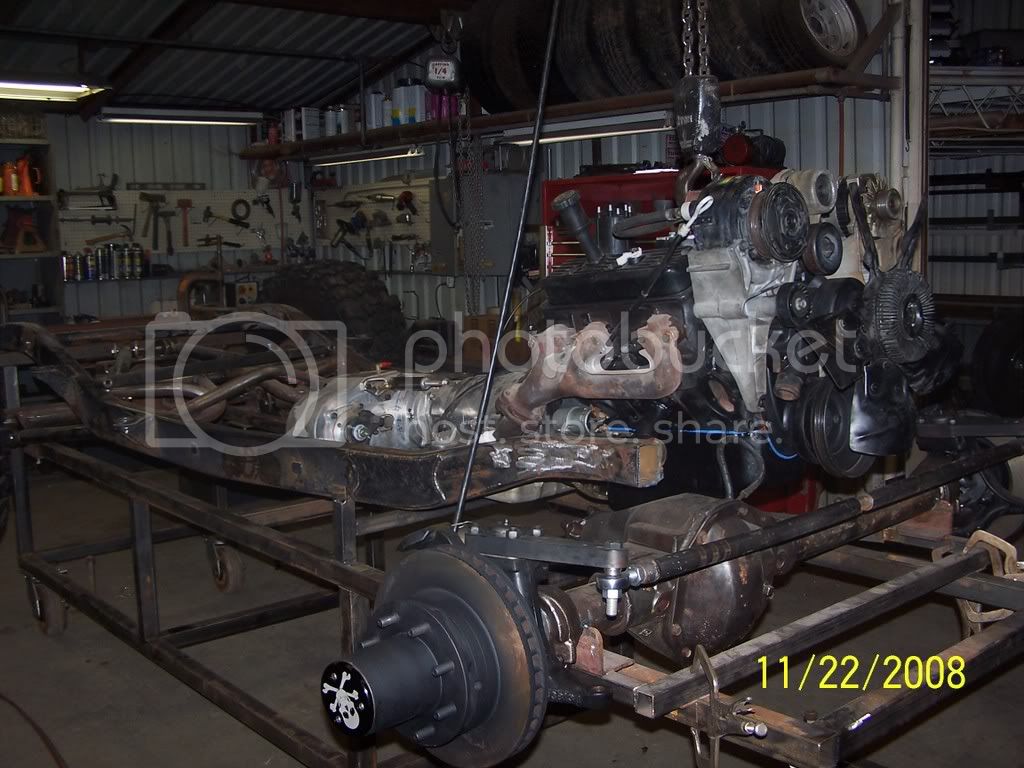
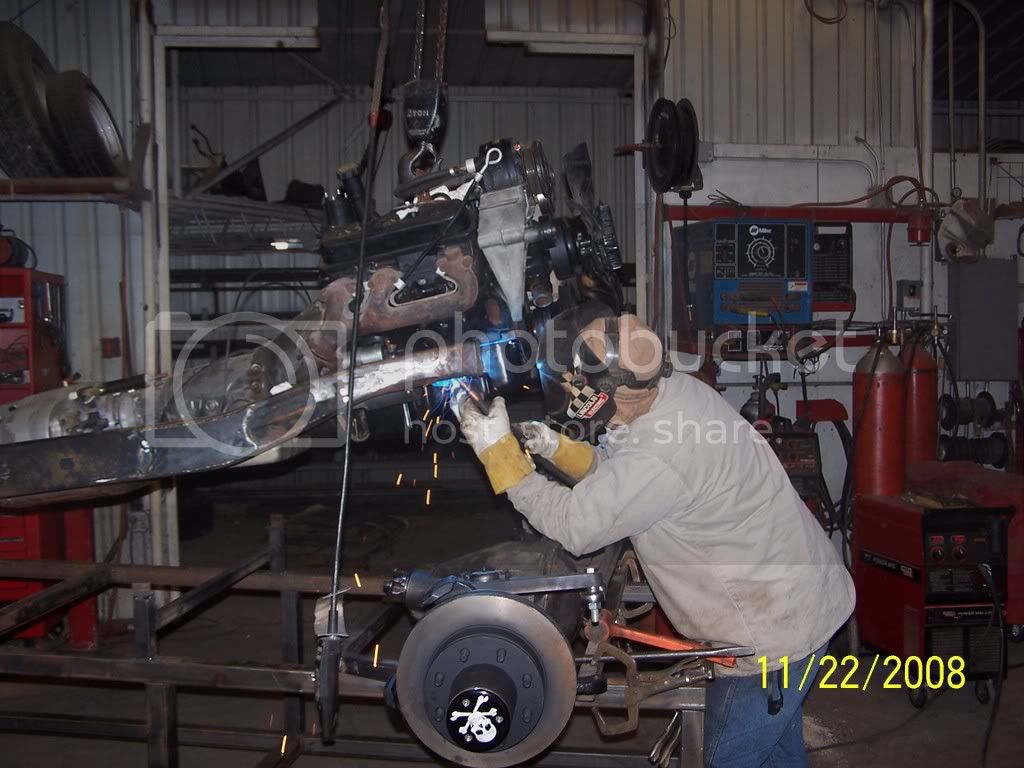
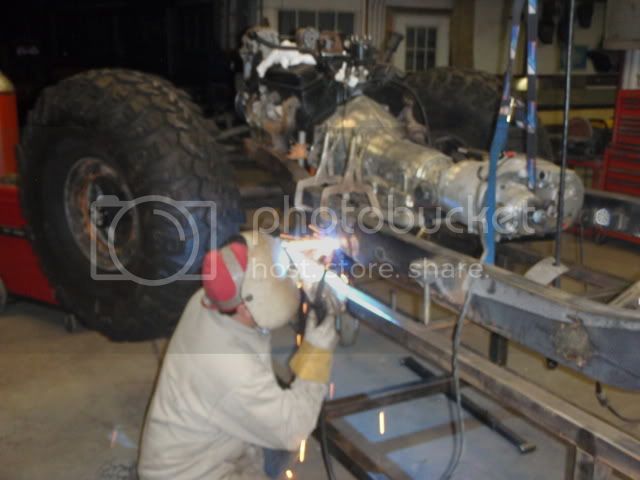
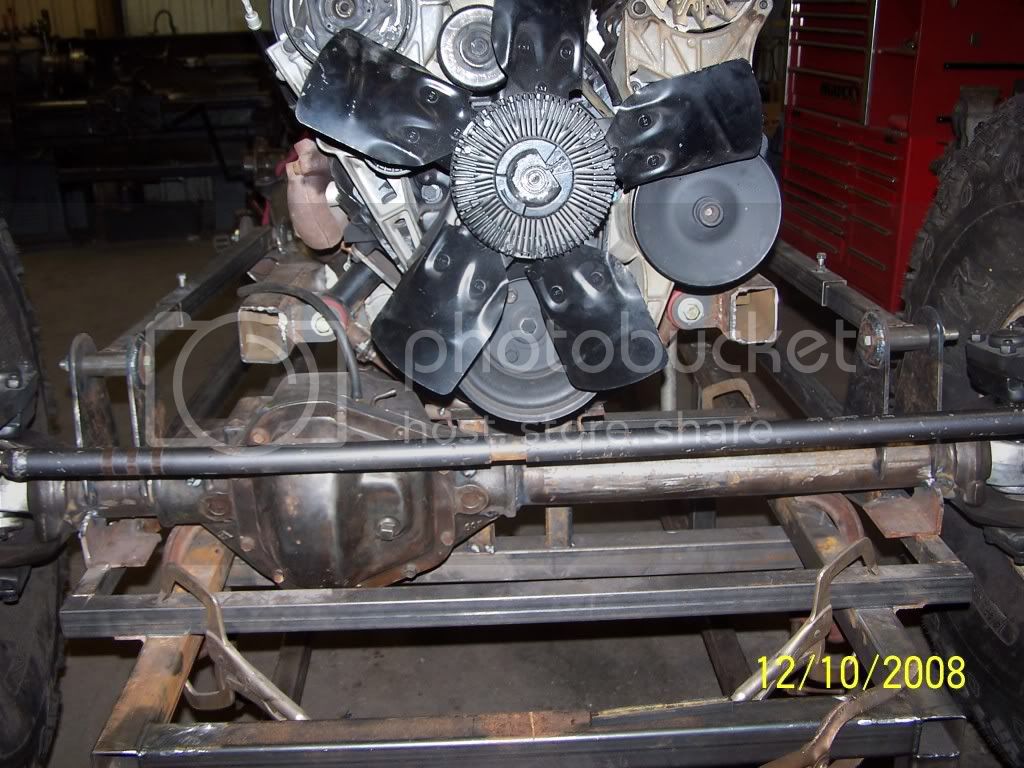
Got some more work done yesterday. I spent the morning getting the tcase, tranny and engine back together and installed.
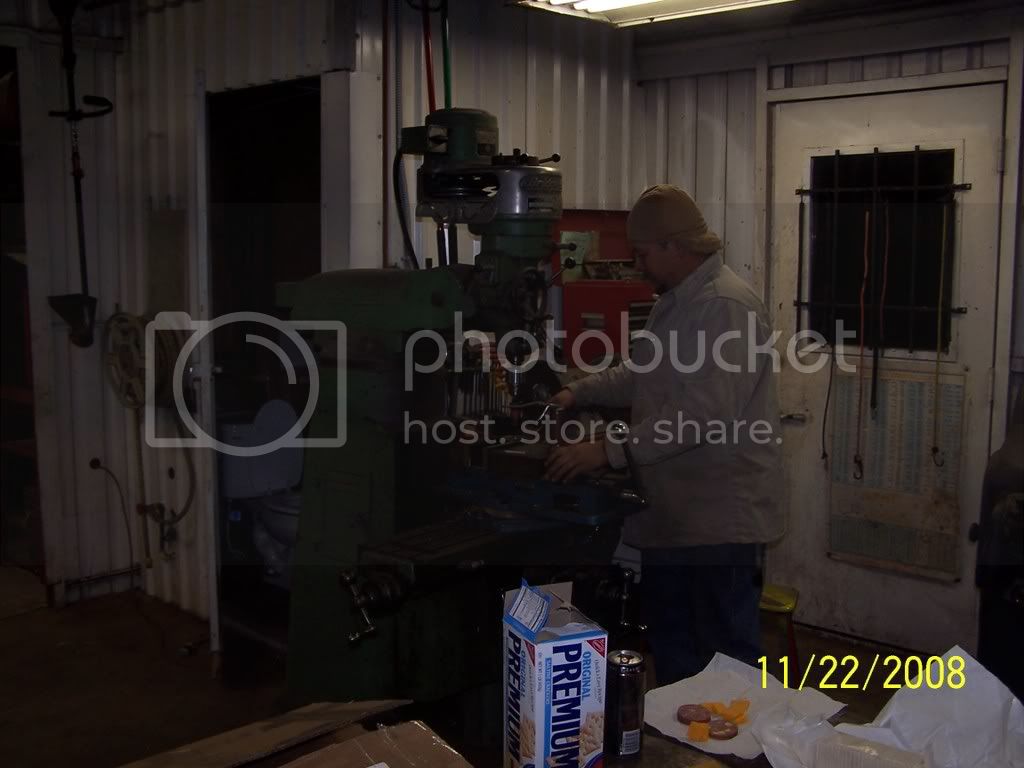
Devin came back from doing a job and decided we should work late and try to get everything ready to start the front supension.
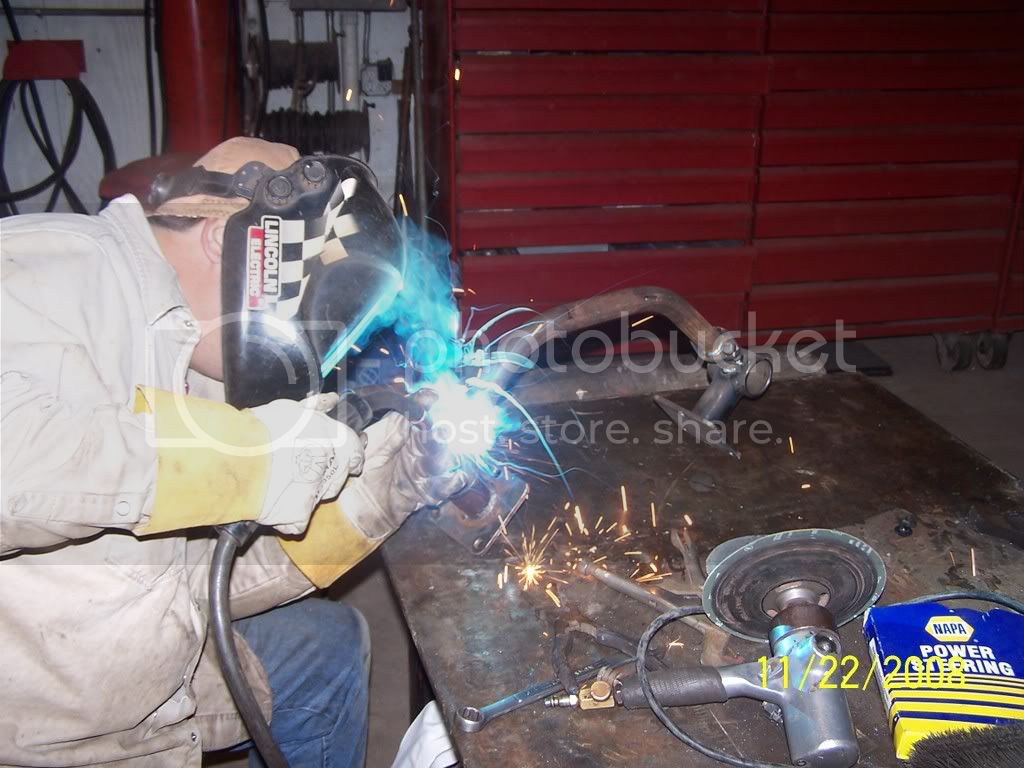
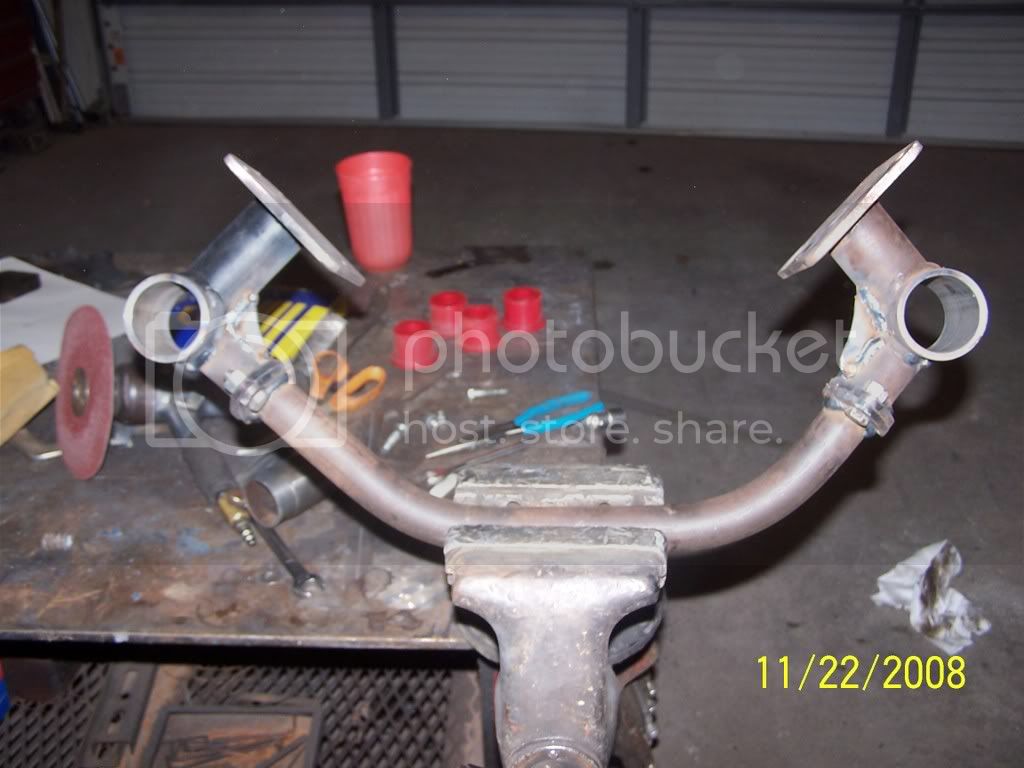
Started out makeing flanges for the removable skid plate that will run from the oilpan back to the tcase skid.
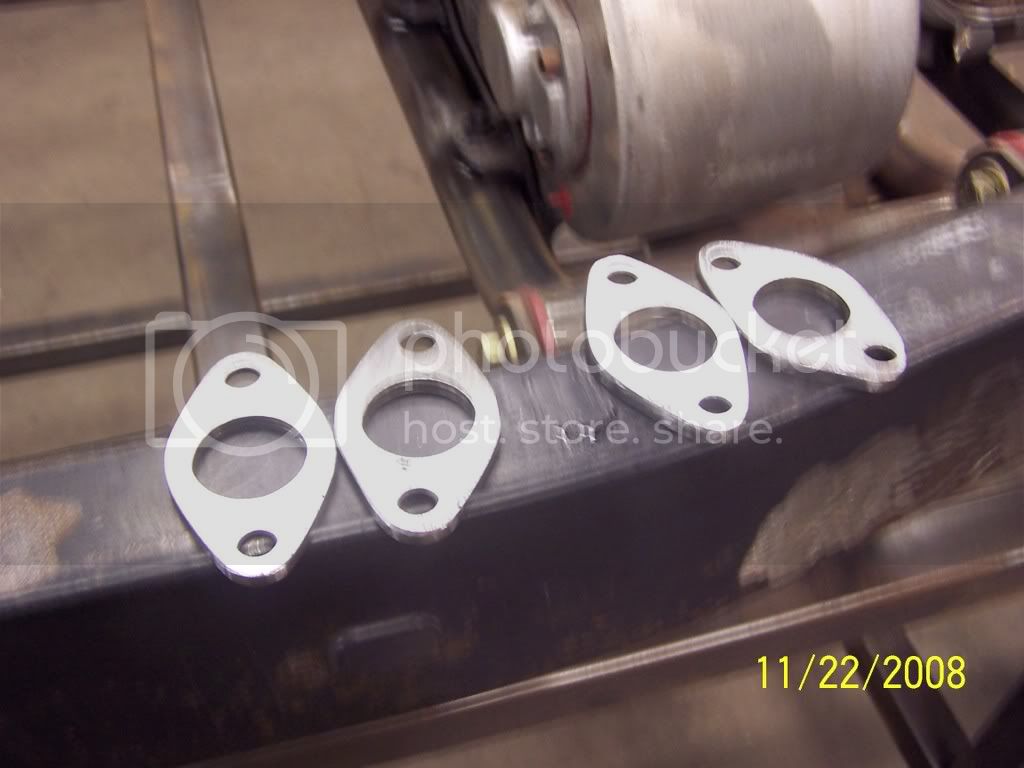
These will go from motor mount to motor mount. I graduated from sweeping and pictures to deburring parts
Next we broke out the bender and made the crossbrace.
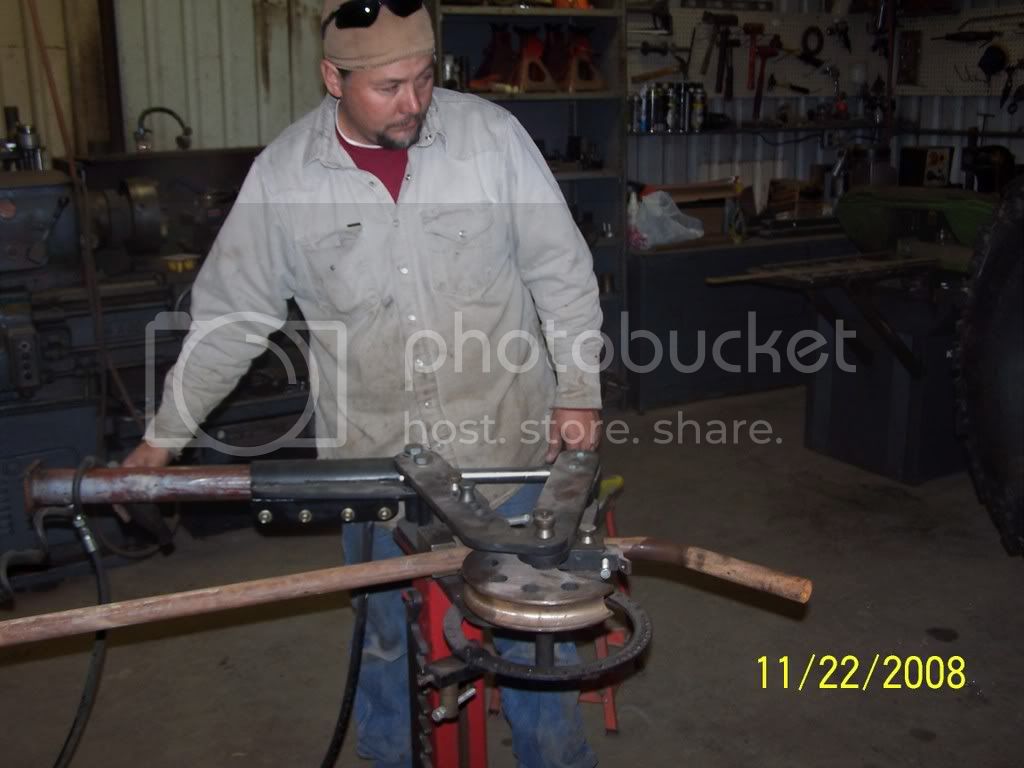
Tacked it in
Pulled it out and welded it solid
Reinstalled it and put the tires and wheels back on and started figuring on the lower links and steering cylinder mount.
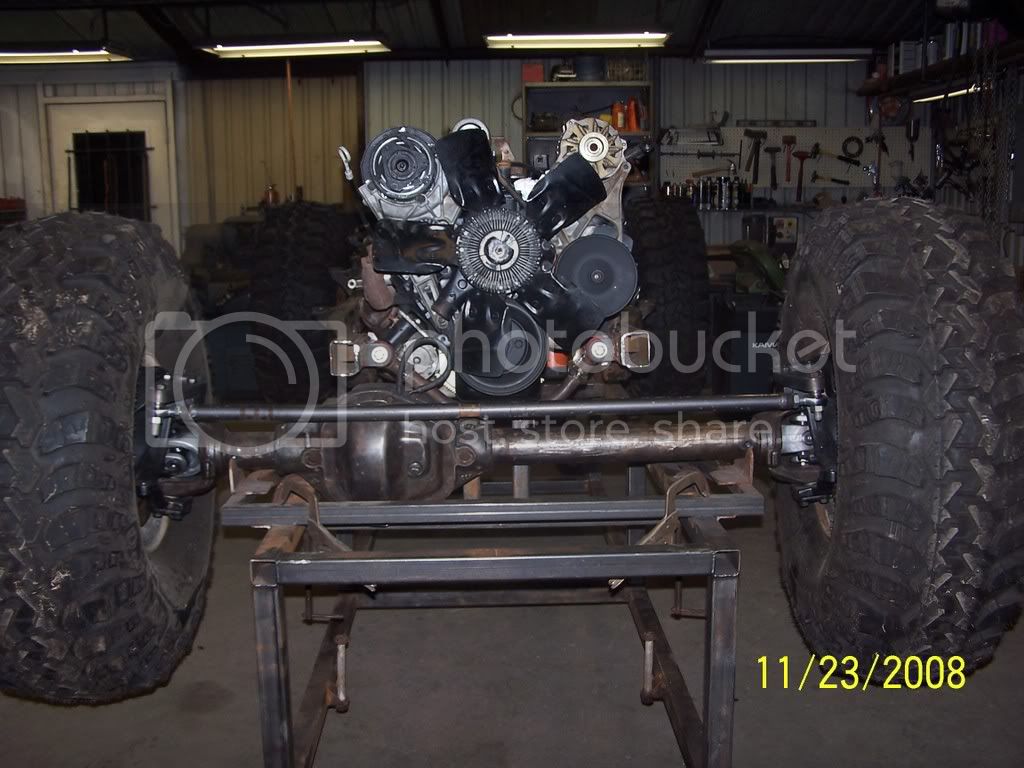
And as she sits as of midnight last night
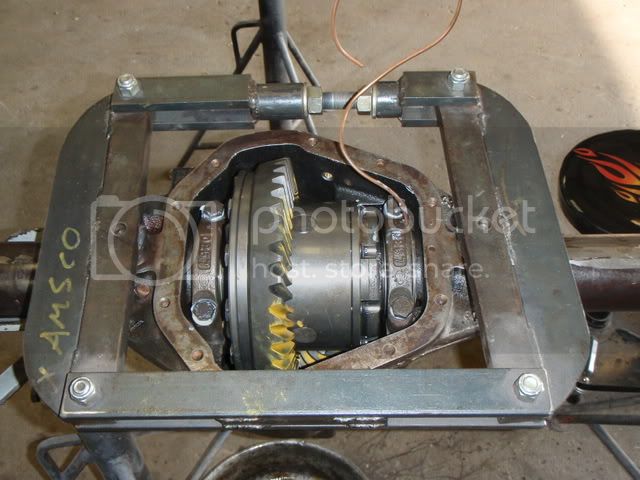
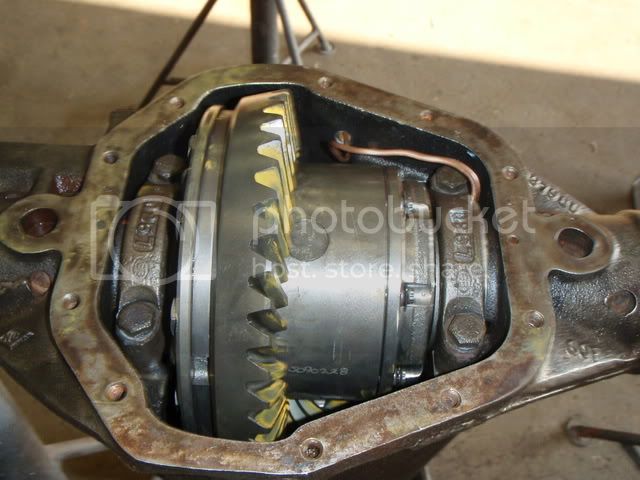
Also tested the ARB locker..... SWEET!
Devin came back from doing a job and decided we should work late and try to get everything ready to start the front supension.
Started out makeing flanges for the removable skid plate that will run from the oilpan back to the tcase skid.
These will go from motor mount to motor mount. I graduated from sweeping and pictures to deburring parts
Next we broke out the bender and made the crossbrace.
Tacked it in
Pulled it out and welded it solid
Reinstalled it and put the tires and wheels back on and started figuring on the lower links and steering cylinder mount.
And as she sits as of midnight last night
Also tested the ARB locker..... SWEET!
- Joined
- Nov 3, 2008
- Threads
- 1
- Messages
- 17
Lookin Good David.. Cannot wait for you to get that thing finished.
Any ideas when it may be done ??
Any ideas when it may be done ??
KOWBOY
President
- Joined
- Mar 21, 2005
- Threads
- 209
- Messages
- 5,878
- Location
- Diggin' mud
- Website
- www.elwoodwhitetrash.com
Very nice indeed sir.
Gonna be damn-fine to have 'nother hardcore rig in The White Trash ... 'specially considerin' your Piggy ain't never done nothin' but slow us down.
Keep on it ... Jamboree be here in no time at all.
Gonna be damn-fine to have 'nother hardcore rig in The White Trash ... 'specially considerin' your Piggy ain't never done nothin' but slow us down.
Keep on it ... Jamboree be here in no time at all.
- Thread starter
- #51
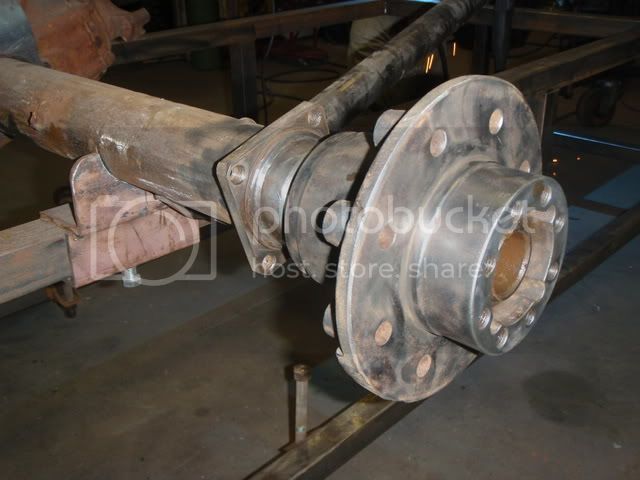
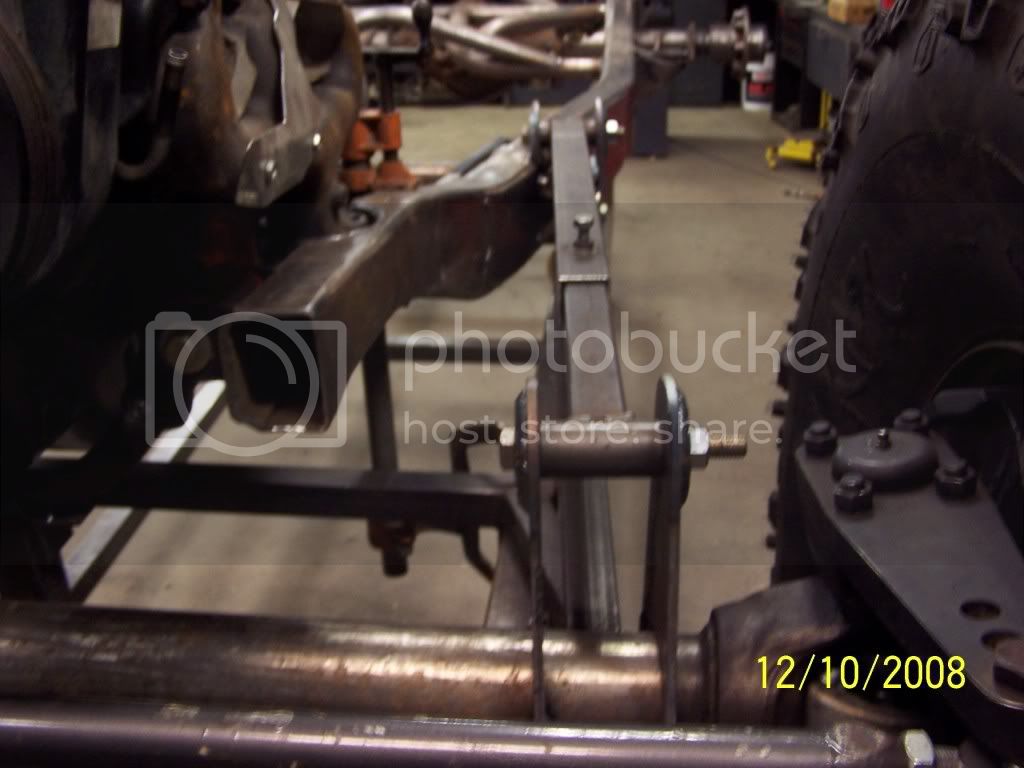
Got a little more to show for last nights work. We have been trying to determine how to mount the front lower link mounts to the frame and keep the tires from hitting the links but we didn't want to have them just hanging off of the bottom of the frame. We wanted to mount them outside of the frame but the tires would get into them hard! There wasn't room inside the frame so Devin just decided to french some buckets into the frame.
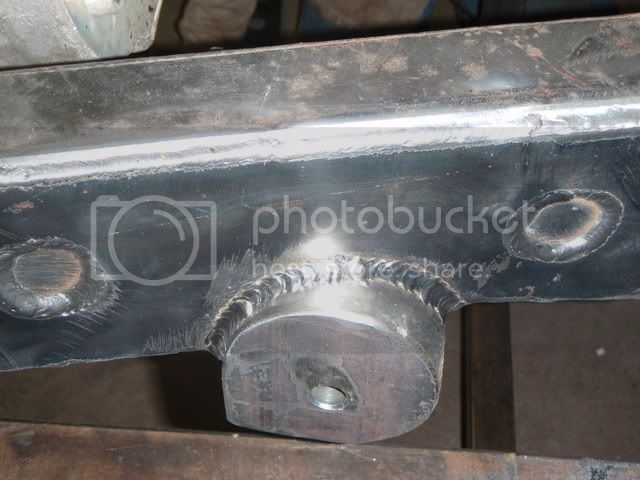
This got us up high enough but he wanted to make it pretty and not hang on any rocks since I'm running such a long wheelbase (115") so we ramped the frame to the buckets.
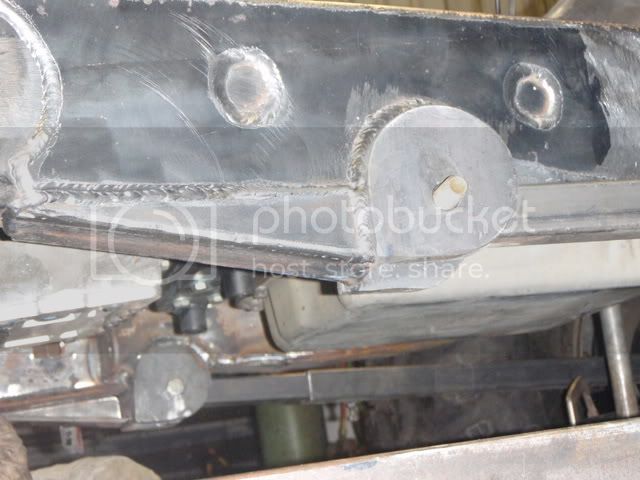
Devin also wanted to reinforce the frame a little since we clearanced the lower part of the frame to help clear the links so he cut a little fishplate and welded it up.

The end result is VERY NICE!!! Strong attatchment points and should be snag-free. The tires clear the links and the front lower links are the same length as the rear lowers so that I can carry a spare link htat fits front and rear ...........just in case!
And just to prove that I've been there and to scare the kids at home
I'm very pleased and thankful for all the work Devin is putting into this thing. It's going to be a blast to wheel when we're done.
This got us up high enough but he wanted to make it pretty and not hang on any rocks since I'm running such a long wheelbase (115") so we ramped the frame to the buckets.
Devin also wanted to reinforce the frame a little since we clearanced the lower part of the frame to help clear the links so he cut a little fishplate and welded it up.
The end result is VERY NICE!!! Strong attatchment points and should be snag-free. The tires clear the links and the front lower links are the same length as the rear lowers so that I can carry a spare link htat fits front and rear ...........just in case!
And just to prove that I've been there and to scare the kids at home
I'm very pleased and thankful for all the work Devin is putting into this thing. It's going to be a blast to wheel when we're done.
KOWBOY
President
- Joined
- Mar 21, 2005
- Threads
- 209
- Messages
- 5,878
- Location
- Diggin' mud
- Website
- www.elwoodwhitetrash.com
Frenched in lower links ... front and rear links same length ...
Was Devin snoopin' under my rig at Clayton??
Keep the update pics comin' ... but please ... no more close-ups of you sir.
Was Devin snoopin' under my rig at Clayton??
Keep the update pics comin' ... but please ... no more close-ups of you sir.
- Thread starter
- #54
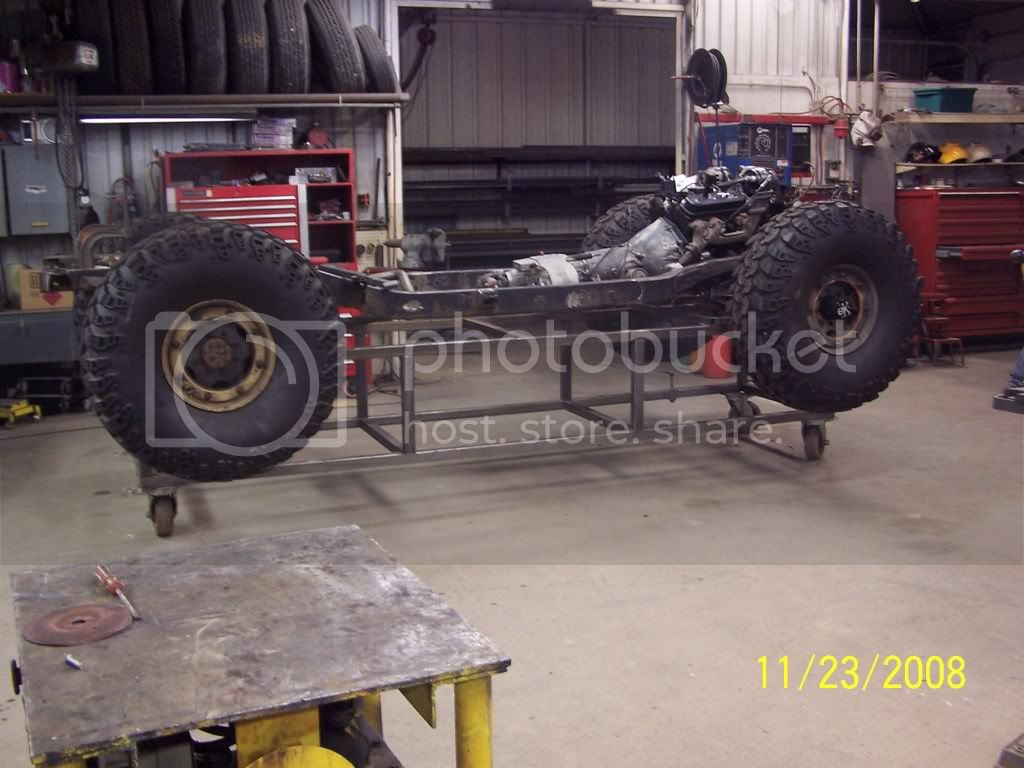
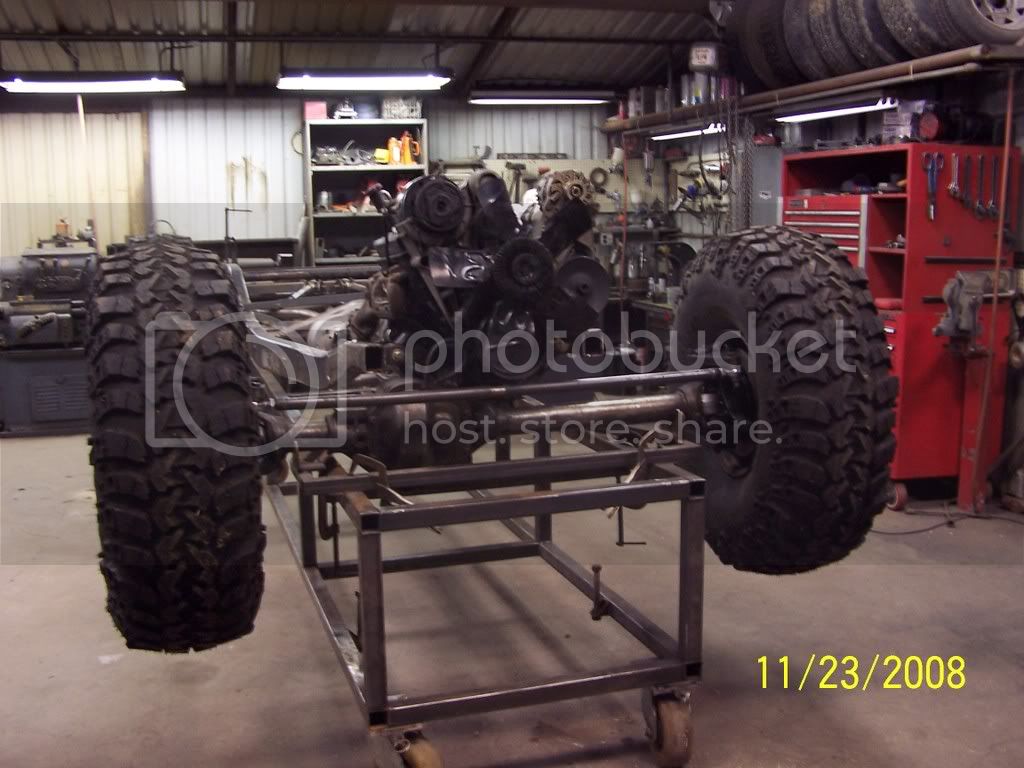
Done posted up in a couple of other forums so I thouught that I'd dang sure let ya'll see some more pics:
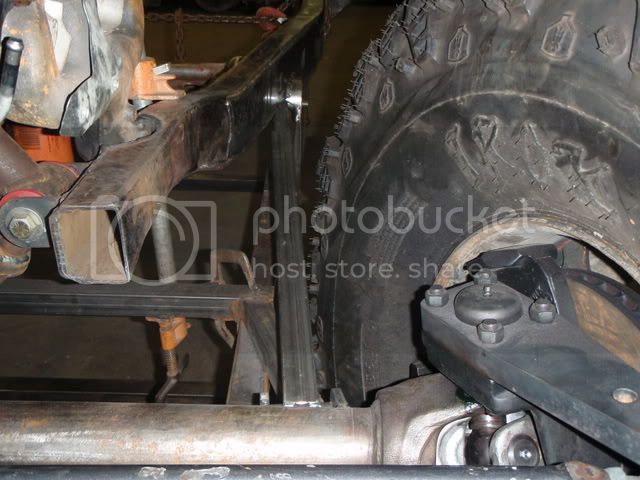
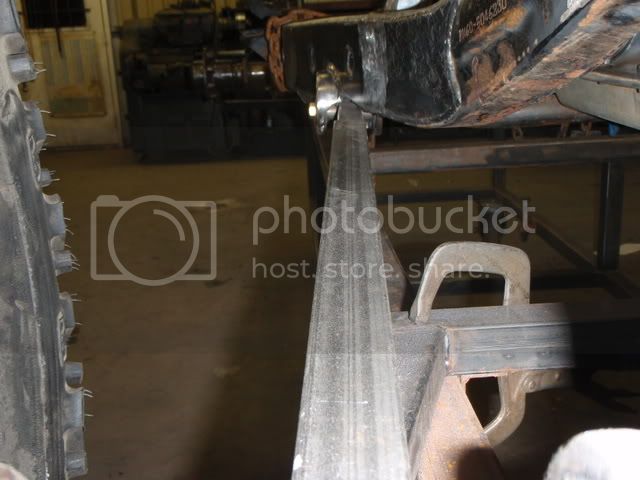
Well here's what we're going to go with. More of a 5 link or a 4 link with panhard. Don't have the panhard on yet though, waiting for heims.
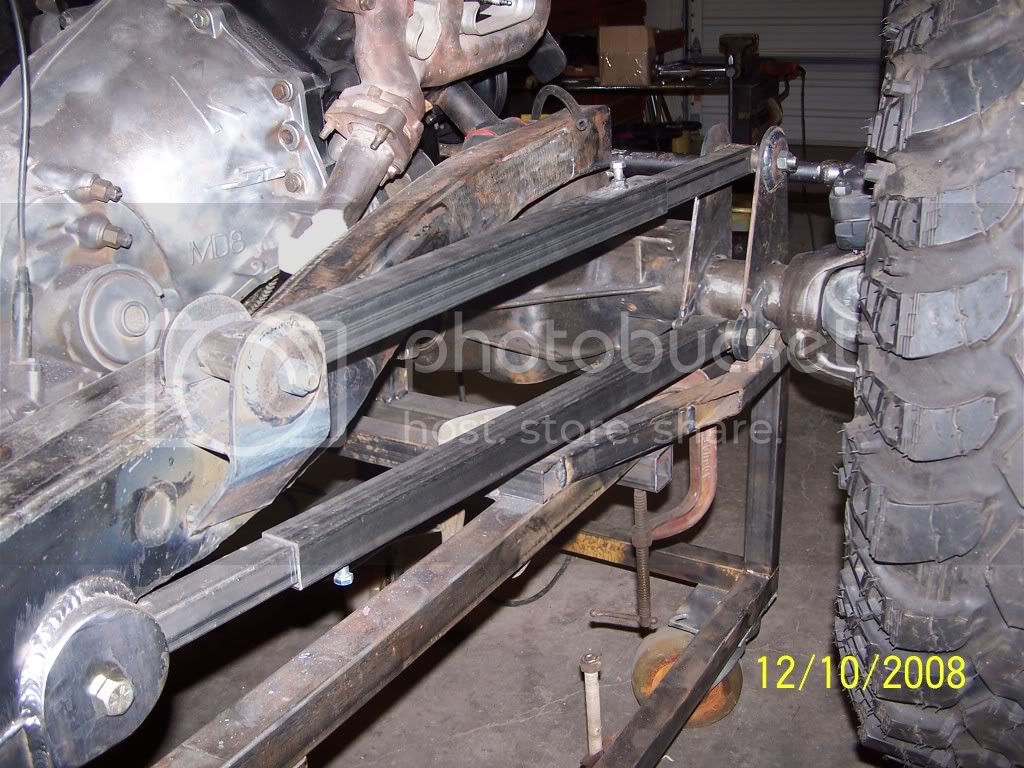
The links have around 8" of seperation at the axle end and about 6 1/2" at the frame.

You can see that the top and bottom links are directly in line to reduce or eliminate binding.
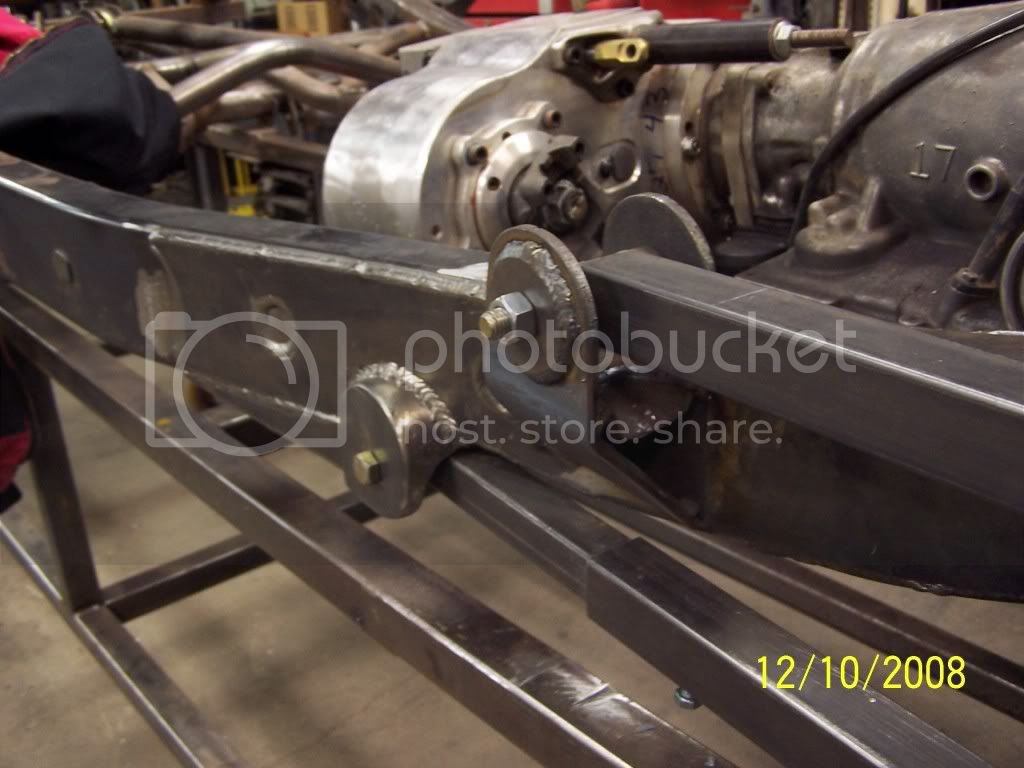
Got alot of boxing in to do and trying to figure out where the shocks are going to mount.
Well here's what we're going to go with. More of a 5 link or a 4 link with panhard. Don't have the panhard on yet though, waiting for heims.
The links have around 8" of seperation at the axle end and about 6 1/2" at the frame.
You can see that the top and bottom links are directly in line to reduce or eliminate binding.
Got alot of boxing in to do and trying to figure out where the shocks are going to mount.
KOWBOY
President
- Joined
- Mar 21, 2005
- Threads
- 209
- Messages
- 5,878
- Location
- Diggin' mud
- Website
- www.elwoodwhitetrash.com
5-link??? 
What happened to the front of the frame? ;p
When's it gonna be done??
What happened to the front of the frame? ;p
When's it gonna be done??
- Thread starter
- #56
Devin caught me wacking it off. The frame that is. Gonna tube the front out to hold the radiator and fenders. Don't know when its gona be done. Gotta put some axles under a trailer pretty soon so I can haul my Pig to the Jambo.
Really diggin' the way you guys frenched in the lower mounts for the links. 
The adjustable mock-up links are one of those cool things you see and say "why didnt I think of that?"
Chris
The adjustable mock-up links are one of those cool things you see and say "why didnt I think of that?"
Chris
Devin caught me wacking it off.
Did you stop or finish?
The adjustable mock-up links are one of those cool things you see and say "why didnt I think of that?"
Chris
Thanks Chris for clearing that up.
I was wondering, What the hell w/ the squre tubing?
now I get it.
Looking good Dave!