Cruiser Rescue Project

This site may earn a commission from merchant affiliate
links, including eBay, Amazon, Skimlinks, and others.

Ordered 2 sets of belts from McGeorge ... $49 with shipping. Called the local Toyo dealer ... $38 for just the one set of drive belts :confused:

Thanks for the links!!! :cheers:

Classic.

2 belt set lists for $8 and change
(90916-02353-83)

AC belt max should be no more than $18-19.
(99332-10910-83)

Wow.
 
I have an ever growing list of parts I will be speaking to you about soon Beno, every day something else seems to make the list.
 
Had a major setback today. Took the truck out for deliveries today (85 miles round trip), same as I have been doing for weeks. I noticed it seemed to be running slightly warmer then it had in past days, but it's almost 90* today, so I figured that was the cause. It had been running 185*F and occasionally getting to 190*F. Temps help steady between 195-205*F today and once hit 213*F before going back down. Truck was turned on and off several times throughout the day and had the AC running all day.

Just as I pulled back in to work, the temp spiked to 222*F. I pulled in and shut it off and then heard what sounded like an air compressor depressurizing (sp?) and then brown coolant leaking down the drivers side rear of the upper pan. Truck was at a slight nose down angle when parked, so can't tell if the head gasket went or maybe I got lucky and the PHH gave out? I checked the oil today before I left and it was good in quantity and color, but forgot to check after parking it, was just focused on having someone drive me home and having a beer ... or several of them.

Regardless, I will have to get the truck towed home and begin the autopsy, then will spend tomorrow putting the LX450 back together (oil leaks and all) with the new radiator and press it back into service until I can hopefully get the Cruiser back up and running.

Almost called Slee today and ordered a bumper and sliders. Glad I waited till I was off work since now that money may need to go towards repairs if doing the head gasket is beyond me mechanically.

:beer: and repeat
 
It's the PHH..... Location fits it perfect. Head gaskets don't blow like that.
 
So I began the PHH process today, coolant drained (now green with a brown sludge in the bottom) and tire off. I can see the hose and also see 2 aftermarket plain worm gear clamps. Seems the PO already had a crack at this and possibly did a crap job like with everything else I've found. I have three questions:

1. Can the PHH be easily accessed from above by removing the intake manifold (upper and/or lower)?

2. What are the chances it's not the PHH seeing how it has already been changed once before?

3. Possible it's he hose next to it?

The entire area is VERY difficult to see as I'm sure many already know. The symtoms I recall seeing previous to the spewing of coolant after shutting it off were small puddles just behind the drivers side front tire every morning, then eventually a large puddle that I found after having it towed home. I had left before daylight that day and backed out, so I didn't notice the puddle.

4th question ... does the trans dipstick only have the one bolt holding it in place?
 
I would confirm which hose first.

Go borrow a coolant pressure tool from parts store.

Pull the driver front wheel off.

Pressurize system and you will see the leak quickly. Depending on how much fluid you lost, you may have to add some water.

You can get to the PHH from the wheelwell. No way I would take of intake manifold just to do this. Yes, this woudl give you awesome access, but you just turned this into a 5 hour project and likely should buy gasket set.
 
Well, that ship has sailed. Got the hose off once I sacked up and stopped whining about it.


Hose didn't look terrible and the rust colored area seems more like the area to the left of the PHH. That hose is VERY no bueno, nope, nada. If it turns out to be that, I will disassemble and attack from the top. That will allow me to see what other awesome things the PO did to save $5. I did notice that he did the rear heater bypass wrong since the rear heater lines are still hooked up in the engine bay, but there is nothing inside the truck.

Bruised right forearm as proof I actually got the part off at least. Somehow I feel like back on will be harder :frown:

I will be doing the Wit's End long bypass since the pipe is covered in whatever the PO put in the cooling system. Will do new radiator hoses and a new radiator as well. That should go quick since I just did the job on the LX450 a week ago.

A Thank You to Joey @ Wit's End for calling me when he spotted that I had accidentally ordered the wrong hose kit for the Cruiser. That is customer service right there!! Do NOT :beer: and buy stuff ... lesson learned.
 
Once you have done the PHH and front end rebuild you get your first stripe in cruiserhood. :lol:

Agreed ... waiting on the wall poster guide and the end of archery season for the front end rebuild. Just trying to keep one of the trucks on the road consistantly so I can work on the other one. Super not stoked about getting this done and finding out its the other hose, but will give me a chance to flush the coolant system one more time before changing out the components.

Broken deli case at work now. Off to play HVAC tech for a bit.

Tried to put that quote in my sig .. don't know how :(
 
Last edited:
PHH finsihed up after a fair amount of swearing and such. Ended up using a 24" extension, reducer to the small drive and then the deep well socket to give me the leverage to work past the wiring and hold the clamp head in place while tightening it down. I went super beefy on it since I had one get loose on the LX450 after doing the hose swap. I do NOT want to have to get back in there.

Next up was getting the seats back to functional. Gamiviti Gears and the step by step tutorial. Went so smooth I was amazed. I used the suggestion of winding the gears all the way to the bottom on both sides to make sure they lined up properly on install. Did both seats on the Cruiser.


Also installed the new door handle from FloridaFJ80. Quick MUD search and youtube vid and no issues. Possibly the easiest thing I've done yet.

Before:

After:
 
Pulled off the wiper arms and used the wire wheel on the grinder to clear the rust. Then some Rustoleum Flat Black and good as new with new wiper blades.


They were pretty beat.

Got a set of Jegs grommets and plugs as well as the same from Harbor Freight. The Jegs worked really well in filling the floor holes in the truck.

 
Assembled the pieces for the mini catch can from Lowes using the separator for a compresor. Removed the spring and drain at the bottom and a Jegs plug fit perfectly.


Hit the bottom side with some RTV and it should keep things sealed up no problem. Went to install and realized that hose is VERY stiff. Are guys sectioning out a piece to put the filter in or going to a different hose completely?

Installed new hood and rear hatch struts ... wow, what a difference. Super happy with those. Got them from Amazon.

Also picked up a knockoff Snorkel. Quality seems fine, but I jacked up the install. Large hole went really smooth, but the other mounting holes really sucked, even after I tried to adjust the template. The curve of the fender must have thrown things off? I may or may not have an extra hole in the fender.

The pillar mount was also a FAIL. Only 1 rivet would hold tight, so I had to go buy larger ones and blah blah blah. Long story short, its riveted and has a ton of RTV on it as well. I did the take the fender off technique to tighten the mounts. I have no idea how anyone would want to try it a different way.


Now it's on ... but I really should take it back off to properly paint under it, but the fender is crap, so part of me just wants to paint around it and save myself the agony. Not sure what I will end up doing yet. I must have had the fender on and off 10 times to mock it up and then make sure the pillar would line up properly to the mounting point.

Decided to remove the side mirrors for paint. Found out I need to take the door panels off to get them out. Balls :bang: I just did the speakers and had everything all buttoned up in there. I was hoping to paint today since it's in the mid 60's and it will be getting cooler this week, but decided to go slow and I will fire up the outdoor wood boiler and run the heat in the garage when I'm ready.

 
In an effort to have some padding, but still have something that is easily removable and rinse-able, I decided to try a rubber gym mat from American Floor Mats. I went with the 1/4" all black to keep the price as low as possible. Laid it out tonight in the rear and am satisfied. It only comes in 4' width, so I will have to seam it in a couple of spots, but some good tape and/or glue on the underside should hold things together just fine. It seems plenty tough to be durable.


Cut it with a pair of scissors and a utility knife. I will post more picks as I move to the front of the truck.

Link to where I got it:
Rubber Roll Matting is Rubber Flooring for Fitness by American Floor Mats
 
Before ... scuffed with the red scrubbie and 120 grit. Mostly the 120 as it made quick work of things.

 
After ... 2 coats of Monstaliner ... used 2 rollers and 3/4 gallon of liner. I bought over a dozen rollers and have another gallon and catalyst yet. Will see if I need touch-ups before selling it off cheap.


And cleaned out the drain tray for the air cleaner housing ... nasty.


Snorkel back on ... hopefully for the last time now and hoping to be done taking the fender on and off. With the snorkel on and limited driving so far the intake temps are MUCH lower and the coolant temp seems to run 2-3*F cooler as well.
 
Roof rack and ribs removed ... no rust and hit the bolts with penetrating oil for a couple of days prior, so they came out without stripping. The hardest part is removing the tape for the ribs. The 3M adhesive removal wheel is the way to go for sure. Mine were really on there and after trying other failed methods the wheel had things cleaned up in just over an hour. Having a shop vac handy helps with the mess and using the Turtle Wax sticker remover after the wheel mess is cleaned up would make things real nice.

 
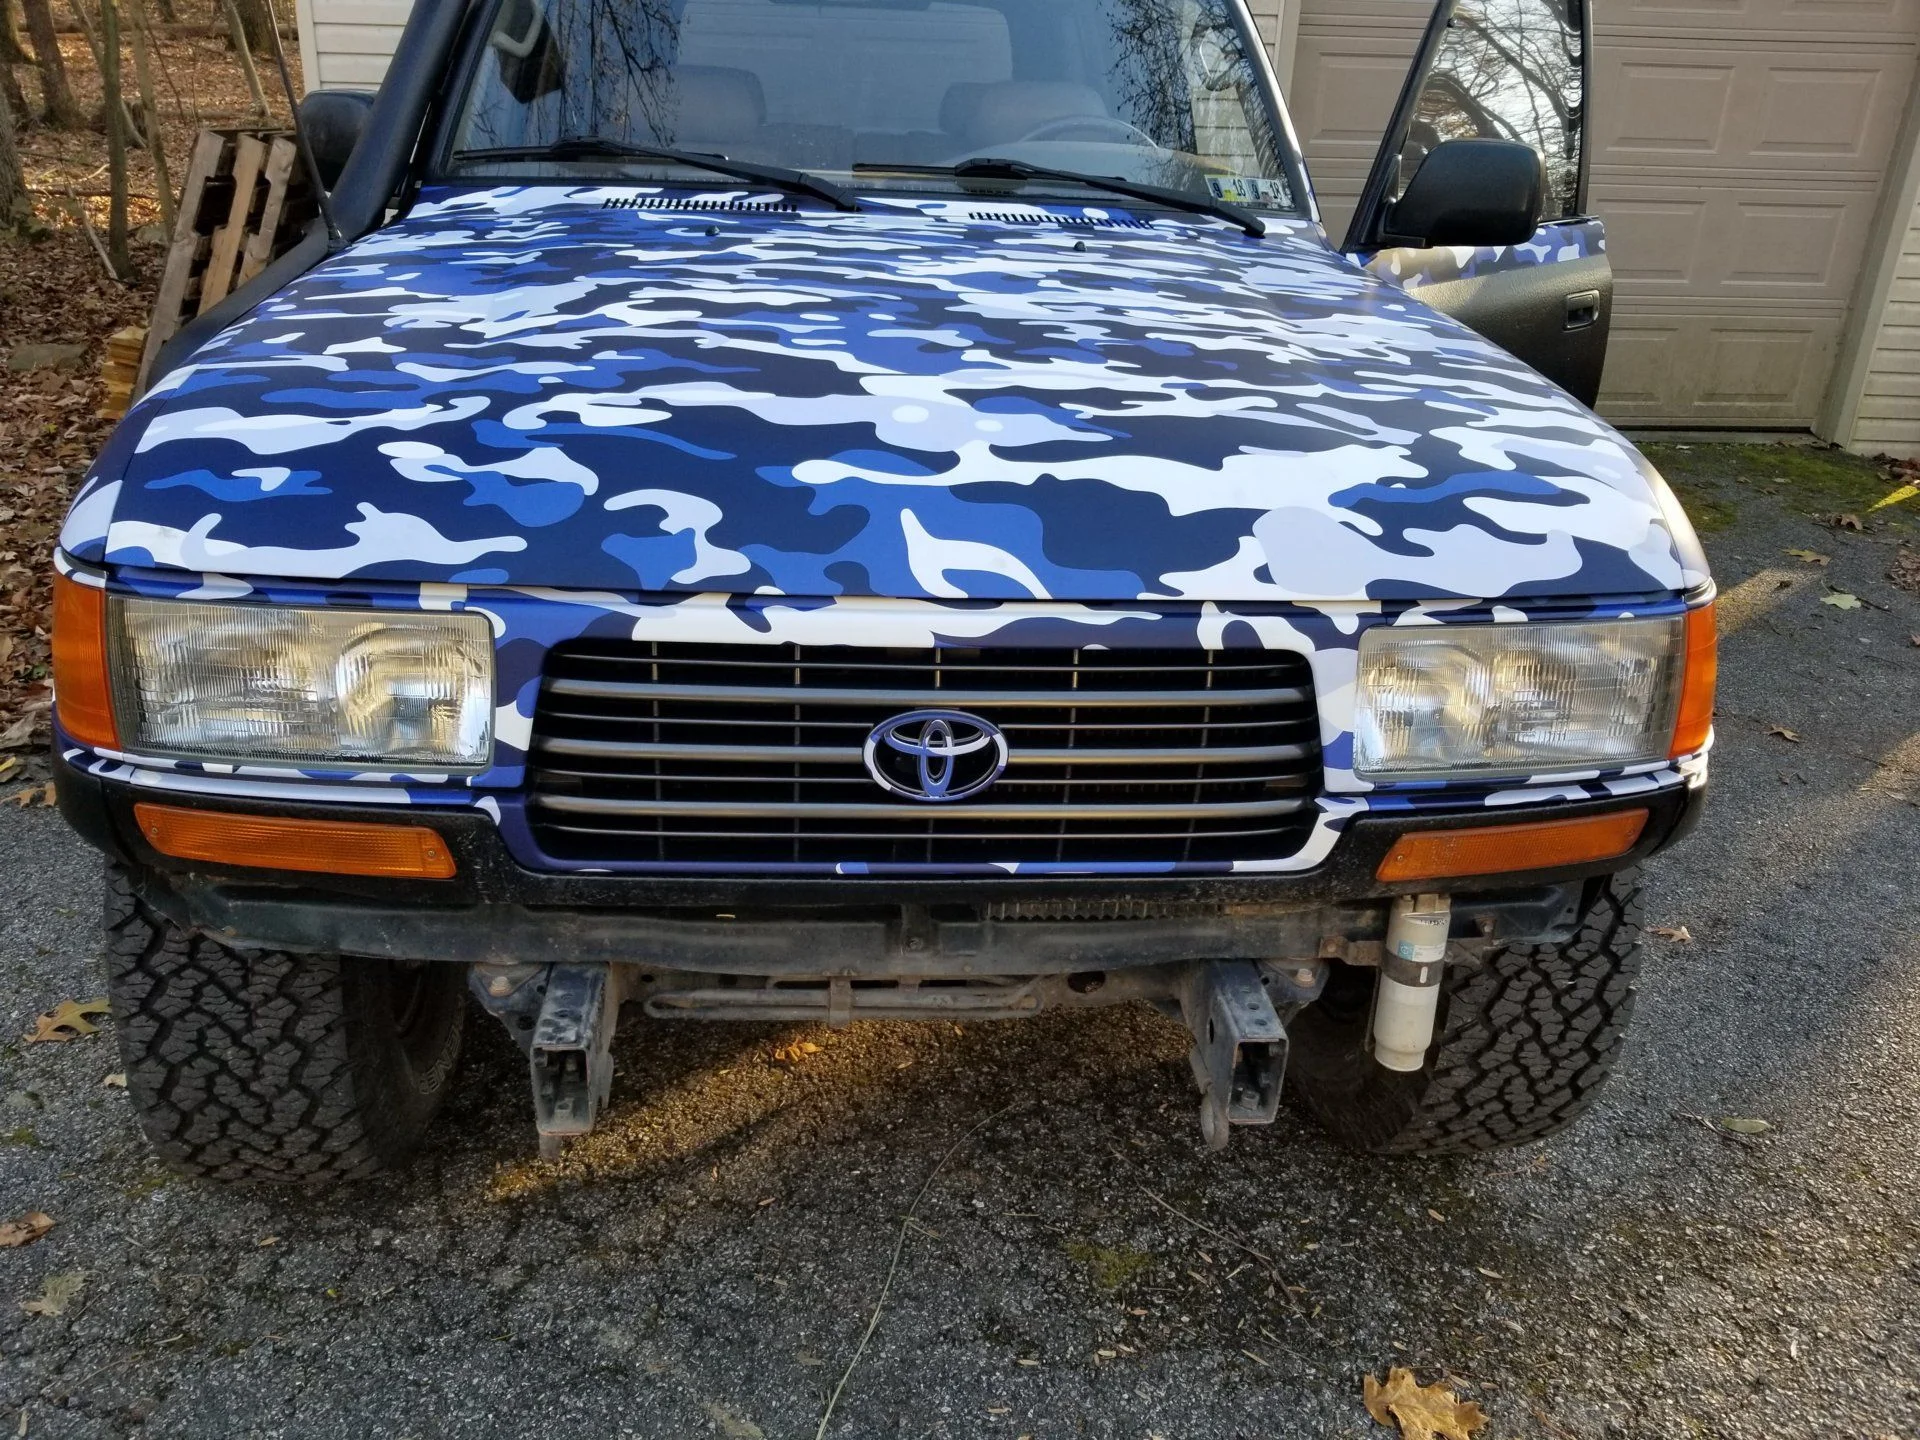
Got a package, actually packages from Onur full of OEM goodness. Several nuts, bolts and the plastic tabs the screws go into. Highlight was the new grill and battery tie down setup. I got it put on today along with the new wrap for the top half. It's a love it, hate it thing, but I love it so far and that's all that matters to me.

Also got a new set of window runs from Ranma21, so I need to get those on as well.

Need to finish up mirrors and door handles yet, but then I can put the exterior to rest and focus on more maintenance and trail prep. Decisions must be made on lift, suspension and tire size. I think gears will have to wait for a bit for the wallet to recover.

 
Hey nice thread! Feel your pain, as I just brought a 15 yr old BMW back from the dead for my son...I saw this rig on CL a while back - glad to see one saved instead of parted out!
 
Assembled the pieces for the mini catch can from Lowes using the separator for a compresor. Removed the spring and drain at the bottom and a Jegs plug fit perfectly.


Hit the bottom side with some RTV and it should keep things sealed up no problem. Went to install and realized that hose is VERY stiff. Are guys sectioning out a piece to put the filter in or going to a different hose completely?

Installed new hood and rear hatch struts ... wow, what a difference. Super happy with those. Got them from Amazon.

Also picked up a knockoff Snorkel. Quality seems fine, but I jacked up the install. Large hole went really smooth, but the other mounting holes really sucked, even after I tried to adjust the template. The curve of the fender must have thrown things off? I may or may not have an extra hole in the fender.

The pillar mount was also a FAIL. Only 1 rivet would hold tight, so I had to go buy larger ones and blah blah blah. Long story short, its riveted and has a ton of RTV on it as well. I did the take the fender off technique to tighten the mounts. I have no idea how anyone would want to try it a different way.


Now it's on ... but I really should take it back off to properly paint under it, but the fender is crap, so part of me just wants to paint around it and save myself the agony. Not sure what I will end up doing yet. I must have had the fender on and off 10 times to mock it up and then make sure the pillar would line up properly to the mounting point.

Decided to remove the side mirrors for paint. Found out I need to take the door panels off to get them out. Balls :bang: I just did the speakers and had everything all buttoned up in there. I was hoping to paint today since it's in the mid 60's and it will be getting cooler this week, but decided to go slow and I will fire up the outdoor wood boiler and run the heat in the garage when I'm ready.


What's the little catch mechanism for?
 
Back
Top Bottom