
I've been told if they arent leaking not to touch them. but whateverYeah @beerock I generally follow the old adage of if it ain't broke...but I had the cam seals and figured it was an opportunity to learn something about the 4.7 I did leave the radiator in. There isn't as much room under the hood as my old 78 Ford had, but it is pretty spacious. I'll be testing that some more in the next couple of weeks when I have a look at my driver's exhaust mani. My tick is turning into a more constant leak so I may try repairing/replacing that.
Navigation
Install the app
How to install the app on iOS
Follow along with the video below to see how to install our site as a web app on your home screen.
Note: This feature may not be available in some browsers.
More options
Style variation
You are using an out of date browser. It may not display this or other websites correctly.
You should upgrade or use an alternative browser.
You should upgrade or use an alternative browser.
This site may earn a commission from merchant affiliate
links, including eBay, Amazon, Skimlinks, and others.
Sorry for the dumb question but I'm getting ready to do all of this on a LC I just bought. What are heater Tees and how many do I need to replace?
Two tees. Located behind the intake against the firewall. Do a search, big thread about them.Sorry for the dumb question but I'm getting ready to do all of this on a LC I just bought. What are heater Tees and how many do I need to replace?
- Thread starter
- #24
Sorry for the dumb question but I'm getting ready to do all of this on a LC I just bought. What are heater Tees and how many do I need to replace?
Not a dumb question, new vehicles always bring new questions for each owner. As Dwight mentioned they are the 2 T pipe fittings located near the firewall. They direct water into and out of your heater core. It is common for them to fall apart. As I recently learned it is good preventive maintenance to replace them. Here is the Toyota part number 87248-60460. You need to order 2. Some folks just replace them with brass T's from your local hardware.
Here is a photo of the new ones I installed. My silver clamps were still good so I just reused them.
Good luck and let me know if you have any other questions when you get to replacing them.
- Thread starter
- #25
@landylover21 Here are a few photos of the headliner. Any suggestions you have as how to tackle cleaning this up would be appreciated. Many thanks in advance.


Not a dumb question, new vehicles always bring new questions for each owner. As Dwight mentioned they are the 2 T pipe fittings located near the firewall. They direct water into and out of your heater core. It is common for them to fall apart. As I recently learned it is good preventive maintenance to replace them. Here is the Toyota part number 87248-60460. You need to order 2. Some folks just replace them with brass T's from your local hardware.
Here is a photo of the new ones I installed. My silver clamps were still good so I just reused them. View attachment 1419655
Good luck and let me know if you have any other questions when you get to replacing them.
Thanks so much, I ordered them today as well as a bunch of PM stuff!
Congrats and I agree, best color. My 98 has the gold package also, plastidip will take care of that. Looking forward to seeing your progress. I also used graphite plastidip and clear coat on my wheels.
Mine looked just like yours about 3 months ago


Mine looked just like yours about 3 months ago


- Thread starter
- #28
Thanks @10ga Love the look of your truck! I've got a lot of work ahead of me but yours is certainly an inspiration. By the looks of your signature you've got a wealth of experience with cruisers so I appreciate any knowledge you can share.
The gold on mine will have to go and I definitely need to do something about my wheels. I've never tried plastidip and my wheels are little rough. Not sure what the PO did but the chrome coating is starting to peel in a couple of spots. I'll do a search for how-to, but in your experience how was the process of painting your wheels?
The gold on mine will have to go and I definitely need to do something about my wheels. I've never tried plastidip and my wheels are little rough. Not sure what the PO did but the chrome coating is starting to peel in a couple of spots. I'll do a search for how-to, but in your experience how was the process of painting your wheels?
- Thread starter
- #29
@Xpnsv72fj awesome. good luck with the work. let me know if you get stuck. fwiw, I found it easiest to work on both sets of hoses from the passenger side. I was practically laying on top of the intake but I had the best access to the clamps from that side. I also sprayed down the connections with a dish soap and water mix 5mins before and it helped. But be prepared for those hoses not to want to let go.
It's actually pretty easy. After finishing mine, me and my sons did their rides. I don't have a pic of the 4 runner but here's a pic of the IS300. We did badges and wheels on this one.


Check this link out for instructions


Check this link out for instructions
BTW, if you use clear coat, make sure to use the plastidip or some other brand that peels. If you put regular clear coat on and decide to take it off, it comes off in small pieces.................ask me how I know this LOL
Found a pic of the 4Runner

Found a pic of the 4Runner

- Joined
- Jan 4, 2014
- Threads
- 94
- Messages
- 3,042
- Location
- Little Rock, Arkansas
- Website
- www.facebook.com
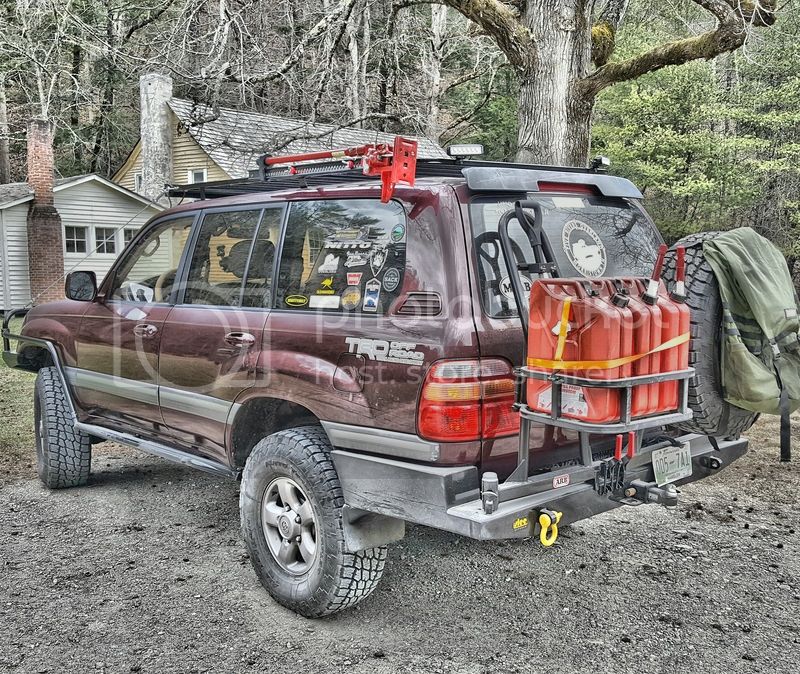
Check out the Razorback Land Cruiser Club and introduce yourself, I think there are a few other members in Conway as well. You just moved to the Natural State so of course there are trails, I think there are a few threads in our club forum with coordinates and maps. Great looking rig, I have a summer trip to the Rockies scheduled as wellThanks @slacker24-7 , That was not me but I'm not to far from you in Conway. I like your avatar shot. That looks like you were having some fun. We just moved here from Wyoming so would appreciate any recommendations that you have for exploring Arkansas. If there is a group that gets together here I would sure like to meet up. I'll be building our rig up over the next few months to get us ready for some family camping here plus a summer trip back to the Rockies.

What forger said !!! Pm sent
- Thread starter
- #36
Quick Update. Continue to baseline and update the maintenance. Pulled the front bearings, cleaned and repacked. Here are a few before photos. Got in a rush and didn't take after shots. Everything cleaned up pretty well. Used Super Clean to degrease everything. Repacked the bearings with Lucas Red "N" Tacky.


Also changed out the rear brake pads. Fronts had plenty of life left in them. Rear driver's guide post on the caliper was gummed up and sticking. Found it to be the culprit of my intermittent brake squeak and a worn pad. Cleaned it up, added new pads and the squeak is gone. I'll upgrade the rotors and pads all around when I service the calipers later this year. But for now it is stopping on a dime.
Took the truck on its first road trips to St Louis for St Patrick's Day and then NW Arkansas for a quick camping outing to Devil's Den. It is running great. Sure do like the upgrade in space and comfort from our old 3rd gen 4Runner.
Next up on the list is the driver's side exhaust leak and then suspension, wheels and tires. I plan to service all of the rubber bushing on the sway bars and links while I'm in there. Work has me busy the next couple of weeks so it will be mid-April before I have it all done.
Thanks for following along. Any feedback and advice is welcome.
- Thread starter
- #37
Gave up on fighting my jet lag and decided to tackle a little cosmetic work on the center console. Followed the success of others on here with a heat gun and patience.


I'm going to stick with the clean black look for now. I may order a kit to recover it. Although I'm skeptical it would match the existing finish.
I'm going to stick with the clean black look for now. I may order a kit to recover it. Although I'm skeptical it would match the existing finish.
fooldall1
Handy Enthusiast
Clean, black looks best.