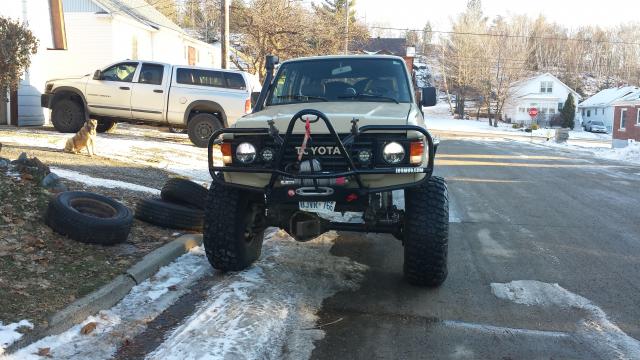
New addition, 85 FJ60 (1 Viewer)

This site may earn a commission from merchant affiliate
links, including eBay, Amazon, Skimlinks, and others.

Nah, atlas 2, its all complex and whatnot... Its an older model that had the old style plate shift forks, stamped steel synchro dogs, and e clip shift linkage. Upgraded all that junk at the same time, hopefully itll shift a little better.

Pictures to come, have to downlink my phone to the new computer and set up whatever the fawk before I can post.

D
 
Finally got a chance to dick with the new laptop and figure out how to hook up the cell.

Pics of the trucklites, new bumper tube/sprockets, and some random ones of the t case (didnt get too many during the rebuild since i was focusin and concentratin real hard lol).


Atlas rebuild kit.


Broken stamped dogs and worn synchro.


Next on the list is new bushings for the trans mount/cross member then maybe bolt the t case back up. Gonna pretty it up a little before it goes back under the van just for s***s.

D
 
Crazy like a fox! Or hungry like a wolf..... Something like that anyways.

D
 
Spent yesterday in the garage and managed to get some jobs off the list that keeps growing.

After getting the 6 to 8 lug adapters for the 60 back from machining I found them to be a little tight on the hub so I made the hole a little bigger and they fit mint now. That done I dropped the tranny xmember on the 60 to check the frame end bushings since I had noticed a bit of play when we were taking the t case out. Yup, po didnt use sleeves between the bushings and bolts so there was a good amount of play. Looked through the tickle trunk of junk and found 2 steel sleeves that fit into the bushings nice n tight but the id was too small for the bolt to pass through. Dammit. Took em over to the drill press and just happened to have the right bit already in the chuck (the best bit in the whole history of drill bits btw), coated the bit in my new fancy drilling wax stuff and she bored right through the sleeve. Bolt fit perfect so I threw some paint at the cross member and called it good. The cross member is made out of 1"x2.5ish" solid stock so while it was out I ground it down where the exhaust passes over it and pinched one of the pipes to get more room between the two. It was just to say close enough before to get an annoying intermittent rattle at idle. While the paint was drying I made a new gasket for the front of the atlas and threw on the new shift linkage.

So then I texted 2 buddies to see if they could come over and help me bench the t case back up under the van figuring at least one of em would be willing. Turned out they both showed up and both happen to be mechanics so in a blur of activity the case was back in (had 3 guys so we were able to leave the shifters on and guide them through the floor), the drive shafts were bolted up along with the speedo cable, ground wire, and breather vent. Paint was semi dry on the xmember so that got bolted up too. Mint. All thats really left to do is tighten the shifter mount and install the skid plate with its shiny new bolts.

Awesomely productive day!


D
 
Last edited:
Threw some more tree protection on the jlo butt. Capped a bunch of stuff on the tire gate thats been buggin me since we built it.


D
 
Been screwing around a little here and there. Swapped out the stupid greasable shackle pins at the rear shackles to regular nuts and bolts and changed the bushings at the frame mounts. Threw some longer wheel studs in the 14 bolt hubs, used pirates 14 bolt bible for the part numbers (2 different style studs) and all went well. Huge difference in length over stock and hopefully now i wont worry about my rear tires rollin past me on the hwy.

Got some energy suspension 4.5" bump stops for the rear as well. Had to position them a lil further back on the frame since i moved the axle back a bit but that was easy. Redid the bump spacers at the same time so theyre all pretty and painted now. I didnt want the new stops getting shredded from hitting the u bolts and whatnot pokin through the stocker u bolt plates so i made up some bump plates that bolt over the u bolt nuts and extend out towards the wheel a little. Turned out good and the bump now has a nice flat surface to make contact with..

Ill throw some pics up when i get a chance.

D
 
A few pics of random dickin around.


CAD template.


D
 
Card board and duct tape for the win man. I wince when I see ppl wasting time doing stuff up on a computer, you cant test fit a computer file....

D
 
Couple few new things.

Redid the rear bump stops again. Found a set of timbren stops I forgot about that a buddy gave me so I threw those on in the rear. They look a little better than the energy stops and more importantly theyre longer. In the pics Ive got 4 33s on steel rims and 2 beadlocked steel rimmed 39,5s in the cargo area so the springs are carrying some weight. Theres still some up travel left but the stops should now make contact before the shocks bottom out and I can adjust the height of the bump stops with shims at the mounts.


Front driver side got a pad above the u bolt plate that looks kinda cool, acts as a nice flat spot for the bump to hit, and is a spacer that brings the bump closer to the axle. I think theres still too much up travel and plan to make some spacers to put between the frame and bump mount but Im gonna wait till I can flex it out a little.


Welded little pieces of channel to the front leaf spring retainers after clamping them together. Hopefully thisll keep the leaf pack from fanning out.


Threw a second set of leds on the front bumper. I found I couldnt see what was off to the side of the trail very well when wheeling at night since every light was pointed forward so a mini version of the leds I already had mounted went on. Didnt want to clutter up the front end much more so I bolted both sets of lights to the same mounts and it actually came out looking pretty clean. Wiring was already there since the van previously had 2 sets of aux lights mounted up so I just had to put some doisch connectors on there to wire them up. Might still have to mess with aiming them better but they light up the sides of the garage pretty damn good.


Might bend some tube later today...

D
 
Last edited:
Man im usually just jumping into projects but i keep hesitating now that im ready to cut the wheel wells lol. Tail lights are out so I dont cut wires lines are marked and quadruple checked and i even used a measuring tape..... two times lol. Grinder and cut off have nice new discs, theyre plugged in yet here i am posting on the interbox like a tool...

D
 
[URL=http://s818.photobucket.com/user/charlesk11charles/media/Mobile%20Uploads/20150318_115103_zpstnmz6rtq.jpg.html] [/URL]

[URL=http://s818.photobucket.com/user/charlesk11charles/media/Mobile%20Uploads/20150318_123236_zps1trthuwe.jpg.html] [/URL]

Manned up a little and did the hack. I feel better now...

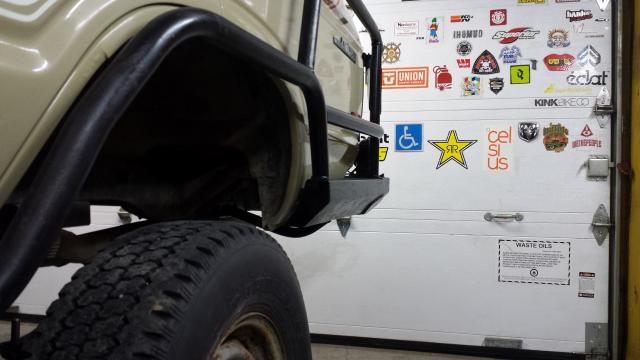
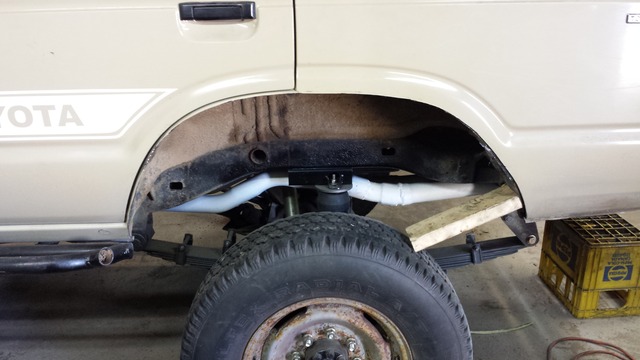
Chopped the inside wall of the 1/4's to match the outer contour then bent the inner wells up against the cuts. Lines up pretty decent. Gonna clean up the cuts with the flap disc then try and bend some 1/4" round stock to match the wells..

D
 
Lol. No air bags just timbren bump stops that kinda look like them.

D
 
Got the wells cleaned up then bent up the 1/4" rod to match. Wasnt too bad to bend, used the vice and the pieces i cut off the van to get it pretty close then fine tuned. The rod is all tacked in and cut to length so today i get to throw on a couple more tacks then start trying to make everything pretty.

Took a rip out to the auto body place yesterday and stocked up on seam sealer, also got the tan pigment for the hippo liner so i should be good to go. Just have to figure out how high i wanna go with it up the side of the van..

D
 

Users who are viewing this thread

Back
Top Bottom